Page 7 of 328
yellowblue
vii
For example,
these symbols
are used on an
original battery:
CAUTION
POSSIBLE
INJURY
PROTECT
EYES BY
SHIELDING
CAUSTIC
BATTERY
ACID COULD
CAUSE
BURNS
AVOID
SPARKS OR
FLAMES
SPARK OR
FLAME
COULD
EXPLODE
BATTERY
These symbols
are important
for you and
your passengers
whenever your
vehicle is
driven:
DOOR LOCK
UNLOCK
FASTEN
SEAT
BELTS
POWER
WINDOW
AIR BAG
These symbols
have to do with
your lamps:
MASTER
LIGHTING
SWITCH
TURN
SIGNALS
PARKING
LAMPS
HAZARD
WARNING
FLASHER
DAYTIME
RUNNING
LAMPS
FOG LAMPS
These symbols
are on some of
your controls:
WINDSHIELD
WIPER
WINDSHIELD
WASHER
WINDSHIELD
DEFROSTER
REAR
WINDOW
DEFOGGER
VENTILATING
FAN
These symbols
are used on
warning and
indicator lights:
ENGINE
COOLANT
TEMP
BATTERY
CHARGING
SYSTEM
BRAKE
COOLANT
ENGINE OIL
PRESSURE
ANTI-LOCK
BRAKES
Here are some
other symbols
you may see:
FUSE
LIGHTER
HORN
SPEAKER
FUEL
Vehicle Symbols
These are some of the symbols you may find on your vehicle.
Page 11 of 328

yellowblue
1-3
If a failure in the power supply system occurs, the power
seats can be manually adjusted by inserting the crank
handle into the slot located below the seat cushion, as
shown in the above illustration. Turn the crank handle
clockwise until you've reached your desired
seating position.
Note: Manually moving the seat requires turning the
crank handle many times.
The crank handle is provided in the tool kit located in
the trunk. To access, pull the red handle on the
passenger's side of the trunk.
Memory Seat and Mirrors
These buttons are located on the side of the driver's seat
closest to the door. They are used to program and recall
your desired memory settings.
To begin, adjust the driver's seat to a comfortable
position. Also adjust the interior and exterior mirrors.
Press memory button ªMº and memory button ª1º at the
same time and hold for five seconds.
Seat and mirror positions may be programmed for
two additional drivers by repeating the above steps and
pressing memory button ª2º or ª3º instead of
memory button ª1.º
Page 24 of 328

yellowblue
1-16
How to Wear Safety Belts Properly
Adults
This part is only for people of adult size.
Be aware that there are special things to know about
safety belts and children. And there are different rules
for smaller children and babies. If a child will be
riding in your vehicle, see the part of this manual
called ªChildren.º Follow those rules for
everyone's protection.
First, you'll want to know which restraint systems your
vehicle has.
We'll start with the driver position.
Driver Position
This part describes the driver's restraint system.
Lap-Shoulder Belt
The driver has a lap-shoulder belt. Here's how to wear
it properly.
1. Close and lock the door.
2. Adjust the seat (to see how, see ªSeatsº in the Index)
so you can sit up straight.
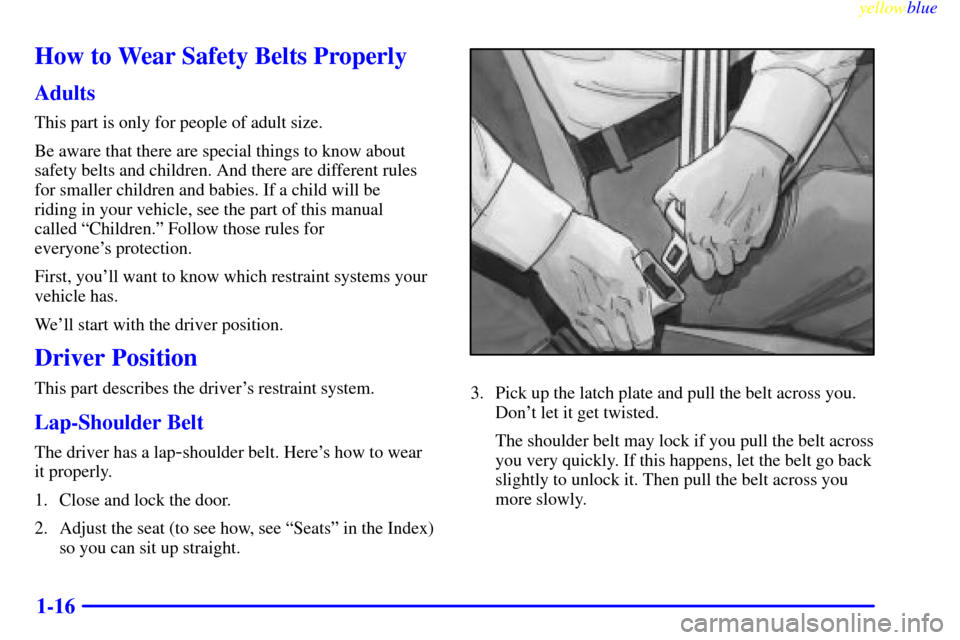
3. Pick up the latch plate and pull the belt across you.
Don't let it get twisted.
The shoulder belt may lock if you pull the belt across
you very quickly. If this happens, let the belt go back
slightly to unlock it. Then pull the belt across you
more slowly.
Page 32 of 328

yellowblue
1-24
The best way to protect the fetus is to protect the
mother. When a safety belt is worn properly, it's more
likely that the fetus won't be hurt in a crash. For
pregnant women, as for anyone, the key to making
safety belts effective is wearing them properly.
Right Front Passenger Position
To learn how to wear the right front passenger's safety belt
properly, see ªDriver Positionº earlier in this section.
The right front passenger's safety belt works the same
way as the driver's safety belt
-- except for one thing. If
you ever pull the shoulder portion of the belt out all the
way, you will engage the child restraint locking feature.
If this happens, just let the belt go back all the way and
start again.
Air Bag Systems
This part explains the frontal and side impact air
bag systems.
Your vehicle has air bags
-- a ªNext Generationº frontal
air bag for the driver and another ªNext Generationº
frontal air bag for the right front passenger. Your vehicle
may also have side impact air bags
-- a side impact air
bag for the driver and another side impact air bag for the
right front passenger.
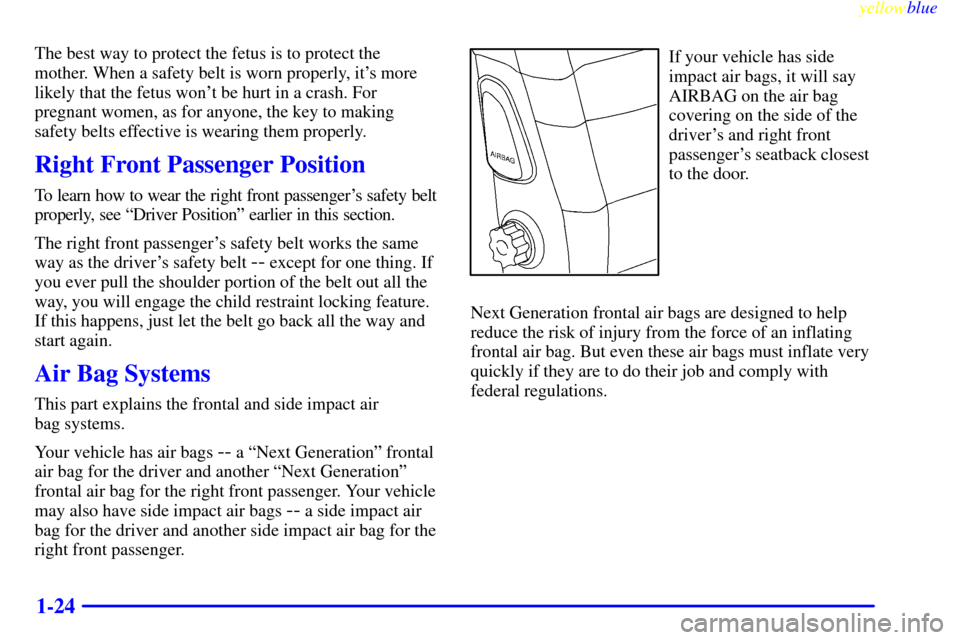
If your vehicle has side
impact air bags, it will say
AIRBAG on the air bag
covering on the side of the
driver's and right front
passenger's seatback closest
to the door.
Next Generation frontal air bags are designed to help
reduce the risk of injury from the force of an inflating
frontal air bag. But even these air bags must inflate very
quickly if they are to do their job and comply with
federal regulations.
Page 37 of 328

yellowblue
1-29
CAUTION:
If something is between an occupant and an air
bag, the bag might not inflate properly or it
might force the object into that person. The path
of an inflating air bag must be kept clear. Don't
put anything between an occupant and an air
bag, and don't attach or put anything on the
steering wheel hub or on or near any other air
bag covering and don't let seat covers block the
inflation path of a side impact air bag.
When should an air bag inflate?
The driver's and right front passenger's frontal air bags
are designed to inflate in moderate to severe frontal or
near
-frontal crashes. The frontal air bags are designed to
inflate only if the impact speed is above the system's
designed ªthreshold level.º If your vehicle goes straight
into a wall that doesn't move or deform, the threshold
level is about 9 to 15 mph (14 to 24 km/h). The
threshold level can vary, however, with specific vehicle
design, so that it can be somewhat above or below thisrange. If your vehicle strikes something that will move
or deform, such as a parked car, the threshold level will
be higher. The driver's and right front passenger's
frontal air bags are not designed to inflate in rollovers,
side impacts, or rear impacts, because inflation would
not help the occupant.
The driver's and right front passenger's side impact air
bags are designed to inflate in moderate to severe side
crashes involving a front door. A side impact air bag
will inflate if the crash severity is above the system's
designed ªthreshold level.º The threshold level can vary
with specific vehicle design. Side impact air bags are not
designed to inflate in frontal or near
-frontal impacts,
rollovers or rear impacts, because inflation would not
help the occupant. A side impact air bag will only
deploy on the side of the vehicle that is struck.
In any particular crash, no one can say whether an air
bag should have inflated simply because of the damage
to a vehicle or because of what the repair costs were. For
frontal air bags, inflation is determined by the angle of
the impact and how quickly the vehicle slows down in
frontal and near
-frontal impacts. For side impact air
bags, inflation is determined by the location of the
impact and how quickly the side of the vehicle deforms.
Page 63 of 328

2-
yellowblue
2-1
Section 2 Features and Controls
Here you can learn about the many standard and optional features on your vehicle, and information on starting,
shifting and braking. Also explained are the instrument panel and the warning systems that tell you if everything is
working properly
-- and what to do if you have a problem.
2
-2 Keys
2
-4 Door Locks
2
-7 Remote Keyless Entry System (RKE)
2
-11 Trunk
2
-12 Theft
2
-13 Theft-Deterrent System
2
-15 Immobilizer
2
-16 New VehicleªBreak-Inº
2
-16 Ignition Positions
2
-18 Starting Your Engine
2
-19 Engine Coolant Heater (If Equipped)
2
-21 Automatic Transmission Operation
2
-25 Parking Brake
2
-26 Shifting Into PARK (P)
2
-28 Shifting Out of PARK (P)2
-30 Parking Over Things that Burn
2
-30 Engine Exhaust
2
-31 Running Your Engine While You're Parked
2
-32 Windows
2
-33 Horn
2
-34 Tilt Wheel
2
-34 Turn Signal/Multifunction Lever
2
-40 Exterior Lamps
2
-46 Interior Lamps
2
-47 Mirrors
2
-49 Storage Compartments
2
-52 Sunroof (Option)
2
-56 Universal Transmitter (If Equipped)
2
-60 Instrument Panel
2
-63 Warning Lights, Gages and Indicators
Page 65 of 328
yellowblue
2-3
One key is used for the
ignition, the doors and all
other locks. (Note that
there is no lock cylinder
for the trunk or the
passenger's door.)
Your vehicle comes with a spare key. This key does not
have an immobilizer pellet in it, however, it will still
unlock your vehicle's doors. Because of the key's flat
shape, it can be stored in your wallet.If you've lost your keys or need to have a new one
made, you will have to contact your dealer for the
correct key code.
NOTICE:
Your vehicle has a number of new features that
can help prevent theft. You can have a lot of
trouble getting into your vehicle if you ever lock
your keys inside and you may have to damage
your vehicle to get in. Be sure you have
extra keys.
Page 66 of 328

yellowblue
2-4
Door Locks
CAUTION:
Unlocked doors can be dangerous.
Passengers -- especially children -- can easily
open the doors and fall out. When a door is
locked, the inside handle won't open it.
Outsiders can easily enter through an unlocked
door when you slow down or stop your vehicle.
This may not be so obvious: You increase the
chance of being thrown out of the vehicle in a
crash if the doors aren't locked. Wear safety belts
properly, lock your doors, and you will be far
better off whenever you drive your vehicle.
There are several ways to lock and unlock your vehicle.
From the outside, use your key or the remote keyless
entry transmitter. This will avoid setting off the optional
theft
-deterrent alarm.
From inside your vehicle,
slide the lock lever down to
lock the door. To unlock the
door, slide the lock lever up.
Central Door Unlocking System
When unlocking the driver's door from the outside, you
can also unlock the other doors by holding the key in a
turned position for several seconds (turn the key
counterclockwise). Pressing the unlock button on the
remote keyless entry transmitter twice in a row will also
open the other doors.