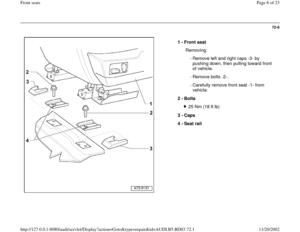
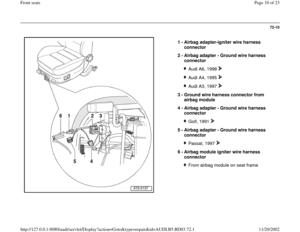
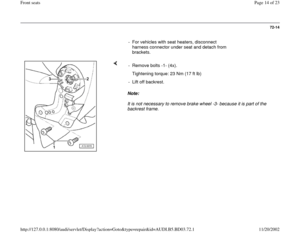
Page 17 of 23
72-17
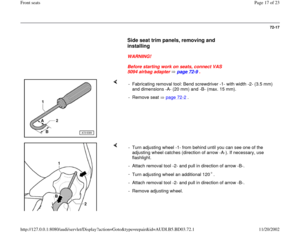
Side seat trim panels, removing and
installing
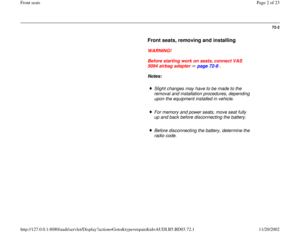
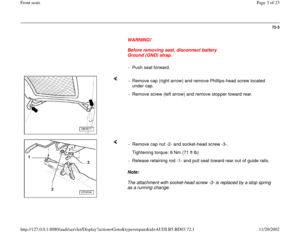
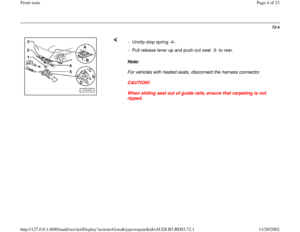
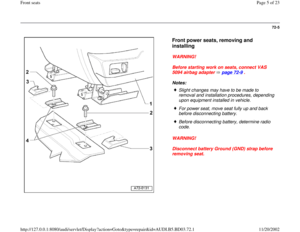
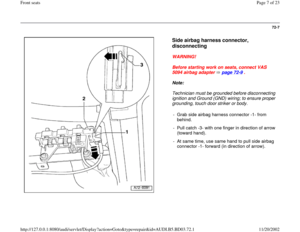
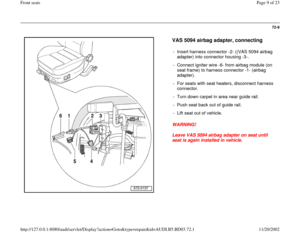
WARNING!
Before starting work on seats, connect VAS
5094 airbag adapter page 72
-9 .
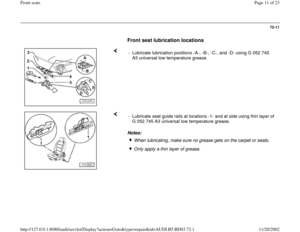
- Fabricating removal tool: Bend screwdriver -1- with width -2- (3.5 mm)
and dimensions -A- (20 mm) and -B- (max. 15 mm).
- Remove seat page 72
-2 .
- Turn adjusting wheel -1- from behind until you can see one of the
adjusting wheel catches (direction of arrow -A-). If necessary, use
flashlight.
- Attach removal tool -2- and pull in direction of arrow -B-.
-
Turn adjusting wheel an additional 120 .- Attach removal tool -2- and pull in direction of arrow -B-.
- Remove adjusting wheel.
Pa
ge 17 of 23 Front seats11/20/2002 htt
p://127.0.0.1:8080/audi/servlet/Dis
play?action=Goto&t
yp
e=re
pair&id=AUDI.B5.BD03.72.1
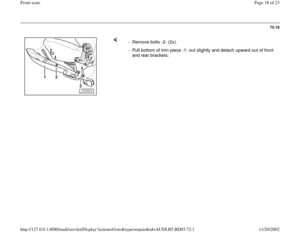
Page 18 of 23
72-18
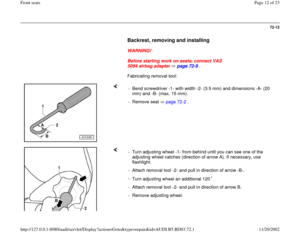
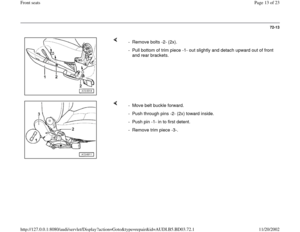
- Remove bolts -2- (2x).
- Pull bottom of trim piece -1- out slightly and detach upward out of front
and rear brackets.
Pa
ge 18 of 23 Front seats11/20/2002 htt
p://127.0.0.1:8080/audi/servlet/Dis
play?action=Goto&t
yp
e=re
pair&id=AUDI.B5.BD03.72.1
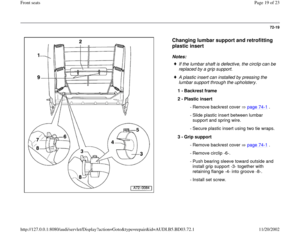
Page 19 of 23
72-19
Changing lumbar support and retrofitting
plastic insert
Notes:
If the lumbar shaft is defective, the circlip can be
replaced by a grip support.
A plastic insert can installed by pressing the
lumbar support through the upholstery.
1 -
Backrest frame
2 -
Plastic insert
- Remove backrest cover page 74
-1 .
- Slide plastic insert between lumbar
support and spring wire.
- Secure plastic insert using two tie wraps.
3 -
Grip support
- Remove backrest cover page 74
-1 .
- Remove circlip -6-.
- Push bearing sleeve toward outside and
install grip support -3- together with
retaining flange -4- into groove -8-.
- Install set screw.
Pa
ge 19 of 23 Front seats11/20/2002 htt
p://127.0.0.1:8080/audi/servlet/Dis
play?action=Goto&t
yp
e=re
pair&id=AUDI.B5.BD03.72.1
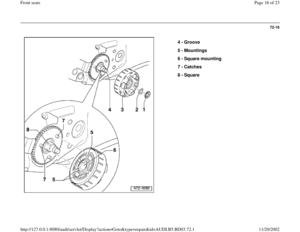
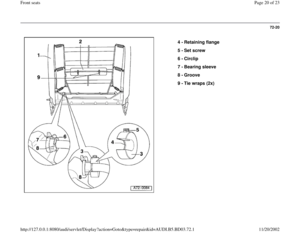
Page 20 of 23
72-20
4 -
Retaining flange
5 -
Set screw
6 -
Circlip
7 -
Bearing sleeve
8 -
Groove
9 -
Tie wraps (2x)
Pa
ge 20 of 23 Front seats11/20/2002 htt
p://127.0.0.1:8080/audi/servlet/Dis
play?action=Goto&t
yp
e=re
pair&id=AUDI.B5.BD03.72.1
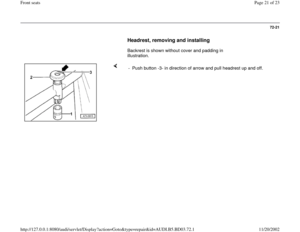
Page 21 of 23
72-21
Headrest, removing and installing
Backrest is shown without cover and padding in
illustration.
- Push button -3- in direction of arrow and pull headrest up and off.
Pa
ge 21 of 23 Front seats11/20/2002 htt
p://127.0.0.1:8080/audi/servlet/Dis
play?action=Goto&t
yp
e=re
pair&id=AUDI.B5.BD03.72.1
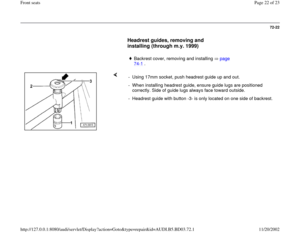
Page 22 of 23
72-22
Headrest guides, removing and
installing (through m.y. 1999)
Backrest cover, removing and installing page 74
-1 .
- Using 17mm socket, push headrest guide up and out.
- When installing headrest guide, ensure guide lugs are positioned
correctly. Side of guide lugs always face toward outside.
- Headrest guide with button -3- is only located on one side of backrest.
Pa
ge 22 of 23 Front seats11/20/2002 htt
p://127.0.0.1:8080/audi/servlet/Dis
play?action=Goto&t
yp
e=re
pair&id=AUDI.B5.BD03.72.1
Page 23 of 23
72-23
Headrest guides, removing and
installing (from m.y. 2000)
Backrest cover, removing and installing page 74
-1 .
For greater clarity, head restraint guide -1- is shown removed. Fig. 1 Removing head restraint guides
- Insert upholstery needle or screwdriver -3- with maximum width of 2
mm into hole -4- (opposite retaining clip for head restraint guide).
- Pry screwdriver -3- in direction of arrow -A-, press retainer tab -2- in
direction of arrow -B- and pull out head restraint guide -1-.
Pa
ge 23 of 23 Front seats11/20/2002 htt
p://127.0.0.1:8080/audi/servlet/Dis
play?action=Goto&t
yp
e=re
pair&id=AUDI.B5.BD03.72.1
Page:
< prev 1-8 9-16 17-24


.
- Pull bottom of trim piece -1- out slightly and detach upward out of front
and rear brackets.
Pa
ge 18 of 23 Front seats11/20/2002 htt
p://127.0.0.1:8080/aud")


Pa
ge 20 of 23 Front seats11/20/2002 htt
p://127.0.0.1:8080/audi/servlet/Dis
play")


Backrest cover, removing and installing page 74
-1 .
- Using 17mm socket, push headrest guide up and out.
-")

Backrest cover, removing and installing page 74
-1 .
For greater clarity, head restraint guide -1- is shown remo")