Page 17 of 74
17-17
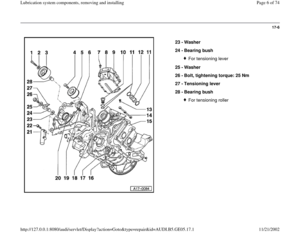
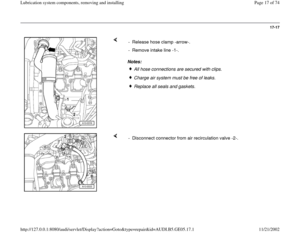
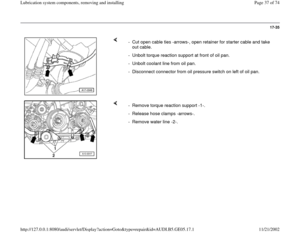
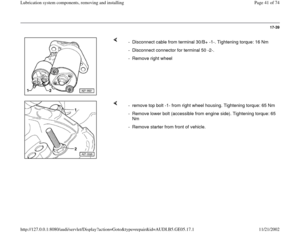
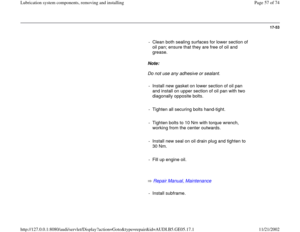
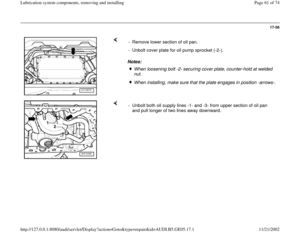
Notes: - Release hose clamp -arrow-.
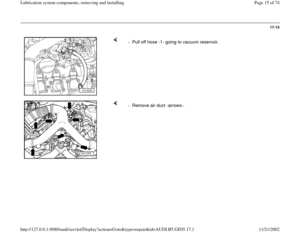
- Remove intake line -1-.
All hose connections are secured with clips. Charge air system must be free of leaks.Replace all seals and gaskets.
- Disconnect connector from air recirculation valve -2-.
Pa
ge 17 of 74 Lubrication s
ystem com
ponents, removin
g and installin
g
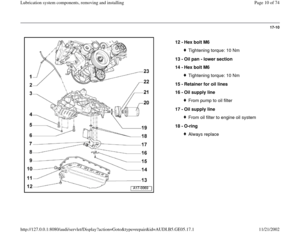
11/21/2002 htt
p://127.0.0.1:8080/audi/servlet/Dis
play?action=Goto&t
yp
e=re
pair&id=AUDI.B5.GE05.17.1
Page 18 of 74
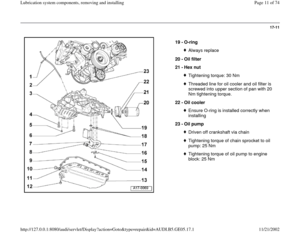
17-18
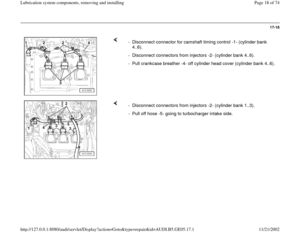
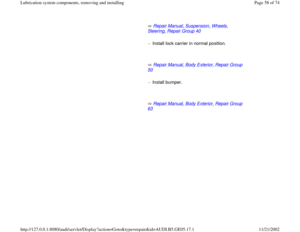
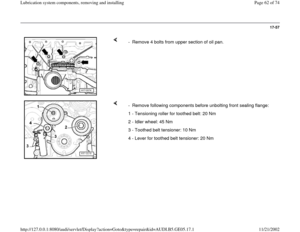
- Disconnect connector for camshaft timing control -1- (cylinder bank
4..6).
- Disconnect connectors from injectors -2- (cylinder bank 4..6).
- Pull crankcase breather -4- off cylinder head cover (cylinder bank 4..6).
- Disconnect connectors from injectors -2- (cylinder bank 1..3).
- Pull off hose -5- going to turbocharger intake side.
Pa
ge 18 of 74 Lubrication s
ystem com
ponents, removin
g and installin
g
11/21/2002 htt
p://127.0.0.1:8080/audi/servlet/Dis
play?action=Goto&t
yp
e=re
pair&id=AUDI.B5.GE05.17.1
Page 19 of 74
17-19
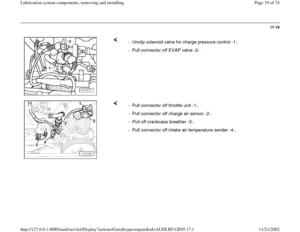
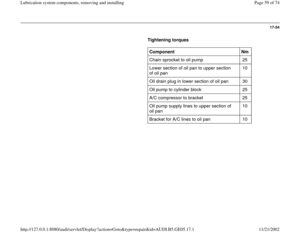
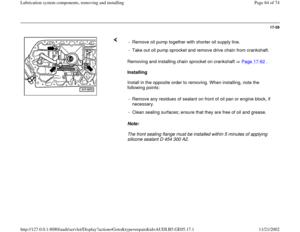
- Unclip solenoid valve for charge pressure control -1-.
- Pull connector off EVAP valve -2-.
- Pull connector off throttle unit -1-.
- Pull connector off charge air sensor -2-.
- Pull off crankcase breather -3-.
- Pull connector off intake air temperature sender -4-.
Pa
ge 19 of 74 Lubrication s
ystem com
ponents, removin
g and installin
g
11/21/2002 htt
p://127.0.0.1:8080/audi/servlet/Dis
play?action=Goto&t
yp
e=re
pair&id=AUDI.B5.GE05.17.1
Page 20 of 74
17-20
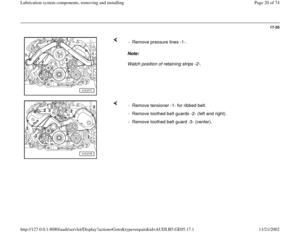
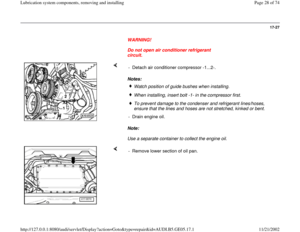
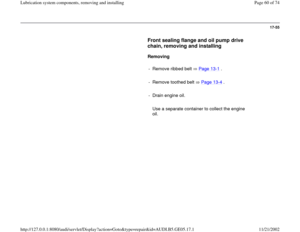
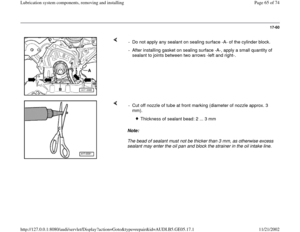
Note:
Watch position of retaining strips -2-. - Remove pressure lines -1-.
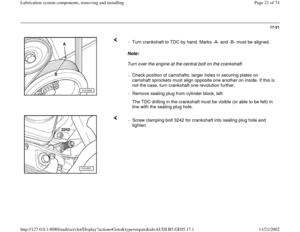
- Remove tensioner -1- for ribbed belt.
- Remove toothed belt guards -2- (left and right).
- Remove toothed belt guard -3- (center).
Pa
ge 20 of 74 Lubrication s
ystem com
ponents, removin
g and installin
g
11/21/2002 htt
p://127.0.0.1:8080/audi/servlet/Dis
play?action=Goto&t
yp
e=re
pair&id=AUDI.B5.GE05.17.1
Page 21 of 74
17-21
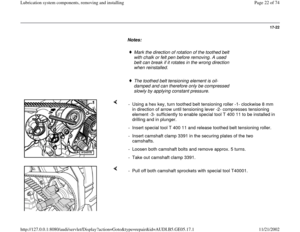
Note:
Turn over the engine at the central bolt on the crankshaft. - Turn crankshaft to TDC by hand. Marks -A- and -B- must be aligned.
- Check position of camshafts: larger holes in securing plates on
camshaft sprockets must align opposite one another on inside. If this is
not the case, turn crankshaft one revolution further.
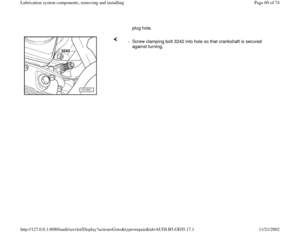
- Remove sealing plug from cylinder block, left.
The TDC drilling in the crankshaft must be visible (or able to be felt) in
line with the sealing plug hole.
- Screw clamping bolt 3242 for crankshaft into sealing plug hole and
tighten.
Pa
ge 21 of 74 Lubrication s
ystem com
ponents, removin
g and installin
g
11/21/2002 htt
p://127.0.0.1:8080/audi/servlet/Dis
play?action=Goto&t
yp
e=re
pair&id=AUDI.B5.GE05.17.1
Page 22 of 74

17-22
Notes:
Mark the direction of rotation of the toothed belt
with chalk or felt pen before removing. A used
belt can break if it rotates in the wrong direction
when reinstalled.
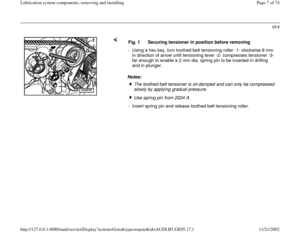
The toothed belt tensioning element is oil-
damped and can therefore only be compressed
slowly by applying constant pressure.
- Using a hex key, turn toothed belt tensioning roller -1- clockwise 8 mm
in direction of arrow until tensioning lever -2- compresses tensioning
element -3- sufficiently to enable special tool T 400 11 to be installed in
drilling and in plunger.
- Insert special tool T 400 11 and release toothed belt tensioning roller.
- Insert camshaft clamp 3391 in the securing plates of the two
camshafts.
- Loosen both camshaft bolts and remove approx. 5 turns.
- Take out camshaft clamp 3391.
- Pull off both camshaft sprockets with special tool T40001.
Pa
ge 22 of 74 Lubrication s
ystem com
ponents, removin
g and installin
g
11/21/2002 htt
p://127.0.0.1:8080/audi/servlet/Dis
play?action=Goto&t
yp
e=re
pair&id=AUDI.B5.GE05.17.1
Page 23 of 74
17-23
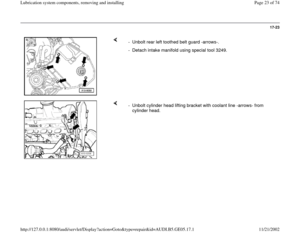
- Unbolt rear left toothed belt guard -arrows-.
- Detach intake manifold using special tool 3249.
- Unbolt cylinder head lifting bracket with coolant line -arrows- from
cylinder head.
Pa
ge 23 of 74 Lubrication s
ystem com
ponents, removin
g and installin
g
11/21/2002 htt
p://127.0.0.1:8080/audi/servlet/Dis
play?action=Goto&t
yp
e=re
pair&id=AUDI.B5.GE05.17.1
Page 24 of 74
17-24
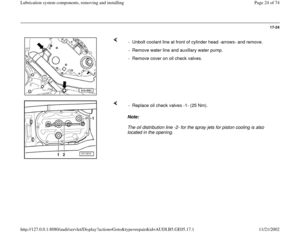
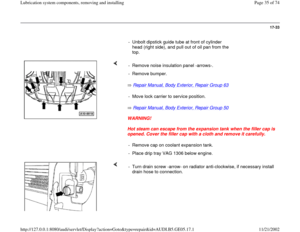
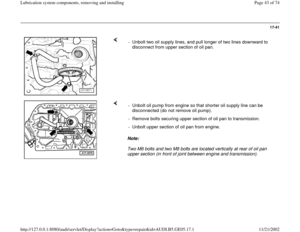
- Unbolt coolant line at front of cylinder head -arrows- and remove.
- Remove water line and auxiliary water pump.
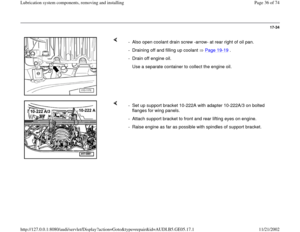
- Remove cover on oil check valves.
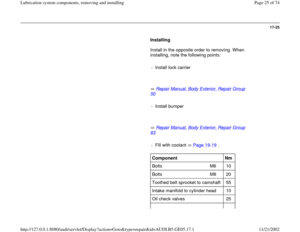
Note:
The oil distribution line -2- for the spray jets for piston cooling is also
located in the opening. - Replace oil check valves -1- (25 Nm).
Pa
ge 24 of 74 Lubrication s
ystem com
ponents, removin
g and installin
g
11/21/2002 htt
p://127.0.0.1:8080/audi/servlet/Dis
play?action=Goto&t
yp
e=re
pair&id=AUDI.B5.GE05.17.1


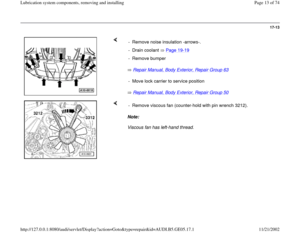


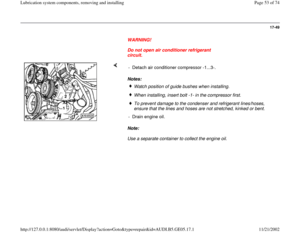


.
- Disconnect connectors from injectors -2- (cylinder bank 4..6).
- Pull crankcase breather -4- off cylind")

.
- Remov")


