1998 VOLVO V90 high beam
[x] Cancel search: high beamPage 23 of 175

1998 Volvo S90
This means that when you switch off the ignition,
the gear selector must be in the (P)ark position
before the starting (ignition) key can be removed
from the ignition switch.
Anti-Lock Brake System (ABS)
The ABS system in your car performs a self-
diagnostic test when the vehicle is started and at
4 mph (6km/h). The driver may detect one
pulsation of the brake pedal and a sound will be
audible from the ABS control module. This is
normal.
The pages in this section provide detailed
descriptions of the vehicle's instruments and
controls.
Note that vehicles may be equipped differently,
depending on special legal requirements. 16 Controls for electrically operated windows...
pg. 29
and side-view mirrors...pg. 35
17
Instrument illumination...pg. 22
18
Hood-release handle...pg. 39
19
Turn signals, high/low beams...pg. 20
cruise control...pg. 24
20
Adjustable steering wheel...pg. 22
21
SRS (air bag)/Horn...pg. 4
22
Starting (ignition) switch/steering wheel
lock...pg. 21
23
Windshield wiper/washer...pg. 21
Tailgate wiper/washer (wagons)...pg. 23
24
Cigarette lighter...pg. 30
25
Transmission mode selector buttons...pg. 59
26
Gear selector...pg. 58
27
Ash tray...pg. 30
28
Shiftlock release (override) button...pg. 61
29
Parking brake...pg. 30
30
Electrically-heated front seats (certain
models)...pg. 28
Instruments pg. 16
file:///K|/ownersdocs/1998/1998_SV90/98S90_014.htm (2 of 3)12/30/2006 \
1:52:36 PM
Page 25 of 175

1998 Volvo S90
Chapter 2 - Instruments, switches and controls (cont.)Indicator and warning lights
pg. 17
1 Turn signal, left
2 Turn signal, right
3 Malfunction indicator
lamp
4 Direction indicator,
trailer
5 Service reminder
indicator
6 Low washer fluid level
If the lamp glows continuously
when the engine is running,
there is only about 1/2 - 1 US
qts. remaining in the washer
fluid reservoir.
7 Rear fog light
8 Bulb failure
9 Generator not charging
10 Low engine oil pressure
11 High beams
12 Brake failure
13 Parking brake applied
14 ABS-system
15 Low coolant level
16 (Not in use)
17 "Winter" mode engaged/
transmission fault
18 Fasten seat belts
19 SRS
20 (Not in use)
21 (Not in use)
Warning lights
pg. 18
file:///K|/ownersdocs/1998/1998_SV90/98S90_017.htm (1 of 7)12/30/2006 \
1:52:36 PM
Page 28 of 175

1998 Volvo S90
Headlights and parking lights
All lights off *
Parking lights on **
Headlights and parking lights are on if
starting (ignition) switch is in position I or II. If
the headlight switch is in position
all lights
will go out when starting switch is switched off.
With the headlight switch in position
the
parking lights will stay on (headlights off) with
the daytime running light switch (A) in position
.
The high beams can only be switched on if the
headlight switch is in position
.
Switch from high to low beams, and vice versa,
by moving the turn signal switch lever on the left
side of the steering column towards the steering
wheel.
*Models equipped with daytime running lights:
The low beams, tail lights, parking lights and
license plate lights will come on automatically
when the ignition is switched on.
Automatic daytime running lights
NOTE: The daytime running light function may
only be disabled (turned off) in the U.S. -
Canadian law mandates the use of daytime
running lights.
Screw A in the illustration (available on U.S.
models only) is used to control the automatic
daytime running lights when the headlight switch
is in position 0. To adjust, press in the screw with
a small screwdriver and turn to one of the
following positions:
Automatic daytime
running lights
Automatic daytime
running lights
** The daytime running
lights will also function when
the headlight switch is in
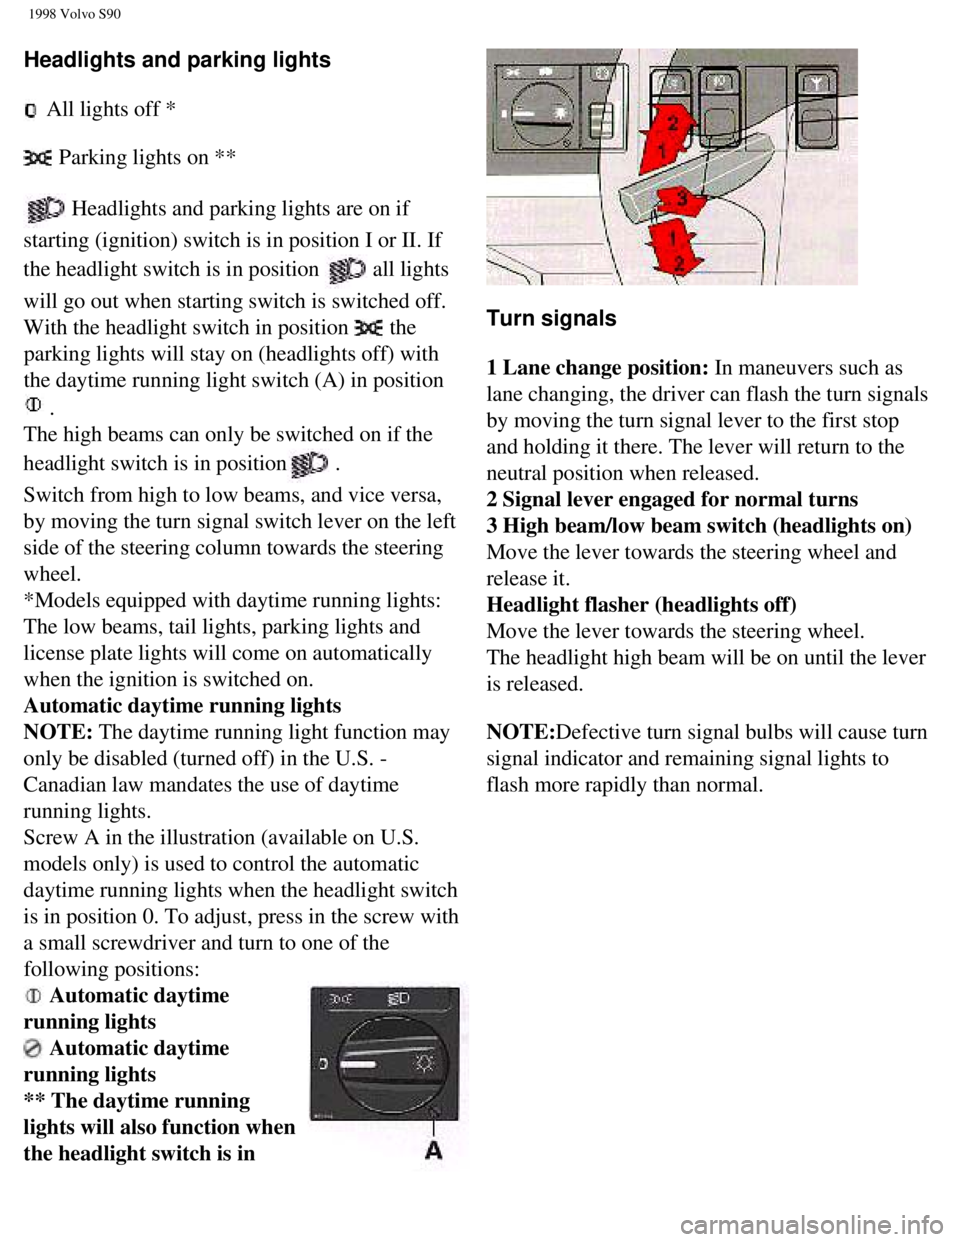
Turn signals
1 Lane change position: In maneuvers such as
lane changing, the driver can flash the turn signals
by moving the turn signal lever to the first stop
and holding it there. The lever will return to the
neutral position when released.
2 Signal lever engaged for normal turns
3 High beam/low beam switch (headlights on)
Move the lever towards the steering wheel and
release it.
Headlight flasher (headlights off)
Move the lever towards the steering wheel.
The headlight high beam will be on until the lever
is released.
NOTE:Defective turn signal bulbs will cause turn
signal indicator and remaining signal lights to
flash more rapidly than normal.
file:///K|/ownersdocs/1998/1998_SV90/98S90_017.htm (4 of 7)12/30/2006 \
1:52:36 PM
Page 80 of 175

1998 Volvo S90
cold-weather oil for hard driving or in warm
weather. See section "Engine oil" for more
information.
l The load placed on the battery is greater during
the winter since the heater, windshield wipers,
lighting etc. are used more often. Moreover, the
capacity of the battery decreases as the
temperature drops. In very cold weather, a poorly
charged battery can freeze and be damaged. It is
therefore advisable to check the state of charge
more frequently and spray an anti-rust oil on the
battery posts.
l Volvo recommends the use of snow tires on all
four wheels for winter driving - see section
"Wheels and tires".
l To prevent the washer reservoir from freezing,
add washer solvents containing antifreeze. This is
important since dirt is often splashed on the
windshield during winter driving, thus requiring
frequent use of the washers and wipers.
functions when the transmission is in reverse.
Also see "Winter/Wet" mode on page 59.
Winter/Wet mode
Enhanced Vehicle Traction
This mode may be selected for starting/moving
off on slippery roads or to lower downshift speeds
if the transmission is in "L".
Mode W
*In position D, the gearbox starts in third gear and
changes up to fourth gear.
*In position 3, second gear is locked and there is
no change up to third gear. In position L, first gear
is locked.
*These positions always offer the kick-down
feature.
Long distance trip pg. 70
Before a long distance trip
It is always worthwhile to have your car checked at a Volvo retailer
before driving long distances. Your retailer will also be able to supply\
you with bulbs, fuses, spark plugs and wiper blades for your use in the \
event that problems occur.
If you prefer to check the car yourself, please note the following:
l Check that the engine runs smoothly and that fuel consumption is
normal.
l Check engine oil, coolant levels, and for possible fuel leakage.
l Check transmission oil level and rear axle for leakage.
l Check condition of drive belts.
l Check state of charge of battery.
l Examine tires carefully (the spare tire as well), and replace those
that are worn. Check tire pressures.
l The brakes, front wheel alignment, and steering gear should be
checked by your Volvo retailer only.
l Check all lights, including high beams.
file:///K|/ownersdocs/1998/1998_SV90/98S90_067.htm (4 of 5)12/30/2006 \
1:52:43 PM
Page 91 of 175

1998 Volvo S90
Chapter 6 - (cont.)
Replacing bulbs
pg. 81
Replacing bulbs
The method for replacement of bulbs in
the various lighting units is shown on the
following pages. Make sure when
installing bulbs, that the guide pin on the
socket fits into its corresponding recess.
When installing Halogen bulbs, do not
touch the glass with your fingers because
grease, oil or any other impurities can be
carbonized onto the bulb and damage the
reflector.
Use bulbs of correct type and voltage.
Failure to do so could cause the bulb
failure warning light to activate.
NOTE: Turn the ignition and light
switch off before replacing any bulbs.
Headlights (high/low beams)
1. Press the protruding tabs on the plastic
cover and pull out towards the fender.
2. Turn the bulb and connector 1/4 turn
counterclockwise and remove.
3. Remove the connector from the bulb.
4. Press a new bulb into the connector
without touching the bulb itself.
5. Reinsert the bulb into the headlight
housing and turn 1/4 turn clockwise until
the unit seats properly.
6. Reinstall the plastic cover.
Bulb Power US Bulb No.
High beam 70W HB3/9005
Low beam 60W HB4/9006
Headlight adjustment
The height of the headlight beams can be
adjusted according to vehicle load. The
headlights should be re-aimed if heavy
loads are carried in the trunk/cargo area or
rear seat, or when towing a trailer.
To adjust the headlights:
Park the car on a level surface and open
the hood.
The headlights are equipped with a level
which can be seen by looking through the
clear "window" on the top of the headlight
lens.
Turn the height adjustment knob (A) until
the bubble in the level aligns with within
the marking lines on the level.
Lateral headlight adjustment (B) should
only be carried out by an authorized
Volvo retailer. This setting should be
preset to "0".
Replacing bulbs pg. 82
file:///K|/ownersdocs/1998/1998_SV90/98S90_081.htm (1 of 6)12/30/2006 \
1:52:45 PM
Page 100 of 175

1998 Volvo S90
compartment.
Location * Amperage
1 Engine control module, Automatic transmission control module 5
2 AC relay 5
3 Relay, air pump, Heated oxygen sensor 15
4 Fuel pump 15
5 Fuel injection, Mass air flow (MAF) sensor, Idle air control system,\
Engine control module 15
6 Automatic transmission control module 15
7 Ignition coil, 25
8 Fog lights 25
9 Spare
10 Positioning/parking lights, left 15
11 Positioning/parking lights, right 15
12 Left high beam 15
13 Right high beam, Instrument panel 15
14 Left low beam 15
15 Right low beam 15
16 A/C compressor 15
17 Horn 15
18 Accessories (see respective accessories instructions)
*Some of the equipment/systems listed may be available on certain models\
only and/or as optional items
only.
Fuses pg. 92
Fuse box in the passenger compartment (Box C)
These fuses generally protect the electrical components in the passenger\
compartment.
The fuses are located inside the cover on the left side of the dash .A n\
umber of spare fuses can also be
found here. Fuses are replaced in the same way as in the relay/fuse box \
in the engine compartment (see
previous page).
file:///K|/ownersdocs/1998/1998_SV90/98S90_089.htm (4 of 9)12/30/2006 \
1:52:46 PM
Page 102 of 175

1998 Volvo S90
19 Backup lights, Turn indicators, Cruise control 15
20 Light switch, High/low beam relay 15
21 Seat belt reminder, Timer- electrically heated rear window 5
Location ** Amperage
22 Heated driver's seat 15
23 Heated passenger's seat 15
24 Rear fog light 5
25 Power seats * 30
26 Power windows, Power sunroof * 30
*Automatic circuit breakers
** Some of the equipment/systems listed may be available on certain mode\
ls only and/or as optional
items only.
Installation of accessories pg. 93
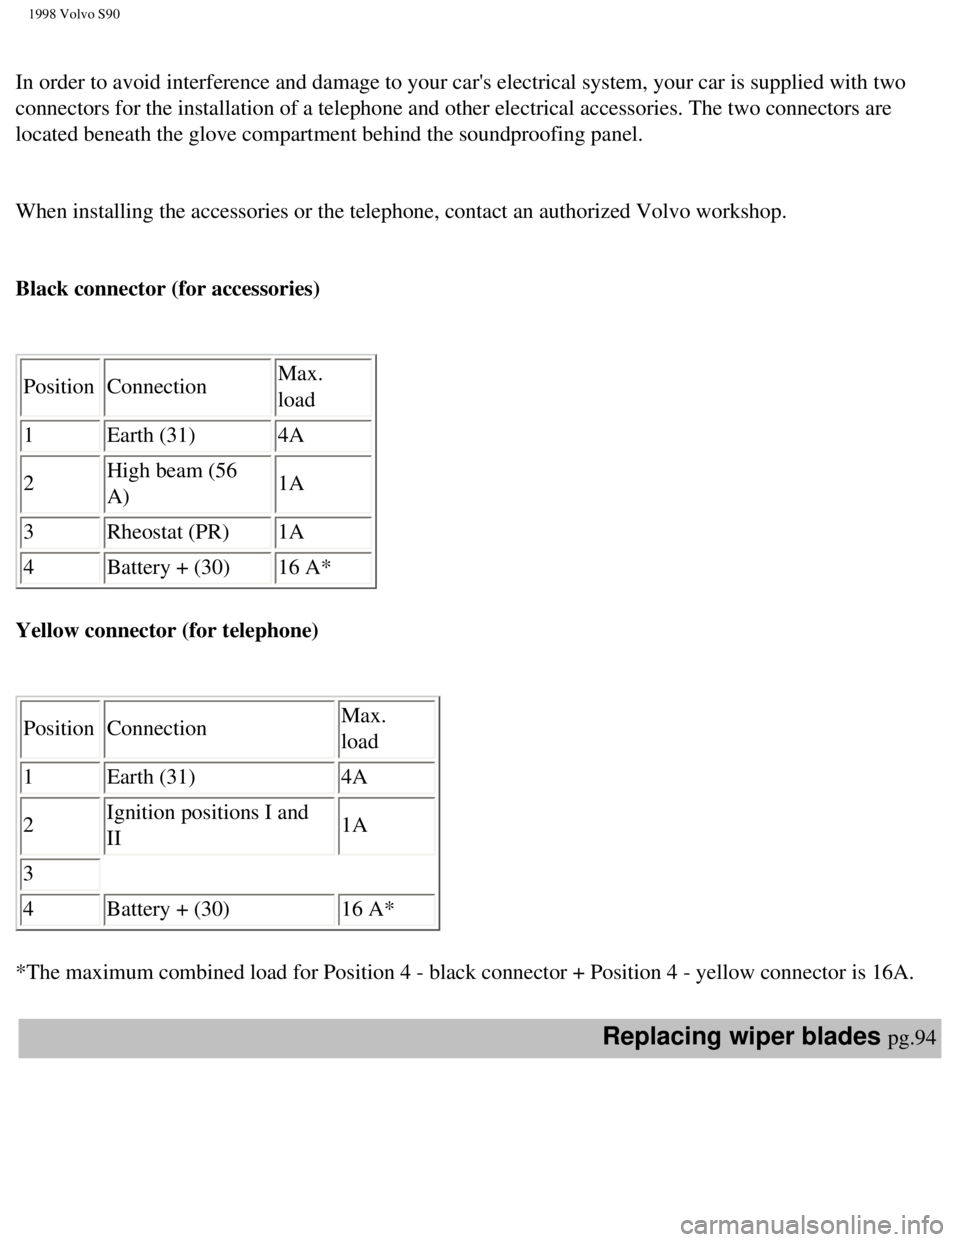
Installation of accessories
Installation of telephone and accessories
file:///K|/ownersdocs/1998/1998_SV90/98S90_089.htm (6 of 9)12/30/2006 \
1:52:46 PM
Page 103 of 175

1998 Volvo S90
In order to avoid interference and damage to your car's electrical syste\
m, your car is supplied with two
connectors for the installation of a telephone and other electrical acce\
ssories. The two connectors are
located beneath the glove compartment behind the soundproofing panel.
When installing the accessories or the telephone, contact an authorized \
Volvo workshop.
Black connector (for accessories)
Position Connection Max.
load
1 Earth (31) 4A
2 High beam (56
A) 1A
3 Rheostat (PR) 1A
4 Battery + (30) 16 A*
Yellow connector (for telephone)
Position Connection Max.
load
1 Earth (31) 4A
2 Ignition positions I and
II 1A
3
4 Battery + (30) 16 A*
*The maximum combined load for Position 4 - black connector + Position 4\
- yellow connector is 16A.
Replacing wiper blades pg.94
file:///K|/ownersdocs/1998/1998_SV90/98S90_089.htm (7 of 9)12/30/2006 \
1:52:46 PM