Page 3 of 204
1998 COROLLA(U)
3
1. Power rear view mirror control switch
2. Headlight and turn signal switch
3. Wiper and washer switches
4. Emergency flasher switch
5. Clock
6. Rear window defogger switch
7. Car audio
8. Air conditioning controls
9. Auxiliary box
10. Cup holder
11. Cigarette lighter
12. Ashtray
13. Ignition switch
14. Cruise control switch
15. Tilt steering lock release lever
16. Instrument panel light control knob
ProCarManuals.com
Page 35 of 204

1998 COROLLA(U)
35
The SRS (Supplemental Restraint Sys-
tem) airbags are designed to provide
further protection for the driver and
front passenger when added to the pri-
mary protection provided by the seat
belts.
In response to a severe frontal impact,
the SRS airbags work together with the
seat belts to help prevent or reduce injury
by inflating, in order to decrease the likeli-
hood of the driver ’s or front passenger ’s
head or chest directly hitting the steering
wheel or dashboard. The passenger airbag
is activated even with no passenger in the
front seat.
Be sure to wear your seat belt.
CAUTION
A driver or front passenger too close
to the steering wheel or dashboard
during airbag deployment can be
killed or seriously injured. Toyota
strongly recommends that:
�The driver sit as far back as pos-
sible from the steering wheel while
still maintaining control of the ve-
hicle.
�The front passenger sit as far back
as possible from the dashboard.
�All vehicle occupants be properly
restrained using the available seat
belts.This indicator comes on when the igni-
tion key is turned to the ”ACC” or
”ON” position. It goes off after about
6 seconds. This means the SRS airbags
are operating properly.
The SRS airbag warning light system
monitors the airbag sensor assembly, in-
flators, warning light, interconnecting wir-
ing and power sources.
SRS driver and front
passenger airbags
ProCarManuals.com
Page 122 of 204

1998 COROLLA(U)
130
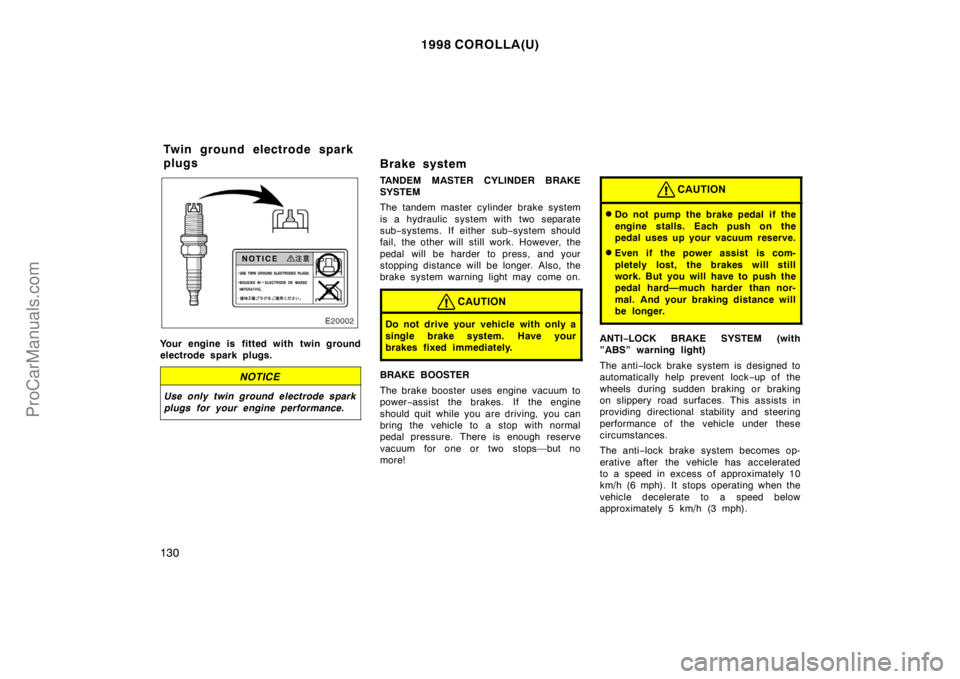
Your engine is fitted with twin ground
electrode spark plugs.
NOTICE
Use only twin ground electrode spark
plugs for your engine performance.
Brake system
TANDEM MASTER CYLINDER BRAKE
SYSTEM
The tandem master cylinder brake system
is a hydraulic system with two separate
sub−systems. If either sub−system should
fail, the other will still work. However, the
pedal will be harder to press, and your
stopping distance will be longer. Also, the
brake system warning light may come on.
CAUTION
Do not drive your vehicle with only a
single brake system. Have your
brakes fixed immediately.
BRAKE BOOSTER
The brake booster uses engine vacuum to
power−assist the brakes. If the engine
should quit while you are driving, you can
bring the vehicle to a stop with normal
pedal pressure. There is enough reserve
vacuum for one or two stops—but no
more!
CAUTION
�Do not pump the brake pedal if the
engine stalls. Each push on the
pedal uses up your vacuum reserve.
�Even if the power assist is com-
pletely lost, the brakes will still
work. But you will have to push the
pedal hard—much harder than nor-
mal. And your braking distance will
be longer.
ANTI−LOCK BRAKE SYSTEM (with
”ABS” warning light)
The anti−lock brake system is designed to
automatically help prevent lock−up of the
wheels during sudden braking or braking
on slippery road surfaces. This assists in
providing directional stability and steering
performance of the vehicle under these
circumstances.
The anti−lock brake system becomes op-
erative after the vehicle has accelerated
to a speed in excess of approximately 10
km/h (6 mph). It stops operating when the
vehicle decelerate to a speed below
approximately 5 km/h (3 mph).
Twin ground electrode spark
plugs
ProCarManuals.com
Page 138 of 204
1998 COROLLA(U)
146�
Keep the bottom of your vehicle free
from mud, etc. This not only lessens
weight but also helps prevent corro-
sion.
�Keep your vehicle tuned−up and in
top shape. A dirty air cleaner, improp-
er valve clearance, dirty plugs, dirty oil
and grease,brakes not adjusted, etc. all
lower engine performance and contrib-
ute to poor fuel economy. For longer
life of all parts and lower operating
costs, keep all maintenance work on
schedule, and if you often drive under
severe conditions, see that your vehicle
receives more frequent maintenance.
(For scheduled maintenance informa-
tion, please refer to the separate ”Own-
er ’s Manual Supplement/Maintenance
Schedule”).
CAUTION
Never turn off the engine to coast
down hills. Your power steering and
brake booster will not function with-
out the engine running. Also, the
emission control system operates
properly only when the engine is run-
ning.
ProCarManuals.com
Page 166 of 204

’98COROLLA(U) 512
174
IN THE ENGINE COMPARTMENT
Items listed below should be checked
from time to time, e.g. each time when
refueling.
Washer fluid
Make sure there is sufficient fluid in the
tank. See Chapter 7−3 for additional in-
formation.
Engine coolant level
Make sure the coolant level is between
the ”FULL” and ”LOW” lines on the see−
through reservoir when the engine is cold.
See Chapter 7−2 for additional information.
Battery electrolyte level
Make sure the electrolyte level of all bat-
tery cells is between upper and lower lev-
el lines on the case. Add only distilled
water when replenishing. See Chapter 7−3
for additional information.
Brake fluid level
Make sure the brake fluid level is correct.
See Chapter 7−2 for additional information.
Engine oil level
Check the level on the dipstick with the
engine turned off and the vehicle parked
on a level spot. See Chapter 7−2 for addi-
tional information.Power steering fluid level
Check the level through the reservoir. The
level should be in the ”HOT” or ”COLD”
range depending on the fluid temperature.
See Chapter 7−2 for additional information.
Exhaust system
If you notice any change in the sound of
the exhaust or smell exhaust fumes, have
the cause located and corrected immedi-
ately. (See engine exhaust cautions in
Part 2.)Be on the alert for changes in perfor-
mance, sounds, and visual tip−offs that
indicate service is needed. Some impor-
tant clues are as follows:
�Engine missing, stumbling, or pinging
�Appreciable loss of power
�Strange engine noises
�A leak under the vehicle (however, wa-
ter dripping from the air conditioning
after use is normal.)
�Change in exhaust sound (This may
indicate a dangerous carbon monoxide
leak. Drive with the windows open and
have the exhaust system checked im-
mediately.)
�Flat−looking tire; excessive tire squeal
when cornering; uneven tire wear
�Vehicle pulls to one side when driving
straight on a level road
�Strange noises related to suspension
movement
�Loss of brake effectiveness; spongy
feeling brake or clutch pedal;pedal al-
most touches floor; vehicle pulls to one
side when braking
�Engine coolant temperature continually
higher than normal
Does your vehicle need
repairing?
ProCarManuals.com
Page 170 of 204
1998 COROLLA(U)
178
Engine compartment overview
1. Power steering fluid reservoir
2. Engine oil level dipstick
3. Engine oil filler cap
4. Brake fluid reservoir
5. Fuse blocks
6. Battery
7. Engine coolant reservoir
8. Electric cooling fans
9. Windshield washer fluid tank
ProCarManuals.com
Page 174 of 204
1998 COROLLA(U)
182
Checking power steering fluid
Parts (if level is low):
�Automatic transmission fluid
DEXRON®II or III
Tools:
�Rag or paper towel
�Funnel (only for adding fluid)
Checking battery condition
Tools:
�Warm water
�Baking soda
�Grease
�Conventional wrench (for terminal
clamp bolts)
Checking and replacing fuses
Parts (if replacement is necessary):
�Genuine Toyota fuse or equivalent with
same amperage rating as original
Adding washer fluid
Parts:
�Water
�Washer fluid containing antifreeze (for
winter use)Tools:
�Funnel
Replacing light bulbs
Parts:
�Bulb with same number and wattage
rating as original (See charts in ”Re-
placing light bulbs” in Chapter 7−3.)
Tools:
�Screwdriver
ProCarManuals.com
Page 175 of 204

1998 COROLLA(U)
183
Part 7
DO−IT−YOURSELF
MAINTENANCE—
Chapter 7−2
Engine and Chassis
�Checking the engine oil level
�Checking the engine coolant
level
�Checking brake fluid
�Checking power steering fluid
�Checking tire pressure
�Checking and replacing tires
�Rotating tires
�Installing snow tires and chains
�Replacing wheels
�Aluminum wheel precautions
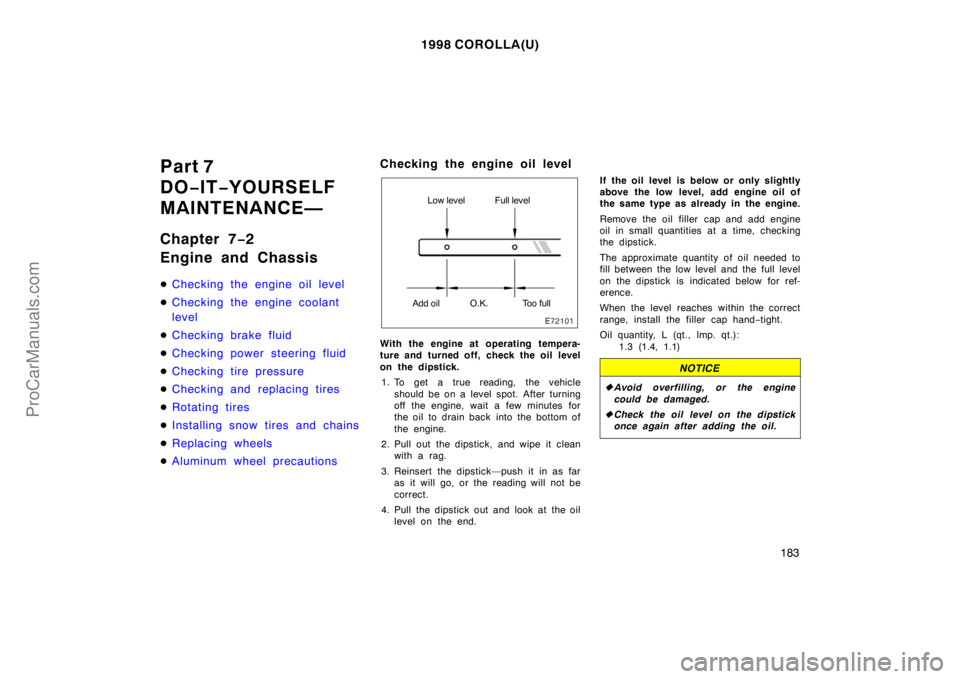
Checking the engine oil level
Low level Full level
Add oilO.K. Too full
With the engine at operating tempera-
ture and turned off, check the oil level
on the dipstick.
1. To get a true reading, the vehicle
should be on a level spot. After turning
off the engine, wait a few minutes for
the oil to drain back into the bottom of
the engine.
2. Pull out the dipstick, and wipe it clean
with a rag.
3. Reinsert the dipstick—push it in as far
as it will go, or the reading will not be
correct.
4. Pull the dipstick out and look at the oil
level on the end.If the oil level is below or only slightly
above the low level, add engine oil of
the same type as already in the engine.
Remove the oil filler cap and add engine
oil in small quantities at a time, checking
the dipstick.
The approximate quantity of oil needed to
fill between the low level and the full level
on the dipstick is indicated below for ref-
erence.
When the level reaches within the correct
range, install the filler cap hand−tight.
Oil quantity, L (qt., lmp. qt.):
1.3 (1.4, 1.1)
NOTICE
�Avoid overfilling, or the engine
could be damaged.
�Check the oil level on the dipstick
once again after adding the oil.
ProCarManuals.com