1998 PONTIAC GRAND PRIX reset
[x] Cancel search: resetPage 177 of 402
NEXT (2): Press this button or the SEEK up arrow to
search for the next selection on the tape.
If you hold the
button,
the player will continue moving forward through
the tape. Your tape must have at least
three seconds of
silence between each selection for NEXT or SEEK to
work. The tape direction arrow blinks during NEXT or SEEK operation. Press NEXT or the SEEK up arrow to
stop searching. The sound
will mute during NEXT or
SEEK operation.
PROG (3): Press this button to play the other side
of the tape.
00 (4): Press this button to reduce background
noise. Note that the double-D symbol will appear
on the display.
Dolby Noise Reduction is manufactured under a license
from Dolby Laboratories Licensing Corporation. Dolby
and the double-D symbol are trademarks of Dolby
Laboratories Licensing Corporation.
REV (5): Press this button to reverse the tape rapidly.
Press it again to return to playing speed. The radio will
play the last-selected station while the tape reverses.
You may select stations during REV operation by using
SEEK or
TUNE.
FWD (6): Press this button to advance quickly to
another part
of the tape. Press the button again to return
to playing speed. The radio will play the last-selected
station
while the tape advances. You may select stations
during
FWD operation by using SEEK or TUNE.
AM-FM: Press this button to play the radio when a tape
is in the player.
TAPEPLAX Press this button to change to the tape
function when the radio is on. The tape symbol with an
arrow will appear on the display when the tape is active.
To return to playing the radio, press the
AM-FM button.
EJECT: Press this button to remove the tape. The radio
will play. EJECT may be activated with either the
ignition or radio
off. Cassettes may be loaded with the
radio
off if this button is pressed fist.
CLN: If this message appears on the display, the
cassette tape player needs to
be cleaned. It will still play
tapes, but you should clean it as soon as possible to
prevent damage to the tapes and player. See “Care
of
Your Cassette Tape Player” in the Index. After you clean
the player, press and hold EJECT for five seconds to
reset the CLN indicator. The radio will display
--- to
show the indicator was reset.
3-18
Page 188 of 402

To unlock a secured radio, see “Unlocking the
Theft-Deterrent Feature After
a Power Loss” earlier in
this section.
Audio Steering Wheel Controls
(If Equipped)
3
r.
If your vehicle has this feature, you can control certain
radio and remote playback functions using the buttons
on your steering wheel.
VOLUME: Press the up or down arrow to increase or
decrease volume.
PLAY: Press this button to play a cassette tape or
compact disc when the radio is playing.
MUTE: Press this button to silence the system. Press it
again, or any other radio button, to turn on the sound.
SEEK: Press the up arrow to tune to the next radio
station and the down
arrow to tune to the previous radio
station.
If a cassette tape or compact disc is playing, the
player will advance
to the next selection with the up
arrow and go to the previous selection with the
down arrow.
PRESET: Press this button to play a station you have
programmed on the radio preset buttons. When a cassette tape
is playing, press this button to change tape
sides.
If you have the trunk mounted CD player, press
this button to advance to
the next disc in the magazine.
AM-FM: Press this button to choose AM, FM1 or FM2.
If a cassette tape or compact disc is playing, it will stop
and the radio will play.
3-29
Page 190 of 402
Care of Your Cassette Tape Player
A tape player that is not cleaned regularly can cause
reduced sound quality, ruined cassettes or a damaged
mechanism. Cassette tapes should be stored in their
cases away from contaminants, direct sunlight and
extreme heat.
If they aren’t, they may not operate
properly or may cause failure of the tape player.
Your tape player should be cleaned regularly after every
50 hours of use. Your radio may display CLN to indicate
that you have used your tape player for
50 hours without
resetting the tape clean timer. If this message appears on
the display, your cassette tape player needs to be
cleaned. It will still play tapes, but you should clean it
as
soon as possible to prevent damage to your tapes and
player. If you notice a reduction in sound quality, try a
known good cassette to see if it is the tape or the tape
player at fault.
If this other cassette has no improvement
in sound quality, clean the tape player.
The recommended cleaning method for your cassette
tape player
is the use of a scrubbing action,
non-abrasive cleaning cassette with pads which scrub the tape head as the hubs
of the cleaner cassette turn.
The recommended cleaning cassette is available through
your dealership
(GM Part No. 12344789).
When using a scrubbing action, non-abrasive cleaning
cassette, it
is normal for the cassette to eject because your unit
is equipped with a cut
tape detection feature and a cleaning
cassette may appear as broken. To prevent the cleaning
cassette from being ejected, use the following steps.
1.
2.
3.
4.
5.
Turn the ignition to RUN or ACCESSORY
Turn the radio
off.
Press and hold the TAPEFLAY button for three
seconds. The tape symbol on the display will flash
for two seconds.
Insert the scrubbing action cleaning cassette.
Eject the cleaning cassette after the manufacturer’s
recommended cleaning time.
When the cleaning cassette has been ejected, the cut tape
detection feature
is active again.
You may also choose a non-scrubbing action, wet-type
cleaner which uses a cassette with a fabric belt to clean
the tape head. This type of cleaning cassette will not
eject on its own. A non-scrubbing action cleaner may
not clean as thoroughly as the scrubbing type cleaner.
The use
of a non-scrubbing action, dry-type cleaning
cassette is not recommended.
After you clean the player, press and hold EJECT for
five seconds to reset the CLN indicator. The radio will
display
--- to show the indicator was reset.
3-31
Page 294 of 402
Engine Oil Additives
Don’t add anything to your oil. Your dealer is ready to advise
if you think something should be added.
How to Reset the CHANGE OIL SOON Light
When to Change Engine Oil
Your vehicle has an Oil Life Monitor. This feature
will let you know when to change your oil and
filter
-- usually between 3,000 miles (5 000 km) and
7,500 miles (12 500 km) since your last oil change.
Under severe conditions, the indicator may come
on
before 3,000 miles (5 000 km). Never drive your vehicle
more than
7,500 miles (12 500 km) or 12 months
(whichever occurs first) without an oil change.
The system won’t detect dust in the oil. So, if you
drive in a dusty area, be sure to change your oil every
3,000 miles (5 000 km) or sooner. Remember to reset
the Oil Life Monitor when the oil has been changed. For
more information, see “CHANGE
OIL SOON Light” in
the Index.
To reset your CHANGE OIL SOON light after an oil
change, turn
the key to ON, without the engine running
and pump the accelerator three times within five seconds.
What to Do with Used Oil
Did you know that used engine oil contains certain
elements that may be unhealthy for your skin and could
even cause cancer? Don’t let used oil stay on your skin
for very long. Clean your skin and nails with soap and
water, or a good hand cleaner. Wash or properly
throw
away clothing or rags containing used engine oil. (See
the manufacturer’s warnings about the use and
disposal
of oil products.)
Used oil can
be a real threat to the environment. If you
change your own oil, be sure to drain
all free-flowing oil
from the filter before disposal. Don’t ever dispose of oil
by putting it in the trash, pouring it on the ground, into
sewers, or into streams or bodies of water. Instead,
recycle it by taking it to a place that collects used oil.
If
you have a problem properly disposing of your used oil,
ask your dealer, a service station or a local recycling
center for help.
6-19
Page 305 of 402
Radiator Pressure Cap
NOTICE:
Your radiator cap is a 15 psi (105 kPa)
pressure-type cap and must be tightly installed to prevent coolant loss and possible engine
damage from overheating. Be sure the arrows
on the cap line
up with the overflow tube on
the radiator filler neck.
When you replace your radiator pressure cap, a GM cap
is recommended.
Thermostat
Engine coolant temperature is controlled by a thermostat
in the engine coolant system. The thermostat stops the
flow of coolant through the radiator until the coolant
reaches a preset temperature.
When
you replace your thermostat, a GM thermostat
is recommended.
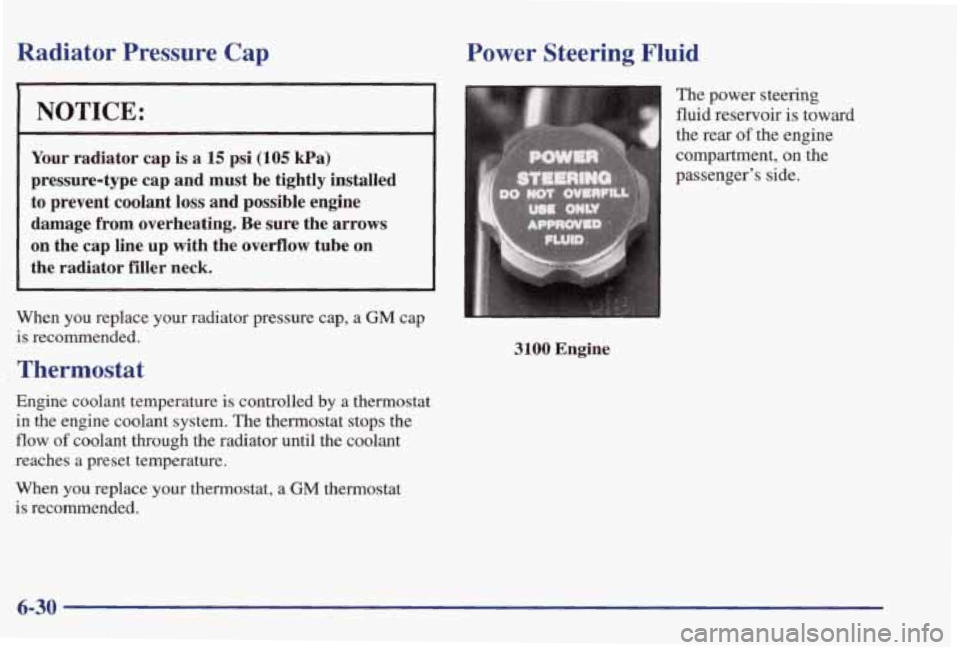
Power Steering Fluid
The power steering
fluid reservoir
is toward
3100 Engine
6-30
Page 325 of 402
Temperature -- A, B, C
The temperature grades are A (the highest), B, and Cy
representing the tire’s resistance to the generation of
heat and its ability to dissipate heat when tested under
controlled conditions on
a specified indoor laboratory
test wheel. Sustained high temperature can cause the
material of the tire to degenerate and reduce tire life, and
excessive temperature can lead to sudden tire failure.
The grade C corresponds to a level of performance
which
all passenger car tires must meet under the
Federal Motor Vehicle Safety Standard
No. 109. Grades
B and A represent higher levels of performance on the
laboratory test wheel than the minimum required by law.
Warning: The temperature grade for this tire is
established for a tire that
is properly inflated and not
overloaded. Excessive speed, underinflation, or
excessive loading, either separately
or in combination,
can cause heat buildup and possible tire failure.
Wheel Alignment and Tire Balance
The wheels on your vehicle were aligned and balanced
carefully at the factory to give you the longest tire life
and best overall performance. Scheduled wheel alignment and wheel balancing are
not needed. However, if you notice unusual tire wear or
your vehicle pulling one way or the other, the alignment
may need to be reset.
If you notice your vehicle
vibrating when driving on a
smooth road, your wheels
may need to be rebalanced.
Wheel Replacement
Replace any wheel that is bent, cracked, or badly rusted
or corroded. If wheel nuts keep coming loose, the wheel,
wheel bolts
and wheel nuts should be replaced. If the
wheel leaks
air, replace it (except some aluminum
wheels, which can sometimes be repaired). See your
dealer
if any of these conditions exist.
Your dealer will know the kind
of wheel you need.
Each new wheel should have the same load-canying
capacity, diameter, width, offset
and be mounted the
same way as
the one it replaces.
If you need to replace any of your wheels, wheel bolts
or wheel nuts, replace them only with
new GM original
equipment parts.
This way, you will be sure to have
the
right wheel, wheel bolts and wheel nuts for your
Pontiac model.
6-50
Page 350 of 402
Maintenance Schedule
The services shown in this schedule up to 100,000 miles
(166
OOO km) should be performed after 100,000 miles
(166
000 km) at the same intervals. The services shown
at
150,000 miles (240 000 km) should be performed at
the same interval after 150,000 miles
(240 000 km).
See “Owner Checks and Services” and “Periodic
Maintenance Inspections” following.
Footnotes
? The US. Environmental Protection Agency or the
California Air Resources Board has determined that the
failure to perform
this maintenance item will not nullify
the emission warranty or limit recall liability prior
to the
completion
of the vehicle’s useful life. We, however,
urge that
all recommended maintenance services be
performed at the indicated intervals and the maintenance be recorded.
* Your vehicle has an Engine Oil Life Monitor. This
monitor will show you when to change the engine oil
and filter
-- usually between 3,000 miles (5 OOO km) and
7,500 miles (12 500 km) since your last oil change.
Under severe conditions, the indicator may come
on
before 3,000 miles (5 000 km). Never drive your vehicle
more than
7,500 miles (12 500 km) or 12 months
without
an oil and filter change.
The system won’t detect dust
in the oil. So if you drive
in
a dusty area, be sure to change your oil and filter
every 3,000 miles (5 000 km) or sooner if the CHANGE
OIL SOON light comes on. Remember to reset the
Oil Life Monitor when the oil has been changed. For
more information, see “CHANGE
OIL SOON light”
in the Index.
+ A good time to check your brakes is during tire
rotation. See “Brake System Inspection” under “Periodic
Maintenance Inspections”
in Part C of this schedule.
Page 351 of 402
Maintenance Schedule
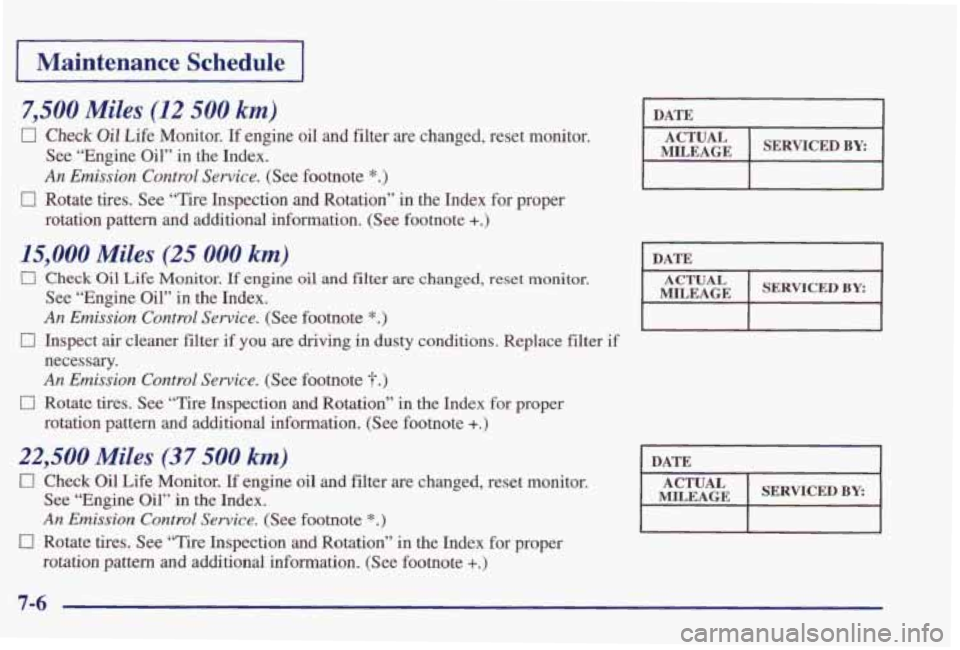
7,500 Miles (12 500 km)
0 Check Oil Life Monitor. If engine oil and filter are changed, reset monitor.
See “Engine Oil”
in the Index.
An Emission Control Service. (See footnote *.)
rotation pattern and additional information. (See footnote +.)
0 Rotate tires. See “Tire Inspection and Rotation” in the Index for proper
I DATE I
15,000 Miles (25 000 km)
0 Check Oil Life Monitor. If engine oil and filter are changed, reset monitor.
See “Engine Oil” in the Index.
An Emission Control Service. (See footnote *.)
necessary.
An Emission Control Service. (See footnote $.)
rotation pattern and additional information. (See footnote +.)
0 Inspect air cleaner filter if you are driving in dusty conditions. Replace filter if
0 Rotate tires. See “Tire Inspection and Rotation” in the Index for proper
22,500 Miles (37 500 km)
0 Check Oil Life Monitor. If engine oil and filter are changed, reset monitor.
See “Engine
Oil” in the Index.
An Emission Control Service. (See footnote *.)
rotation pattern and additional information. (See footnote +.)
0 Rotate tires. See “Tire Inspection and Rotation” in the Index for proper
MILEAGE
7-6