1998 OLDSMOBILE SILHOUETTE ECU
[x] Cancel search: ECUPage 96 of 444

You’ll be using the lap-shoulder belt. See the earlier part
about the top strap if the child restraint has one. Be sure
to follow the instructions that came with the child
restraint. Secure the child in the child restraint when and
as the instructions say.
1. Because your vehicle has a front passenger air bag,
always move the seat as far back as it will
go before
securing
a forward-facing child restraint. (See
“Seats” in the Index.)
2. Put the restraint on the seat.
3. Pick up the latch plate, and run the lap and shoulder
portions
of the vehicle’s safety belt through or
around the restraint. The child restraint instructions
will show you how.
If the shoulder belt goes in front
of the child’s face or
neck, put it behind the child restraint. 4. Buckle the belt. Make sure the release button is
positioned so you would be able to unbuckle the
safety belt quickly if you ever had to.
1-84
ProCarManuals.com
Page 97 of 444
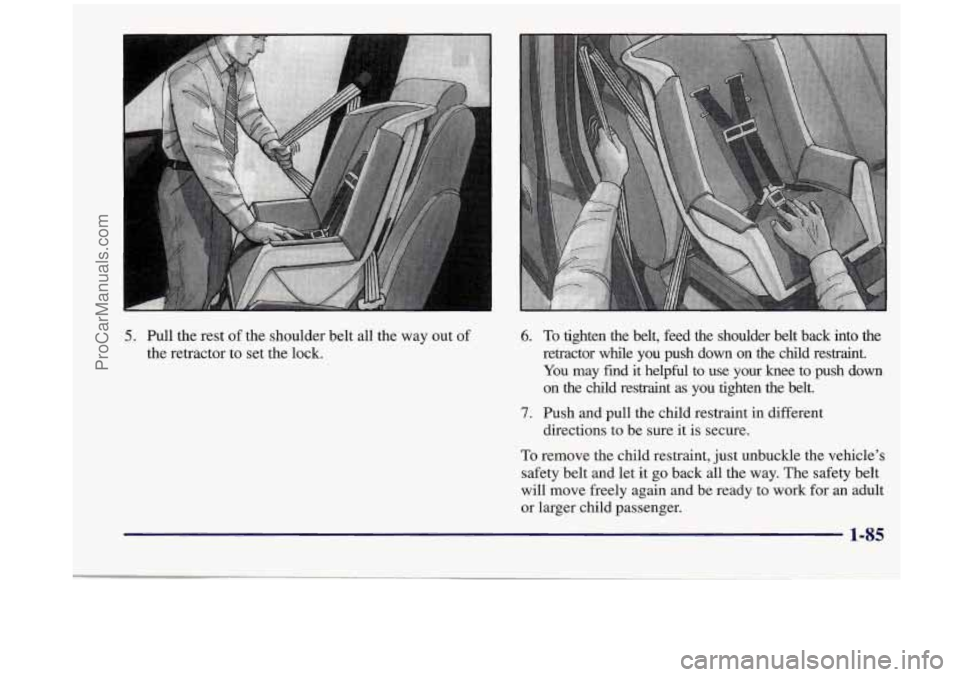
5. Pull the rest of the shoulder belt all the way out of
the retractor to set the lock. 6.
7.
To tighten the belt, feed the shoulder belt back into the
retractor while you push down on the child restraint. You may find
it helpful to use your knee to push down
on the child restraint as you tighten the belt.
Push and pull the child restraint in different
directions to be sure it is secure.
To remove the child restraint, just unbuckle the vehicle’s
safety belt and let it go back all the way. The safety belt
will move freely again and be ready to work for an adult
or larger child passenger.
ProCarManuals.com
Page 114 of 444
Replacing the Battery in the
Remote Transmitter
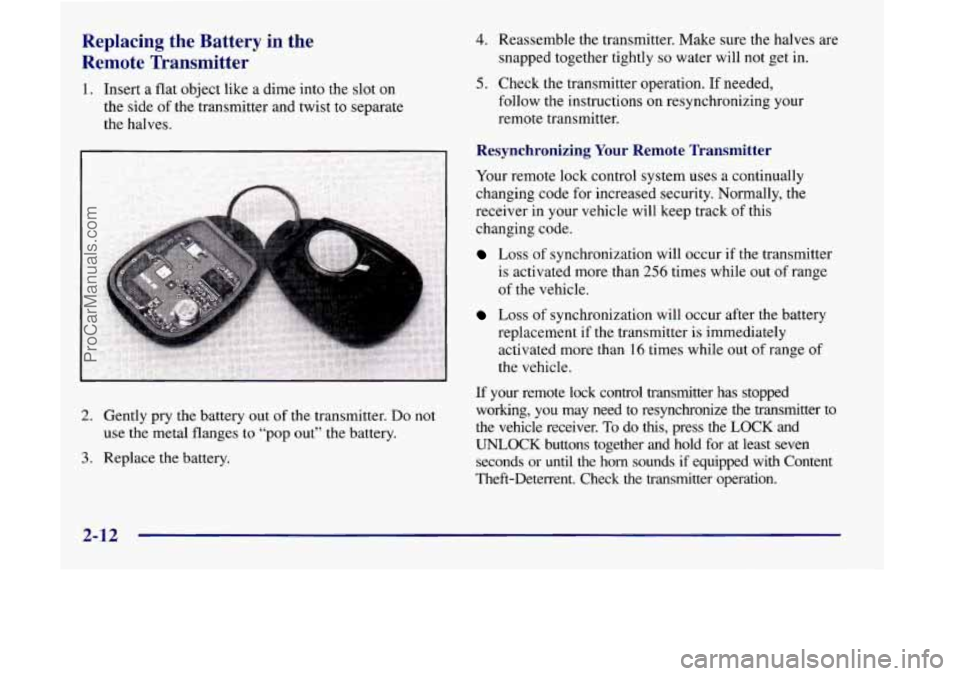
1. Insert a flat object like a dime into the slot on
the side of the transmitter and twist to separate
the halves.
2. Gently pry the battery out of the transmitter. Do not
use the metal flanges to “pop out” the battery.
3. Replace the battery.
4. Reassemble the transmitter. Make sure the halves are
snapped together tightly
so water will not get in.
5. Check the transmitter operation. If needed,
follow the instructions on resynchronizing your
remote transmitter.
Resynchronizing Your Remote Transmitter
Your remote lock control system uses a continually
changing code for increased security. Normally, the
receiver in your vehicle will keep track of this
changing code.
Loss of synchronization will occur if the transmitter
is activated more than
256 times while out of range
of the vehicle.
Loss of synchronization will occur after the battery
replacement if the transmitter is immediately
activated more than
16 times while out of range of
the vehicle.
If your remote lock control transmitter has stopped
working, you may need to resynchronize the transmitter
to
the vehicle receiver. To do this, press the LOCK and
UNLOCK buttons together and hold for at least seven seconds
or until the horn sounds if equipped with Content
Theft-Deterrent. Check the transmitter operation.
2-12
ProCarManuals.com
Page 121 of 444
Resetting the Power Sliding Door
The power sliding door may operate incorrectly or not at
all because of the following conditions:
A low voltage or dead battery,
Disconnecting the battery or
If the IGN 1, B/U LAMP, RADIO or PWR
SEATPSD fuse is removed or blown.
See “Fuse Panel” in the Index for more information
about your fuse panel.
If any of these conditions occur, the power sliding door
will need to be reset.
To do this, follow the directions
listed here. It will be easier if you read through them
once before beginning this procedure.
1. Check to be sure the power sliding door is unlocked
2. Turn the ignition switch to OFF.
and securely closed.
3. Enable the power sliding door override feature.
4. Remove the RADIO fuse from the underhood fuse
and relay center. Leave it out for
30 seconds.
5. Reinstall the fuse and wait 10 seconds.
6. Disable the power sliding door override feature.
7. Push either of the power door buttons to open the
power sliding door.
8. Wait five seconds and close the door by pushing
9. Wait five seconds and repeat Steps 7 and 8.
either power door button.
If the door does not rest in the fully open position after
repeating Step
7, repeat Steps 7 and 8 again. If the
door still does not operate correctly, see your retailer
for service.
Sliding Door Security Lock
Your vehicle is equipped with a sliding door security
lock that helps prevent young children or other
passengers from opening the sliding door by using the
inside door handle. This lock is on both doors if your
vehicle has the dual sliding doors.
If you have the optional power sliding door, you can
override the security lock by pressing either power door
switch when the power sliding door override feature is
disabled. See “Power Sliding Door” earlier in
the section.
2-19
ProCarManuals.com
Page 122 of 444
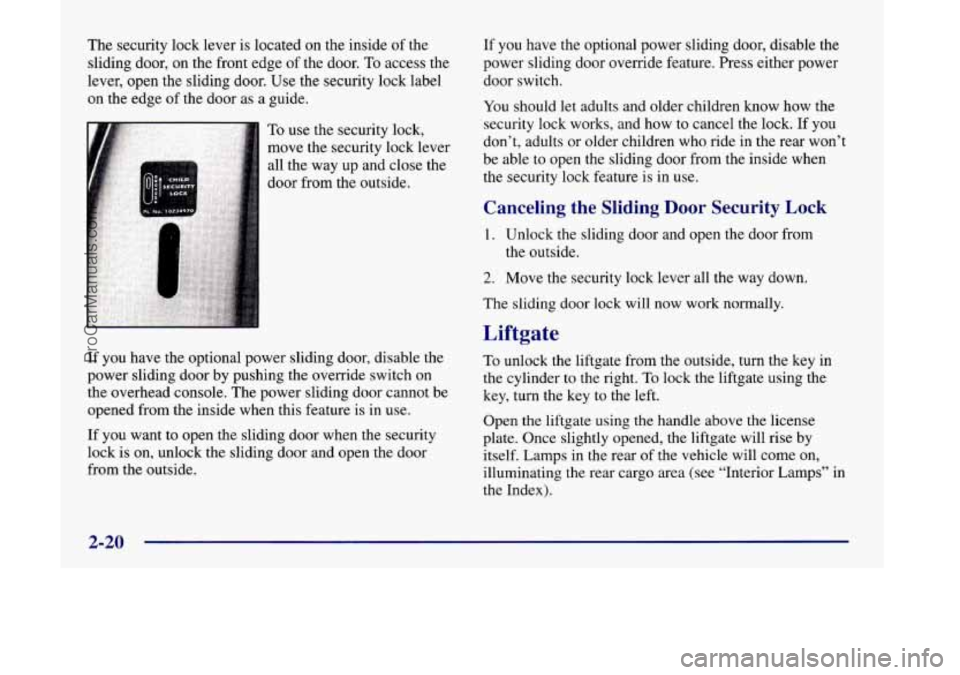
The security lock lever is located on the inside of the
sliding door, on the front edge of the door.
To access the
lever, open the sliding door. Use the security lock label
on the edge of the door as a guide.
To use the security lock,
move the security lock lever
all the way up and close the
door from the outside.
If you have the optional power sliding door, disable the
power sliding door by pushing the override switch on
the overhead console. The power sliding door cannot be
opened from the inside when this feature
is in use.
If you want to open the sliding door when the security
lock
is on, unlock the sliding door and open the door
from the outside.
If you have the optional power sliding door, disable the
power sliding door override feature. Press either power
door switch.
You should let adults and older children know how the
security lock works, and how to cancel the lock. If you
don’t, adults or older children who ride in the rear won’t
be able to open the sliding door from the inside when
the security lock feature is in use.
Canceling the Sliding Door Security Lock
1. Unlock the sliding door and open the door from
the outside.
2. Move the security lock lever all the way down.
The sliding door lock will now work
normally.
Liftgate
To unlock the liftgate from the outside, turn the key in
the cylinder to the right.
To lock the liftgate using the
key,
turn the key to the left.
Open the liftgate using
the handle above the license
plate. Once slightly opened, the liftgate will rise by
itself. Lamps in the rear of the vehicle will come on,
illuminating the rear cargo area (see “Interior Lamps” in
the Index).
2-20
ProCarManuals.com
Page 125 of 444
Content Theft-Deterrent (Option)
11 your vehicle has this option, it has a theft-deterrent
alarm system.
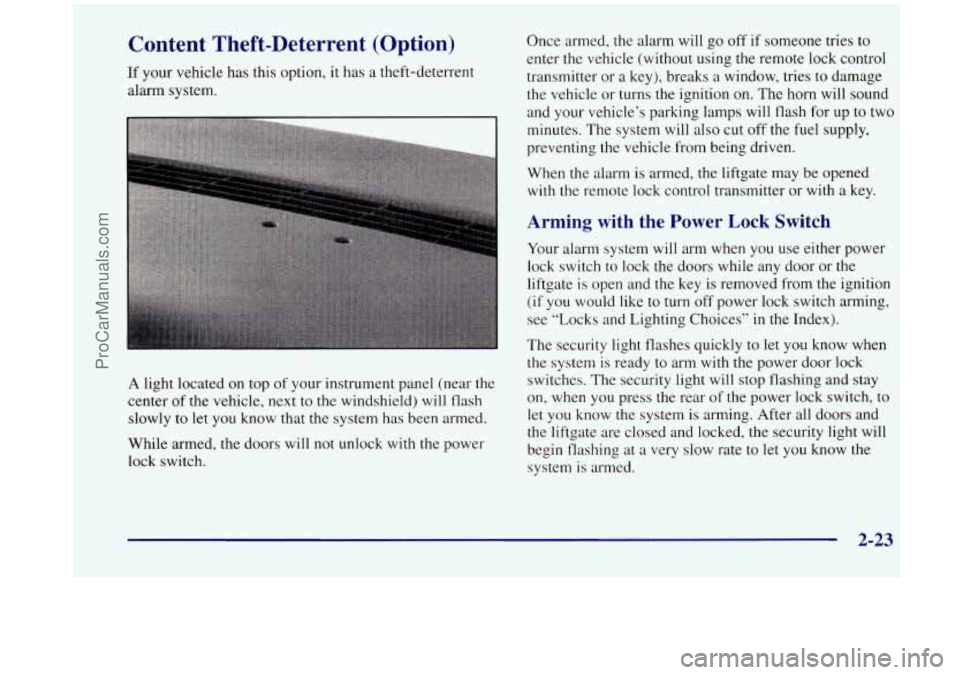
A light located on top of your instrument panel (near the
center of the vehicle,
next to the windshield) will flash
slowly to let you know that the system has been armed.
While armed, the doors will not unlock with the power
lock switch. Once armed,
the alarm will go off if
someone tries to
enter the vehicle (without using the remote lock control
transmitter or
a key), breaks a window, tries to damage
the vehicle or turns the ignition on. The horn will sound
and your vehicle’s parking lamps will flash for up to two
minutes. The system will also cut off the fuel supply,
preventing the vehicle from being driven.
When the alarm is armed, the liftgate may be opened
with the remote lock control transmitter or with a key.
Arming with the Power Lock Switch
Your alarm system will arm when you use either power
lock switch to lock the doors while any door or the
liftgate is open and the key is removed from the ignition
(if you would like to turn off power lock switch arming,
see “Locks and Lighting Choices”
in the Index).
The security light flashes quickly to let you know when
the system is ready
to arm with the power door lock
switches. The security light will stop flashing and stay
on, when
you press the rear of the power lock switch, to
let you know the system is arming. After all doors and
the liftgate are closed and locked, the security light will
begin flashing at
a very slow rate to let you know the
system is armed.
2-23
ProCarManuals.com
Page 126 of 444
Arming with the Remote Lock
Control Transmitter
Your alarm system will arm when you use your remote
lock control transmitter to lock the doors, if the key is
not in the ignition. The security light will turn on to let
you know the system is arming. After all doors and
the
liftgate are closed and locked, the security light will
begin flashing at a very slow rate to let you know the
system is armed.
Arming with Your Key
Your alarm system will arm when you use your key to
lock the doors. The security light will turn on to let you
know the system is arming. After all doors and the
liftgate are closed and locked, the security light will
begin flashing at a very slow rate to let you know the
system is armed. If you would like your key not
to arm
the system, see “Locks and Lighting Choices” in
the Index.
Arming Confirmation
If remote unlock confirmation is on (see “Locks and
Lighting Choices”
in the Index), your parking lamps
will flash briefly to let you know when your alarm
system has armed.
Disarming with the Remote Lock
Control Transmitter
Your alarm system will disarm when you use your
remote lock control transmitter to unlock the doors. The
security light will stop flashing to let you know the
system is no longer armed.
Disarming with Your Key
Your alarm system will disarm when you use your key
to unlock the doors. The security light will stop flashing
to let you know the system is no longer armed. If you
would like your key not to disarm the alarm system, see
“Locks and Lighting Choices” in the Index.
2-24
ProCarManuals.com
Page 151 of 444
NOTE: While this mode provides increased security, it
can be a problem if your remote lock control transmitter
is damaged, lost or if it fails to operate for any reason
while the Content Theft-Deterrent system is armed. The
Content Theft-Deterrent system must be disarmed for
the engine to run while in Mode
2; your key can no
longer disarm the system.
If your vehicle is equipped with the optional dealer
installed Onstar@ system, OnStar will not be able to
remotely unlock your vehicle if it has been programmed
to Mode
2.
Mode 3: Standard Arming and Disarming
The system will arm when you lock the doors using
either power door lock switch while any door or the
liftgate is open and the key is removed from
the ignition.
The system will arm when you lock the doors with
your key
or remote lock control transmitter and the
key is removed from the ignition.
The system will disarm when you unlock the doors
with your key or remote lock control transmitter.
Vehicles are delivered programmed in Mode
1.
To change the mode:
1.
2.
3.
4.
5.
6.
Follow the instructions for “Entering Programming
Mode” listed previously.
Insert your second key fully into any door key
cylinder and turn it to the unlock position.
This step is inconvenient, but necessary to prevent
accidental programming of this feature to Mode
2.
Do not program this feature to Mode 2 without first
reading the special note contained in the description
for that mode. The door key cylinder must remain in
the unlock position during Steps
2 through 4.
Press the horn symbol on the remote lock
control transmitter.
Count the number of chimes you hear. The number
of chimes tells you which mode your vehicle
is in.
You can change the mode by pressing the horn
symbol on the remote lock control transmitter again.
Repeat Step
3 until you hear the number of chimes
that matches the mode you want.
Remove your key from the door key cylinder.
The mode you selected is now set. You can either exit
the programming mode by following the instructions
later in this section or program the next feature available
on your vehicle.
ProCarManuals.com