Page 272 of 444

Parking on Hills
You really should not park your vehicle, with a trailer
attached, on a hill.
If something goes wrong, your rig
could start to move. People can be injured, and both
your vehicle and the trailer can be damaged.
But
if you ever have to park your rig on a hill, here’s
how
to do it:
1. Apply your regular brakes, but don’t shift into
PARK
(P) yet.
2. Have someone place chocks under the trailer wheels.
3. When the wheel chocks are in place, release the
regular brakes until the chocks absorb the load.
4. Reapply the regular brakes. Then apply your parking
brake, and then shift to PARK (P).
5. Release the regular brakes.
When You Are Ready to Leave After
Parking on a Hill
1. Apply your regular brakes and hold the pedal down
while you:
Start your engine;
Shift into a gear; and
Release the parking brake.
2. Let up on the brake pedal.
3. Drive slowly until the trailer is clear of the chocl ss .
4. Stop and have someone pick up and store the chocks.
Maintenance When Trailer Towing
Your vehicle will need service more often when you’re
pulling a trailer. See the Maintenance Schedule for more
on this. Things that are especially important in trailer
operation are automatic transaxle fluid (don’t overfill),
engine oil, belts, cooling system and brake adjustment.
Each of these is covered in this manual, and the Index
will help you find them quickly. If you’re trailering, it’s
a good idea to review these sections before you start
your trip.
Check periodically to see that all hitch nuts and bolts
are tight.
4-40
ProCarManuals.com
Page 308 of 444

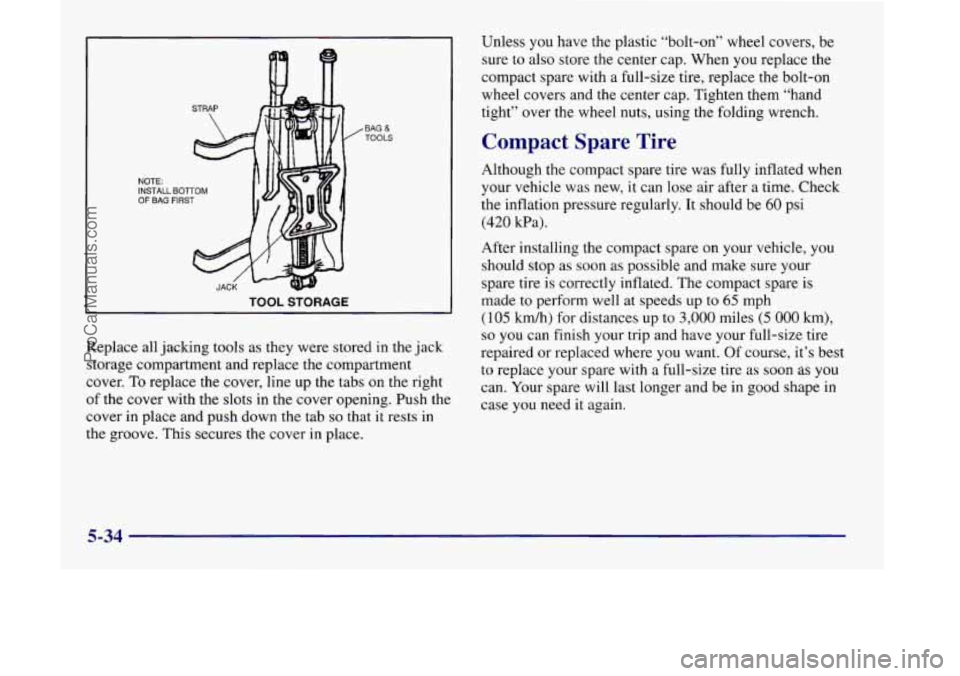
NOTE: INSTALL BOlTOM OF BAG FIRST
TOOL STORAGE
’ BAG & TOOLS
Replace all jacking tools as they were stored in the jack
storage compartment and replace the compartment
cover.
To replace the cover, line up the tabs on the right
of the cover with the slots in the cover opening. Push the
cover
in place and push down the tab so that it rests in
the groove. This secures the cover in place. Unless
you have the plastic “bolt-on” wheel covers, be
sure to also store the center cap. When you replace the
compact spare with a full-size tire, replace the bolt-on
wheel covers and the center cap. Tighten them “hand
tight’’ over the wheel nuts, using the folding wrench.
Compact Spare Tire
Although the compact spare tire was fully inflated when
your vehicle was new, it can lose air after a time. Check
the inflation pressure regularly. It should be
60 psi
(420 kPa).
After installing the compact spare on your vehicle, you
should stop as soon as possible and make sure your
spare tire is correctly inflated. The compact spare
is
made to perform well at speeds up to 65 mph
(105 km/h) for distances up to 3,000 miles (5 000 km),
so you can finish your trip and have your full-size tire
repaired or replaced where you want. Of course, it’s best
to replace your spare with a full-size tire as soon as
you
can. Your spare will last longer and be in good shape in
case
you need it again.
5-34
ProCarManuals.com
Page 326 of 444

Checking or Replacing the Air Cleaner
1. Unlatch the two hooks on top of the air
cleaner housing.
2. Turn back the air inlet panel and rest it on top of the
housing. The air intake tube is designed to flex back;
you do not need to disconnect it.
3. After replacing the air cleaner filter, seat the tabs on
the bottom of the panel into the slots at the bottom.
4. Latch the hooks to secure the panel in place. If the
panel moves easily, check that the tabs
are seated
correctly in the slots.
NOTICE:
If the air cleaner is off, a backfire can cause a
damaging engine fire. And, dirt can easily get
into your engine, which will damage it. Always
have the air cleaner in place when you’re driving.
Passenger Cornparti .t Air
Filter Replacemem
Passenger compartment air, both outside and
I recirculated air, is routed through a passenger
compartment filter, which is part of
a two-piece filter
system. The filter removes certain contaminants from
the air, including pollen and dust particles. Reductions
Operating the engine with the air cleaner off can in airflow, which may occur more quickly in dusty
cause you or others to be burned. The air cleaner areas, indicate that the filter needs to be replaced early.
not only cleans the air, it stops flame if the engine For how often to change the passenger compartment air
backfires. If it isn’t there, and the engine
backfires, you could be burned. Don’t drive with
The access panel for the passenger compartment air
it off, and be careful working on the engine with filter is in the back of the glove box.
the air cleaner off.
filter, see “Maintenance Schedule” in the Index.
6-16
ProCarManuals.com
Page 342 of 444
3. Remove the two wing nuts located on top of the
headlamp assembly.
4. Unscrew the black retainer ring that holds the bulb
assembly in place.
5. Pull the bulb assembly straight up from the
lamp housing.
I
6. Unhook the electrical connector by lifting up the
blue tabs and pulling
the bulb out.
6-32
ProCarManuals.com
Page 343 of 444
7. Replace the new bulb through the black retainer ring
and into the electrical connector. Push the bulb
firmly enough
so that the blue tabs hook over the tab
on the bulb.
8. Carefully put the bulb assembly back into the lamp
housing and tighten the black retainer ring in place.
Be careful not to damage the bulb on the headlamp
aiming bar.
6-33
ProCarManuals.com
Page 344 of 444
9. Align the pins on the bottom of the headlamp
assembly with the holes in the lamp support bracket
while placing the holes in the assembly over the
bolts where the wing nuts attach.
10. Replace and tighten the wing nuts.
11. Replace the parkinghrn signal lamp assembly by
lining up the tabs
at the back of the assembly with
the
holes in the fender.
12. Tighten the bolt connecting the parkinghurn
signal lamp assembly. Be sure the tab from the
parking/turn signal lamp assembly is inboard of the
tab from the headlamp assembly.
Front ParkingTurn Signal Lamps
1. Open the hood.
2. Remove the thumb screw attaching the parking/turn
signal lamp assembly to the headlamp assembly.
3. Pull the parkinghrn signal lamp assembly away
from the body.
4. Unscrew the bulb socket from the lamp assembly by
pressing the tab while turning
it to the left.
6-34
ProCarManuals.com
Page 345 of 444
5. Replace the bulb by pulling the old one out and
gently pushing the new one into the lamp socket.
6. Line up the tabs on the sockets with the gaps in the
socket holes and screw the bulb socket back into the
lamp housing until a click is heard (the tab popping
back out).
7. To replace the lamp assembly, line up and insert the
tabs on the back of the assembly with the slots in
the fender. Engage the lower clip on the front of the
lamp assembly, keeping the upper tab on the
parking/turn signal lamp assembly inboard
of the
headlamp bracket tab.
8. To align the parking/tum signal lamp assembly with the
headlamp assembly,
lift up the pxking/turn signal lamp
assembly until the upper edge is contacting the fender.
9. Fasten the parkinghrn signal lamp assembly to the
headlamp assembly with the thumb screw removed
in Step
1.
6-35
ProCarManuals.com
Page 346 of 444
Front Sidemarker
1. Open the hood.
2. Remove the thumb screw attaching the parkingkurn signal lamp assembly to
the headlamp assembly.
3. Pull the parkinghrn signal lamp assembly away
from the body.
4. Unscrew the bulb socket from the lamp assembly
by turning
it to the left.
5. Replace the bulb by pulling the old one out and
gently pushing 'the new one
into the lamp socket.
6. Line up the tabs on the sockets with the gaps in the
socket holes and screw the bulb socket back into the
lamp housing.
6-36
ProCarManuals.com