1998 NISSAN ALTIMA warning light
[x] Cancel search: warning lightPage 154 of 217
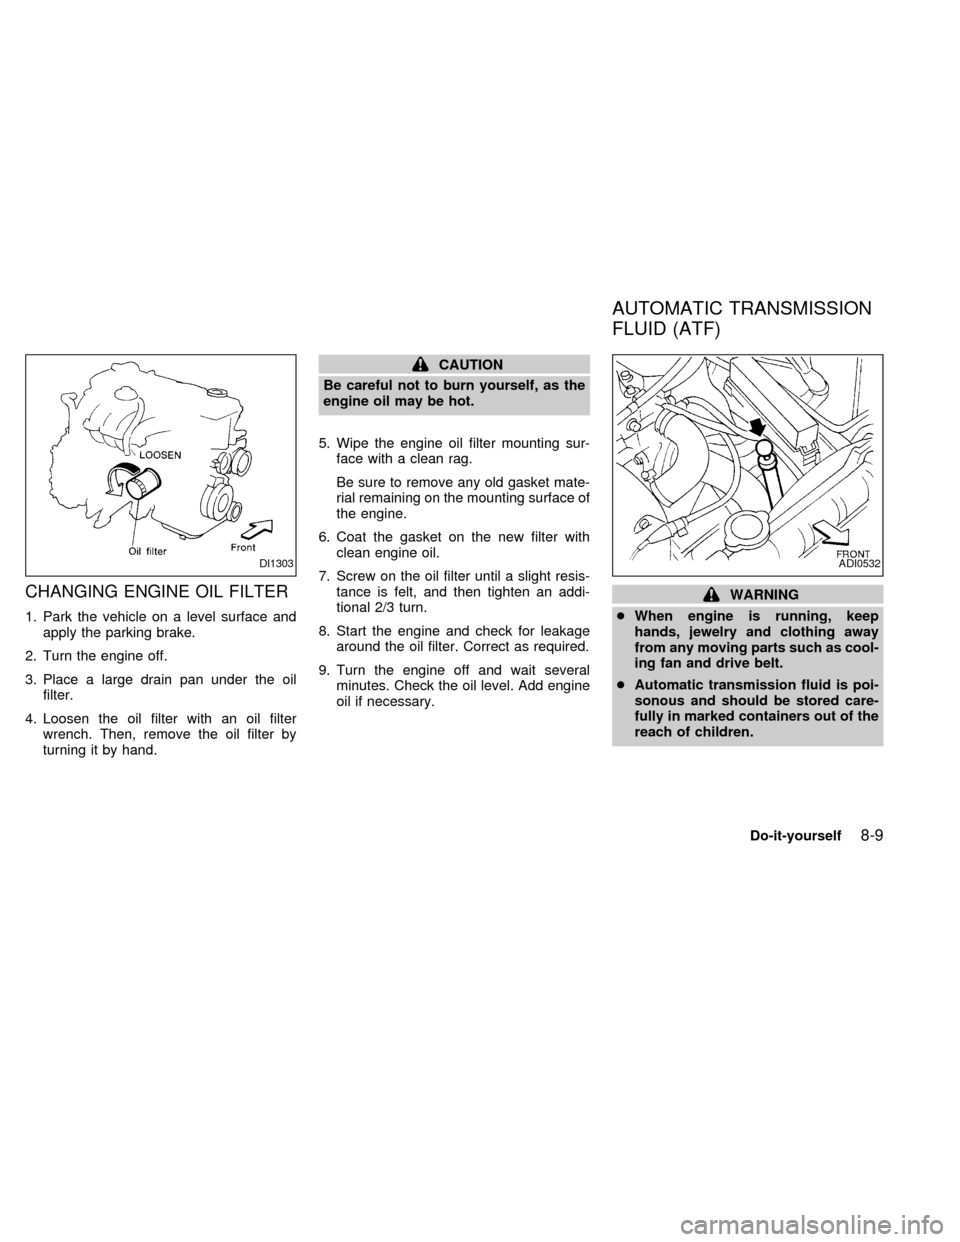
CHANGING ENGINE OIL FILTER
1. Park the vehicle on a level surface and
apply the parking brake.
2. Turn the engine off.
3. Place a large drain pan under the oil
filter.
4. Loosen the oil filter with an oil filter
wrench. Then, remove the oil filter by
turning it by hand.
CAUTION
Be careful not to burn yourself, as the
engine oil may be hot.
5. Wipe the engine oil filter mounting sur-
face with a clean rag.
Be sure to remove any old gasket mate-
rial remaining on the mounting surface of
the engine.
6. Coat the gasket on the new filter with
clean engine oil.
7. Screw on the oil filter until a slight resis-
tance is felt, and then tighten an addi-
tional 2/3 turn.
8. Start the engine and check for leakage
around the oil filter. Correct as required.
9. Turn the engine off and wait several
minutes. Check the oil level. Add engine
oil if necessary.
WARNING
cWhen engine is running, keep
hands, jewelry and clothing away
from any moving parts such as cool-
ing fan and drive belt.
cAutomatic transmission fluid is poi-
sonous and should be stored care-
fully in marked containers out of the
reach of children.
DI1303ADI0532
AUTOMATIC TRANSMISSION
FLUID (ATF)
Do-it-yourself8-9
ZX
Page 156 of 217
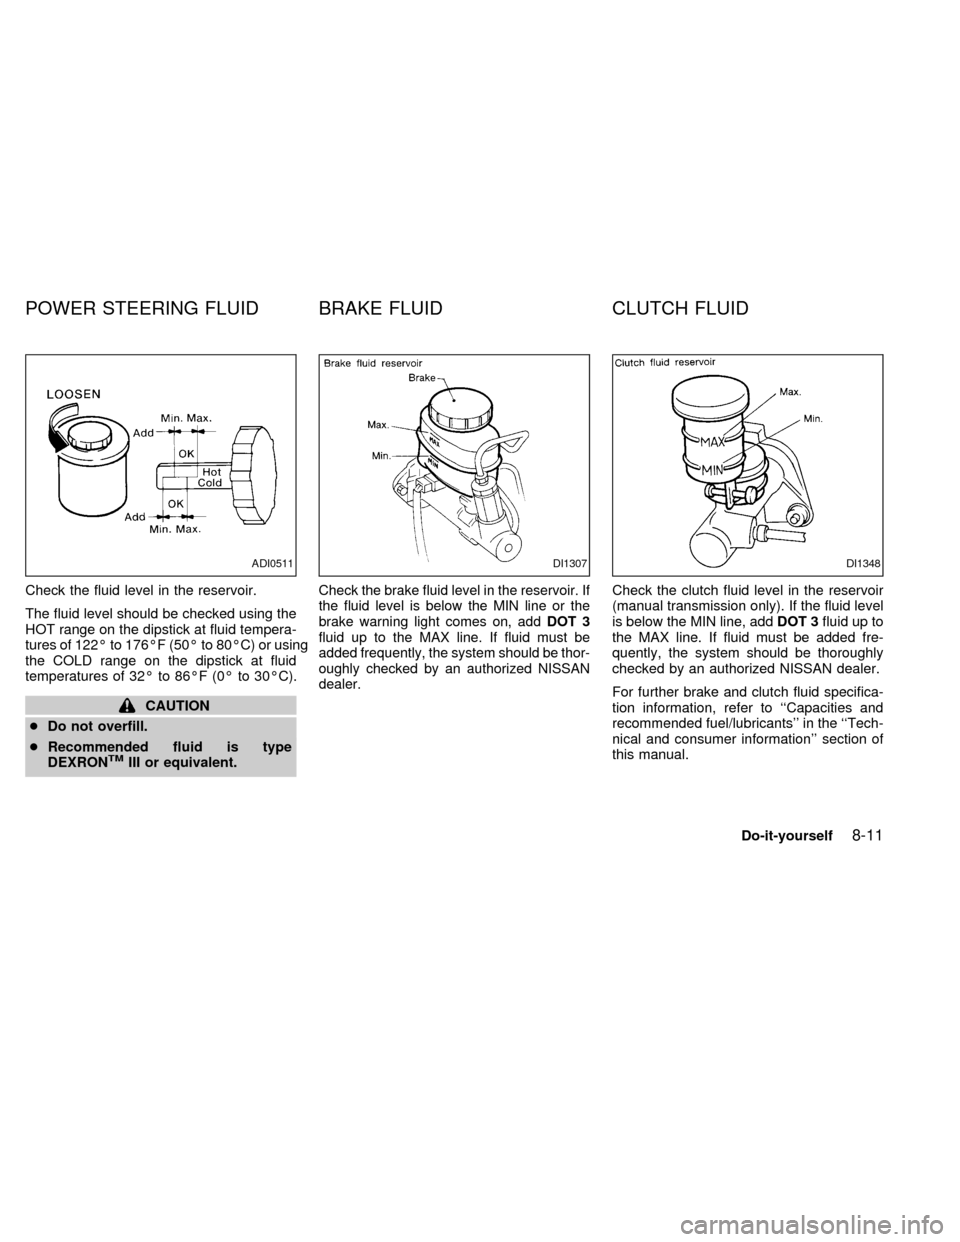
Check the fluid level in the reservoir.
The fluid level should be checked using the
HOT range on the dipstick at fluid tempera-
tures of 122É to 176ÉF (50É to 80ÉC) or using
the COLD range on the dipstick at fluid
temperatures of 32É to 86ÉF (0É to 30ÉC).
CAUTION
cDo not overfill.
cRecommended fluid is type
DEXRON
TMIII or equivalent.
Check the brake fluid level in the reservoir. If
the fluid level is below the MIN line or the
brake warning light comes on, addDOT 3
fluid up to the MAX line. If fluid must be
added frequently, the system should be thor-
oughly checked by an authorized NISSAN
dealer.Check the clutch fluid level in the reservoir
(manual transmission only). If the fluid level
is below the MIN line, addDOT 3fluid up to
the MAX line. If fluid must be added fre-
quently, the system should be thoroughly
checked by an authorized NISSAN dealer.
For further brake and clutch fluid specifica-
tion information, refer to ``Capacities and
recommended fuel/lubricants'' in the ``Tech-
nical and consumer information'' section of
this manual.
ADI0511DI1307DI1348
POWER STEERING FLUID BRAKE FLUID CLUTCH FLUID
Do-it-yourself8-11
ZX
Page 157 of 217
WARNING
Use only new fluid. old, inferior, or
contaminated fluid may damage the
brake and clutch systems. The use of
improper fluids can damage the brake
system and affect the vehicle's stop-
ping ability.
CAUTION
Do not spill the fluid on painted sur-
faces. This will damage the paint. If
fluid is spilled, wash with water.
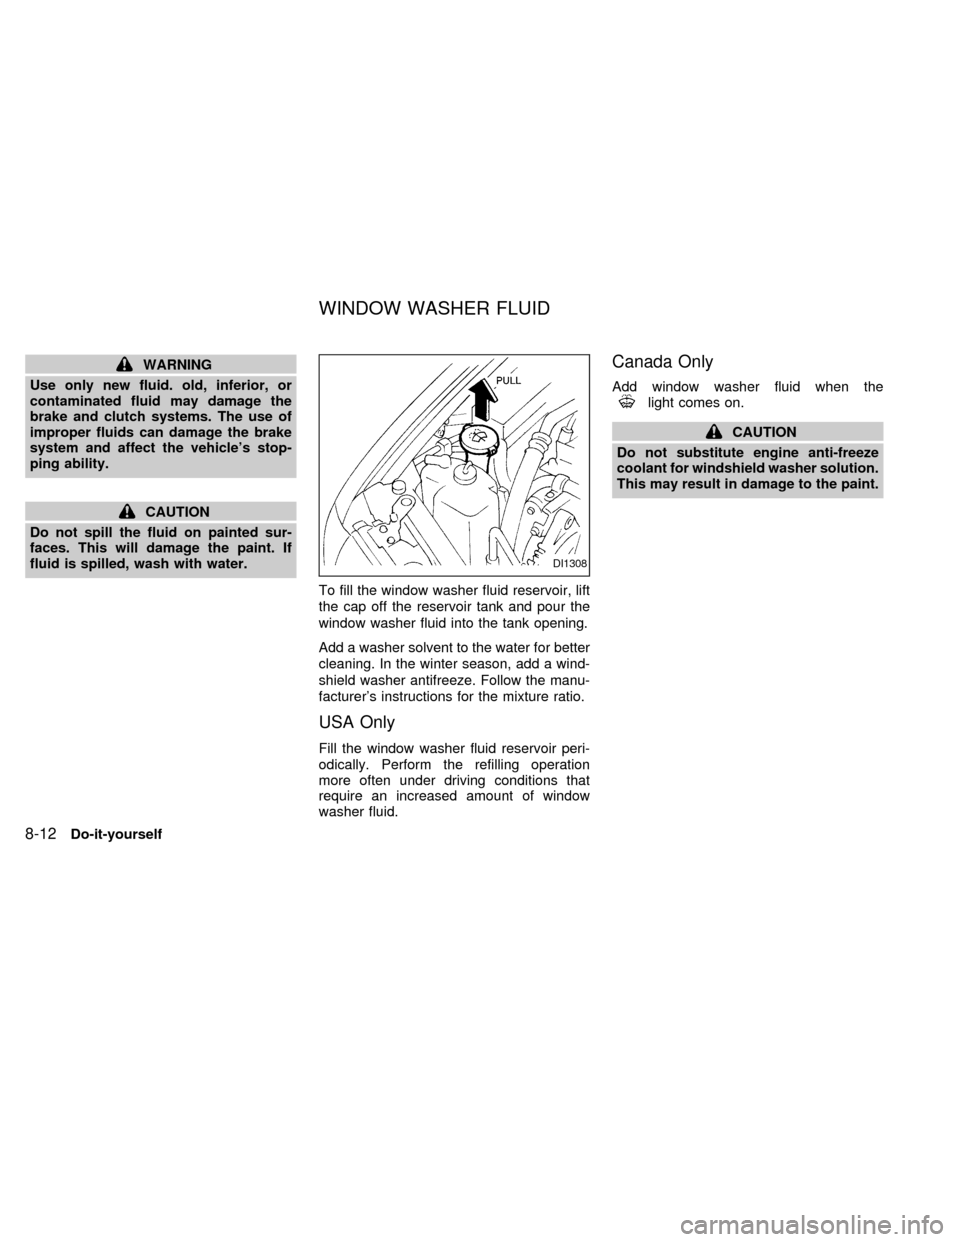
To fill the window washer fluid reservoir, lift
the cap off the reservoir tank and pour the
window washer fluid into the tank opening.
Add a washer solvent to the water for better
cleaning. In the winter season, add a wind-
shield washer antifreeze. Follow the manu-
facturer's instructions for the mixture ratio.
USA Only
Fill the window washer fluid reservoir peri-
odically. Perform the refilling operation
more often under driving conditions that
require an increased amount of window
washer fluid.
Canada Only
Add window washer fluid when thelight comes on.
CAUTION
Do not substitute engine anti-freeze
coolant for windshield washer solution.
This may result in damage to the paint.
DI1308
WINDOW WASHER FLUID
8-12Do-it-yourself
ZX
Page 164 of 217
Self-adjusting brakes
Your vehicle is equipped with self-adjusting
brakes.
The front (and rear, if equipped) disc-type
brakes self-adjust every time the brake
pedal is applied. The rear drum-type brakes
also self-adjust every time the brake pedal
is applied.
If the brake pedal goes down farther than
normal, it may be due to a lack of adjust-
ment of the rear drum brakes. To adjust,
apply the parking brake several times.
WARNING
See your NISSAN dealer and have it
checked if the brake pedal height does
not return to normal.
Brake pad wear indicators
The disc brake pads on your vehicle have
audible wear indicators. When a brake pad
requires replacement, it makes a high
pitched scraping or screeching sound when
the vehicle is in motion whether or not the
brake pedal is depressed. Have the brakes
checked as soon as possible if the wearindicator sound is heard.
Under some driving or climate conditions,
occasional brake squeak, squeal or other
noise may be heard. Occasional brake
noise during light to moderate stops is nor-
mal and does not affect the function or
performance of the brake system.
The rear drum brakes (if so equipped) do
not have audible wear indicators. Should
you ever hear an unusually loud noise from
the rear drum brakes, have them inspected
as soon as possible by an authorized
NISSAN dealer.
Proper brake inspection intervals should
be followed.For more information regard-
ing brake inspections, see the appropriate
maintenance schedule information in the
``Maintenance'' section of this manual.Check the brake booster function as fol-
lows:
1. With the engine off, press and release
the brake pedal several times. When
brake pedal movement (distance of
travel) remains the same from one pedal
application to the next, continue on to the
next step.
2. While depressing the brake pedal, start
the engine. The pedal height should drop
a little.
3. With the brake pedal depressed, stop the
engine. Keep the pedal depressed for
about 30 seconds. The pedal height
should not change.
4. Run the engine for one minute without
depressing the brake pedal, then turn it
off. Depress the brake pedal several
times. The pedal travel distance will de-
crease gradually with each depression
as the vacuum is released from the
booster.
If the brakes do not operate properly, see an
authorized NISSAN dealer.
BRAKE BOOSTER
Do-it-yourself8-19
ZX
Page 176 of 217
cImproper service for a T-type spare
tire may result in serious personal
injury. If it is necessary to repair the
T-type spare tire, contact your NIS-
SAN dealer.Changing tires and wheels
When replacing a tire, use the same size,
tread design, speed rating and load carrying
capacity as originally equipped. Recom-
mended types and sizes are shown in
``wheels/tire size'' in the ``Technical and con-
sumer information'' section of this manual.
WARNING
c
The use of tires other than those rec-
ommended or the mixed use of tires of
different brands, construction (bias,
bias-belted or radial), or tread patterns
can adversely affect the ride, braking,
handling, ground clearance, body-to-
tire clearance, tire chain clearance,
speedometer calibration, headlight
aim and bumper height. Some of these
effects may lead to accidents and
could result in serious personal injury.
cIf the wheels are changed for any rea-
son, always replace with wheels which
have the same offset dimension.
Wheels of a different offset could
cause early tire wear, possibly de-
graded vehicle handling characteris-
tics and/or interference with the brakediscs/drums. Such interference can
lead to decreased braking efficiency
and/or early brake pad/shoe wear.
cDo not install a deformed wheel or
tire even if it has been repaired. Such
wheels or tires could have structural
damage and could fail without warn-
ing.
cThe use of retread tires is not recom-
mended.
Wheel balance
Unbalanced wheels may affect vehicle han-
dling and tire life. Even with regular use,
wheels can get out of balance. Therefore,
they should be balanced as required.
Wheel balance service should be per-
formed with the wheels off the vehicle. Spin
balancing the front wheels on the vehicle
could lead to transmission damage.
Care of wheels
cWash the wheels when washing the ve-
hicle to maintain their appearance.
cClean the inner side of the wheels when
the wheel is changed or the underside of
Do-it-yourself
8-31
ZX
Page 180 of 217

Tire rotation*Ð Tires should be rotated
every 7,500 miles (12,000 km).
Wheel alignment and balanceÐIfthe
vehicle should pull to either side while driv-
ing on a straight and level road, or if you
detect uneven or abnormal tire wear, there
may be a need for a wheel alignment.
If the steering wheel or seat vibrates at
normal highway speeds, wheel balancing
may be needed.
Windshield wiper blades*Ð Check for
cracks or wear if they do not wipe properly.
Doors and hoodÐ Check that all doors
and the hood operate properly. Also ensure
all latches lock securely. Lubricate hinges,
latches, rollers and links if necessary. Make
sure the secondary latch keeps the hood
from opening when the primary latch is
released.
When driving in areas using road salt or
other corrosive materials, check lubrication
frequently.
Lights*Ð Make sure the headlights, stop
lights, tail lights, turn signal lights, and other
lights are all operating properly and installed
securely. Also check headlight aim.INSIDE THE VEHICLE
The maintenance items listed here should
be checked on a regular basis, such as
when performing periodic maintenance,
cleaning the vehicle, etc.
Additional information on the following
items with an ``*'' is found in the ``Do-it-
yourself'' section of this manual.
Warning lights and chimesÐ Make sure
all warning lights and buzzers/chimes are
operating properly.
Windshield wiper and washer*Ð Check
that the wipers and washer operate properly
and that the wipers do not streak.
Windshield defrosterÐ Check that the air
comes out of the defroster outlets properly
and in sufficient quantity when operating the
heater or air conditioner.
Steering wheelÐ Check for changes in
the steering conditions, such as excessive
freeplay, hard steering or strange noises.
SeatsÐ Check seat position controls such
as seat adjusters, seatback recliner, etc. to
ensure they operate smoothly and all latches
lock securely in every position. Check that
the head restraints move up and downsmoothly and the locks (if so equipped) hold
securely in all latched positions.
Seat beltsÐ Check that all parts of the seat
belt system (for example, buckles, anchors,
adjusters and retractors) operate properly
and smoothly, and are installed securely.
Check the belt webbing for cuts, fraying,
wear or damage.
Accelerator pedalÐ Check the pedal for
smooth operation and make sure the pedal
does not catch or require uneven effort.
Keep the floor mat away from the pedal.
Clutch pedal*Ð Make sure the pedal
operates smoothly and check that it has the
proper free travel.
BrakesÐ Check that the brakes do not pull
the vehicle to one side when applied.
Brake pedal*Ð Check the pedal for
smooth operation and make sure it has the
proper distance under it when depressed
fully. Check the brake booster function. Be
certain to keep the floor mat away from the
pedal.
Parking brake*Ð Check that the lever has
the proper travel and confirm that your
vehicle is held securely on a fairly steep hill
with only the parking brake applied.
Maintenance
9-3
ZX
Page 200 of 217
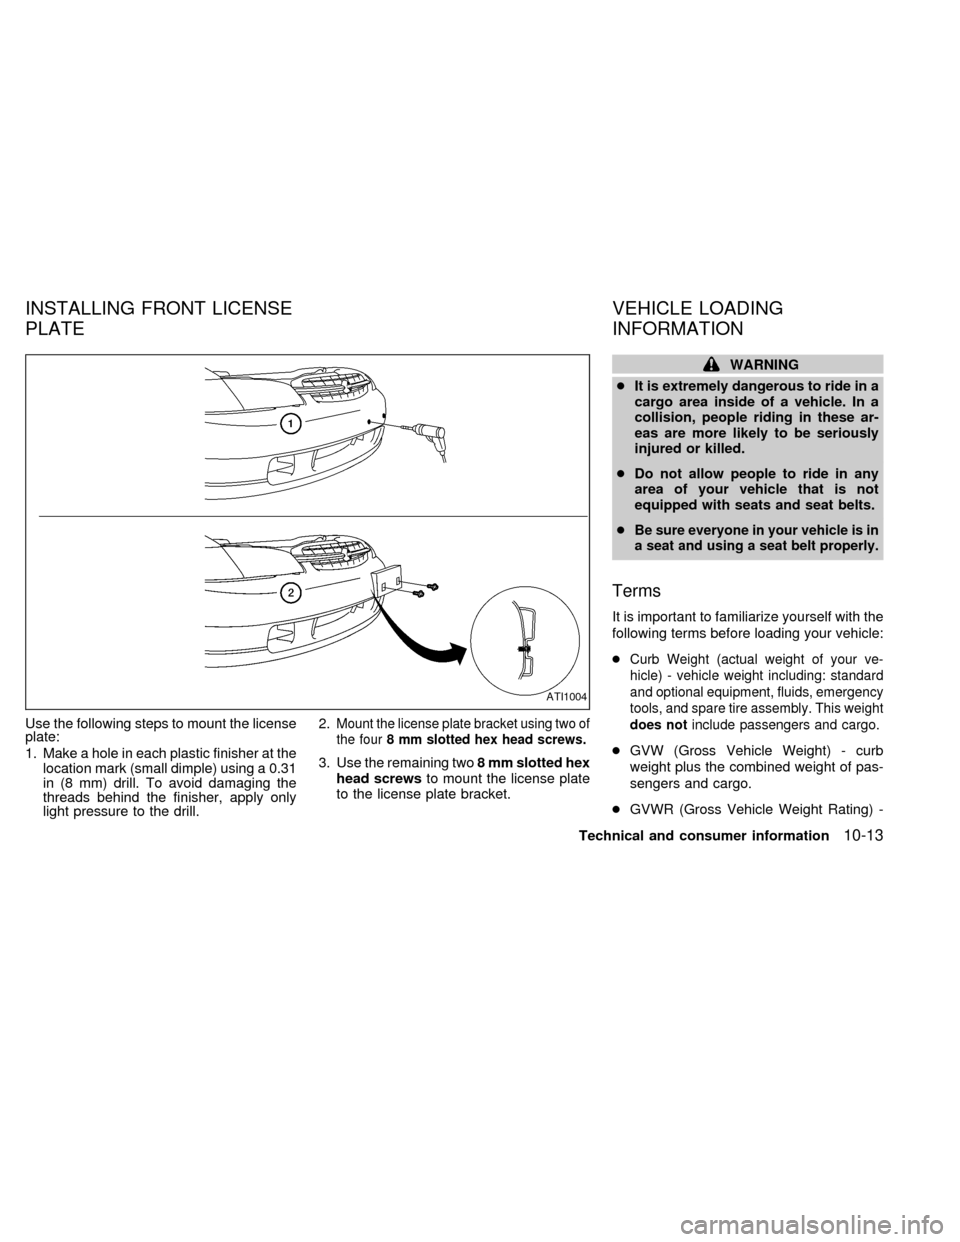
Use the following steps to mount the license
plate:
1. Make a hole in each plastic finisher at the
location mark (small dimple) using a 0.31
in (8 mm) drill. To avoid damaging the
threads behind the finisher, apply only
light pressure to the drill.2.Mount the license plate bracket using two of
the four8 mm slotted hex head screws.
3. Use the remaining two8 mm slotted hex
head screwsto mount the license plate
to the license plate bracket.
WARNING
cIt is extremely dangerous to ride in a
cargo area inside of a vehicle. In a
collision, people riding in these ar-
eas are more likely to be seriously
injured or killed.
cDo not allow people to ride in any
area of your vehicle that is not
equipped with seats and seat belts.
c
Be sure everyone in your vehicle is in
a seat and using a seat belt properly.
Terms
It is important to familiarize yourself with the
following terms before loading your vehicle:
c
Curb Weight (actual weight of your ve-
hicle) - vehicle weight including: standard
and optional equipment, fluids, emergency
tools, and spare tire assembly. This weight
does notinclude passengers and cargo.
cGVW (Gross Vehicle Weight) - curb
weight plus the combined weight of pas-
sengers and cargo.
cGVWR (Gross Vehicle Weight Rating) -
ATI1004
INSTALLING FRONT LICENSE
PLATEVEHICLE LOADING
INFORMATION
Technical and consumer information10-13
ZX
Page 203 of 217
cDo not modify the vehicle exhaust
system, brake system, etc. when the
hitch is installed.
cTo reduce the possibility of addi-
tional damage if your vehicle is
struck from the rear, where practical
remove the hitch when not in use.
Remove receiver when not in use.
cAfter the hitch is removed, seal the
bolt holes to prevent exhaust fumes,
water or dust from entering the pas-
senger compartment.
cRegularly check that all hitch mount-
ing bolts are securely mounted.
Tire pressures
cWhen towing a trailer, inflate the vehicle
tires to the recommended cold tire pres-
sure indicated on the tire placard (affixed
to the driver's door, center pillar).
cTrailer tire condition, size, load rating and
proper inflation pressure should be in
accordance with the trailer and tire
manufacturer's specifications.
Safety chains
Always use suitable chains between your
vehicle and the trailer. Safety chains should
be crossed and should be attached to the
hitch, not to the vehicle bumper or axle. Be
sure to leave enough slack in the chains to
permit turning corners.
Trailer lights
Trailer lights should comply with federal
and/ or local regulations. When wiring the
vehicle for towing, connect the stop and tail
light pickup into the vehicle electrical circuit.
Trailer brakes
If your trailer is equipped with a braking
system, make sure it conforms to Federal
and/or local regulations and that it is prop-
erly installed.
WARNING
Never connect a trailer brake system
directly to the vehicle brake system.
Pre-towing tips
cBe certain your vehicle maintains a level
position when a loaded and/or unloaded
trailer is hitched. Do not drive the vehicle ifit has an abnormal nose-up or nose- down
condition; check for improper tongue load,
overload, worn suspension or other pos-
sible causes of either condition.
cAlways secure items in the trailer to
prevent load shift while driving.
cBe certain your rear view mirrors conform
to all federal, state or local regulations. If
not, install any mirrors required for towing
before driving the vehicle.
Trailer towing tips
In order to gain skill and an understanding
of the vehicle's behavior, you should prac-
tice turning, stopping and backing up in an
area which is free from traffic. Steering
stability and braking performance will be
somewhat different than under normal driv-
ing conditions.
cAlways secure items in the trailer to
prevent load shift while driving.
cAvoid abrupt starts, acceleration or
stops.
cAvoid sharp turns or lane changes.
cAlways drive your vehicle at a moderate
speed.
10-16Technical and consumer information
ZX