Page 52 of 217

The theft warning system provides visual
and audio alarm signals if parts of the
vehicle are disturbed.
How to activate the theft warning
system
1. Close all windows.
2. Remove the key from the ignition switch.
3. Close the hood, trunk lid and all doors.
4. Push the
button on the multi-remote
controller. All doors lock. The hazard
lights flash twice and the horn beeps
once to indicate all doors are locked.cWhen the
button is pushed with all
doors locked, the hazard lights flash
twice and the horn beeps once as a
reminder that the doors are already
locked. The horn may or may not beep
once. Refer to ``silencing the horn beep
feature'' later in this section.
The system can be activated even if the
windows are open.
5.
Confirm that the SECURITY indicator light
comes on. The SECURITY light glows for
about 30 seconds and then begins to flash
once every three seconds. The system is
now activated. If, during this 30-second
time period, the door is unlocked by the
key or the multi-remote controller, or the
ignition key is turned to ACC or ON, the
system will not activate.
If the key is turned slowly when locking
the door, the system may not activate.
Furthermore, if the key is turned exces-
sively to the unlock position, the system
may be deactivated when the key is re-
moved. If the indicator light fails to glow
for 30 seconds, unlock the door once
and lock it again.
Even when the driver and/or passengersare in the vehicle, the system will acti-
vate with all doors, hood and trunk lid
locked and ignition key off. Turn the
ignition key to ACC or ON to turn the
system off.
Theft warning system operation
The theft warning system emits the follow-
ing alarm:
cThe headlights blink and the horn sounds
intermittently. In addition, the starter mo-
tor does not operate.
cThe alarm automatically turns off after 2
to 3 minutes. However, the alarm reacti-
vates if the vehicle is tampered with
again. The alarm can be shut off by
unlocking a door or trunk lid with the key,
or by pressing the
button on the
multi-remote controller.
The alarm is activated by:
copening the door or trunk lid without
using the key (even if the door is un-
locked by releasing the door inside lock
switch) or opening the trunk lid by oper-
ating the opener lever.
copening the hood.
IC0005
THEFT WARNING
(if so equipped)
Instruments and controls2-9
ZX
Page 54 of 217
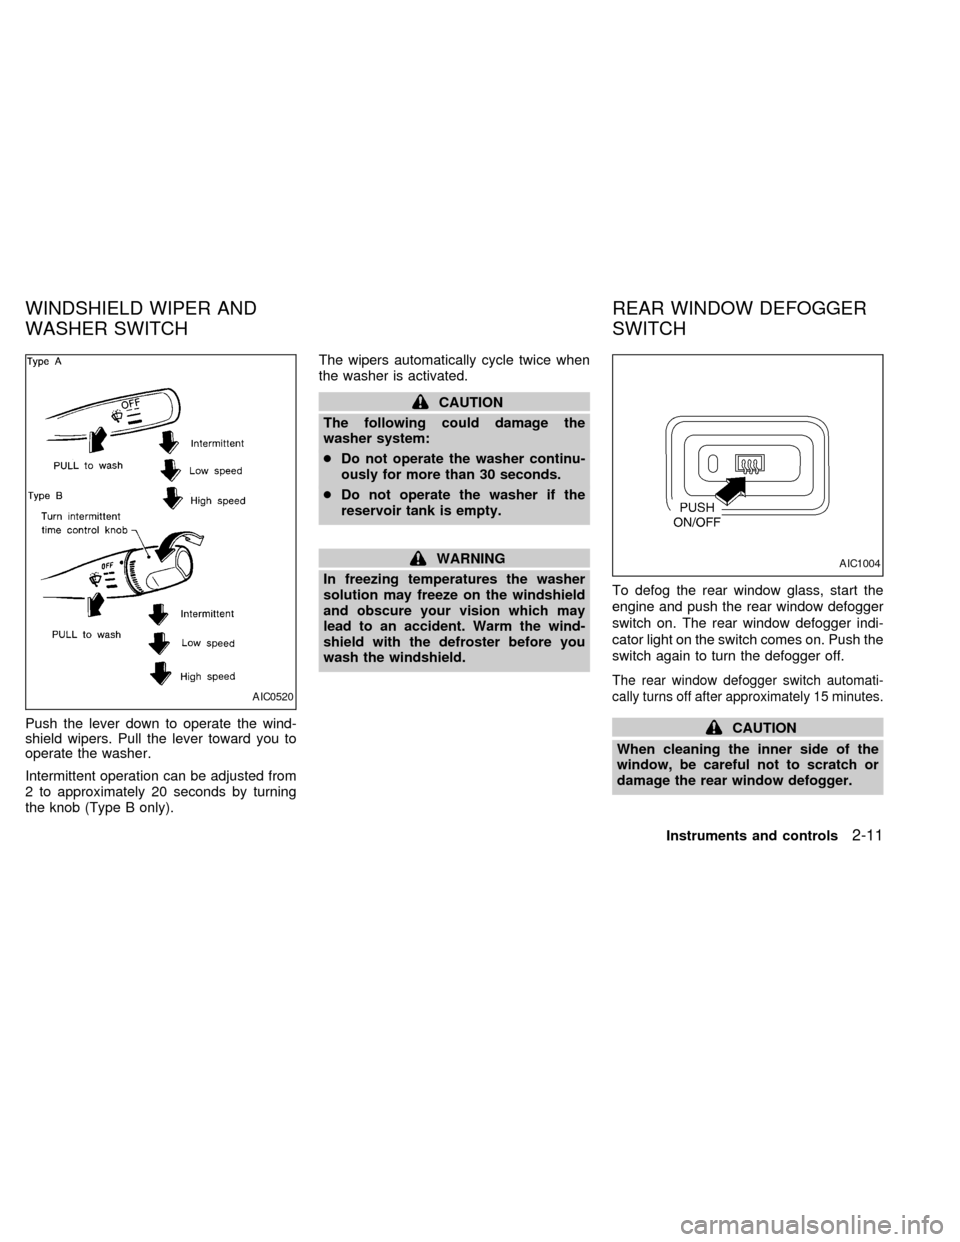
Push the lever down to operate the wind-
shield wipers. Pull the lever toward you to
operate the washer.
Intermittent operation can be adjusted from
2 to approximately 20 seconds by turning
the knob (Type B only).The wipers automatically cycle twice when
the washer is activated.
CAUTION
The following could damage the
washer system:
cDo not operate the washer continu-
ously for more than 30 seconds.
cDo not operate the washer if the
reservoir tank is empty.
WARNING
In freezing temperatures the washer
solution may freeze on the windshield
and obscure your vision which may
lead to an accident. Warm the wind-
shield with the defroster before you
wash the windshield.To defog the rear window glass, start the
engine and push the rear window defogger
switch on. The rear window defogger indi-
cator light on the switch comes on. Push the
switch again to turn the defogger off.
The rear window defogger switch automati-
cally turns off after approximately 15 minutes.
CAUTION
When cleaning the inner side of the
window, be careful not to scratch or
damage the rear window defogger.
AIC0520
AIC1004
WINDSHIELD WIPER AND
WASHER SWITCHREAR WINDOW DEFOGGER
SWITCH
Instruments and controls2-11
ZX
Page 56 of 217
DAYTIME RUNNING LIGHT SYS-
TEM (Canada only)
The headlights automatically illuminate at a
reduced intensity when the engine is started
with the parking brake released. The day-
time running lights operate with the head-
light switch in the OFF position or in the
position. Turn the headlight switch to
the
position for full illumination when
driving at night.
If the parking brake is applied before the
engine is started, the daytime running lights
do not illuminate. The daytime running lights
illuminate once the parking brake is re-
leased. The daytime running lights will re-
main on until the ignition switch is turned off.
WARNING
When the daytime running light system
is active, tail lights on your vehicle are
not on. It is necessary at dusk to turn
on your headlights. Failure to do so
could cause an accident injuring your-
self and others.
Passing signal
Pulling and releasing the lever flashes the
headlight high beams on and off.
Turn signal
Move the lever up or down to signal the
turning direction. When the turn is com-
pleted, the turn signals cancel automati-
cally.
Lane change signal
To signal a lane change, move the lever up
or down to the point where the indicator light
begins to flash, but the lever does not latch.
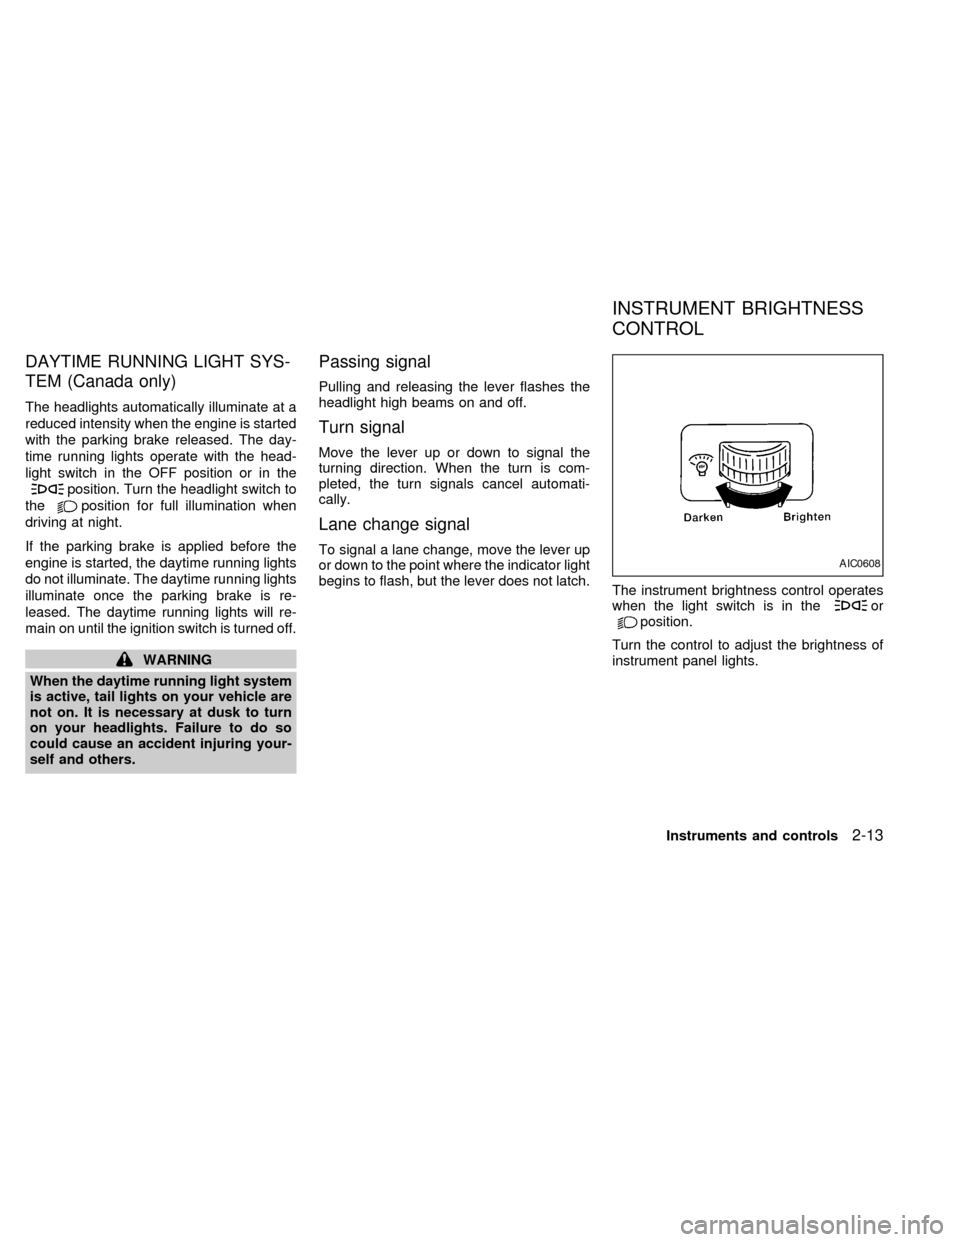
The instrument brightness control operates
when the light switch is in the
orposition.
Turn the control to adjust the brightness of
instrument panel lights.
AIC0608
INSTRUMENT BRIGHTNESS
CONTROL
Instruments and controls2-13
ZX
Page 57 of 217
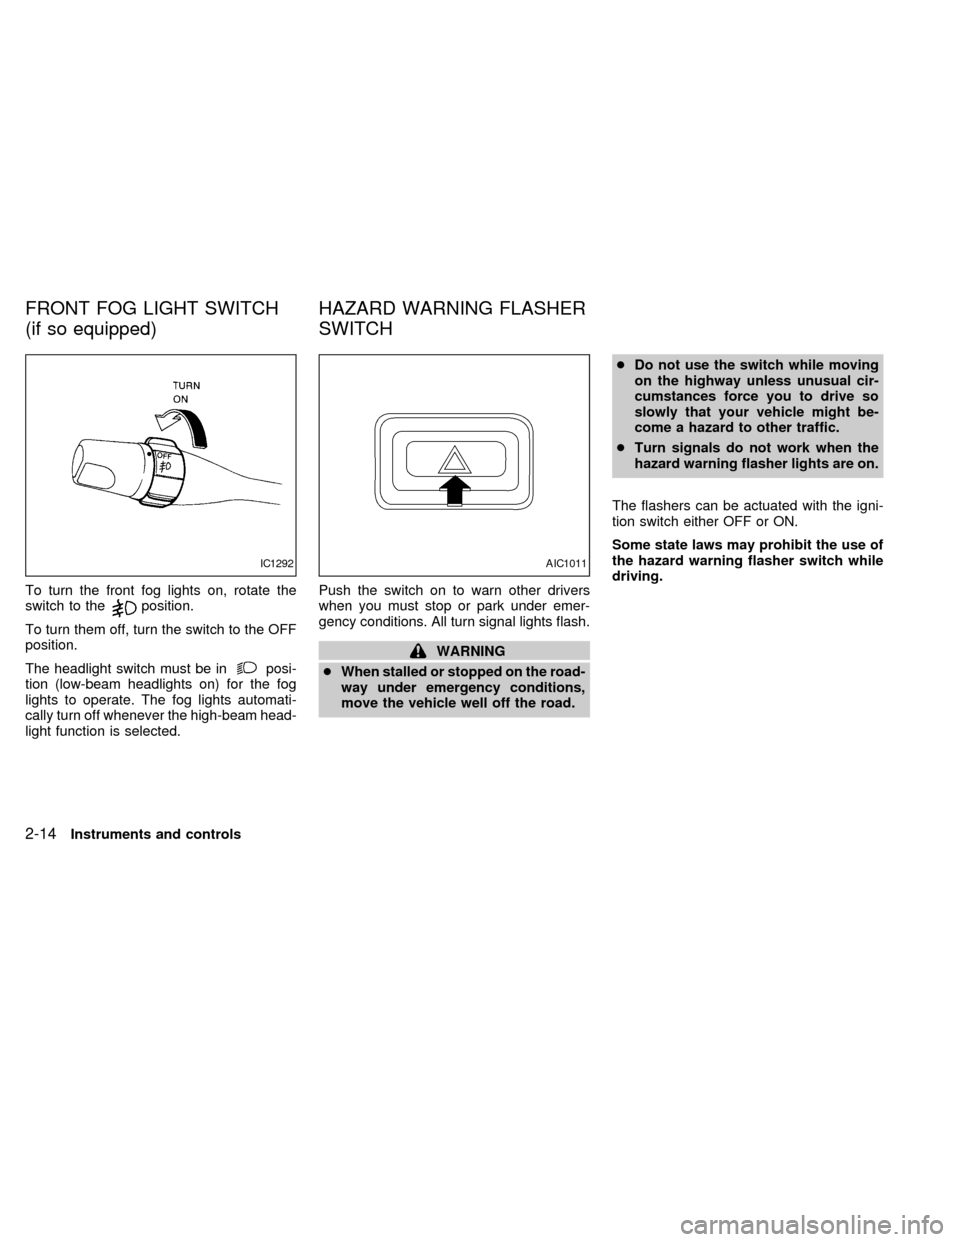
To turn the front fog lights on, rotate the
switch to theposition.
To turn them off, turn the switch to the OFF
position.
The headlight switch must be in
posi-
tion (low-beam headlights on) for the fog
lights to operate. The fog lights automati-
cally turn off whenever the high-beam head-
light function is selected.Push the switch on to warn other drivers
when you must stop or park under emer-
gency conditions. All turn signal lights flash.
WARNING
cWhen stalled or stopped on the road-
way under emergency conditions,
move the vehicle well off the road.cDo not use the switch while moving
on the highway unless unusual cir-
cumstances force you to drive so
slowly that your vehicle might be-
come a hazard to other traffic.
cTurn signals do not work when the
hazard warning flasher lights are on.
The flashers can be actuated with the igni-
tion switch either OFF or ON.
Some state laws may prohibit the use of
the hazard warning flasher switch while
driving.
IC1292AIC1011
FRONT FOG LIGHT SWITCH
(if so equipped)HAZARD WARNING FLASHER
SWITCH
2-14Instruments and controls
ZX
Page 58 of 217
The cigarette lighter element is an acces-
sory. A genuine NISSAN cigarette lighter can
be purchased from an authorized NISSAN
dealer.
The cigarette lighter operates when the
ignition switch is in the ACC or ON position.
Push the lighter in all the way. When the
lighter is heated, it springs out.
Return the lighter to its original position after
use.
CAUTION
The cigarette lighter socket is a power
source for the cigarette lighter element
only. The use of the cigarette lighter
socket as a power source for any other
accessory is not recommended.
WARNING
The cigarette lighter should not be
used while driving in order that full
attention may be given to the driving
operation.
AIC0509
CIGARETTE LIGHTER
(ACCESSORY) AND ASH TRAY
Instruments and controls2-15
ZX
Page 71 of 217

The interior light can be turned off without
waiting 30 seconds by inserting the key into
the ignition or locking the doors with the
multi-remote controller or pushing the
interior light button to OFF.
Using the panic alarm
If you are near your vehicle and feel threat-
ened, you may activate the alarm to call
attention as follows:
1. Push the
button on the remote con-
troller forlonger than 0.8 seconds.
2. The theft warning alarm and headlights
will stay on for 30 seconds.
3. The panic alarm stops when:
cit has run for 30 seconds, or
cthe
,or thebutton is
pressed, on the multi-remote controller.
Silencing the horn beep feature
If desired, the horn beep feature can be
deactivated using the multi-remote control-
ler. The instructions are on the back of the
multi-remote controller.
To deactivate:Press and hold the
andbuttonsfor at least two seconds.
The hazard lights will quickly flash three
times to confirm that the horn beep feature
has been deactivated.
To activate:Press and hold the
andbuttonsfor at least two seconds
once more.The hazard lights will quickly flash three
times to confirm that the horn beep feature
has been reactivated.
Deactivating the horn feature does not si-
lence the horn if the alarm is triggered.
AIC1037
3-6Pre-driving checks and adjustments
ZX
Page 73 of 217
Operation is subject to the following two
conditions: (1) This device may not
cause harmful interference, and (2) this
device must accept any interference re-
ceived including interference that may
cause undesired operation of the device.
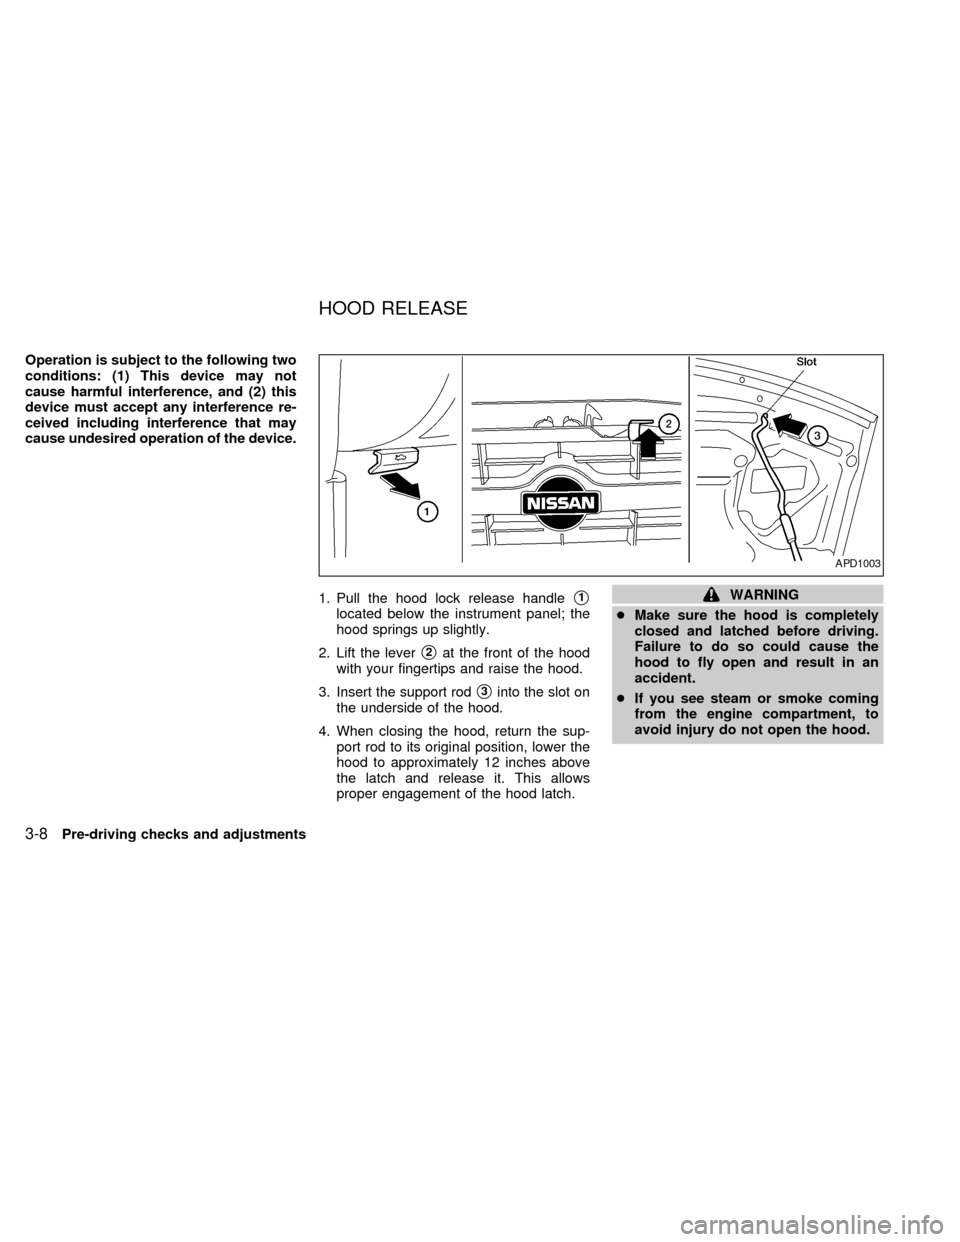
1. Pull the hood lock release handle
s1
located below the instrument panel; the
hood springs up slightly.
2. Lift the lever
s2at the front of the hood
with your fingertips and raise the hood.
3. Insert the support rod
s3into the slot on
the underside of the hood.
4. When closing the hood, return the sup-
port rod to its original position, lower the
hood to approximately 12 inches above
the latch and release it. This allows
proper engagement of the hood latch.
WARNING
cMake sure the hood is completely
closed and latched before driving.
Failure to do so could cause the
hood to fly open and result in an
accident.
cIf you see steam or smoke coming
from the engine compartment, to
avoid injury do not open the hood.
APD1003
HOOD RELEASE
3-8Pre-driving checks and adjustments
ZX
Page 77 of 217
WARNING
cGasoline is extremely flammable and
highly explosive under certain con-
ditions. You could be burned or se-
riously injured if it is misused or
mishandled. Always stop the engine
and do not smoke or allow open
flames or sparks near the vehicle
when refueling.
c
Fuel may be under pressure. Turn the
cap one-half turn, and wait for any
``hissing'' sound to stop to prevent
fuel from spraying out and possible
personal injury. Then remove the cap.
cDo not attempt to top off the fuel
tank after the fuel pump nozzle shuts
off automatically. Continued refuel-
ing may cause fuel overflow, result-
ing in fuel spray and possibly fire.
cUse only a genuine NISSAN fuel filler
cap as a replacement. It has a built-in
safety valve needed for proper op-
eration of the fuel system and emis-
sion control system. An incorrect
cap can result in a serious malfunc-
tion and possible injury.
cNever pour fuel into the throttle body
to attempt to start your vehicle.
CAUTION
cIf fuel is spilled on the car body,
flush it away with water to avoid
paint damage.
cTighten until the cap clicks. Failure
to tighten the fuel cap properly may
cause the
malfunction indica-
tor light (MIL) to illuminate. If this
occurs, securely close the fuel filler
cap. After driving for a while, the
light should remain off. If the light
remains on, have the vehicle in-
spected by an authorized NISSAN
dealer.
For additional information, see the
``Malfunction indicator light (MIL)'' in
the ``Instruments and controls'' sec-
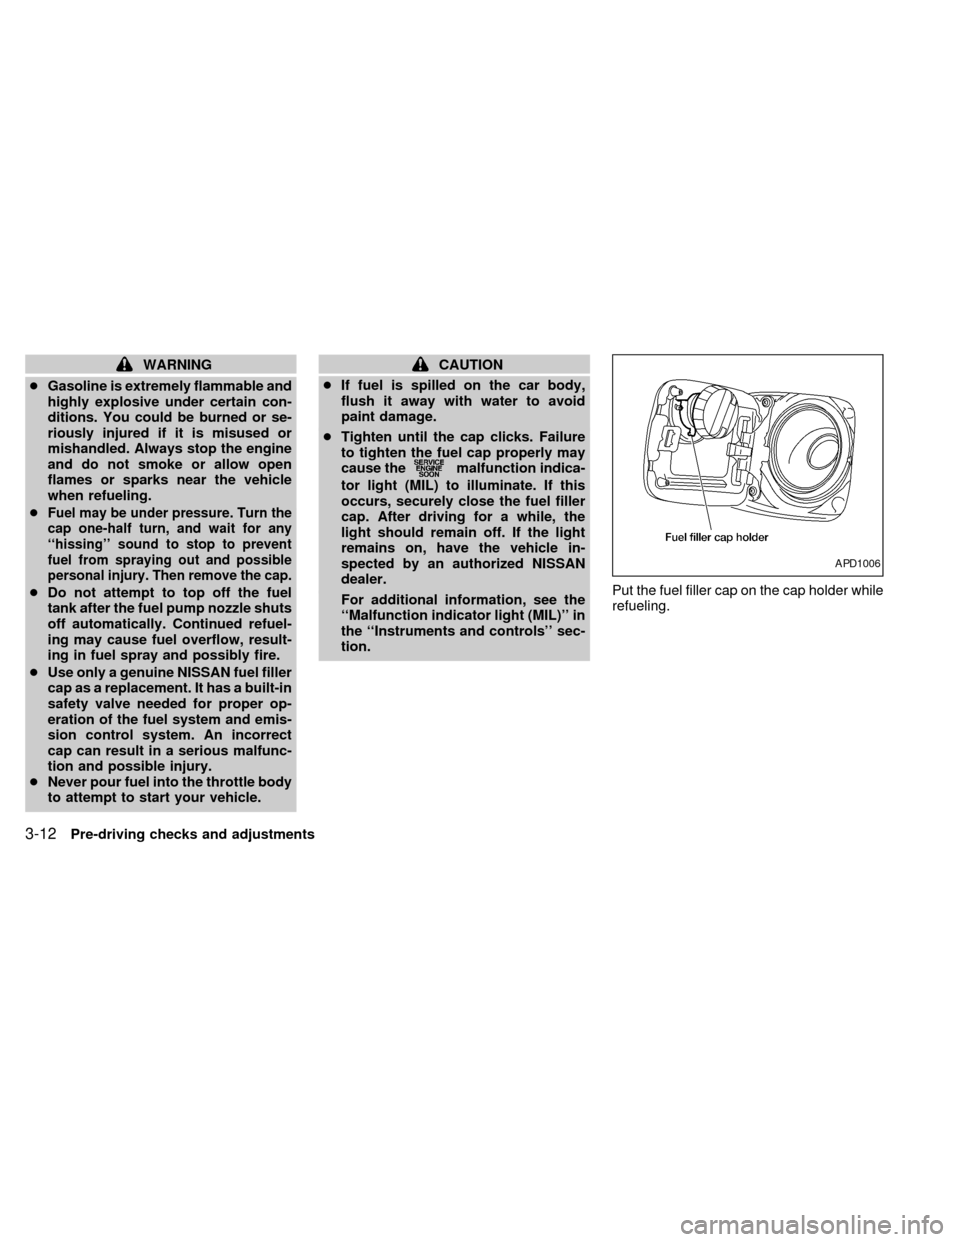
tion.Put the fuel filler cap on the cap holder while
refueling.
APD1006
3-12Pre-driving checks and adjustments
ZX