1998 NISSAN ALTIMA ECO mode
[x] Cancel search: ECO modePage 100 of 217
turned off resumes playing. When no CD or
tape is loaded, the radio comes on. Pushing
the ONzOFF/VOL control knob button again
turns the system off.
Turn the ONzOFF/VOL control knob to ad-
just the volume.
Clock operation
Pressing the clock button alternates the
clock and the radio/cassette/CD player op-
tions in the display.
Clock set
Depressing the clock andbuttons to-
gether sets hours. Depressing the clock and
buttons together sets minutes.
Clock priority mode
In this mode the clock is shown in the
display. If any radio, cassette or CD func-
tions are activated, the radio, cassette or
CD display illuminates for 10 seconds then
returns to the clock mode.
NOTE:
After clock adjustment, the radio is in the
clock priorty mode.
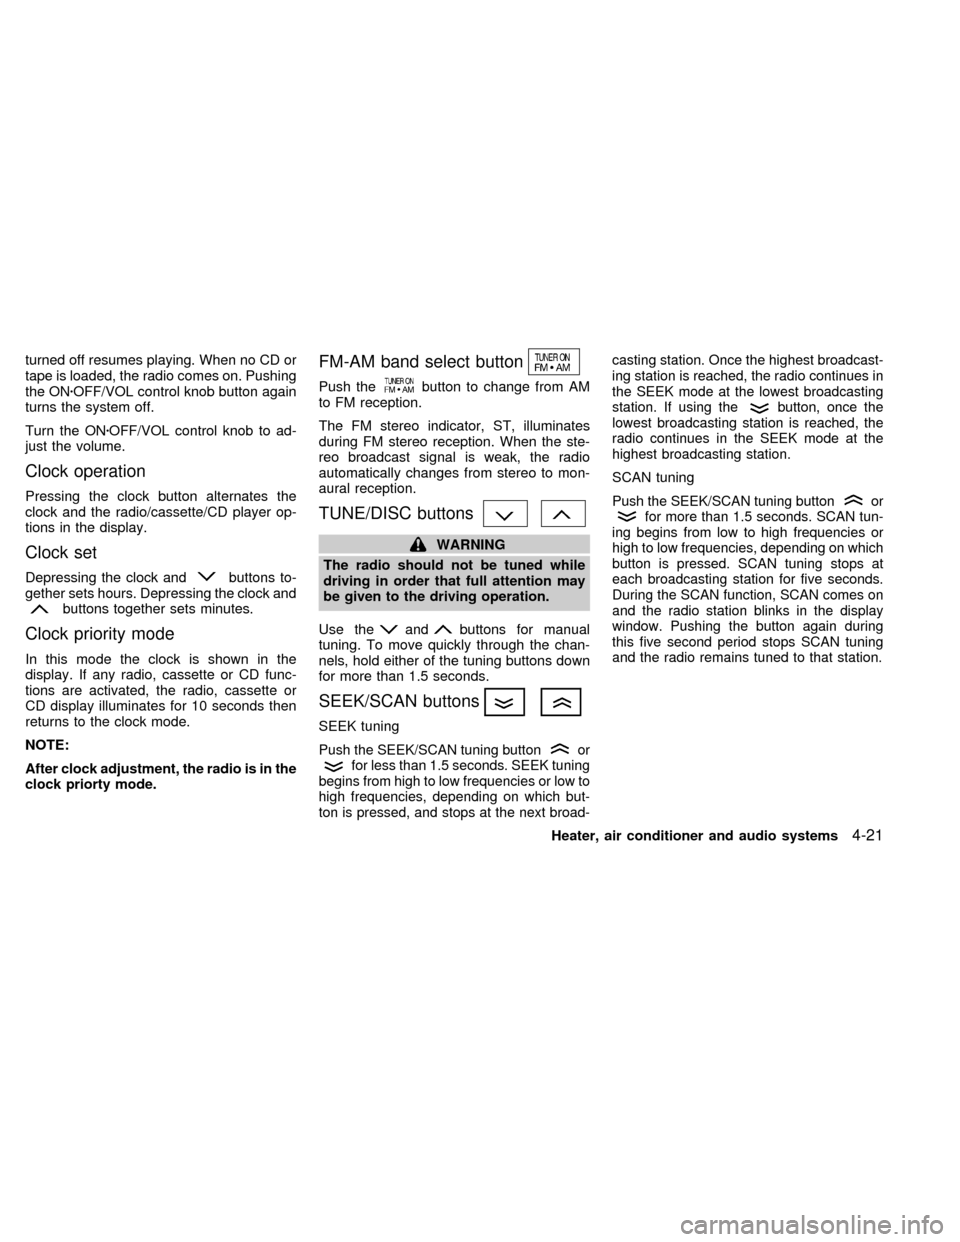
FM-AM band select button
Push thebutton to change from AM
to FM reception.
The FM stereo indicator, ST, illuminates
during FM stereo reception. When the ste-
reo broadcast signal is weak, the radio
automatically changes from stereo to mon-
aural reception.
TUNE/DISC buttons
WARNING
The radio should not be tuned while
driving in order that full attention may
be given to the driving operation.
Use the
andbuttons for manual
tuning. To move quickly through the chan-
nels, hold either of the tuning buttons down
for more than 1.5 seconds.
SEEK/SCAN buttons
SEEK tuning
Push the SEEK/SCAN tuning buttonorfor less than 1.5 seconds. SEEK tuning
begins from high to low frequencies or low to
high frequencies, depending on which but-
ton is pressed, and stops at the next broad-casting station. Once the highest broadcast-
ing station is reached, the radio continues in
the SEEK mode at the lowest broadcasting
station. If using the
button, once the
lowest broadcasting station is reached, the
radio continues in the SEEK mode at the
highest broadcasting station.
SCAN tuning
Push the SEEK/SCAN tuning buttonorfor more than 1.5 seconds. SCAN tun-
ing begins from low to high frequencies or
high to low frequencies, depending on which
button is pressed. SCAN tuning stops at
each broadcasting station for five seconds.
During the SCAN function, SCAN comes on
and the radio station blinks in the display
window. Pushing the button again during
this five second period stops SCAN tuning
and the radio remains tuned to that station.
Heater, air conditioner and audio systems4-21
ZX
Page 106 of 217
Microphone installed model
If equipped with a genuine cellular phone,
your NISSAN features a non-directional
microphone in the steering column cover,
so it is not necessary to look at or speak
directly into the microphone when calling.
To do so could detract from the driving
operation and cause an accident. See the
manual for car phone operation.
Pre-wired and antenna for phone
installed model
Some models are pre-wired to accept the
genuine NISSAN cellular phone. In addition,
the same model has the phone antenna
built into the rear glass window.
When installing a CB, ham radio or car
phone in your NISSAN, be sure to observe
the following cautions, otherwise the new
equipment may adversely affect the MFI
(Multiport Fuel Injection) system and other
electronic parts.
CAUTION
cKeep the antenna as far as possible
away from the Engine Control Mod-
ule.
cAlso keep the antenna wire more
than 8 inches (20 cm) away from the
MFI harness. Do not route the an-
tenna wire next to any harness.
cAdjust the antenna standing-wave
ratio as recommended by the manu-
facturer.
cConnect the ground wire from the
CB radio chassis to the body.
cFor details, consult an authorized
NISSAN dealer.
CB RADIO OR CAR PHONE
Heater, air conditioner and audio systems4-27
ZX
Page 117 of 217
Suggested maximum speed in each
gear
Downshift to a lower gear if the engine is not
running smoothly, or if you need to accelerate.
Do not exceed the maximum suggested
speed (shown below) in any gear. For level
road driving, use the highest gear sug-
gested for that speed. Always observe
posted speed limits, and drive according to
the road conditions, which will ensure safe
operation. Do not over-rev the engine when
shifting to a lower gear as it may cause
engine damage or loss of vehicle control.
GEAR MPH (km/h)
1st 30 (50)
2nd 60 (95)
3rd 90 (145)
4th þ
5th þ1. Apply the parking brake.
2.Automatic transmission:
Move the shift selector lever to P (Park)
or N (Neutral). (P is recommended.)The shift selector lever cannot be
moved out of P (Park) and into any of
the other gear positions if the ignition
key is turned to OFF or if the key is
removed.
The starter is designed not to operate
if the shift selector lever is in any of
the driving positions.
Manual transmission:
Move the shift selector lever to N (Neu-
tral), and depress the clutch pedal to the
floor while cranking the engine.
The starter is designed not to operate
unless the clutch pedal is fully de-
pressed.
3. Crank the enginewith your foot off the
accelerator pedalby turning the ignition
key to START. Release the key when the
engine starts. If the engine starts, but
fails to run, repeat the above procedure.
Ð If the engine is very hard to start in
extremely cold or hot weather, de-
press and hold the accelerator pedalto help start the engine.
Ð In the summer, when restarting the
engine within 30 minutes after it has
been stopped, keep the accelerator
pedal fully depressed while starting.
CAUTION
Do not operate the starter for more than
15 seconds at a time. If the engine does
not
start, turn the key off and wait 10
seconds before cranking again, other-
wise the starter could be damaged.
4.Warm-up
Allow the engine to idle for at least 30
seconds after starting. Drive at moderate
speed for a short distance first, especially
in cold weather.
STARTING THE ENGINE
5-10Starting and driving
ZX
Page 121 of 217

During the first 1,000 miles (1,600 km),
follow these recommendations for the future
reliability and economy of your new vehicle.
Failure to follow these recommendations
may result in vehicle damage or shortened
engine life.
cDo not drive over 55 MPH (90 km/h) and
do not run the engine over 4,000 rpm.
Avoid driving for long periods at constant
speed, either fast or slow.
cDo not accelerate at full throttle in any
gear.
cAvoid quick starts.
cAvoid hard braking as much as possible.
cDo not tow a trailer for the first 500 miles
(800 km).cAccelerate slowly and smoothly. Main-
tain cruising speeds with a constant ac-
celerator position.
cDrive at moderate speeds on the high-
way. Driving at high speed lowers fuel
economy.
cAvoid unnecessary stopping and brak-
ing. Maintain a safe distance behind
other vehicles.
cUse a proper gear range which suits road
conditions. On level roads, shift into high
gear as soon as possible.
cAvoid unnecessary engine idling.cKeep your engine tuned up.
cFollow the recommended periodic main-
tenance schedule.
cKeep the tires inflated at the correct
pressure. Low tire pressure increases
tire wear and wastes fuel.
cKeep the front wheels in correct align-
ment. Improper alignment increases tire
wear and lowers fuel economy.
cAir conditioner operation lowers fuel
economy. Use the air conditioner only
when necessary.
cWhen cruising at highway speeds, it is
more economical to use the air condi-
tioner and leave the windows closed to
reduce drag.
SD1001M
BREAK-IN SCHEDULE INCREASING FUEL
ECONOMY
5-14Starting and driving
ZX
Page 137 of 217
WARNING
Be careful not to allow your hands, hair,
jewelry or clothing to come into contact
with, or to get caught in, the running
fan, belts, or fan motor.
The fan motor can start at any time
when the coolant temperature is high.
7. After the engine cools down, check the
coolant level in the reservoir tank with the
engine running. Add coolant to the res-
ervoir tank if necessary. Have your ve-
hicle repaired at an authorized NISSAN
dealer.When towing your vehicle, U.S. States,
Canadian Provinces and local regulations
for towing must be followed. Incorrect tow-
ing equipment could damage your vehicle.
Towing instructions are available from an
authorized NISSAN dealer. Local service
operators will generally be familiar with the
applicable laws and procedures for towing.
To assure proper towing and to prevent
accidental damage to your vehicle, NISSAN
recommends that you have a service opera-
tor tow your vehicle. It is advisable to have
the service operator carefully read the fol-
lowing precautions:
WARNING
cNever ride in a vehicle that is being
towed.
cNever get under your vehicle after it
has been lifted by a tow truck.
CAUTION
cWhen towing, make sure that the
transmission, axles, steering system
and powertrain are in working con-
dition. If any unit is damaged, dollies
must be used.cWhen towing with the front wheels
on the ground:
Turn the ignition key to the OFF
position and secure the steering
wheel in a straight-ahead position
with a rope or similar device. Never
place the ignition key in the LOCK
position. This will result in damage
to the steering lock mechanism.
Move the gearshift lever to the Neu-
tral (N position).
On automatic transmission models,
to move the shift lever to the Neutral
position, turn the ignition key to the
ACC position. After moving the shift
lever to the Neutral position, be sure
to turn the ignition key to the OFF
position.
c
When towing with the rear wheels on
the ground, release the parking brake.
On automatic transmission models,
to move the shift lever to the Neutral
position, turn the ignition key to the
ACC position. After moving the shift
lever to the Neutral position, be sure
to turn the ignition key to the OFF
position.
cAttach safety chains for all towing.
TOW TRUCK TOWING
6-10In case of emergency
ZX
Page 138 of 217
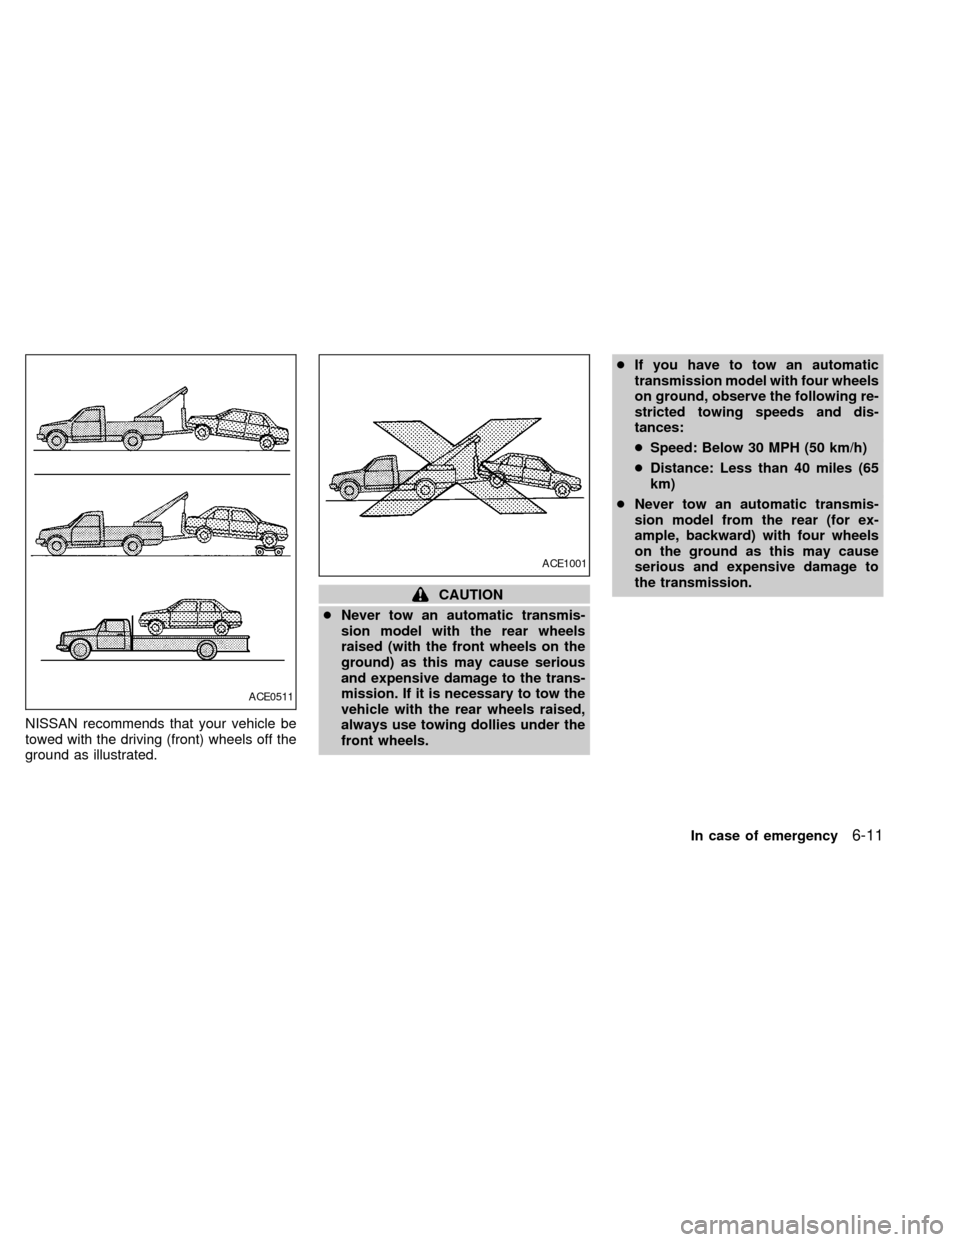
NISSAN recommends that your vehicle be
towed with the driving (front) wheels off the
ground as illustrated.
CAUTION
cNever tow an automatic transmis-
sion model with the rear wheels
raised (with the front wheels on the
ground) as this may cause serious
and expensive damage to the trans-
mission. If it is necessary to tow the
vehicle with the rear wheels raised,
always use towing dollies under the
front wheels.cIf you have to tow an automatic
transmission model with four wheels
on ground, observe the following re-
stricted towing speeds and dis-
tances:
cSpeed: Below 30 MPH (50 km/h)
cDistance: Less than 40 miles (65
km)
cNever tow an automatic transmis-
sion model from the rear (for ex-
ample, backward) with four wheels
on the ground as this may cause
serious and expensive damage to
the transmission.
ACE0511
ACE1001
In case of emergency6-11
ZX
Page 144 of 217
Floor mat positioning aid
(Driver's side only)
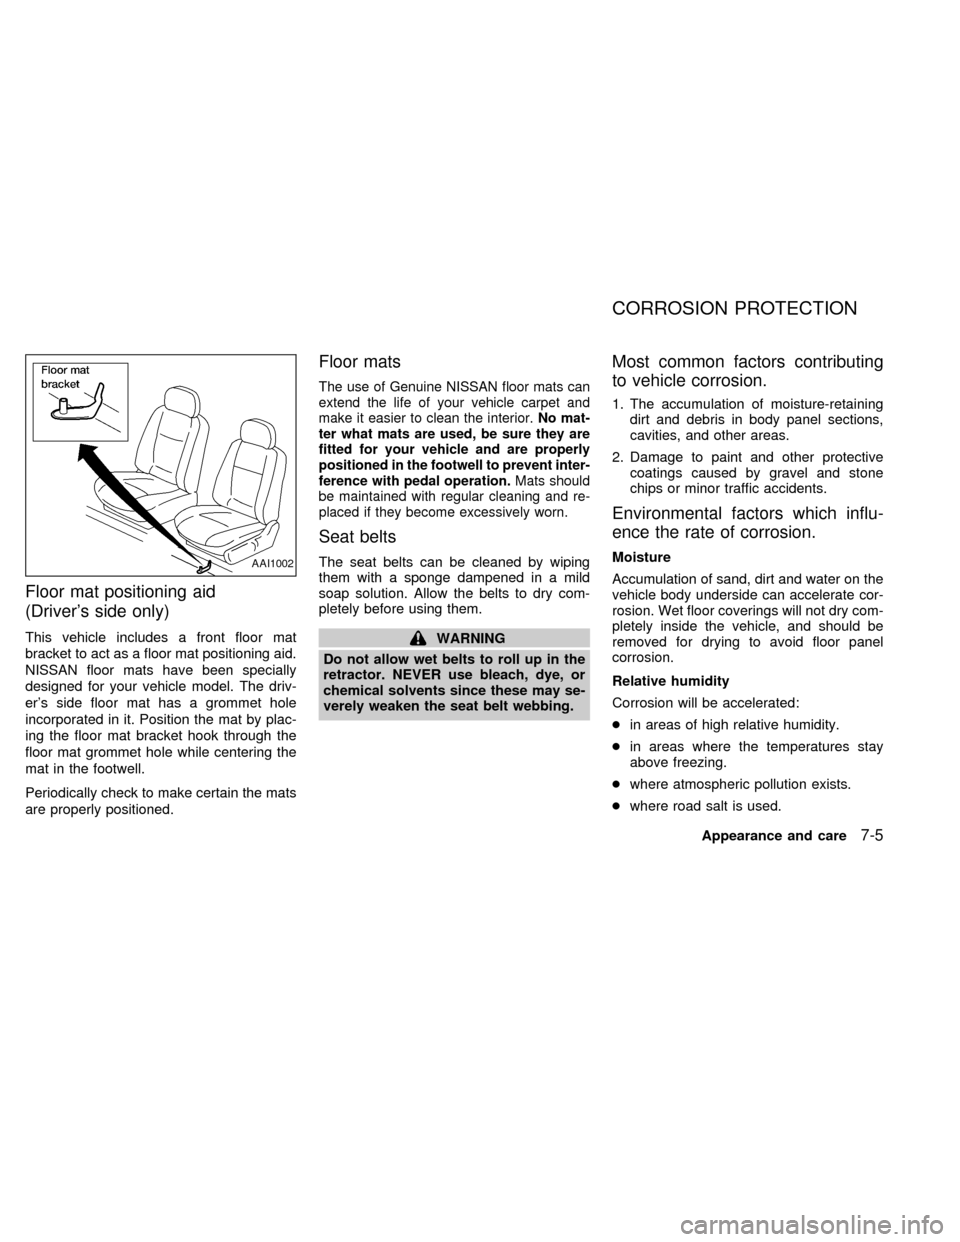
This vehicle includes a front floor mat
bracket to act as a floor mat positioning aid.
NISSAN floor mats have been specially
designed for your vehicle model. The driv-
er's side floor mat has a grommet hole
incorporated in it. Position the mat by plac-
ing the floor mat bracket hook through the
floor mat grommet hole while centering the
mat in the footwell.
Periodically check to make certain the mats
are properly positioned.
Floor mats
The use of Genuine NISSAN floor mats can
extend the life of your vehicle carpet and
make it easier to clean the interior.No mat-
ter what mats are used, be sure they are
fitted for your vehicle and are properly
positioned in the footwell to prevent inter-
ference with pedal operation.Mats should
be maintained with regular cleaning and re-
placed if they become excessively worn.
Seat belts
The seat belts can be cleaned by wiping
them with a sponge dampened in a mild
soap solution. Allow the belts to dry com-
pletely before using them.
WARNING
Do not allow wet belts to roll up in the
retractor. NEVER use bleach, dye, or
chemical solvents since these may se-
verely weaken the seat belt webbing.
Most common factors contributing
to vehicle corrosion.
1. The accumulation of moisture-retaining
dirt and debris in body panel sections,
cavities, and other areas.
2. Damage to paint and other protective
coatings caused by gravel and stone
chips or minor traffic accidents.
Environmental factors which influ-
ence the rate of corrosion.
Moisture
Accumulation of sand, dirt and water on the
vehicle body underside can accelerate cor-
rosion. Wet floor coverings will not dry com-
pletely inside the vehicle, and should be
removed for drying to avoid floor panel
corrosion.
Relative humidity
Corrosion will be accelerated:
cin areas of high relative humidity.
cin areas where the temperatures stay
above freezing.
cwhere atmospheric pollution exists.
cwhere road salt is used.AAI1002
CORROSION PROTECTION
Appearance and care7-5
ZX
Page 164 of 217
Self-adjusting brakes
Your vehicle is equipped with self-adjusting
brakes.
The front (and rear, if equipped) disc-type
brakes self-adjust every time the brake
pedal is applied. The rear drum-type brakes
also self-adjust every time the brake pedal
is applied.
If the brake pedal goes down farther than
normal, it may be due to a lack of adjust-
ment of the rear drum brakes. To adjust,
apply the parking brake several times.
WARNING
See your NISSAN dealer and have it
checked if the brake pedal height does
not return to normal.
Brake pad wear indicators
The disc brake pads on your vehicle have
audible wear indicators. When a brake pad
requires replacement, it makes a high
pitched scraping or screeching sound when
the vehicle is in motion whether or not the
brake pedal is depressed. Have the brakes
checked as soon as possible if the wearindicator sound is heard.
Under some driving or climate conditions,
occasional brake squeak, squeal or other
noise may be heard. Occasional brake
noise during light to moderate stops is nor-
mal and does not affect the function or
performance of the brake system.
The rear drum brakes (if so equipped) do
not have audible wear indicators. Should
you ever hear an unusually loud noise from
the rear drum brakes, have them inspected
as soon as possible by an authorized
NISSAN dealer.
Proper brake inspection intervals should
be followed.For more information regard-
ing brake inspections, see the appropriate
maintenance schedule information in the
``Maintenance'' section of this manual.Check the brake booster function as fol-
lows:
1. With the engine off, press and release
the brake pedal several times. When
brake pedal movement (distance of
travel) remains the same from one pedal
application to the next, continue on to the
next step.
2. While depressing the brake pedal, start
the engine. The pedal height should drop
a little.
3. With the brake pedal depressed, stop the
engine. Keep the pedal depressed for
about 30 seconds. The pedal height
should not change.
4. Run the engine for one minute without
depressing the brake pedal, then turn it
off. Depress the brake pedal several
times. The pedal travel distance will de-
crease gradually with each depression
as the vacuum is released from the
booster.
If the brakes do not operate properly, see an
authorized NISSAN dealer.
BRAKE BOOSTER
Do-it-yourself8-19
ZX