Page 14 of 170

Selectable features
You can select different features for the message center to display by
using the message center controls located below the message center
display. You will hear a tone when you press one of these controls.
However, the message center will display the appropriate warning
message if it detects a warning from any of the monitored systems.
Vehicle setting
Each press of the VEHICLE
SETTING control will select a
different feature as follows:
²TRACTION CONTROL. This
system helps prevent wheel spin
to improve tire traction. The
RESET control will toggle this
feature on or off, but the feature
defaults to ON after each cycle of
the ignition key.
²ENGLISH/METRIC. This feature
allows you to change the message
center and electronic automatic temperature control units from metric
to English units. The modes can be toggled by pressing the RESET
control.
²AUTOLAMP DELAY STATUS. This feature displays the current
autolamp delay setting. To change the delay setting, you must rotate
the headlamp control.
²WIPER/HEADLAMP ON. When enabled, the headlamps will
automatically switch on when the windshield wipers are in the
intermittent, low or high speed settings. Use the RESET control to
toggle the feature on or off.
VEHICLE
SETTINGDRIVER
SETTINGTRIP
ODO RANGE
FUELECONOMY
Instrumentation
15
Page 34 of 170

Automatic operation
Press AUTOMATIC and select the desired temperature. The selected
temperature and the word AUTO will appear in the display window. The
EATC system will either heat or cool to achieve the selected
temperature. The system will automatically determine fan speed, airflow
location and if fresh outside air or recirculated air is required. Fan speed
remains automatic unless the fan speed thumbwheel is turned.
When in AUTOMATIC and weather conditions require heat, air will be
sent to the floor. However, if the engine is not warm enough to provide
heat, the fan will be at a low speed and the air will be directed to the
windshield. In 3ó minutes or less, the fan speed will start to increase
and the airflow location will change to the floor area.
If unusual conditions exist (i.e.-window fogging, etc.), the manual
override controls allow you to select airflow locations and the fan control
allows you to adjust fan speed as necessary.
Temperature selection
The display window indicates the
selected temperature, function
(AUTO or one of the override
controls) and manual control of fan
speed (
) if automatic fan speed is
not desired.
To control the temperature, select
any temperature between 18ÉC
(65ÉF) and 29ÉC (85ÉF) by pressing
the blue (cooler) or red (warmer)
buttons.
For continuous maximum cooling, push the blue button until 16ÉC
(60ÉF) is shown in the display window. The EATC will continue
maximum cooling (disregarding the displayed temperature) until a
warmer temperature is selected by pressing the red button.
˚F
AUTO
VENTPNL • FLRMAX A/C
OUTSIDE TEMP
Controls and features
35
Page 35 of 170

For continuous maximum heating, push the red button until 32ÉC (90ÉF)
is shown in the display window. The EATC will continue maximum
heating (disregarding the displayed temperature) until a cooler
temperature is selected by pressing the blue button.
Temperature conversion
Press MAX A/C and DEFat the
same time (for one second) to
switch between Fahrenheit and
Celsius.
Your vehicle has an English/Metric (E/M) control to change your
electronic message center display from English to Metric. This control
will also change the temperature display. Refer toElectronic Message
Centerin theInstrumentationchapter.
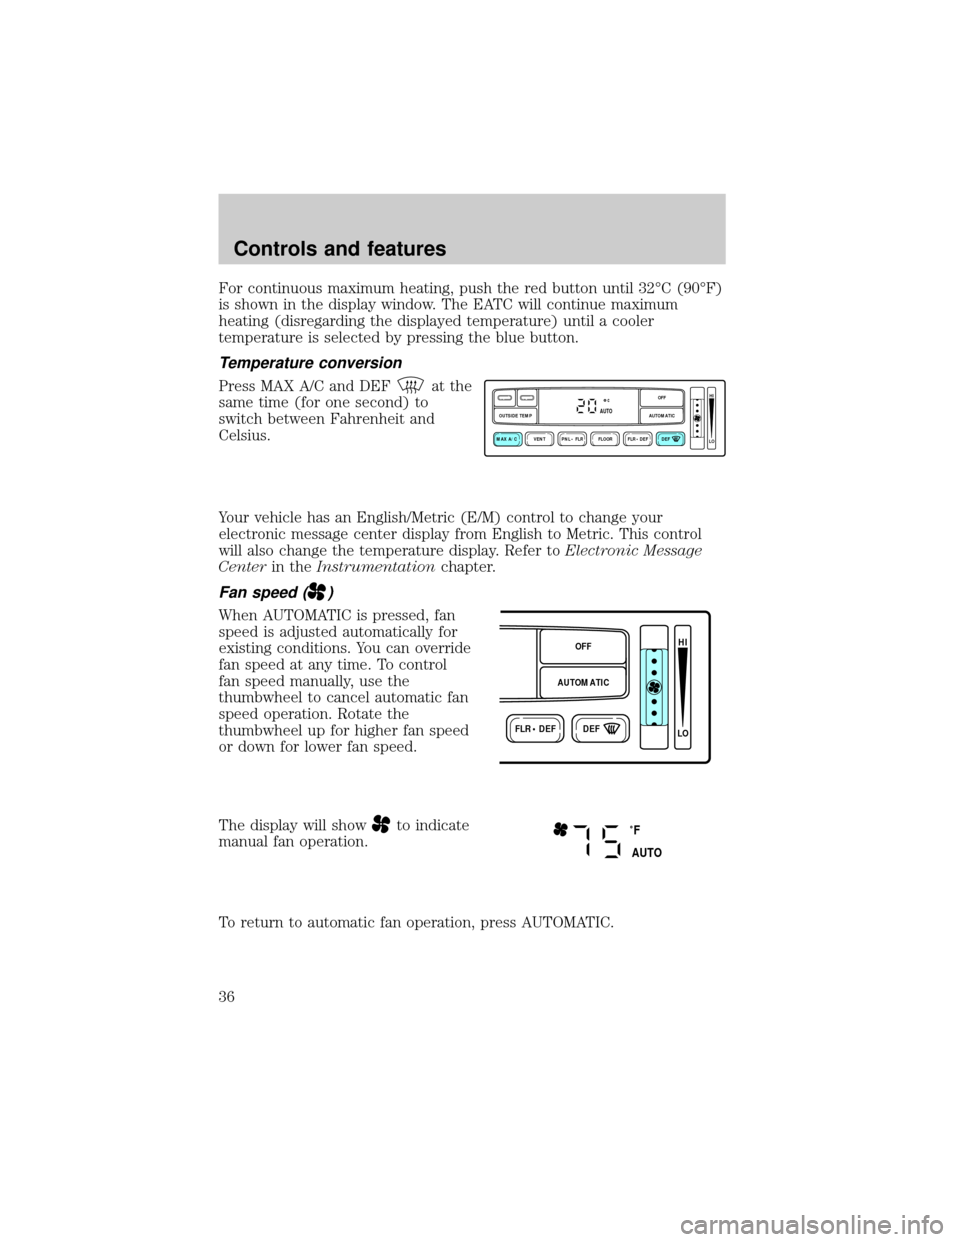
Fan speed ()
When AUTOMATIC is pressed, fan
speed is adjusted automatically for
existing conditions. You can override
fan speed at any time. To control
fan speed manually, use the
thumbwheel to cancel automatic fan
speed operation. Rotate the
thumbwheel up for higher fan speed
or down for lower fan speed.
The display will show
to indicate
manual fan operation.
To return to automatic fan operation, press AUTOMATIC.
VENT PNL • FLR FLOOR FLR • DEF DEF
HI
LO
MAX A/C
OUTSIDE TEMP AUTOMATICOFFAUTO
FLR • DEFDEF
HI
LO
AUTOMATICOFF
˚F
AUTO
Controls and features
36
Page 114 of 170
Fuse/Relay
LocationFuse Amp
RatingDescription
20 30A** Anti-Lock Brake Control Module
21 20A** Anti-Lock Brake Control Module, EVAC/Fill
Connector
22 60A** I/P Fuses (1, 7, 13, 19, 25, 31)
23 40A** Variable Load Control Module
24 40A** Rear Window Defrost Control, I/P Fuse 30
25 60A** I/P Fuses (2, 14, 20, 26, 32, 38), Engine
Compartment Fuse 5
26 20A** Ignition Switch, I/P Fuses (5, 9, 11, 15, 17,
21)
27 30A** Starter Motor Solenoid, Ignition Switch, I/P
Fuses (6, 28, 34)
28 30A** Delayed Accessory Power Relay #2, I/P
Fuse 41
29 40A** Blower Motor Relay
* Mini Fuses ** Maxi Fuses
CHANGING THE TIRES
If you get a flat tire while driving, do not apply the brake heavily.
Instead, gradually decrease your speed. Hold the steering wheel firmly
and slowly move to a safe place on the side of the road.
Tire change procedure
1. Park on a level surface, activate hazard flashers and set parking brake.
2. Place gearshift lever in P (Park).
Roadside emergencies
115