Page 9 of 176

Engine oil pressure
Illuminates when the oil pressure
falls below the normal range. Stop
the vehicle as soon as safely
possible and switch off the engine
immediately. Check the oil level and
add oil if needed. Refer toEngine oilin theMaintenance and Care
chapter.
This lamp also illuminates when the ignition is turned to ON and the
engine is off.
Traction ControlYoff light
Illuminates when the Traction
Controlysystem has been disabled
(by the driver or as a result of a
system failure). For more
information, refer to theDriving
chapter.
Safety belt warning chime
Chimes to remind you to fasten your safety belts.
For information on the safety belt warning chime, refer to theSeating
and safety restraintschapter.
Supplemental restraint system (SRS) warning chime
For information on the SRS warning chime, refer to theSeating and
safety restraintschapter.
Key-in-ignition warning chime
Sounds when the key is left in the ignition in the OFF/LOCK or ACC
position and either front door is opened.
Headlamps on warning chime
Sounds when the headlamps or parking lamps are on, the ignition is off
(and the key is not in the ignition) and either front door is opened.
Turn signal chime
Sounds when the turn signal lever has been activated to signal a turn.
T/ C
OFF
Instrumentation
9
Page 13 of 176

System check
Pressing this control causes the
message center to cycle through a
status of each of the systems being
monitored. For each of the monitored systems, the message center will
indicate either an OK message or a warning message for three seconds.
The sequence of the system check report is as follows:
²voltage level
²engine temperature
²oil level
²engine coolant level
²washer fluid level
²doors closed (driver and passenger side). This message can only be
reset by closing the door(s). If the RESET control is pressed, PLEASE
CLOSE DOOR will be displayed.
²trunk closed
²exterior lamps (front turn, brake and tail)
²fuel level
²distance to empty
²traction control
²ride control
System warnings
System warnings alert you to possible problems or malfunctions in your
vehicle's operating systems.
The message center will display the
last selected feature if there are no
more warning messages. This allows
you to use the full functionality of
the message center after you acknowledge the warning by pressing the
RESET control and clearing the warning message.
SYSTEM
RESET
Instrumentation
13
Page 14 of 176

Door Ajar Cannot be reset
Driver's Door Ajar
Check Engine Temp Warning returns after 10 minutes
Transmission Overheat
Check Transmission
Low Oil Level
Check Charging System
Low Fuel Level
Low Engine Coolant
Low Tire Pressure (if equipped)
Gear Display Data ERR Warning reappears after key is
turned from OFF to ON
Brake Lamp Out
Check Traction Control
Check Ride Control
Trunk Ajar
Check Steering Assist
Low Washer Fluid
Air Leveling Disabled
Tail Lamp Out
Check FRT Turn Lamps
Turn on Headlamps
Warning messages that have been reset are divided into two categories:
²They will reappear on the display ten minutes from the reset.
²They will not reappear until an ignition OFF-ON cycle has been
completed. This acts as a reminder that these warning conditions still
exist within the vehicle.
TRIP
Press this control to display the first
of two trip odometers. Press it again
to display the second trip odometer.
To reset the displayed trip
odometer, press the RESET control.
TRIP
RESET
Instrumentation
14
Page 46 of 176

²INFORMATION REQUEST, EMERGENCY REQUEST or AIR BAG
REQUEST
²CALL IN PROGRESS
²RINGING RESPONSE CENTER
²SENDING LOCATION DATA
²DATA RECEIVED
²WAITING FOR OPERATOR
Once an assistance request is made, it will typically take less than one
minute until contact is made with an operator. During voice
communication the following messages will alternately toggle on the
display:
²CID XXXXXXXXXX
²LAT XXXXXXXXXX
²LON XXXXXXXXXX
²HDG XX
These messages respectively are the customer identification number,
vehicle latitude, vehicle longitude and heading. Under special conditions,
the operator may ask you to read the information being displayed on the
message center.
If vehicle messages are being displayed on the message center (low
washer fluid, low oil, door ajar, etc.), they must be cleared in order to
view the Lincoln RESCU messages. To clear the vehicle messages, press
the message center RESET control which is located to the right of the
display. Continue pressing the control until all messages are cleared.
Automatic redial
As described previously, when an assistance request is made, the
vehicle's cellular phone automatically dials the Lincoln Security Response
Center's central computer and attempts to send an electronic data
message. Occasionally, it can be difficult for the computer to recognize
the message if the cellular connection is weak or noisy. If the
transmission of the message is unsuccessful, the data call will be
terminated and the message ªREDIAL IN PROGRESSº will be displayed
on the message center. A second call will automatically be placed which
bypasses the response center's computer and is forwarded directly to an
operator.
Controls and features
46
Page 113 of 176
Fuse/Relay Location Fuse Amp Rating Description
5 10A Virtual Image
Instrument Cluster,
Lighting Control
Module (LCM
RUN/START Sense),
Autolamp Light Sensor
6 10A Virtual Image
Instrument Cluster, RF
Park/Turn Lamp
7 20A Power Point
8 20A Fuel Filler Door
Release Switch, Trunk
Lid Relay
9 10A Air Bag Diagnostic
Monitor, EATC
Module, Blower Motor
Relay
10 30A Windshield Wiper
Motor, Windshield
Wiper Module
11 10A Ignition Coils, Radio
Interference Capacitor,
PCM Power Relay,
Passive Anti-Theft
System (PATS)
Transceiver
12 10A Lighting Control
Module
Roadside emergencies
113
Page 128 of 176
3. Engine coolant reservoir
4. Passenger compartment air filter assembly
5. Transaxle fluid dipstick
6. Brake fluid reservoir
7. Battery
8. Air filter assembly
9. Engine oil dipstick
10. Engine oil fill cap
ENGINE OIL
Checking the engine oil
Check the engine oil each time you fuel your vehicle.
1. Make sure the vehicle is on level ground.
2. Turn the engine off and wait a few minutes for the oil to drain into the
oil pan.
3. Set the parking brake and ensure the gearshift is securely latched in P
(Park).
4. Open the hood. Protect yourself from engine heat.
5. Locate and carefully remove the
engine oil level indicator (dipstick).
6. Wipe the indicator clean. Insert the indicator fully, then remove it
again.
MAX MIN
Maintenance and care
128
Page 129 of 176
²If the oil level isbetween the MIN and MAX marks, the oil level is
acceptable.DO NOT ADD OIL.
²If the oil level is below the MIN
mark, add enough oil to raise the
level within the MIN-MAX range.
²Oil levels above the MAX mark may cause engine damage. Some oil
must be removed from the engine by a service technician.
7. Put the indicator back in and ensure it is fully seated.
Adding engine oil
1. Check the engine oil. For instructions, refer toChecking the engine
oilin this chapter.
2. If the fluid level is not within the normal range, add only certified
engine oil of the preferred viscosity. Add engine oil through the oil filler
cap. Remove the filler cap and use a funnel to pour oil in the opening.
3. Recheck the oil level. Make sure the oil level is not above the MAX
mark on the dipstick.
Engine oil recommendations
Look for this certification mark.
Ford oil specification is WSS-M2C153-G.
Maintenance and care
129
Page 130 of 176

Use SAE 5W-30 motor oil certified for gasoline engines by the American
Petroleum Institute.
Do not use supplemental engine oil additives, oil treatments or engine
treatments. They are unnecessary and could, under certain conditions,
lead to engine damage which is not covered by your warranty.
Changing the engine oil and filter
Change your engine oil and filter according to the appropriate schedule
listed in the ªService Guideº.
Ford production and aftermarket (Motorcraft) oil filters are designed for
added engine protection and long life. If a replacement oil filter is used
that does not meet Ford material and design specifications, startup
engine noises or knock may be experienced.
It is recommended you use the appropriate Motorcraft oil filter (or
another brand meeting Ford specifications) for your engine application.
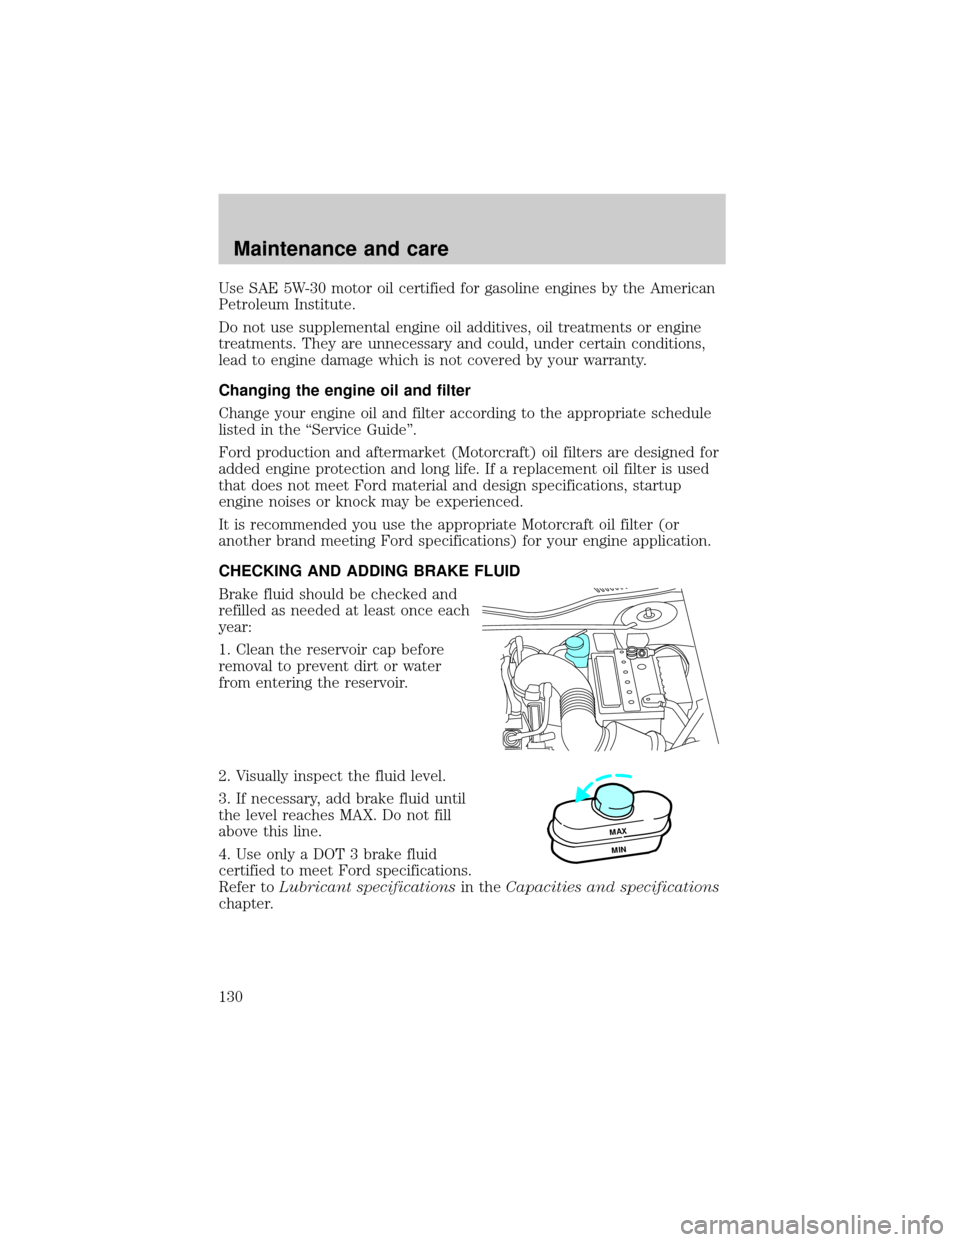
CHECKING AND ADDING BRAKE FLUID
Brake fluid should be checked and
refilled as needed at least once each
year:
1. Clean the reservoir cap before
removal to prevent dirt or water
from entering the reservoir.
2. Visually inspect the fluid level.
3. If necessary, add brake fluid until
the level reaches MAX. Do not fill
above this line.
4. Use only a DOT 3 brake fluid
certified to meet Ford specifications.
Refer toLubricant specificationsin theCapacities and specifications
chapter.
MAX
MIN
Maintenance and care
130