1998 LINCOLN CONTINENTAL warning light
[x] Cancel search: warning lightPage 79 of 176

Conditions of operation
If... Then...
The driver's safety belt is not
buckled before the ignition
switch is turned to the ON
position...The safety belt warning light
illuminates for one to two minutes and
the warning chime sounds for four to
eight seconds.
The driver's safety belt is
buckled while the indicator
light is illuminated and the
warning chime is sounding...The safety belt warning light and
warning chime turn off.
The driver's safety belt is
buckled before the ignition
switch is turned to the ON
position...The safety belt warning light and
indicator chime remain off.
Safety belt maintenance
Check the safety belt systems periodically to make sure they work
properly and are not damaged. Check the safety belts to make sure there
are no nicks, wears or cuts. All safety belt assemblies, including
retractors, buckles, front seat belt buckle assemblies (slide bar)
(if equipped), shoulder belt height adjusters (if equipped), child safety
seat tether bracket assemblies (if equipped), and attaching hardware,
should be inspected after a collision. Ford recommends that all safety
belt assemblies used in vehicles involved in a collision be replaced.
However, if the collision was minor and a qualified technician finds that
the belts do not show damage and continue to operate properly, they do
not need to be replaced. Safety belt assemblies not in use during a
collision should also be inspected and replaced if either damage or
improper operation is noted.
Failure to replace the safety belt assembly under the above
conditions could result in severe personal injuries in the event of
a collision.
Refer toCleaning and maintaining the safety beltsin the
Maintenance and caresection.
Seating and safety restraints
79
Page 82 of 176

The air bags inflate and deflate
rapidly upon activation.
After air bag deployment, it is
normal to notice a smoke-like,
powdery residue or smell the burnt
propellant. This may consist of
cornstarch, talcum powder
(to lubricate the bag) or sodium
compounds (e.g., baking soda) that
result from the combustion process
that inflates the air bag. Small
amounts of sodium hydroxide may
be present which may irritate the
skin and eyes, but none of the
residue is toxic.
Several air bag system components get hot after inflation. Do not
touch them after inflation.
If the air bag is inflated,the air bag will not function again
and must be replaced immediately. If the air bag is not
replaced, the unrepaired area will increase the risk of injury in a
collision.
The SRS consists of:
²driver and passenger air bag modules (which include the inflators and
air bags),
²one or more impact and safing sensors,
²a readiness light and tone
²and the electrical wiring which connects the components.
The diagnostic module monitors its own internal circuits and the
supplemental air bag electrical system warning (including the impact
sensors), the system wiring, the air bag system readiness light, the air
bag back up power and the air bag ignitors.
Determining if the system is operational
The SRS uses a readiness light in the instrument cluster or a tone to
indicate the condition of the system. Refer to theAir bag readiness
Seating and safety restraints
82
Page 83 of 176

section in theInstrumentationchapter. Routine maintenance of the air
bag is not required.
A difficulty with the system is indicated by one or more of the following:
²The readiness light will either
flash or stay lit.
²The readiness light will not
illuminate immediately after
ignition is turned on.
²A series of five beeps will be heard. The tone pattern will repeat
periodically until the problem and light are repaired.
If any of these things happen, even intermittently, have the SRS serviced
at your dealership or by a qualified technician immediately. Unless
serviced, the system may not function properly in the event of a
collision.
Disposal of air bags and air bag equipped vehicles
For disposal of air bags or air bag equipped vehicles, see your local
dealership or qualified technician. Air bags MUST BE disposed of by
qualified personnel.
SAFETY RESTRAINTS FOR CHILDREN
Important child restraint precautions
You are required by law to use safety restraints for children in the U.S.
and Canada. If small children ride in your vehicle (generally children who
are four years old or younger and who weigh 18 kg [40 lbs] or less), you
must put them in safety seats made especially for children. Check your
local and state or provincial laws for specific requirements regarding the
safety of children in your vehicle.
Never let a passenger hold a child on his or her lap while the
vehicle is moving. The passenger cannot protect the child from
injury in a collision.
Always follow the instructions and warnings that come with any infant or
child restraint you might use.
When possible, place children in the rear seat of your vehicle. Accident
statistics suggest that children are safer when properly restrained in the
rear seating positions than in the front seating position.
AIR
BAG
Seating and safety restraints
83
Page 96 of 176

light will remain on and your vehicle should be serviced as soon as
possible.
Normal braking is still effective
unless the BRAKE warning lamp is
also illuminated.
Using ABS
²In an emergency or when maximum efficiency from the ABS is
required, apply continuous full force on the brake. The ABS will be
activated immediately, thus allowing you to retain full steering control
of your vehicle and, providing there is sufficient space, will enable you
to avoid obstacles and bring the vehicle to a controlled stop.
²We recommend that you familiarize yourself with this braking
technique. However, avoid taking any unnecessary risks.
Parking brake with auto-release
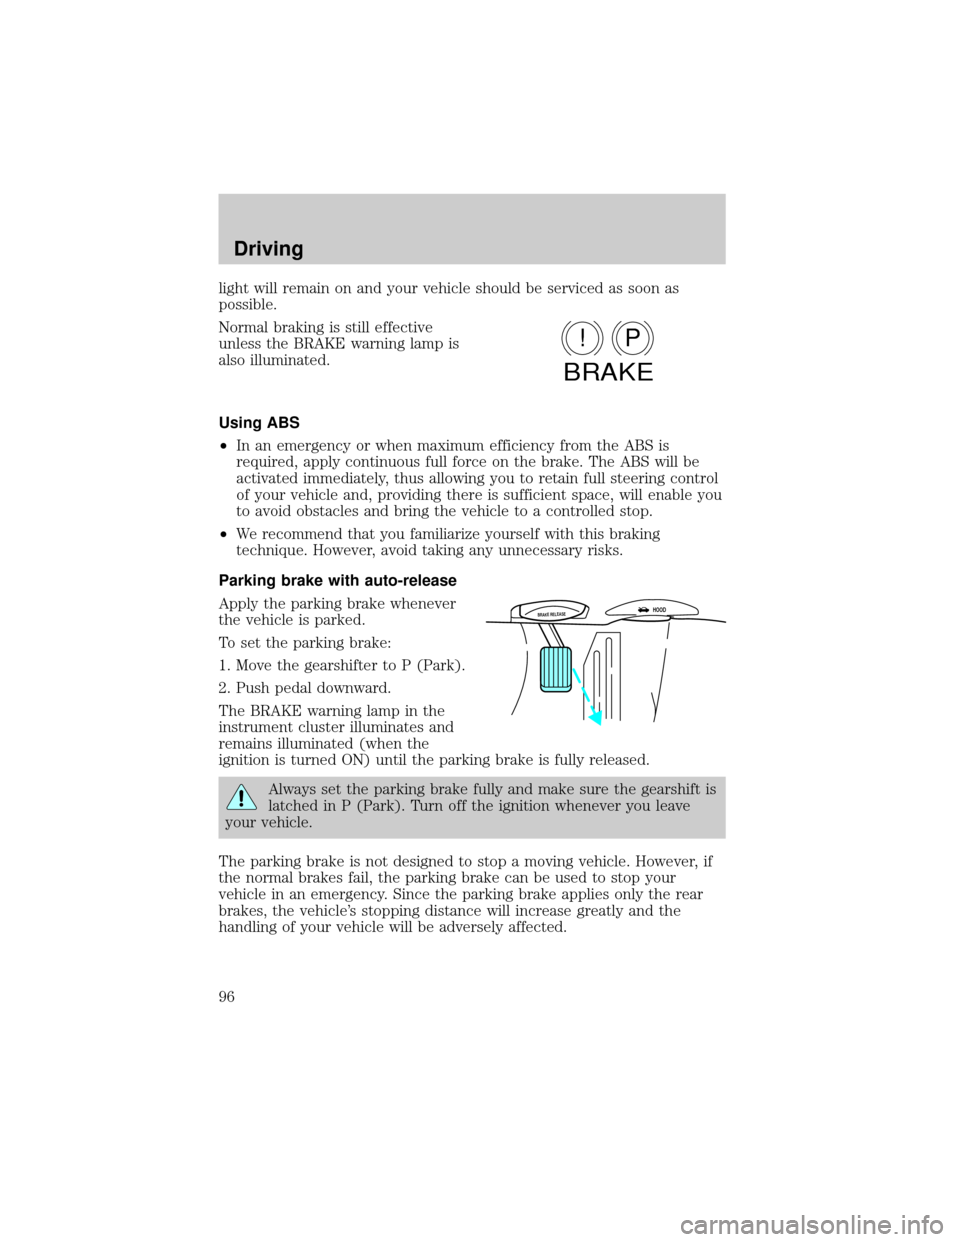
Apply the parking brake whenever
the vehicle is parked.
To set the parking brake:
1. Move the gearshifter to P (Park).
2. Push pedal downward.
The BRAKE warning lamp in the
instrument cluster illuminates and
remains illuminated (when the
ignition is turned ON) until the parking brake is fully released.
Always set the parking brake fully and make sure the gearshift is
latched in P (Park). Turn off the ignition whenever you leave
your vehicle.
The parking brake is not designed to stop a moving vehicle. However, if
the normal brakes fail, the parking brake can be used to stop your
vehicle in an emergency. Since the parking brake applies only the rear
brakes, the vehicle's stopping distance will increase greatly and the
handling of your vehicle will be adversely affected.
P!
BRAKE
BRAKE RELEASEHOOD
Driving
96
Page 114 of 176

Fuse/Relay Location Fuse Amp Rating Description
13 15A Lighting Control
Module (LCM): RF
Turn Lamp, Right
Turn Indicator (VIC),
RR Side Marker
Lamps, Tail Lamps,
License Lamps, LR
Stop/Turn Lamps,
Clock Illumination
14 20A Cigar Lighter
15 10A ABS Evac and Fill
Connector
16 30A Moonroof Switch
17 - NOT USED
18 10A Lighting Control
Module
19 10A Lighting Control
Module (LCM): Left
Headlamp, DRL
20 15A Multi-Function Switch:
Flash to Pass, and
Hazard Warning Input
to LCM
21 - NOT USED
22 - NOT USED
23 10A Digital Transmission
Range Sensor
24 10A Virtual Image
Cluster-LF Turn
Indicator, LF Turn
Signal
25 10A Lighting Control
Module (LCM): Right
Headlamp
Roadside emergencies
114
Page 141 of 176

²do not exceed 90 km/h (55 mph). Drive at a reduced rate of speed, if
possible.
²avoid excessive hard steering and braking maneuvers, if possible.
²stop periodically to allow the tires to cool down.
Pressure alert system (if equipped)
Each of your SecuriTires is
monitored by a low tire pressure
sensor. A warning will appear in the
overhead console when the pressure
in one of your tires drops below
acceptable levels or if the system
has malfunctioned.
This device complies with Part 15 of
the FCC rules and with RS-210 of
Industry Canada. Operation is
subject to the following two
conditions: (1) This device may not
cause harmful interference, and (2)
This device must accept any interference received, including interference
that may cause undesired operation.
Maintenance warning
The LOW TIRE PRESSURE warning will illuminate and stay on when one
of your vehicle's tires drops below 124 kPa (18 psi). The warning light
will also come on and stay lit if the Pressure Alert System has
malfunctioned.
If this warning appears, check the pressure in your tires as soon as
possible and adjust any tire that is low to the recommended air pressure
level.
If the warning remains on after you have adjusted the tires to the
recommended air pressure levels, take your vehicle to an authorized
Lincoln/Mercury dealer for service.
Flat tire warning
If the sensors detect a tire pressure lower than 68 kPa (10 psi), the LOW
TIRE PRESSURE warning will appear in the overhead console and the
message WARNING LOW TIRE PRESSURE will be displayed in the
message center, indicating an impending flat tire. If this condition occurs,
ROOF
LOW TIRE
PRESSURE
OPEN
Maintenance and care
141
Page 149 of 176

EMISSION CONTROL SYSTEM
Your vehicle is equipped with various emission control components and a
catalytic converter which will enable your vehicle to comply with
applicable exhaust emission standards. To make sure that the catalytic
converter and other emission control components continue to work
properly:
²Use only unleaded fuel.
²Avoid running out of fuel.
²Do not turn off the ignition while your vehicle is moving, especially at
high speeds.
²Have the services listed in your ªService Guideº performed according
to the specified schedule.
The Scheduled Maintenance Services listed in the ªService Guideº are
required because they are considered essential to the life and
performance of your vehicle and to its emissions system.
If other than Ford, Motorcraft or Ford authorized parts are used for
maintenance replacements or for service of components affecting
emission control such non-Ford parts should be equivalent to genuine
Ford Motor Company parts in performance and durability.
Do not park, idle, or drive your vehicle in dry grass or other dry
ground cover. The emission system heats up the engine
compartment and exhaust system, which can start a fire.
Watch for fluid leaks, strange odors, smoke, loss of oil pressure, the
charging system warning light, the ªService Engine Soonº light or the
temperature warning light. These events could indicate that the emission
control system is not working properly.
If you smell exhaust fumes of any kind inside your vehicle, have
the dealer inspect and fix your vehicle immediately. Do not drive
if you smell exhaust fumes. These fumes are harmful and could kill
you.
Do not make any unauthorized changes to your vehicle or engine. By
law, vehicle owners and anyone who manufactures, repairs, services,
sells, leases, trades vehicles, or supervises a fleet of vehicles are not
permitted to intentionally remove an emission control device or prevent
it from working. Information about your vehicle's emission system is on
Maintenance and care
149
Page 150 of 176

the Vehicle Emission Control Information Decal located on or near the
engine. This decal identifies engine displacement and gives some tune up
specifications.
Please consult your ªWarranty Guideº for complete emission warranty
information.
Readiness for inspection/maintenance (I/M) testing
In some localities, it may be a legal requirement to pass an I/M test of
the on-board diagnostic (OBD-II) system. If your ªcheck engine/service
engine soonº light is on, reference the applicable light description in the
Warning Lights and Chimessection of your owners guide. Your vehicle
may not pass the I/M test with the ªcheck engine/service engine soonº
light on.
If the vehicle's powertrain system or its battery has just been serviced,
the OBD-II system is reset to a ªnot ready for I/M testº condition. To
ready the OBD-II system for I/M testing, a minimum of 30 minutes of city
and highway driving is necessary as described below:
²First, at least 10 minutes of driving on an expressway or highway.
²Next, at least 20 minutes driving in stop and go, city type traffic with
at least four idle periods.
Allow the vehicle to sit for at least eight hours without starting the
engine. Then, start the engine and complete the above driving cycle. The
engine must warm up to its normal operating temperature. Once started,
do not turn off the engine until the above driving cycle is complete.
EXTERIOR BULBS
Replacing headlamp bulbs
Handle a halogen headlamp bulb carefully and keep out of
children's reach. Grasp the bulb only by its plastic base and do
not touch the glass. The oil from your hand could cause the bulb to
break the next time the headlamps are operated.
To remove the headlamp bulb:
1. Make sure headlamp switch is in OFF position.
2. Lift the hood and remove the plastic sight shield covering the back of
the headlamps by lifting up on the rear corners to release the velcro
attachments. Lift the shield and pull towards the windshield.
Maintenance and care
150