1998 HONDA ODYSSEY warning light
[x] Cancel search: warning lightPage 50 of 272

Instruments and Controls
This section gives information about
the controls and displays thatcontribute to the daily operation of
your Honda. All the essential
controls are within easy reach.
Control Locations............................ 50
Indicator Lights................................ 51
Gauges.............................................. 54
Tachometer.................................. 54
Trip Meter.................................... 54
Speedometer................................ 55
Odometer...................................... 55
Temperature Gauge.................... 55
Fuel Gauge................................... 55
Maintenance Required
Indicator.................................... 56
Controls Near the Steering
Wheel........................................ 57
Headlights.................................... 58
Daytime Running Lights............. 58
Instrument Panel Brightness..... 59
Turn Signals................................. 59
Windshield Wipers...................... 60
Windshield Washers................... 61
Rear Window Wiper and
Washer...................................... 61
Hazard Warning........................... 61
Rear Window Defogger.............. 62
Steering Wheel Adjustment....... 62
Steering Wheel Controls ................ 64
Cruise Control.............................. 64
Keys and Locks................................ 67
Keys............................................... 67
Immobilizer System..................... 68
Ignition Switch............................. 69
Power Door Locks....................... 70
Remote Transmitter.................... 71
Childproof Door Locks............... 72
Tailgate......................................... 72
Glove Box..................................... 73
Seats.................................................. 74
Passenger Seating....................... 74
Seat Adjustments......................... 74
Driver's Seat Power Height
Adjustment............................... 75
Armrests....................................... 76
Head Restraints........................... 76
Third Seat Access........................ 77
Removing the Second Seats
in the Six-Passenger Model.... 78
Folding the Second Seats
in the Seven-Passenger
Model.................................... 78
Reclining the Second Seat.......... 79
Folding the Third Seat
in All Models............................ 80
Power Windows............................... 82
Sunroof.............................................. 83
Mirrors.............................................. 84
Adjusting the Power Mirrors..... 84
Parking Brake.................................. 85
Digital Clock..................................... 86 Beverage Holder.............................. 86
Dashboard Compartment............... 88
Center Pocket.................................. 88
Vanity Mirror................................... 88
Cigarette Lighter............................. 89
Ashtrays............................................ 89 Interior Lights.................................. 90
Ceiling Lights............................... 90
Spotlights...................................... 90
Tailgate Light............................... 91 Courtesy Lights........................... 91
Instruments and ControlsProCarManuals.comMain Menu s t
Page 54 of 272

Indicator Lights
U.S.
Anti-lock Brake System
(ABS) Indicator
This light normally comes on when you turn the ignition switch ON (II) and goes off after the engine starts.
If it comes on at any other time,
there is a problem in the ABS. If this
happens, take the vehicle to your dealer to have it checked. With the
light on, your vehicle still has normal
braking ability but no anti-lock. Turn Signal and
Hazard Warning
Indicators
The left or right turn signal light blinks when you signal a lane changeor turn. If the light does not blink or
blinks rapidly, it usually means one of the turn signal bulbs is burned out (see page 207). Replace the bulb as
soon as possible, since other drivers
cannot see that you are signalling.
When you turn on the Hazard
Warning switch, both turn signal lights blink. All turn signals on theoutside of the vehicle should flash. Door and Brake Lamp Monitor
The appropriate light comes on in this display if the tailgate or any dooris not closed tightly. If a brake lightdoes not work, the BRAKE LAMP
indicator comes on when you push
the brake pedal with the ignition switch ON (II).
A burned out brake light is a hazard when drivers behind you cannot tell
you are braking. Have your brakelights repaired right away.
All the lights in the monitor display come on for a few seconds when you
turn the ignition switch ON (II).
Instruments and Controls
BRAKE LAMP
INDICATOR
ABS
CanadaProCarManuals.comMain Menu Table of Contents s t
Page 58 of 272
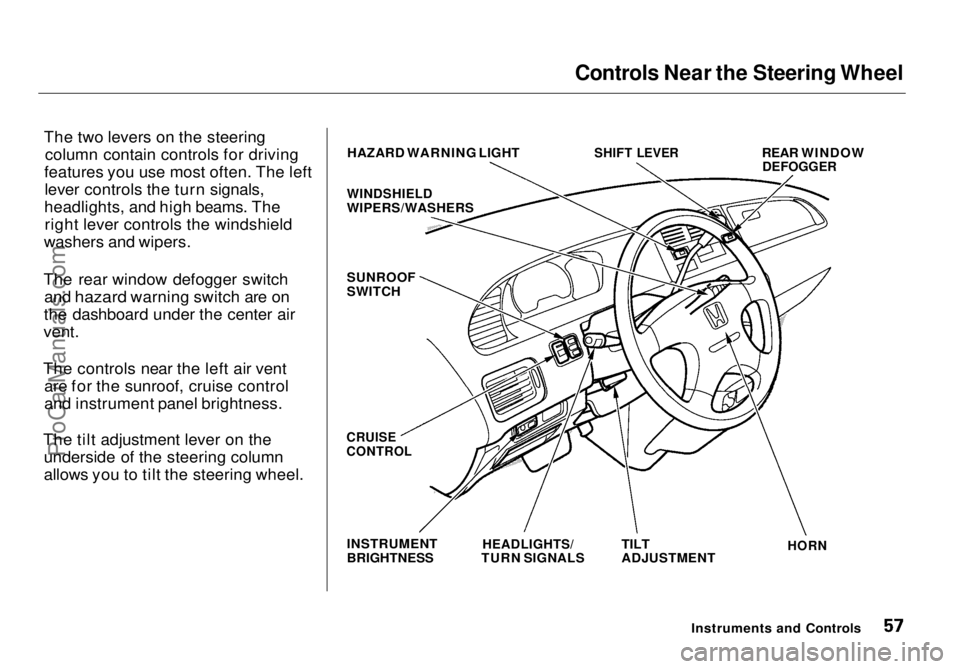
Controls Near the Steering Wheel
The two levers on the steering column contain controls for driving
features you use most often. The left lever controls the turn signals,
headlights, and high beams. The right lever controls the windshield
washers and wipers.
The rear window defogger switch and hazard warning switch are on
the dashboard
under the center air
vent.
The controls near the left air vent are for the sunroof, cruise control
and instrument panel brightness.
The tilt adjustment lever on the underside of the steering column
allows you to tilt the steering wheel. HAZARD WARNING LIGHT
WINDSHIELD
WIPERS/WASHERS
SUNROOF
SWITCH
SHIFT LEVER
REAR WINDOW
DEFOGGER
CRUISE
CONTROL
INSTRUMENT
BRIGHTNESS
HEADLIGHTS/
TURN SIGNALS
TILT
ADJUSTMENT
HORN
Instruments and ControlsProCarManuals.comMain Menu Table of Contents s t
Page 62 of 272
Controls Near the Steering Wheel
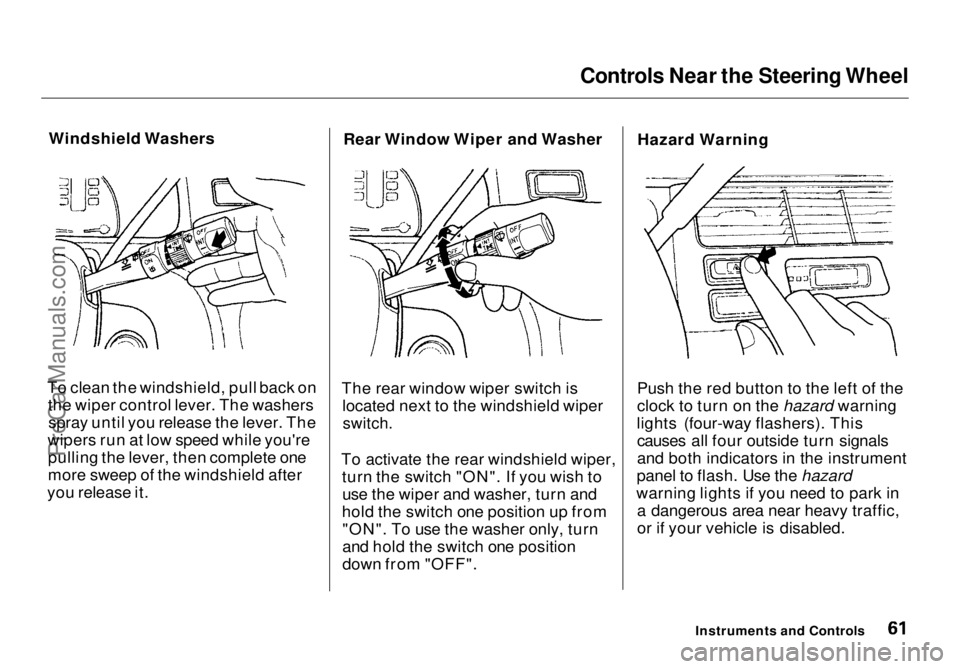
Windshield Washers
To clean the windshield, pull back on the wiper control lever. The washersspray until you release the lever. The
wipers run at low speed while you're pulling the lever, then complete one
more sweep of the windshield after
you release it. Rear Window Wiper and Washer
The rear window wiper switch is located next to the windshield wiper
switch.
To activate the rear windshield wiper, turn the switch "ON". If you wish touse the wiper and washer, turn and
hold the switch one position up from "ON". To use the washer only, turn
and hold the switch one position
down from "OFF". Hazard Warning
Push the red button to the left of the
clock to turn on the hazard warning
lights (four-way flashers). This causes all four outside turn signals
and both indicators in the instrument
panel to flash. Use the hazard
warning lights if you need to park in a dangerous area near heavy traffic,
or if your vehicle is disabled.
Instruments and ControlsProCarManuals.comMain Menu Table of Contents s t
Page 151 of 272
Driving in Bad Weather
Visibility — Being able to see clearly in all directions and being
visible to other drivers are important in all weather conditions. This is
more difficult in bad weather. To beseen more clearly during daylight
hours, turn on your headlights.
Inspect your windshield wipers and
washers frequently. Keep the wind- shield washer reservoir full of the
proper fluid. Have the windshield
wiper blades replaced if they start to streak the windshield or leave parts
unwiped. Use the defrosters and air
conditioning to keep the windows
from fogging up on the inside (see
page 99).
Traction — Check your tires
frequently for wear and proper
pressure. Both are important in
preventing "hydroplaning" (loss of
traction on a wet surface). In the
winter, mount snow tires on all four
wheels for the best handling.
Watch road conditions carefully, they can change from moment to
moment. Wet leaves can be as slip-
pery as ice. "Clear" roads can have
patches of ice. Driving conditionscan be very hazardous when the
outside temperature is near freezing.
The road surface can become covered with areas of water puddles
mixed with areas of ice, so your
traction can change without warning.
Be careful when downshifting. If
traction is low, you can lock up the drive wheels for a moment and cause
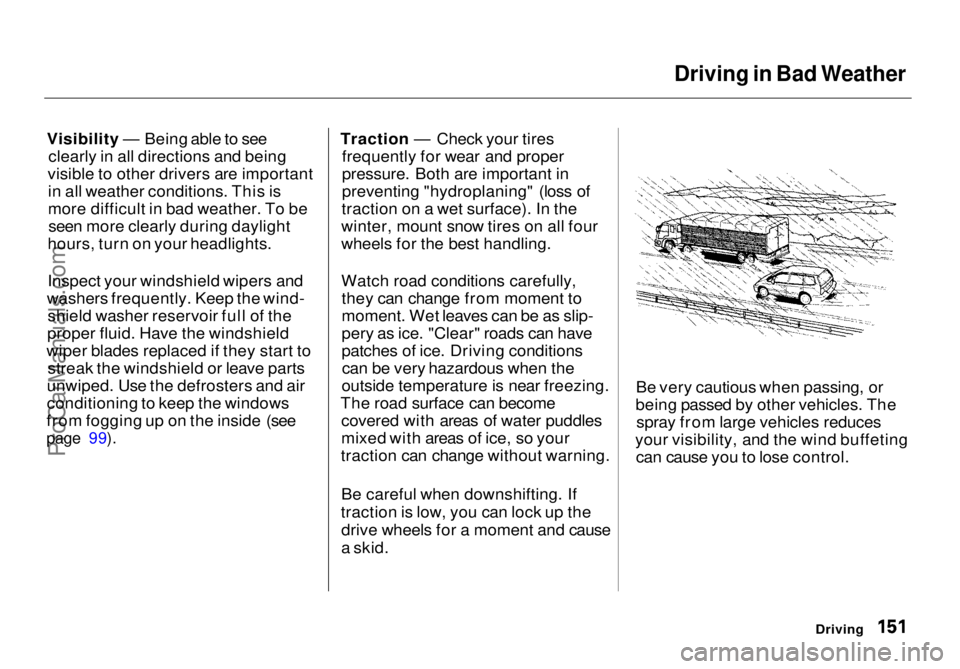
a skid. Be very cautious when passing, or
being passed by other vehicles. The spray from large vehicles reduces
your visibility, and the wind buffeting can cause you to lose control.
DrivingProCarManuals.comMain Menu Table of Contents s t
Page 220 of 272
Changing a Flat Tire
If you have a flat tire while driving,
stop in a safe place to change it.
Stopping in traffic or on the shoulder of a busy road is dangerous. Drive
slowly along the shoulder until you
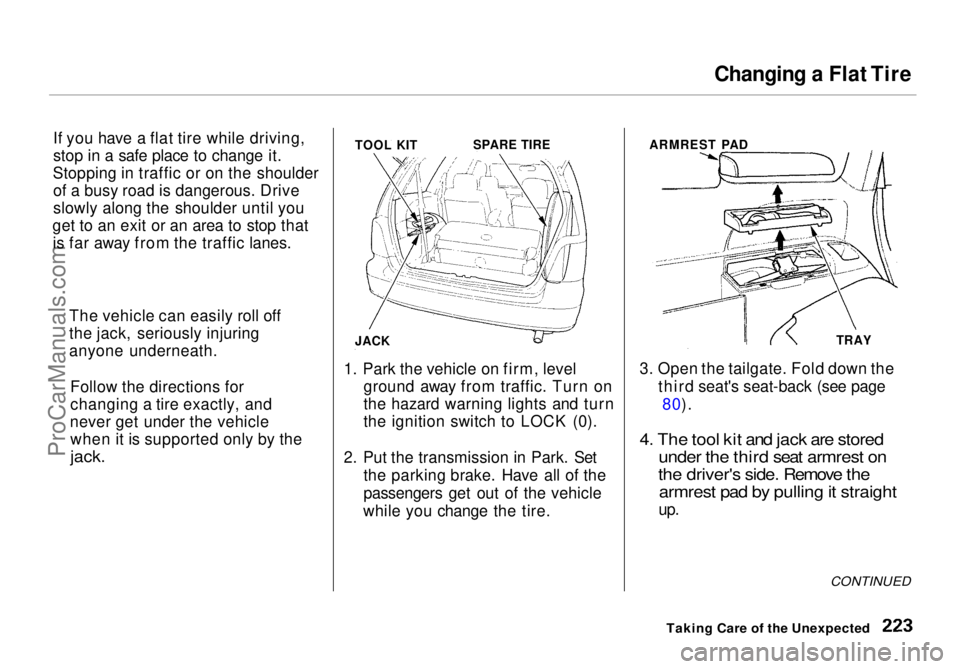
get to an exit or an area to stop that is far away from the traffic lanes. TOOL KIT
SPARE TIRE
JACK
1. Park the vehicle on firm, level ground away from traffic. Turn on
the hazard warning lights and turn
the ignition
switch to LOCK (0).
2. Put the transmission in Park. Set the parking brake. Have all of the
passengers get out of the vehicle
while you change the tire. ARMREST PAD
TRAY
3. Open the tailgate. Fold down the third seat's seat-back (see page80).
4. The tool kit and jack are stored under the third seat armrest on
the driver's side. Remove the armrest pad by pulling it straight
up.
CONTINUED
Taking Care of the Unexpected
The vehicle can easily roll off
the jack, seriously injuring
anyone underneath.
Follow the directions for
changing a tire exactly, and
never get under the vehicle when it is supported only by the
jack.ProCarManuals.comMain Menu Table of Contents s t
Page 227 of 272
If Your Engine Won't Start, Jump Starting
The Starter
Operates Normally
In this case, the starter motor's
speed sounds normal, or even faster
than normal, when you turn the
ignition switch to START (III), but
the engine does not run. Are you using the proper startingprocedure? Refer to Starting the
Engine on page 141.
Do you have fuel? Turn the
ignition switch to ON (II) for a
minute and watch the fuel gauge.
The low fuel level warning light may not be working, so you were
not reminded to fill the tank.
There may be an electrical problem, such as no power to the
fuel pump. Check all the fuses (see page 242).
If you find nothing wrong, you will
need a qualified technician to find
the problem. See Towing on page
244.
Jump Starting
If your vehicle's battery has rundown, you may be able to start the
engine by using a booster battery.
Although this seems like a simple procedure, you should take several
precautions.
You cannot start a Honda by pushing or pulling it. To jump start your vehicle, follow
these directions closely:
1. Open the hood and check the physical condition of the battery(see page 189 ). In very cold
weather, check the condition of the electrolyte. If it seems slushyor like ice, do not try jump starting
until it thaws.
If a battery sits in extreme cold, the electrolyte inside can freeze.
Attempting to jump start with a frozen battery can cause it to rupture.
2. Turn off all the electrical acces- sories: heater, A/C, stereo system,
lights, etc.
Put the transmission in Neutral or
Park and set the parking brake.
Taking Care of the Unexpected
A battery can explode if you do
not follow the correct procedure,
seriously injuring anyone nearby.
Keep all sparks, open flames,
and smoking materials away
from the battery.
NOTICEProCarManuals.comMain Menu Table of Contents s t
Page 231 of 272
Low Oil Pressure Indicator
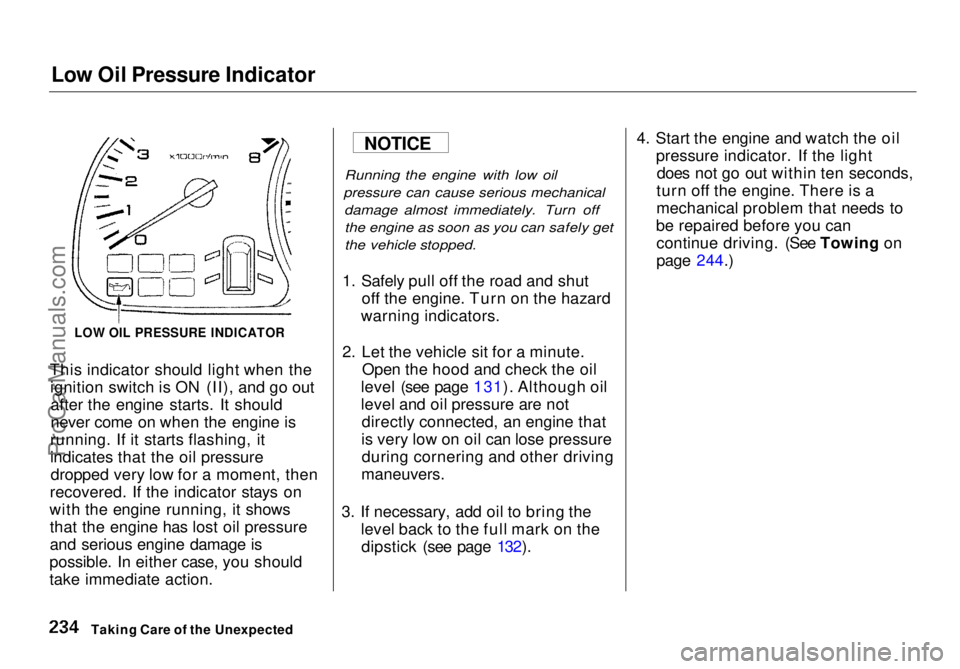
This indicator should light when the ignition switch is ON (II), and go outafter the engine starts. It should
never come on when the engine is
running. If it starts flashing, it
indicates that the oil pressure dropped very low for a moment, then
recovered. If the indicator stays on
with the engine running, it shows that the engine has lost oil pressure
and serious engine damage is
possible. In either case, you should
take immediate action.
Running the engine with low oil
pressure can cause serious mechanical damage almost immediately. Turn offthe engine as soon as you can safely get
the vehicle stopped.
1. Safely pull off the road and shut off the engine. Turn on the hazard
warning indicators.
2. Let the vehicle sit for a minute. Open the hood and check the oil
level (see page 131). Although oil
level and oil pressure are not directly connected, an engine that
is very low on oil can lose pressure during cornering and other driving
maneuvers.
3. If necessary, add oil to bring the level back to the full mark on thedipstick (see page 132). 4. Start the engine and watch the oil
pressure indicator. If the lightdoes not go out within ten seconds,
turn off the engine. There is a
mechanical problem that needs to
be repaired before you can continue driving. (See Towing on
page 244.)
Taking Care of the Unexpected
LOW OIL PRESSURE INDICATOR
NOTICEProCarManuals.comMain Menu Table of Contents s t