Page 6 of 272

Your Vehicle's Safety Features
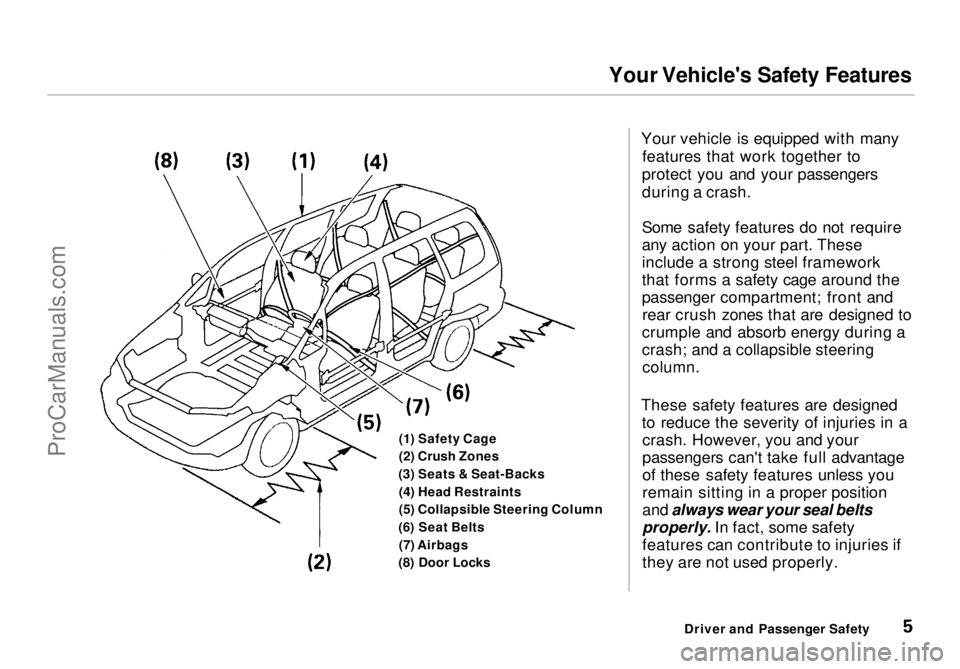
(1) Safety Cage
(2) Crush Zones
(3) Seats & Seat-Backs (4) Head Restraints
(5) Collapsible Steering Column
(6) Seat Belts (7) Airbags
(8) Door Locks Your vehicle is equipped with many
features that work together to
protect you and your passengers
during a crash.
Some safety features do not require
any action on your part. These
include a strong steel framework
that forms a safety cage around the
passenger compartment; front and rear crush zones that are designed to
crumple and absorb energy during a
crash; and a collapsible steering
column.
These safety features are designed to reduce the severity of injuries in acrash. However, you and your
passengers can't take full advantage
of these safety features unless you
remain sitting in a proper position
and always wear your seal belts
properly. In fact, some safety
features can contribute to injuries if
they are not used properly.
Driver and Passenger SafetyProCarManuals.comMain Menu Table of Contents s t
Page 9 of 272

Your Vehicle's Safety Features
Seats & Seat-Backs
Your vehicle's seats are designed to keep you in a comfortable, upright
position so you can take full advantage of the protection offered
by seat belts and the seats' energy absorbing materials.
How you adjust your seats and seat-
backs can also affect your safety. For example, sitting too close to the
steering wheel or dashboard
increases your risk of being injured
by striking the inside of the vehicle or being injured by an inflating
airbag.
Reclining a seat-back too far makes
your seat belt less effective and increases your chance of sliding
under the seat belt and beingseriously injured in a crash.
What you should do: Move the front
seats as far back as possible, and
keep adjustable seat-backs in an upright position whenever the
vehicle is moving.
Head Restraints
Head restraints can help protect you
from whiplash and other injuries. For maximum protection, the back of
your head should rest against the center of the head restraint.
Driver and Passenger SafetyProCarManuals.comMain Menu Table of Contents s t
Page 54 of 272

Indicator Lights
U.S.
Anti-lock Brake System
(ABS) Indicator
This light normally comes on when you turn the ignition switch ON (II) and goes off after the engine starts.
If it comes on at any other time,
there is a problem in the ABS. If this
happens, take the vehicle to your dealer to have it checked. With the
light on, your vehicle still has normal
braking ability but no anti-lock. Turn Signal and
Hazard Warning
Indicators
The left or right turn signal light blinks when you signal a lane changeor turn. If the light does not blink or
blinks rapidly, it usually means one of the turn signal bulbs is burned out (see page 207). Replace the bulb as
soon as possible, since other drivers
cannot see that you are signalling.
When you turn on the Hazard
Warning switch, both turn signal lights blink. All turn signals on theoutside of the vehicle should flash. Door and Brake Lamp Monitor
The appropriate light comes on in this display if the tailgate or any dooris not closed tightly. If a brake lightdoes not work, the BRAKE LAMP
indicator comes on when you push
the brake pedal with the ignition switch ON (II).
A burned out brake light is a hazard when drivers behind you cannot tell
you are braking. Have your brakelights repaired right away.
All the lights in the monitor display come on for a few seconds when you
turn the ignition switch ON (II).
Instruments and Controls
BRAKE LAMP
INDICATOR
ABS
CanadaProCarManuals.comMain Menu Table of Contents s t
Page 139 of 272

Driving
This section gives you tips on starting the engine under various
conditions, and how to operate the
automatic transmission. It also
includes important information on
parking your vehicle and the braking system, and facts you need if you are
planning to tow a trailer. Preparing to Drive......................... 140
Starting the Engine........................ 141
Starting in Cold Weatherat High Altitude ..................... 141
Automatic Transmission............... 142 Shift Lever Position Indicator.. 142
Shift Lever Positions................. 142
Maximum Allowable Speeds.... 145
Shift Lock Release..................... 145
Parking............................................ 146
The Braking System...................... 147 Brake Wear Indicators.............. 147
Brake System Design................ 147
Anti-lock Brakes........................ 148 Important SafetyReminders.......................... 149
ABS Indicator......................... 149
Driving in Bad Weather................ 150
Towing a Trailer............................ 152
DrivingProCarManuals.comMain Menu s t
Page 148 of 272

The Braking System
Anti-lock Brakes
Your vehicle has an Anti-lock BrakeSystem (ABS).
ABS (Anti-lock Brake System) helps to prevent the wheels from lockingup and skidding during hard braking,
allowing you to retain steering
control.
When the front tires skid, you lose steering control; the vehicle
continues straight ahead even
though you turn the steering wheel.
The ABS helps to prevent lock-up and helps you retain steering control
by pumping the brakes rapidly; much
faster than a person can do it. You should never pump the
brake pedal, this defeats the
purpose of the ABS. Let the ABS
work for you by always keeping firm, steady pressure on the brake pedal
as you steer away from the hazard.
This is sometimes referred to as
"stomp and steer."
You will feel a pulsation in the brake
pedal when the ABS activates, and
you may hear some noise. This is normal, it is the ABS rapidly
pumping the brakes.
Activation varies with the amount of traction your tires have. On dry
pavement, you will need to press on
the brake pedal very hard before youactivate the ABS. However, you may
feel the ABS activate immediately if
you are trying to stop on snow or ice.
DrivingProCarManuals.comMain Menu Table of Contents s t
Page 149 of 272

The Braking System
Important Safety Reminders
ABS does not reduce the time or distance it takes to stop the
vehicle, it only helps with steering control during braking. You should
always maintain a safe following distance from other vehicles.
ABS will not prevent a skid that results from changing direction
abruptly, such as trying to take a
corner too fast or making a sudden
lane change. Always drive at a safe,
prudent speed for the road and
weather conditions.
ABS cannot prevent a loss of stability. Always steer moderately
when you are braking hard. Severe or sharp steering wheel movement
can still cause your vehicle to veer
into oncoming traffic or off the road. A vehicle with ABS may require a
longer distance to stop on loose or
uneven surfaces, such as gravel orsnow, than a vehicle without anti-
lock. Slow down and allow a greater
distance between vehicles under
those conditions.
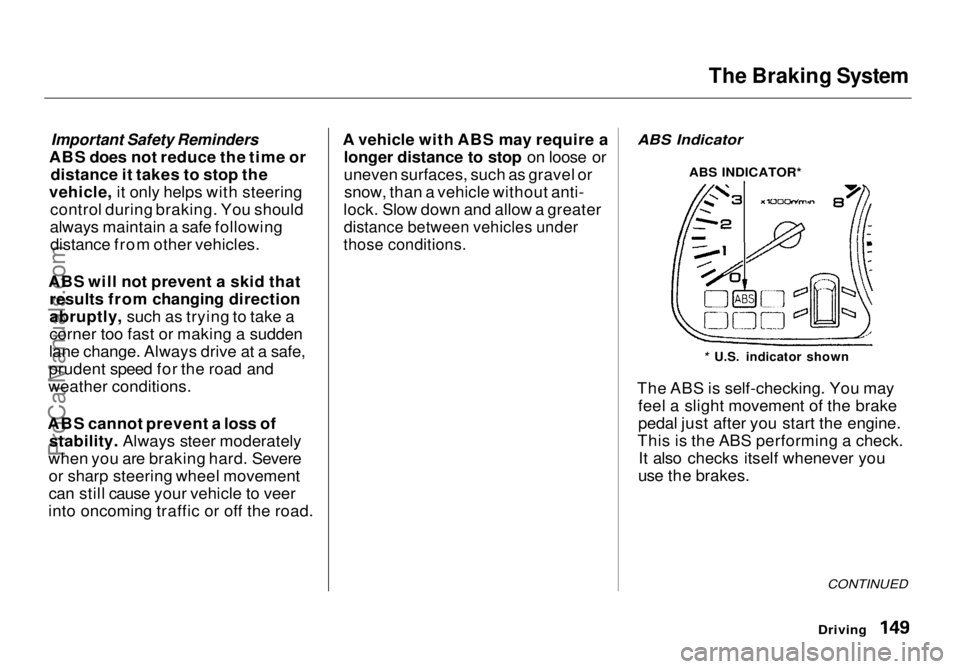
ABS Indicator
The ABS is self-checking. You may feel a slight movement of the brake
pedal just after you start the engine.
This is the ABS performing a check. It also checks itself whenever you
use the brakes.
Driving
CONTINUED
* U.S. indicator shown
ABS INDICATOR*ProCarManuals.comMain Menu Table of Contents s t
Page 150 of 272

The Braking System, Driving in Bad Weather
If anything goes wrong, the ABS
indicator on the instrument panel
comes on (see page 53). This means
the anti-lock function of the braking system has shut down. The brakes
still work like a conventional system
without anti-lock, providing normal stopping ability. You should have the
dealer inspect your vehicle as soon
as possible if this light stays on after
you start the engine, or comes on
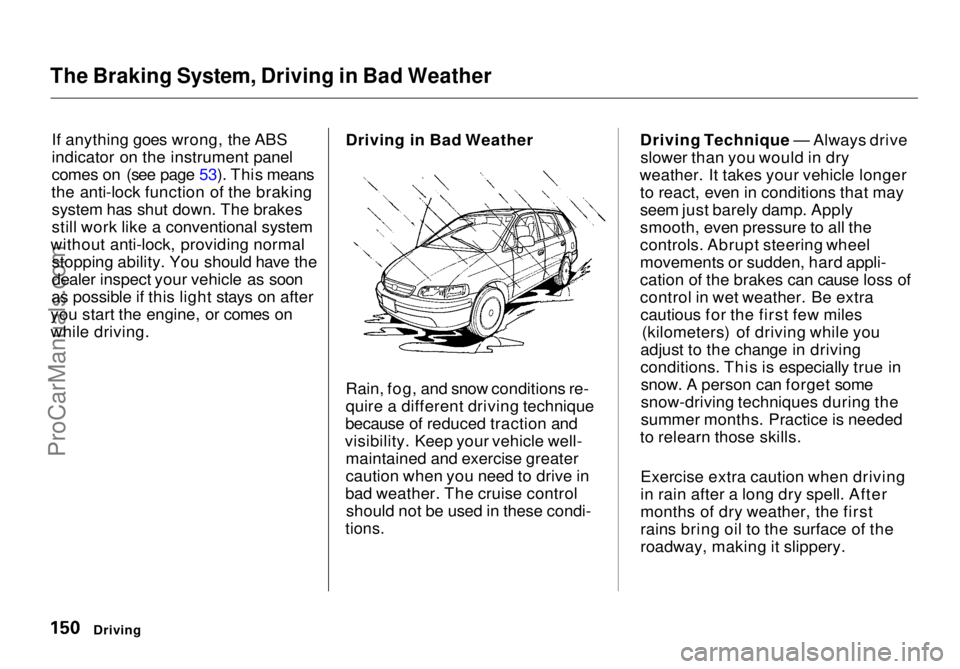
while driving. Driving in Bad Weather
Rain, fog, and snow conditions re-
quire a different driving technique
because of reduced traction and
visibility. Keep your vehicle well- maintained and exercise greater
caution when you need to drive in
bad weather. The cruise control should not be used in these condi-
tions.
Driving Technique — Always drive
slower than you would in dry
weather. It takes your vehicle longer to react, even in conditions that may
seem just barely damp. Apply
smooth, even pressure to all the
controls. Abrupt steering wheel
movements or sudden, hard appli-
cation of the brakes can cause loss of
control in wet weather. Be extracautious for the first few miles (kilometers) of driving while you
adjust to the change in driving
conditions. This is especially true in snow. A person can forget some
snow-driving techniques during the
summer months. Practice is needed
to relearn those skills.
Exercise extra caution when driving
in rain after a long dry spell. After
months of dry weather, the first
rains bring oil to the surface of the
roadway, making it slippery.
DrivingProCarManuals.comMain Menu Table of Contents s t
Page 190 of 272
Wiper Blades
WIPER ARMS
Check the condition of the wiper
blades at least every six months. Look for signs of cracking in the
rubber, or areas that are getting
hard. Replace the blades if you find
these signs, or they leave streaks and unwiped areas when used.
To replace the front wiper blades:
1. Raise the wiper arm off the windshield. LOCK TAB
2. Disconnect the blade assembly from the wiper arm by pushing inthe lock tab. Hold it in while you
push the blade assembly toward
the base of the arm.
BLADE
3. Remove the blade from its holder by grasping the tabbed end of the
blade. Pull firmly until the tabscome out of the holder.
CONTINUED
MaintenanceProCarManuals.comMain Menu Table of Contents s t