Page 158 of 272

Maintenance
This section explains why it is important to keep your vehicle well
maintained and to follow basic
maintenance safety precautions.
This section also includes Maintenance Schedules for normaldriving and severe driving conditions,
a Maintenance Record, and instruc-
tions for simple maintenance tasks
you may want to take care of
yourself.
If you have the skills and tools to per-
form more complex maintenance tasks on your Honda, you may want
to purchase the Service Manual. See
page 235 for information on how to obtain a copy, or see your Honda
dealer.
Maintenance Safety....................... 160
Important Safety Precautions.. 161
Maintenance Schedule.................. 162
Required Maintenance Record.... 169 Owner Maintenance Checks........ 171
Fluid Locations............................... 172
Engine Oil....................................... 173 Adding Oil................................... 173Recommended Oil..................... 173
Synthetic Oil............................... 174
Additives..................................... 175
Changing the Oil and Filter...... 175
Cooling System.............................. 177
Adding Engine Coolant............. 177Replacing Engine Coolant........ 179
Windshield Washers..................... 181
Automatic Transmission Fluid..... 182
Brake Fluid..................................... 183
Brake System............................. 183
Power Steering............................... 184
Air Cleaner Element...................... 185 Spark Plugs..................................... 187
Replacement............................... 187
Specifications............................. 188
Battery............................................ 189
Wiper Blades.................................. 191 Air Conditioning System............... 194
Drive Belts...................................... 195
Timing Belt..................................... 195
Tires................................................ 196 Inflation....................................... 196
Inspection................................... 198
Maintenance............................... 198
Tire Rotation.............................. 199
Replacing Tires and Wheels .... 199
Wheels and Tires....................... 200
Winter Driving........................... 200
Snow Tires.............................. 201
Tire Chains............................. 201
Lights.............................................. 202 Headlight Aiming...................... 204
Replacing Bulbs......................... 206
Storing Your Vehicle..................... 211
MaintenanceProCarManuals.comMain Menu s t
Page 170 of 272
Owner Maintenance Checks
You should check the following items at the specified intervals. If
you are unsure of how to perform any check, turn to the page given. Engine oil level — Check every
time you fill the fuel tank. See
page 131.
Engine coolant level — Check the
radiator reserve tank every time
you fill the fuel tank. See page 132.
Windshield washer fluid — Check the level in the reservoir monthly.If weather conditions cause you to
use the washers frequently, check
the reservoir each time you stop
for fuel. See page 181.
Automatic transmission — Check the fluid level monthly. See page
182.
Brakes — Check the fluid level
monthly. See page 183. Tires — Check the tire pressure
monthly. Examine the tread for
wear and foreign objects. See page 196. Lights — Check the operation of
the headlights, parking lights,
taillights, high-mount brake light,
turn signals, brake lights, and
license plate lights monthly. See
page 202.
MaintenanceProCarManuals.comMain Menu Table of Contents s t
Page 202 of 272
Lights
Check the following:
Headlights (low and high beam)
Parking lights
Taillights Brake lights
High-mount brake light Turn signals
Back-up lights
Hazard light function
License plate light
Side marker lights
Daytime running lights (Canadian models)
If you find any bulbs are burned out,
replace them as soon as possible.
Refer to the chart on page 249 to determine what type of replacement
bulb is needed.
Maintenance
STOP/TAILLIGHTS/
BACK-UP/TURN SIGNAL/
SIDE MARKER LIGHTS
LICENCSE PLATE LIGHTHIGH-MOUNT BRAKE LIGHTProCarManuals.comMain Menu Table of Contents s t
Page 210 of 272
Storing Your Vehicle
If you need to park your vehicle for
an extended period (more than one
month), there are several things you
should do to prepare it for storage.
Proper preparation helps prevent
deterioration and makes it easier to
get your vehicle back on the road. If
possible, store your vehicle indoors.
Fill the fuel tank.
Change the engine oil and filter(see page 175 ). Wash and dry the exterior
completely.
Clean the interior. Make sure the
carpeting, floor mats, etc. are
completely dry. Leave the parking brake off. Put
the transmission in Park. Block the rear wheels. If the vehicle is to be stored for a
longer period, it should be supported on jackstands so the
tires are off the ground.
Leave one window open slightly (if
the vehicle is being stored
indoors).
Disconnect the battery.
Support the front and rear wiper
blade arms with a folded towel or rag so they do not touch the
windshield.
To minimize sticking, apply a
silicone spray lubricant to all door
and trunk seals. Also, apply a body
wax to the painted surfaces that mate with the door and trunk seals. Cover the vehicle with a
"breathable" vehicle cover, one
made from a porous material such as cotton. Nonporous materials,
such as plastic sheeting, trap
moisture, which can damage the
paint. If possible, run the engine for a
while periodically (preferably once a month).
If you store your vehicle for 12
months or longer, have your Honda dealer perform the inspections called
for in the 24 months/30,000 miles (48,000 km) maintenance schedule
(Normal Conditions) as soon as you
take it out of storage (see page 164 ).
The replacements called for in the maintenance schedule are not
needed unless the vehicle has
actually reached that time or mileage.
MaintenanceProCarManuals.comMain Menu Table of Contents s t
Page 220 of 272
Changing a Flat Tire
If you have a flat tire while driving,
stop in a safe place to change it.
Stopping in traffic or on the shoulder of a busy road is dangerous. Drive
slowly along the shoulder until you
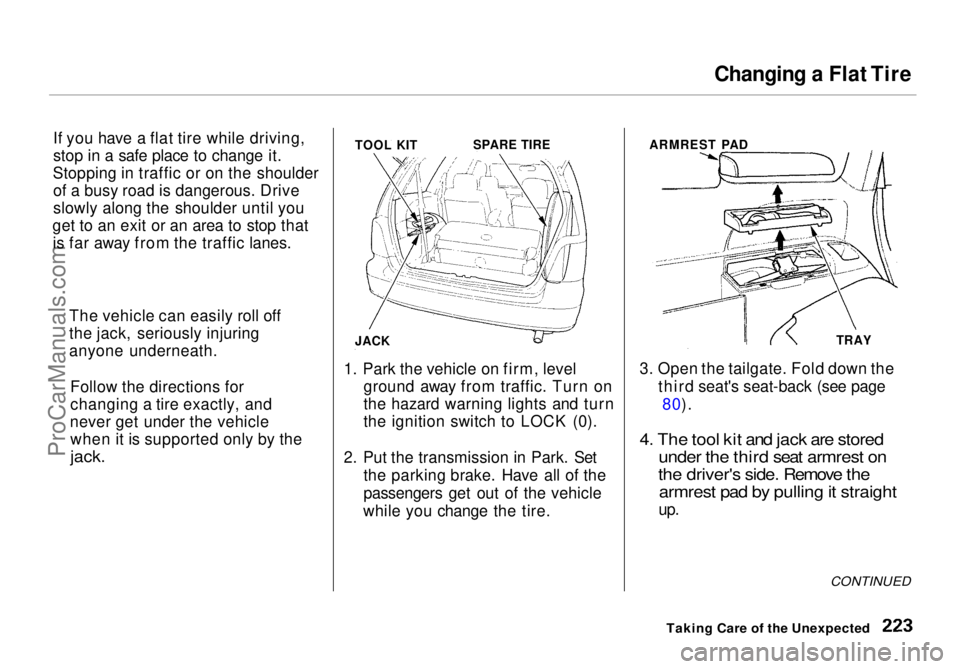
get to an exit or an area to stop that is far away from the traffic lanes. TOOL KIT
SPARE TIRE
JACK
1. Park the vehicle on firm, level ground away from traffic. Turn on
the hazard warning lights and turn
the ignition
switch to LOCK (0).
2. Put the transmission in Park. Set the parking brake. Have all of the
passengers get out of the vehicle
while you change the tire. ARMREST PAD
TRAY
3. Open the tailgate. Fold down the third seat's seat-back (see page80).
4. The tool kit and jack are stored under the third seat armrest on
the driver's side. Remove the armrest pad by pulling it straight
up.
CONTINUED
Taking Care of the Unexpected
The vehicle can easily roll off
the jack, seriously injuring
anyone underneath.
Follow the directions for
changing a tire exactly, and
never get under the vehicle when it is supported only by the
jack.ProCarManuals.comMain Menu Table of Contents s t
Page 227 of 272
If Your Engine Won't Start, Jump Starting
The Starter
Operates Normally
In this case, the starter motor's
speed sounds normal, or even faster
than normal, when you turn the
ignition switch to START (III), but
the engine does not run. Are you using the proper startingprocedure? Refer to Starting the
Engine on page 141.
Do you have fuel? Turn the
ignition switch to ON (II) for a
minute and watch the fuel gauge.
The low fuel level warning light may not be working, so you were
not reminded to fill the tank.
There may be an electrical problem, such as no power to the
fuel pump. Check all the fuses (see page 242).
If you find nothing wrong, you will
need a qualified technician to find
the problem. See Towing on page
244.
Jump Starting
If your vehicle's battery has rundown, you may be able to start the
engine by using a booster battery.
Although this seems like a simple procedure, you should take several
precautions.
You cannot start a Honda by pushing or pulling it. To jump start your vehicle, follow
these directions closely:
1. Open the hood and check the physical condition of the battery(see page 189 ). In very cold
weather, check the condition of the electrolyte. If it seems slushyor like ice, do not try jump starting
until it thaws.
If a battery sits in extreme cold, the electrolyte inside can freeze.
Attempting to jump start with a frozen battery can cause it to rupture.
2. Turn off all the electrical acces- sories: heater, A/C, stereo system,
lights, etc.
Put the transmission in Neutral or
Park and set the parking brake.
Taking Care of the Unexpected
A battery can explode if you do
not follow the correct procedure,
seriously injuring anyone nearby.
Keep all sparks, open flames,
and smoking materials away
from the battery.
NOTICEProCarManuals.comMain Menu Table of Contents s t
Page 234 of 272
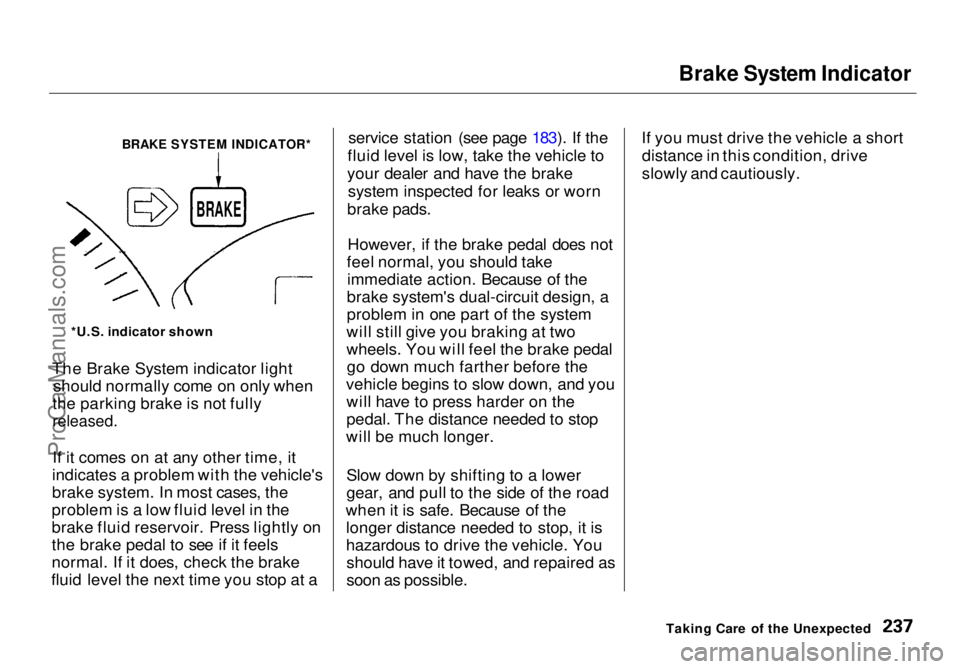
Brake System Indicator
The Brake System indicator light should normally come on only when
the parking brake is not fully
released.
If it comes on at any other time, it
indicates a problem with the vehicle's
brake system. In most cases, the
problem is a low fluid level in the
brake fluid reservoir. Press lightly on
the brake pedal to see if it feels
normal. If it does, check the brake
fluid level the next time you stop at a service station (see page 183). If the
fluid level is low, take the vehicle to
your dealer and have the brake system inspected for leaks or worn
brake pads.
However, if the brake pedal does not
feel normal, you should take immediate action. Because of the
brake system's dual-circuit design, a
problem in one part of the system
will still give you braking at two
wheels. You will feel the brake pedal go down much farther before the
vehicle begins to slow down, and you will have to press harder on the
pedal. The distance needed to stop
will be much longer.
Slow down by shifting to a lower
gear, and pull to the side of the road
when it is safe. Because of the longer distance needed to stop, it is
hazardous to drive the vehicle. Youshould have it towed, and repaired as
soon as possible. If you must drive the vehicle a short
distance in this condition, drive
slowly and cautiously.
Taking Care of the Unexpected
BRAKE SYSTEM INDICATOR*
*U.S. indicator shown
BRAKEProCarManuals.comMain Menu Table of Contents s t
Page 246 of 272
Specifications
Technical Information
NOTE:
Replacement of the high-mount brake light should be done by your
dealer.
page 243
page 242 page 188ProCarManuals.comMain Menu Table of Contents s t