1998 HONDA ODYSSEY change time
[x] Cancel search: change timePage 18 of 272
Protecting Adults
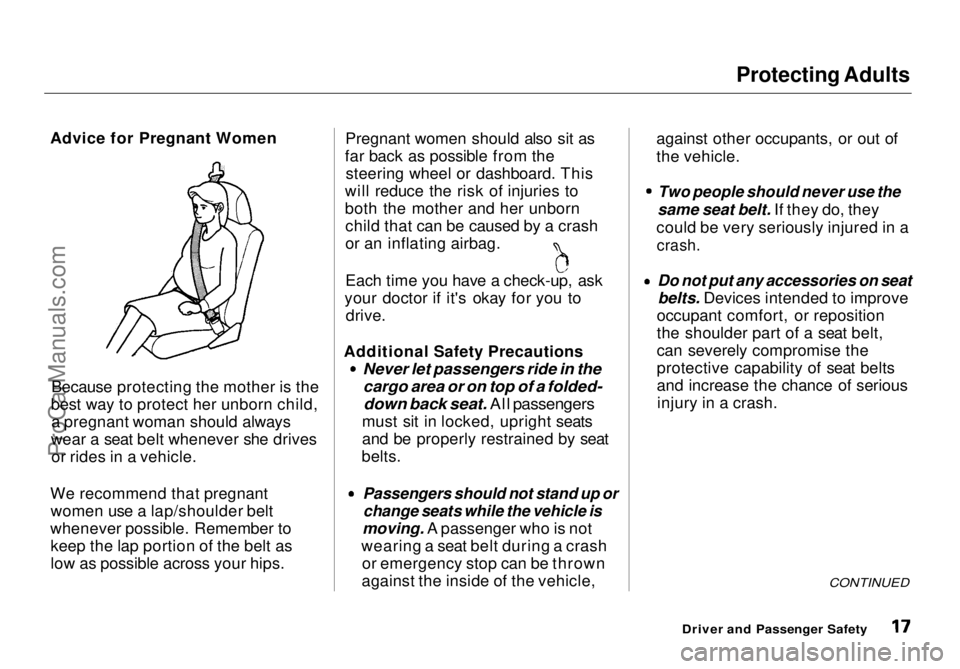
Advice for Pregnant Women
Because protecting the mother is the
best way to protect her unborn child, a pregnant woman should always
wear a seat belt whenever she drives or rides in a vehicle.
We recommend that pregnant women use a lap/shoulder belt
whenever possible. Remember to keep the lap portion of the belt as
low as possible across your hips. Pregnant women should also sit as
far back as possible from the steering wheel or dashboard. This
will reduce the risk of injuries to
both the mother and her unborn child that can be caused by a crash
or an inflating airbag. Each time you have a check-up, ask
your doctor if it's okay for you to drive.
Additional Safety Precautions
Never let passengers ride in the
cargo area or on top of a folded-
down back seat. All passengers
must sit in locked, upright seats
and be properly restrained by seat
belts.
Passengers should not stand up or
change seats while the vehicle is
moving. A passenger who is not
wearing a seat belt during a crash or emergency stop can be thrown
against the inside of the vehicle, against other occupants, or out of
the vehicle.
Two people should never use the
same seat belt. If they do, they
could be very seriously injured in a
crash.
Do not put any accessories on seat
belts. Devices intended to improve
occupant comfort, or reposition
the shoulder part of a seat belt,
can severely compromise the
protective capability of seat belts
and increase the chance of serious injury in a crash.
CONTINUED
Driver and Passenger SafetyProCarManuals.comMain Menu Table of Contents s t
Page 54 of 272

Indicator Lights
U.S.
Anti-lock Brake System
(ABS) Indicator
This light normally comes on when you turn the ignition switch ON (II) and goes off after the engine starts.
If it comes on at any other time,
there is a problem in the ABS. If this
happens, take the vehicle to your dealer to have it checked. With the
light on, your vehicle still has normal
braking ability but no anti-lock. Turn Signal and
Hazard Warning
Indicators
The left or right turn signal light blinks when you signal a lane changeor turn. If the light does not blink or
blinks rapidly, it usually means one of the turn signal bulbs is burned out (see page 207). Replace the bulb as
soon as possible, since other drivers
cannot see that you are signalling.
When you turn on the Hazard
Warning switch, both turn signal lights blink. All turn signals on theoutside of the vehicle should flash. Door and Brake Lamp Monitor
The appropriate light comes on in this display if the tailgate or any dooris not closed tightly. If a brake lightdoes not work, the BRAKE LAMP
indicator comes on when you push
the brake pedal with the ignition switch ON (II).
A burned out brake light is a hazard when drivers behind you cannot tell
you are braking. Have your brakelights repaired right away.
All the lights in the monitor display come on for a few seconds when you
turn the ignition switch ON (II).
Instruments and Controls
BRAKE LAMP
INDICATOR
ABS
CanadaProCarManuals.comMain Menu Table of Contents s t
Page 57 of 272
Gauges
The gauge does not stay at the same fuel level reading after you turn off
the ignition. When you add fuel, the
gauge slowly changes to the new
reading after you turn the ignitionswitch back ON (II).
Maintenance Required
Indicator
This indicator reminds you that it is time to take your vehicle in for sched-
uled maintenance.Refer to the Maintenance Schedules
for Normal and Severe Driving Conditions on pages 164 — 168 .
For the first 6,000 miles (9,600 km)
after the Maintenance Required
Indicator is reset, it will come on for
two seconds when you turn the
ignition switch ON (II).
Between 6,000 miles (9,600 km) and
7,500 miles (12,000 km) this
indicator will light for two seconds
when you first turn the ignition switch ON (II), and then flash for
ten seconds.
If you exceed 7,500 miles (12,000
km) without having the scheduled
maintenance performed, this
indicator will remain on as a constant
reminder.
Your dealer will reset this indicator after completing the scheduled
maintenance. If this maintenance is done by someone other than your
Honda dealer, reset the indicator as
follows.
1. Turn off the engine.
2. Press and hold the select/reset button in the instrument panel,
then turn the ignition switch ON
(II).
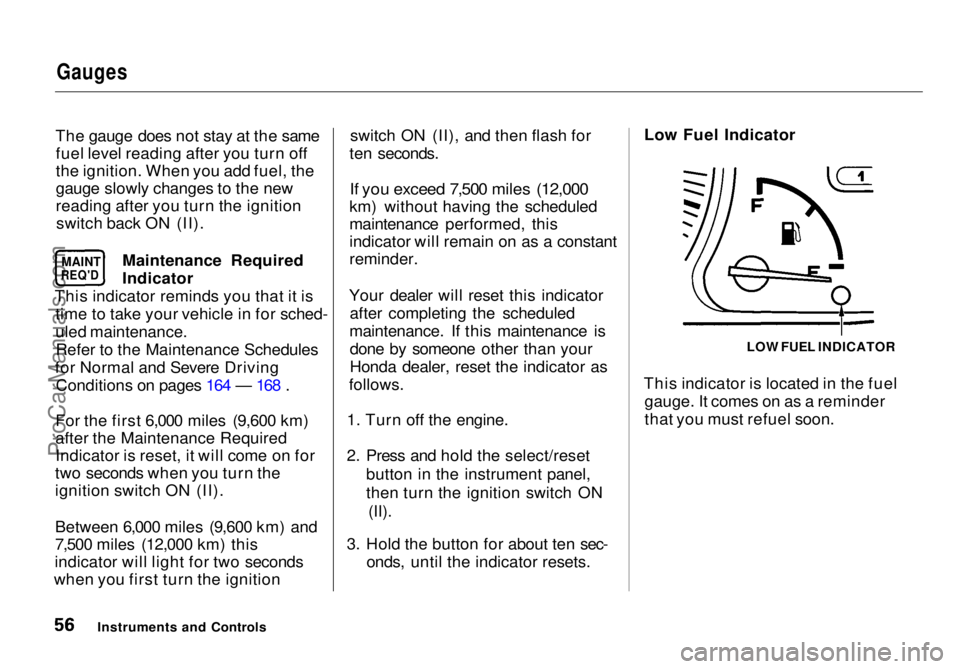
3. Hold the button for about ten sec- onds, until the indicator resets. Low Fuel Indicator
This indicator is located in the fuel gauge. It comes on as a reminder
that you must refuel soon.
Instruments and Controls LOW FUEL INDICATOR
MAINT
REQ'DProCarManuals.comMain Menu Table of Contents s t
Page 59 of 272
Controls Near the Steering Wheel
Headlights
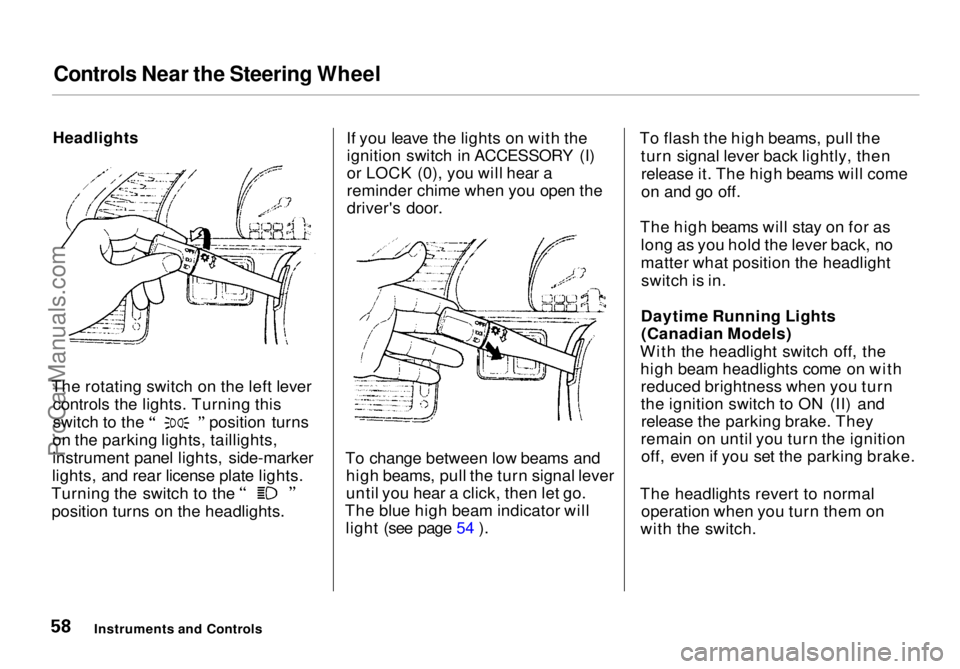
The rotating switch on the left lever controls the lights. Turning this switch to the position turns
on the parking lights, taillights,
instrument panel lights, side-marker
lights, and rear license plate lights. Turning the switch to the
position turns on the headlights. If you leave the lights on with the
ignition switch in ACCESSORY (I)
or LOCK (0), you will hear a
reminder chime when you open the
driver's door.
To change between low beams and high beams, pull the turn signal lever
until you hear a click, then let go.
The blue high beam indicator will light (see page 54 ). To flash the high beams, pull the
turn signal lever back lightly, thenrelease it. The high beams will come
on and go off.
The high beams will stay on for as long as you hold the lever back, no
matter what position the headlightswitch is in.
Daytime Running Lights (Canadian Models)
With the headlight switch off, the high beam headlights come on withreduced brightness when you turn
the ignition switch to ON (II) andrelease the parking brake. They
remain on until you turn the ignition off, even if you set the parking brake.
The headlights revert to normal operation when you turn them on
with the switch.
Instruments and ControlsProCarManuals.comMain Menu Table of Contents s t
Page 69 of 272

Keys and Locks
Immobilizer System
The Immobilizer System protects
your vehicle from theft. A properly- coded master or valet key must be
used in the ignition switch for the
engine to start. If an improperly-
coded key (or other device) is used,
the engine's starting circuit is
disabled.
When you turn the ignition switch to ON (II), the Immobilizer System
indicator should come on for a few seconds, then go out. If the indicator
starts to blink, it means the system
does not recognize the coding of the
key. Turn the ignition switch to LOCK (0), remove the key, reinsert
it, and turn the switch to ON (II)
again.
If the system repeatedly does not
recognize the coding of your key,
contact your Honda dealer.
This indicator will also blink several times when you turn the ignitionswitch from ON (II) to ACCESSORY (I) or LOCK (0).
The system may not recognize your key's coding if the key is in contact
with a key from another immobilizer system. If you have a key from
another vehicle's immobilizer system,
keep it separate.
Do not attempt to alter this system
or add other devices to it. Electrical
problems could result that may make
your vehicle undriveable.
If you have lost your key and you
cannot start the engine, contact your
Honda dealer. As required by the FCC:
This device complies with Part 15 of the
FCC rules. Operation is subject to the
following two conditions: (1) This device
may not cause harmful interference, and (2) this device must accept any
interference received, including interference that may cause undesired operation.
Changes or modifications not expressly
approved by the party responsible for compliance could void the user's
authority to operate the equipment.
Instruments and ControlsProCarManuals.comMain Menu Table of Contents s t
Page 149 of 272
The Braking System
Important Safety Reminders
ABS does not reduce the time or distance it takes to stop the
vehicle, it only helps with steering control during braking. You should
always maintain a safe following distance from other vehicles.
ABS will not prevent a skid that results from changing direction
abruptly, such as trying to take a
corner too fast or making a sudden
lane change. Always drive at a safe,
prudent speed for the road and
weather conditions.
ABS cannot prevent a loss of stability. Always steer moderately
when you are braking hard. Severe or sharp steering wheel movement
can still cause your vehicle to veer
into oncoming traffic or off the road. A vehicle with ABS may require a
longer distance to stop on loose or
uneven surfaces, such as gravel orsnow, than a vehicle without anti-
lock. Slow down and allow a greater
distance between vehicles under
those conditions.
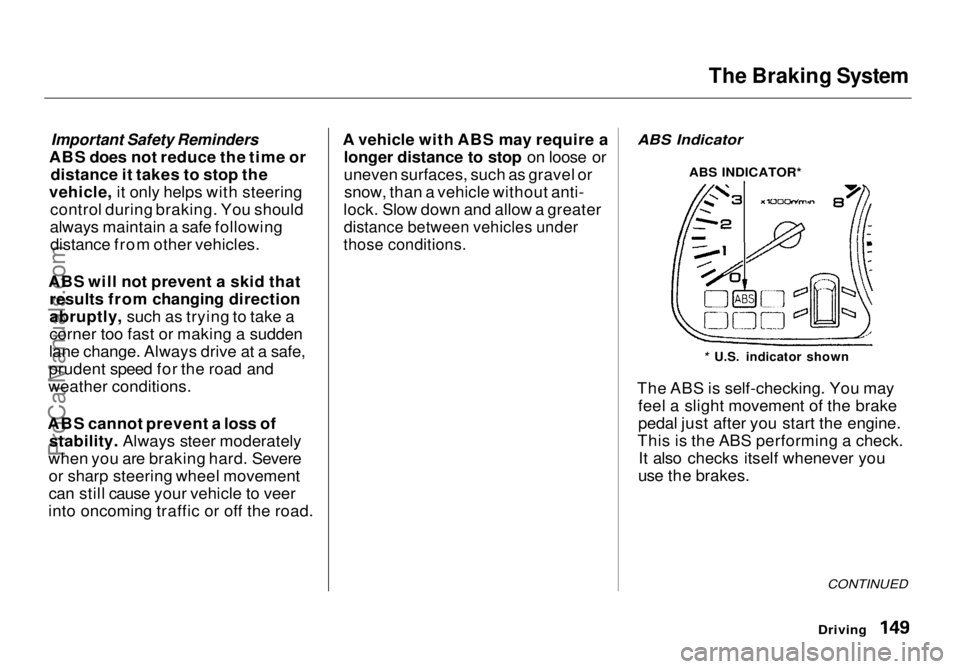
ABS Indicator
The ABS is self-checking. You may feel a slight movement of the brake
pedal just after you start the engine.
This is the ABS performing a check. It also checks itself whenever you
use the brakes.
Driving
CONTINUED
* U.S. indicator shown
ABS INDICATOR*ProCarManuals.comMain Menu Table of Contents s t
Page 174 of 272
Engine Oil
Additives Your Honda does not need any oil
additives. Purchasing additives for
the engine or transmission will not
increase your vehicle's performance
or longevity. It only increases the
cost of operating your vehicle. Changing the Oil and Filter
Always change the oil and filter according to the time and distance (miles/kilometers) recommenda-
tions in the maintenance schedule.
The oil and filter collect contami- nants that can damage your engine if
they are not removed regularly.
Changing the oil and filter requires
special tools and access from
underneath the vehicle. The vehicle should be raised on a service station-
type hydraulic lift for this service. Unless you have the knowledge and
proper equipment, you should have
this maintenance done by a skilled
mechanic.
1. Run the engine until it reaches normal operating temperature,
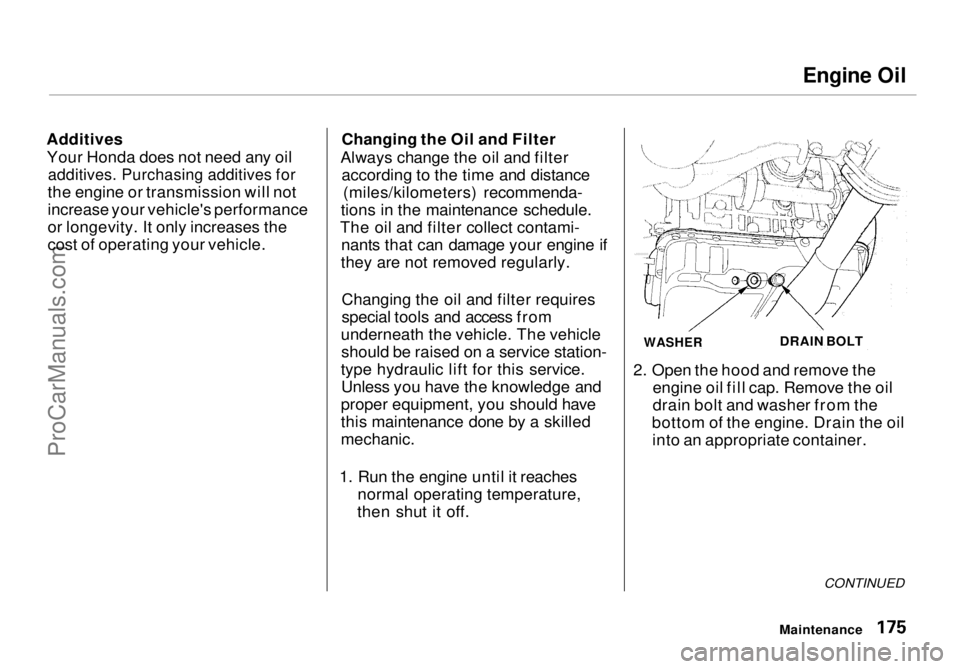
then shut it off. 2. Open the hood and remove the
engine oil fill cap. Remove the oil
drain bolt and washer from the
bottom of the engine. Drain the oil into an appropriate container.
CONTINUED
Maintenance
WASHER
DRAIN BOLTProCarManuals.comMain Menu Table of Contents s t
Page 210 of 272
Storing Your Vehicle
If you need to park your vehicle for
an extended period (more than one
month), there are several things you
should do to prepare it for storage.
Proper preparation helps prevent
deterioration and makes it easier to
get your vehicle back on the road. If
possible, store your vehicle indoors.
Fill the fuel tank.
Change the engine oil and filter(see page 175 ). Wash and dry the exterior
completely.
Clean the interior. Make sure the
carpeting, floor mats, etc. are
completely dry. Leave the parking brake off. Put
the transmission in Park. Block the rear wheels. If the vehicle is to be stored for a
longer period, it should be supported on jackstands so the
tires are off the ground.
Leave one window open slightly (if
the vehicle is being stored
indoors).
Disconnect the battery.
Support the front and rear wiper
blade arms with a folded towel or rag so they do not touch the
windshield.
To minimize sticking, apply a
silicone spray lubricant to all door
and trunk seals. Also, apply a body
wax to the painted surfaces that mate with the door and trunk seals. Cover the vehicle with a
"breathable" vehicle cover, one
made from a porous material such as cotton. Nonporous materials,
such as plastic sheeting, trap
moisture, which can damage the
paint. If possible, run the engine for a
while periodically (preferably once a month).
If you store your vehicle for 12
months or longer, have your Honda dealer perform the inspections called
for in the 24 months/30,000 miles (48,000 km) maintenance schedule
(Normal Conditions) as soon as you
take it out of storage (see page 164 ).
The replacements called for in the maintenance schedule are not
needed unless the vehicle has
actually reached that time or mileage.
MaintenanceProCarManuals.comMain Menu Table of Contents s t