1998 HONDA CIVIC COUPE Electrical
[x] Cancel search: ElectricalPage 45 of 251
Additional Information About Your SRS
SRS Components
Your Supplemental Restraint System (SRS) includes:
Two frontal airbags. The driver'sairbag is stored in the center of
the steering wheel; the front
passenger's airbag is stored in thedashboard. Both are marked
"SRS".
Sensors that can detect a severe
frontal collision. A sophisticated electronic system
that continually monitors thesensors, control unit, the airbag
activators, and all related wiring
when the ignition is ON (II). An indicator light on the
instrument panel to alert you to a
possible problem with the system (see page 45). Emergency backup power in case
your vehicle's electrical system is disconnected in a crash.
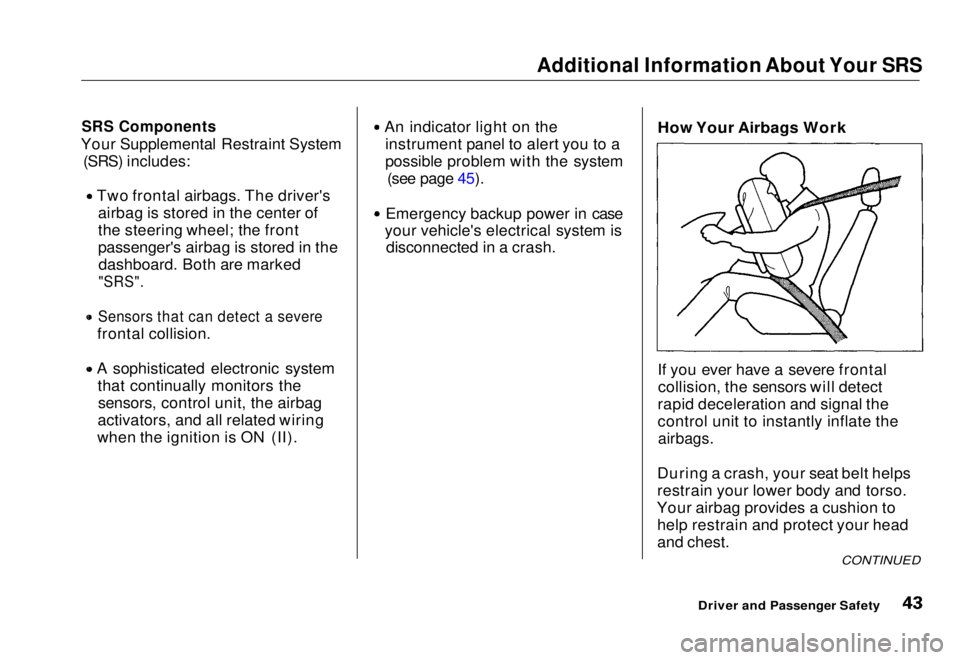
How Your Airbags Work
If you ever have a severe frontal
collision, the sensors will detect
rapid deceleration and signal the
control unit to instantly inflate the
airbags.
During a crash, your seat belt helps
restrain your lower body and torso.
Your airbag provides a cushion to help restrain and protect your head
and chest.
CONTINUED
Driver and Passenger SafetyMain Menu Table of Contents s t
Page 84 of 251
Beverage Holder
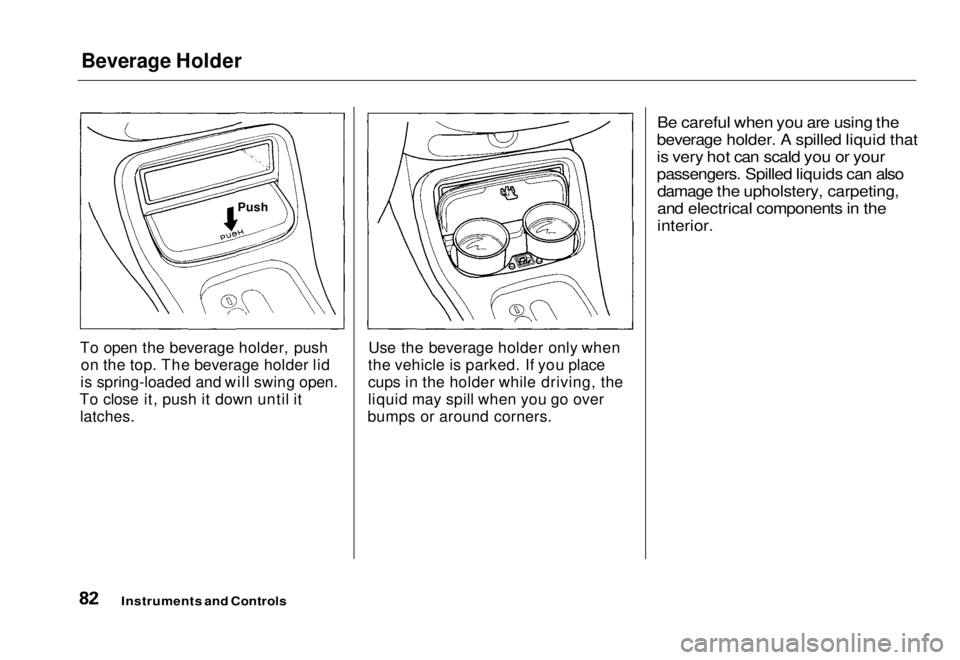
To open the beverage holder, push on the top. The beverage holder lid
is spring-loaded and will swing open.
To close it, push it down until it latches. Use the beverage holder only when
the vehicle is parked. If you place
cups in the holder while driving, the
liquid may spill when you go over
bumps or around corners.
Be careful when you are using the
beverage holder. A spilled liquid that
is very hot can scald you or your
passengers. Spilled liquids can also damage the upholstery, carpeting,
and electrical components in the
interior.
Instruments and Controls
PushMain Menu Table of Contents s t
Page 100 of 251
Audio System
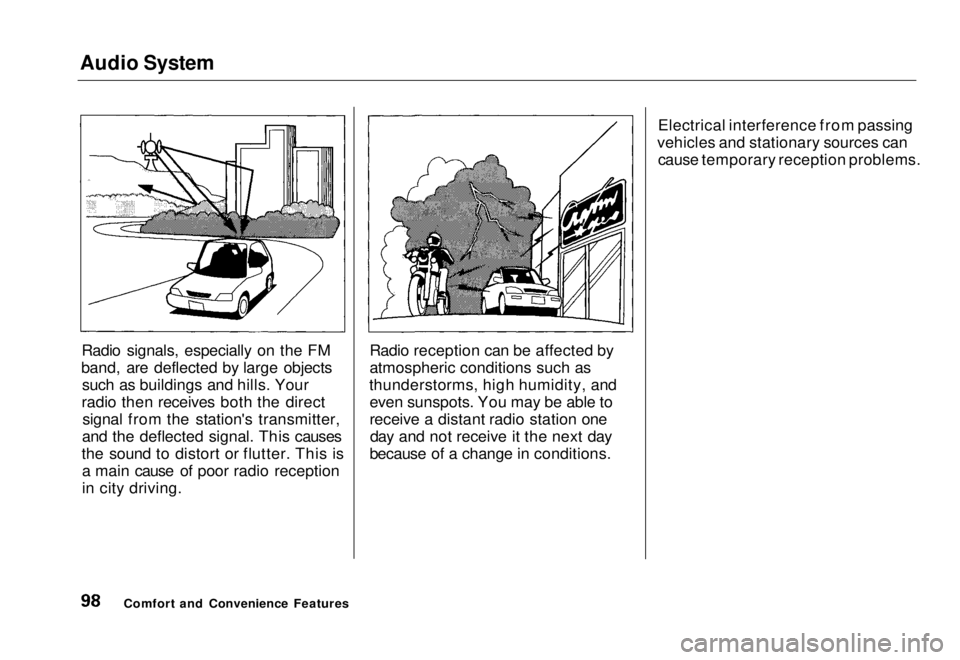
Radio signals, especially on the FM
band, are deflected by large objects such as buildings and hills. Your
radio then receives both the direct signal from the station's transmitter,
and the deflected signal. This causes
the sound to distort or flutter. This is a main cause of poor radio reception
in city driving. Radio reception can be affected by
atmospheric conditions such as
thunderstorms, high humidity, and even sunspots. You may be able to
receive a distant radio station oneday and not receive it the next day
because of a change in conditions. Electrical interference from passing
vehicles and stationary sources can cause temporary reception problems.
Comfort and Convenience FeaturesMain Menu Table of Contents s t
Page 116 of 251
Accessories and Modifications
Modifying your vehicle, or installingsome non-Honda accessories, can
make your vehicle unsafe. Before
you make any modifications or add
any accessories, be sure to read the
following information.
Accessories
Your dealer has Genuine Honda accessories that allow you to
personalize your vehicle. These accessories have been designed and
approved for your vehicle, and are
covered by warranty.
Non-Honda accessories are usually
designed for universal applications.
Although aftermarket accessories may fit on your vehicle, they may not
meet factory specifications, and
could adversely affect your vehicle's
handling and stability. (See "Modifications" on page 115 for
additional information.) When properly installed, car phones,
alarms, two-way radios, and low-
powered audio systems should not
interfere with your vehicle's
computer-controlled systems, such as the SRS and anti-lock brake
system.
However, if electronic accessories
are improperly installed, or exceed
your vehicle's electrical system capacity, they can interfere with the operation of your vehicle, or even
cause the airbags to deploy.
Before installing any accessory:
Make sure the accessory does notobscure any lights, or interfere
with proper vehicle operation or performance.
Be sure electronic accessories do
not overload electrical circuits (see page 225). Have the installer contact your
Honda dealer for assistance before
installing any electronic accessory.
If possible, have your dealer inspect
the final installation.
Before Driving
Improper accessories or
modifications can affect your
vehicle's handling, stability and performance, and cause a
crash in which you can be hurt
or killed.
Follow all instructions in this
owner's manual regarding
accessories and modifications.Main Menu Table of Contents s t
Page 123 of 251
Starting the Engine
1. Apply the parking brake.
2. In cold weather, turn off all electrical accessories to reduce
the drain on the battery.
3. Manual Transmission:
Push the clutch pedal down all the
way. START (III) does not
function unless the clutch pedal is
depressed.
Automatic Transmission (Including
CVT):
Make sure the shift lever is in Park. Press on the brake pedal.
4. Without touching the accelerator
pedal, turn the ignition key to the
START (III) position. If the enginedoes not start right away, do not
hold the key in START (III) for
more than 15 seconds at a time.
Pause for at least 10 seconds
before trying again.
5. If the engine does not start within
15 seconds, or starts but stalls
right away, repeat step 4 with the accelerator pedal pressed half-way
down. If the engine starts, release
pressure on the accelerator pedal so the engine does not race.
6. If the engine still does not start, press the accelerator pedal all the
way down and hold it there while starting in order to clear flooding.
As before, keep the ignition key in the START (III) position for no
more than 15 seconds. Return to step 5 if the engine does not start.
If it starts, lift your foot off theaccelerator pedal so the enginedoes not race.
Starting in Cold Weather at High
Altitud
e (Above 8,000 feet/
2,40
0 meters)
An engine is harder to start in cold
weather. The thinner air found athigh altitude above 8,000 feet (2,400 meters) adds to the problem.
Use the following procedure:
1. Turn off all electrical accessories to reduce the drain on the battery.
2. Push the accelerator pedal half- way to the floor and hold it there
while starting the engine. Do not
hold the ignition key in START(III) for more than 15 seconds.
When the engine starts, release the accelerator pedal gradually as
th
e
engine speeds up and smooths
out.
3. I
f the engine fails to start in step 2,
push the accelerator pedal to the
floor and hold it there while you
try to start the engine for no more
than 15 seconds. If the engine does not start, return to step 2.
DrivingMain Menu Table of Contents s t
Page 175 of 251
Battery
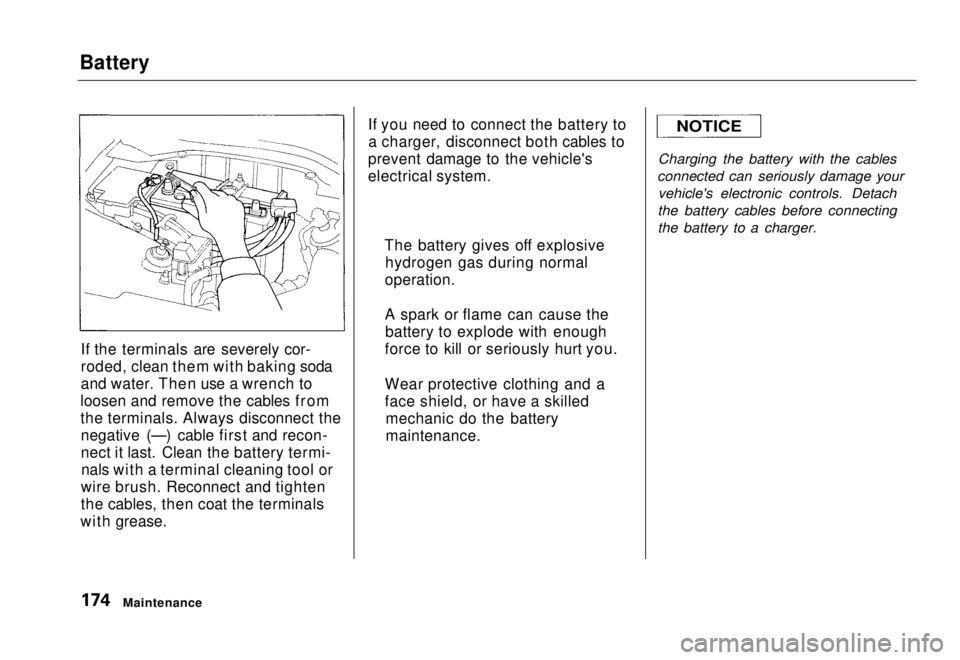
If the terminals are severely cor-
roded, clean them with baking soda
and water. Then use a wrench to
loosen and remove the cables from
the terminals. Always disconnect the negative (—) cable first and recon-
nect it last. Clean the battery termi-nals with a terminal cleaning tool or
wire brush. Reconnect and tighten
the cables, then coat the terminals
with grease. If you need to connect the battery to
a charger, disconnect both cables to
prevent damage to the vehicle's
electrical system.
Charging the battery with the cables
connected can seriously damage your vehicle's electronic controls. Detach
the battery cables before connecting
the battery to a charger.
Maintenance
The battery gives off explosive
hydrogen gas during normal
operation.
A spark or flame can cause the battery to explode with enough
force to kill or seriously hurt you.
Wear protective clothing and a
face shield, or have a skilled mechanic do the battery
maintenance.
NOTICEMain Menu Table of Contents s t
Page 191 of 251
Lights
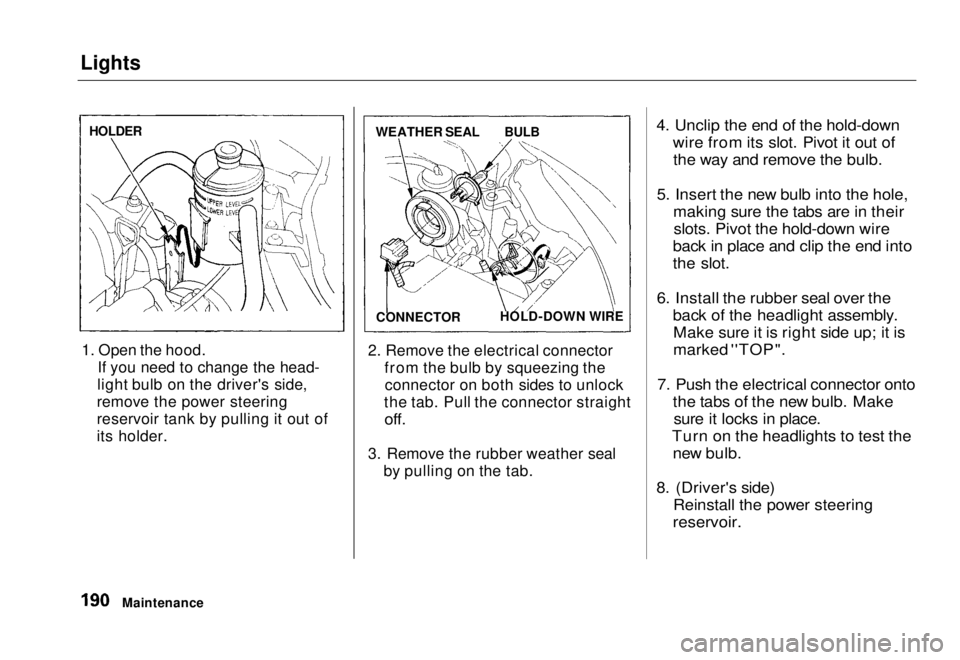
1. Open the hood. If you need to change the head-
light bulb on the driver's side,
remove the power steering
reservoir tank by pulling it out of
its holder. 2. Remove the electrical connector
from the bulb by squeezing theconnector on both sides to unlock
the tab. Pull the connector straight
off.
3. Remove the rubber weather seal by pulling on the tab.
4. Unclip the end of the hold-down
wire from its slot. Pivot it out ofthe way and remove the bulb.
5. Insert the new bulb into the hole, making sure the tabs are in theirslots. Pivot the hold-down wire
back in place and clip the end into
the slot.
6. Install the rubber seal over the back of the headlight assembly.Make sure it is right side up; it is
marked ''TOP".
7. Push the electrical connector onto the tabs of the new bulb. Makesure it locks in place.
Turn on the headlights to test the new bulb.
8. (Driver's side) Reinstall the power steering
reservoir.
Maintenance
HOLDER
WEATHER SEAL
BULB
CONNECTOR HOLD-DOWN WIREMain Menu Table of Contents s t
Page 212 of 251
If Your Engine Won't Start
Diagnosing why your engine won't
start falls into two areas, depending
on what you hear when you turn the
key to START (III):
You hear nothing, or almostnothing. The engine's starter
motor does not operate at all, or
operates very slowly.
You can hear the starter motor operating normally, or the starter
motor sounds like it is spinning
faster than normal, but the engine does not start up and run. Nothing Happens or the Starter
Motor Operates Very Slowly
When you turn the ignition switch to START (III), you do not hear the
normal noise of the engine trying to
start. You may hear a clicking sound
or series of clicks, or nothing at all.
Check these things:
Check the transmission interlock.
If you have a manual transmission,
the clutch pedal must be pushed
all the way to the floor or the
starter will not operate. With an
automatic transmission, it must be
in Park or Neutral.
Turn the ignition switch to ON (II).
Turn on the headlights and check their brightness. If the headlights
are very dim or don't light at all,
the battery is discharged. See
Jump Starting on page 213.
Turn the ignition switch to START
(III). If the headlights do not dim,
check the condition of the fuses. If
the fuses are OK, there is proba-
bly something wrong with the
electrical circuit for the ignition switch or starter motor. You will
need a qualified technician to determine the problem. (See
Emergency Towing on page 227).
If the headlights dim noticeably or
go out when you try to start the engine, either the battery is dis-
charged or the connections are
corroded. Check the condition of
the battery and terminal connec-
tions (see page 173). You can
then try jump starting the vehicle
from a booster battery (see page 213).
Taking Care of the UnexpectedMain Menu Table of Contents s t