Page 98 of 192
N (Neutral)
With the gearshift in
the N (Neutral)
position, the vehicle
can be started and is
free to roll. Hold the
brake pedal down
while in this position.
(Overdrive Ð column shift without O/D OFF
switch) or D (Overdrive Ð column or console
mounted gearshift with O/D off switch)
The overdrive position
is the normal driving
position for an
automatic overdrive
transaxle. It works the
same way as
(Overdrive) or D
(Drive Ð with the O/D
OFF switchnot
depressed) works, but
shifts to a fourth gear
Ð an overdrive gear Ð
when your vehicle
cruises at a constant speed for any length of time.
This fourth gear will increase your fuel economy
when you travel at cruising speeds.
Overdrive may not be appropriate for certain
terrains. If the transaxle shifts back and forth
between third and fourth gears while you are driving
hilly roads or if your vehicle requires additional
power for climbing hills, shift into D (Drive) or press
the O/D OFF switch (if equipped).
Driving
98
Page 101 of 192

When parking, do not use the gearshift in
place of the parking brake. Always set the
parking brake fully and make sure that the
gearshift is securely latched in Park (P). Turn off
the ignition whenever you leave your vehicle.
Never leave your vehicle unattended while it is
running. If you do not take these precautions, your
vehicle may move unexpectedly and injure
someone.
VEHICLE LOADING
Before loading a vehicle, familiarize yourself with the
following terms:
²Base Curb Weight: Weight of the vehicle
including any standard equipment, fluids,
lubricants, etc. It does not include passengers or
aftermarket equipment.
²Payload: Combined maximum allowable weight
of cargo, passengers and optional equipment. The
payload equals the gross vehicle weight rating
minus base curb weight.
²GVW (Gross Vehicle Weight): Base curb
weight plus payload weight. The GVW is not a
limit or a specification.
²GVWR (Gross Vehicle Weight Rating):
Maximum total weight of the base vehicle,
passengers, optional equipment and cargo. The
GVWR is specific to each vehicle and is listed on
the Safety Compliance Label on the driver's door
pillar.
²GAWR (Gross Axle Weight Rating): Carrying
capacity for each axle system. The GAWR is
specific to each vehicle and is listed on the Safety
Compliance Label on the driver's door pillar.
Driving
101
Page 103 of 192

DRIVING THROUGH WATER
Do not drive quickly through standing water,
especially if the depth is unknown. Traction or brake
capability may be limited and if the ignition system
gets wet, your engine may stall. Water may also
enter your engine's air intake and severely damage
your engine.
If driving through deep or standing water is
unavoidable, proceed very slowly. Never drive
through water that is higher than the bottom of the
hubs (truck)/wheel rims (car).
Once through the water, always try the brakes. Wet
brakes do not stop the vehicle as effectively as dry
brakes. Drying can be improved by moving your
vehicle slowly while applying light pressure on the
brake pedal.
TRAILER TOWING
Your vehicle is classified as a light duty towing
vehicle. The amount of weight you can safely tow
depends on the type of engine you have in your
vehicle. Your vehicle does not come from the factory
fully equipped to tow. No towing packages are
available through Ford or Mercury/Lincoln dealers.
Do not tow a trailer until your vehicle has been
driven at least 800 km (500 miles). If towing with a
station wagon, inflate the rear tires to 35 psi.
Towing a trailer places an additional load on your
vehicle's engine, transaxle, brakes, tires and
suspension. Inspect these components carefully after
towing.
The amount of weight that you can tow depends on
the type of engine in your vehicle. See the following
charts:
Driving
103
Page 106 of 192

Trailer brakes
Electric brakes and manual, automatic or surge-type
brakes are safe if installed properly and adjusted to
the manufacturer's specifications. The trailer brakes
must meet local and Federal regulations.
Do not connect a trailer's hydraulic brake
system directly to your vehicle's brake
system. Your vehicle may not have enough braking
power and your chances of having a collision
greatly increase.
The braking system of the tow vehicle is rated for
operation at the GVWR not GCWR.
Trailer lamps
Trailer lamps are required on most towed vehicles.
Make sure your trailer lamps conform to local and
Federal regulations. See your dealer or trailer rental
agency for proper instructions and equipment for
hooking up trailer lamps.
Driving while you tow
Do not drive faster than 88 km/h (55 mph) when
towing a trailer. Do not drive faster than 72 km/h
(45 mph) with any weight on the trailer while
towing on a hot day or in hilly country.
Speed control may shut off if you are towing on
long, steep grades.
When towing a trailer:
²Use D (Drive) or a lower gear when towing up or
down steep hills. This will eliminate excessive
downshifting and upshifting for optimum fuel
economy and transaxle cooling.
²Anticipate stops and brake gradually.
Driving
106
Page 108 of 192

Towing your vehicle behind another vehicle
At times, you may want to tow your vehicle behind
another vehicle, such as a recreational vehicle, car
or a truck.
Before you have your vehicle towed:
²Release the parking brake.
²Move the gearshift to N (Neutral).
²Turn the key in the ignition to OFF.
²Unlock the steering wheel.
Do not tow your vehicle at a speed faster than 56
km/h (35 mph) or for a distance greater than 80 km
(50 miles), unless the drive wheels are placed on
dollies.
Never use a tow bar that attaches to the
bumper when you tow your vehicle. This
could damage the bumper and cause an accident.
LUGGAGE RACK (IF EQUIPPED)
The rear crossbar can be adjusted to fit the item
being carried. The front crossbar does not move. Do
not load more than 44 kg (100 lbs.) on the luggage
rack.
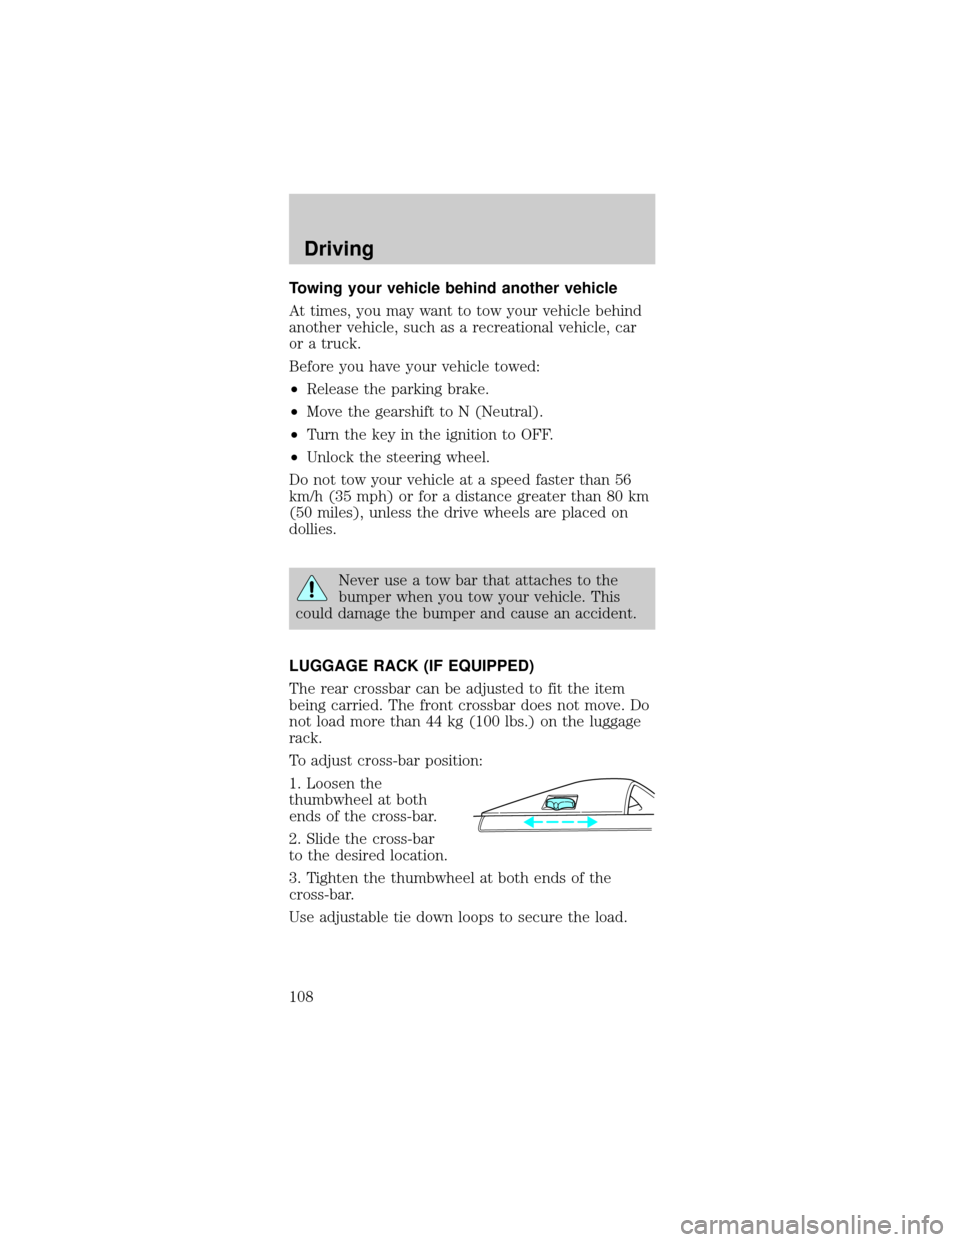
To adjust cross-bar position:
1. Loosen the
thumbwheel at both
ends of the cross-bar.
2. Slide the cross-bar
to the desired location.
3. Tighten the thumbwheel at both ends of the
cross-bar.
Use adjustable tie down loops to secure the load.
Driving
108
Page 111 of 192
Standard fuse amperage rating and color
Fuse rating Color
5 amp Tan
7.5 amp Brown
10 amp Red
15 amp Light blue
20 amp Yellow
20 amp fuse link Light blue
25 amp Natural
30 amp Light green
30 amp fuse link Pink
40 amp fuse link Green
50 amp fuse link Red
60 amp fuse link Yellow
80 amp fuse link Black
100 amp fuse link Dark blue
Passenger compartment fuse panel
The fuse panel is located below and to the left of
the steering wheel by the brake pedal. Remove the
panel cover to access the fuses.
To remove a fuse use the fuse puller tool provided
on the fuse panel cover.
RELAY
38
RELAY 37
RELAY 35
RELAY 34RELAY
39
RELAY
36
29
25
21
17
13
9
5
130
26
22
18
14
10
6
227
23
19
15
11
7
332 33
28
24
20
16
12
8
4 31
Roadside emergencies
111
Page 112 of 192
The fuses are coded as follows.
Fuse/
Relay
LocationFuse
Amp
RatingDescription
1 Ð Not Used
2 5A Instrument Illumination
3 10A Left Low Beam Headlamp
4 10A Right Low Beam Headlamp
5 5A Brake Shift Interlock, Rear
Defrost
6 15A MLPS Switch, Backup Lamps,
Speed Control
7 10A MLPS Switch, Starter Relay
8 5A Power Antenna, RCU, GEM
9 10A ABS
10 20A PCM Relay, Ignition Coil, PATS,
Radio
11 5A Instrument Cluster
12 5A Instrument Cluster, Autolamps,
Transmission Control Switch,
ICP, GEM
13 5A Air Bag, Blower Motor, EATC
14 5A Air Suspension
15 10A Multi-Function Switch (Turn
Signal)
16 Ð Not Used
17 30A Front Wiper/Washer
18 5A Headlamp Switch
19 15A Rear Wiper/Washer
20 5A ICP, RAP, Phone
21 20A Cigar Lighter
22 5A Power Mirrors, Power Antenna,
Decklid Lamps, Autolamp
23 5A GEM, RAP, PATS
Roadside emergencies
112
Page 115 of 192
Fuse/
Relay
LocationFuse
Amp
RatingDescription
7 40A** Rear Window Defrost Relay
8 30A** Thermactor Air ByPass
Solenoid, EAM Solid State
Relay
9 40A** High Speed Cooling Fan Relay,
Low Speed Cooling Fan Relay
10 20A** Fuel Pump Relay
11 40A** Blower Motor Relay
12 20A** Semi-Active Ride Control
Module
13 40A** Anti-Lock Brake Module
14 Ð Not Used
15 15A* Daytime Running Lamps
(DRL) Module
16 10A* Air Bag Diagnostic Monitor
17 20A* Rear Control Unit, CD Changer
18 30A* Anti-Lock Brake Module
19 15A* Horn Relay, Powertrain
Control Module (PCM)
20 15A* Headlamp Switch, Autolamp
Park Relay
21 Ð Not Used
22 30A* Autolamps Relay,
Multi-Function Switch,
Headlamp Switch
23 Ð Blower Motor Relay
24 Ð Starter Relay
25 Ð A/C Clutch Relay
26 30A* Generator/Voltage Regulator
27 10A* A/C Clutch Relay
28 15A* Heated Oxygen Sensors,
Canister Vent
Roadside emergencies
115