Page 5 of 160
SM
L
OFFA/CMAX
A/C
TUNESEEK
12
34AM-FM
ON
OFF
OFF
PASSENGER AIRBAG
Climate control systems
(pg. 17) Auxiliary power point
(pg. 23) Electronic sound system;
refer to Audio Guide
(pg. 24)
Passenger air bag deactivate
switch
(pg. 51)
Instrumentation
5
Page 23 of 160
AUXILIARY POWER POINT
The auxiliary power point is located on the instrument panel. This outlet
should be used in place of the cigarette lighter for optional electrical
accessories.
PASSENGER AIR BAG DEACTIVATE SWITCH
This switch must be used to
deactivate the passenger air bag
whenever a child seat is used in the
right front or center front passenger
seat position. Refer toPassenger
air bag deactivate switchin the
Seating and safety restraints
chapter.
OFFA/CMAX
A/C
TUNESEEK
12
34AM-FM
ON
OFF
OFF
PASSENGER AIRBAG
Controls and features
23
Page 31 of 160
POWER DOOR LOCKS (IF EQUIPPED)
Press the top of the control to
unlock all doors and the bottom to
lock all doors.
POWER SIDE VIEW MIRRORS (IF EQUIPPED)
To adjust your mirrors:
1. Select
to adjust the left mirror orto adjust the right mirror.
2. Move the control in the direction
you wish to tilt the mirror.
3. Return to the center position to lock mirrors in place.
CENTER CONSOLE (IF EQUIPPED)
Your vehicle may be equipped with a
variety of console features. These
include:
²utility compartment with
cassette/compact disc storage
²auxiliary power point
²cupholders
²coin holder slots
²ashtray
²flip up armrest
UNLOCK
LOCK
Controls and features
31
Page 97 of 160

Fuse/
Relay
LocationFuse
Amp
RatingDescription
11 7.5A Instrument Cluster, Daytime Running Lights
(DRL), RABS Resistor
12 - NOT USED
13 20A Brake Pedal Position Switch
14 20A or
10A20A: If equipped with Rear Anti-Lock Brake
System (RABS) Module. 10A: If equipped with
4 Wheel Anti-Lock Brake System (4WABS)
Module, 4WABS Main Relay
15 7.5A Instrument Cluster
16 30A Windshield Wiper Motor, Wiper Hi-Lo Relay,
Wiper Run/Park Relay
17 25A Cigar Lighter
18 15A Driver's Unlock Relay, All-Unlock Relay, All-Lock
Relay
19 25A PCM Power Diode
20 7.5A RAP Module, Generic Electronic Module (GEM),
Radio
21 15A Flasher (Hazard)
22 20A Auxiliary Power Socket
23 Ð Not Used
24 7.5A Clutch Pedal Position (CPP) switch, Starter
Interrupt Relay, Anti-Theft
25 7.5A Generic Electronic Module (GEM), Instrument
Cluster
26 10A Battery Saver Relay, Electronic Shift Relay,
Interior Lamp Relay, Power Window Relay,
Electronic Shift Control Module, Dome/Map
Lamp, GEM
27 15A Electric Shift, Backup Lamps, Daytime Running
Lamps (DRL), Transmission Control Switch
28 7.5A Generic Electronic Module (GEM), Radio
Roadside emergencies
97
Page 99 of 160
The high-current fuses are coded as follows:
Fuse/Relay
LocationFuse Amp
RatingDescription
1 50A** I/P Fuse Panel
2 40A** Blower Motor Relay
3 50A** 4 Wheel Anti-Lock Brake System (4WABS)
Module
4 20A** Power Windows
5 50A Ignition Switch, Starter Relay
1 10A* A/C Relay
2 20A* Auxiliary Power Point
3 20A* Electronic Shift Relay and Electronic Shift
Control Module
4 15A* Fog Lamp and Daytime Running Lamps
5 10A* Air Bag Diagnostic Monitor
6 10A* Powertrain Control Module
7 30A* 4 Wheel Anti-lock Brake System (4WABS)
Module
5432112 11 10 9
876 5
432 1
14 15 13
9 6
10 87 5 41
2 3
211
175
MEGAFUSE
11
13 12
14
Roadside emergencies
99
Page 111 of 160

3. Turn off the engine and remove the key.
4. Block the wheels to prevent the vehicle from moving unexpectedly.
Working with the engine on
²Automatic transmission:
1. Set the parking brake and ensure the gearshift is securely latched in P
(Park).
2. Block the wheels to prevent the vehicle from moving unexpectedly.
Do not start your engine with the air cleaner removed and do
not remove it while the engine is running.
²Manual transmission:
1. Set the parking brake, depress the clutch and place the gearshift in N
(Neutral).
2. Block the wheels to prevent the vehicle from moving unexpectedly.
Do not start your engine with the air cleaner removed and do
not remove it while the engine is running.
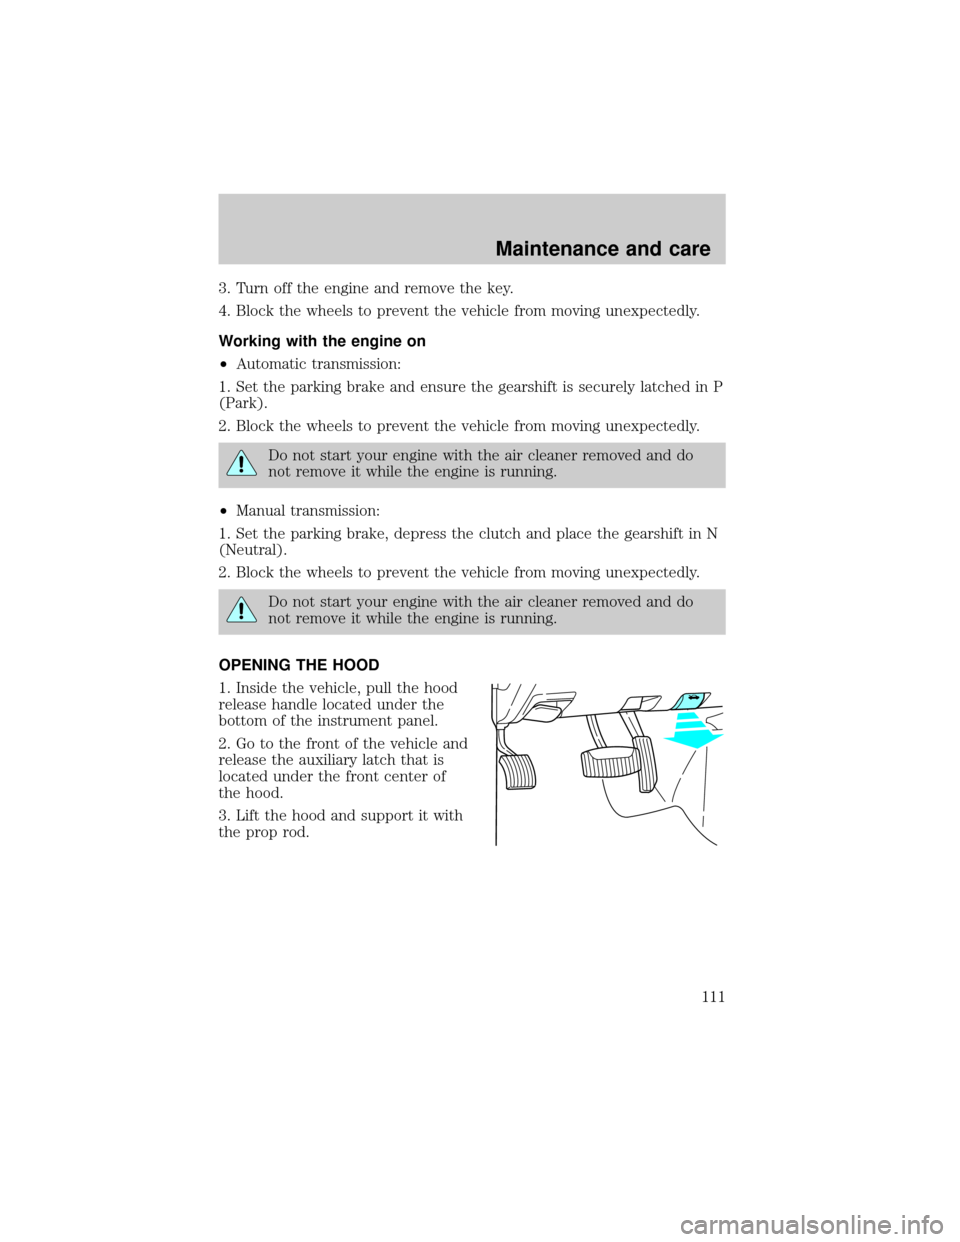
OPENING THE HOOD
1. Inside the vehicle, pull the hood
release handle located under the
bottom of the instrument panel.
2. Go to the front of the vehicle and
release the auxiliary latch that is
located under the front center of
the hood.
3. Lift the hood and support it with
the prop rod.
Maintenance and care
111