1998 FORD EXPLORER light
[x] Cancel search: lightPage 143 of 210

Fuse/Relay
LocationFuse Amp
RatingDescription
2 - NOT USED
3 30A* Heated Backlight
4 15A* Fog Lamps and Daytime Running Lamps
5 10A* Air Bag Diagnostic Monitor
6 10A* Powertrain Control Module
7 30A* 4 Wheel Anti-Lock System (4WABS)
Module
8 15A* Rear Wiper Motor
9 20A* Fuel Pump Relay and RAP Module
10 15A* Horn Relay
11 15A* Parklamps Relay and Mainlight Switch
12 30A* Mainlight Switch and Multifunction Switch
13 15A* Heated Oxygen Sensor, EGR Vacuum
Regulator, EVR Solenoid, Camshaft Position
(CMP) Sensor, Canister Vent Solenoid
14 30A* Generator/Voltage Regulator
15 - NOT USED
1 - Wiper Park Relay
2 - A/C Relay
3 - Wiper High/Low Relay
4 - PCM Power Relay
5 - Fuel Pump Relay
6 - Starter Relay
7 - Horn Relay
8 - Rear Wipe Down Relay
9 - Blower Motor Relay
10 - Rear Wipe Up Relay
1 - NOT USED
1 - NOT USED
2 - Electronic Engine Controls Diode
* Mini Fuses ** Maxi Fuses
15.0L Engines Only
Roadside emergencies
143
Page 144 of 210
CHANGING THE TIRES
If you get a flat tire while driving, do not apply the brake heavily.
Instead, gradually decrease your speed. Hold the steering wheel firmly
and slowly move to a safe place on the side of the road.
Spare tire information
Your vehicle is equipped with a spare tire that may be used as a spare or
a regular tire. The spare tire is not equipped with wheel trim. The wheel
trim from the original wheel/tire may be used on the spare.
If your vehicle is equipped with 4WD or AWD, a spare tire of a
different size than the road tires should not be used. Such a tire
could result in damage to driveline components and make the
vehicle difficult to control.
Location of the spare tire and tools
The spare tire and tools for your vehicle are stowed in the following
locations:
Tool Location
Spare tire Under the vehicle, just in front of the rear
bumper
Jack, lug nut wrench Left rear quarter panel behind interior trim
Jack handle Behind rear seats, under carpet
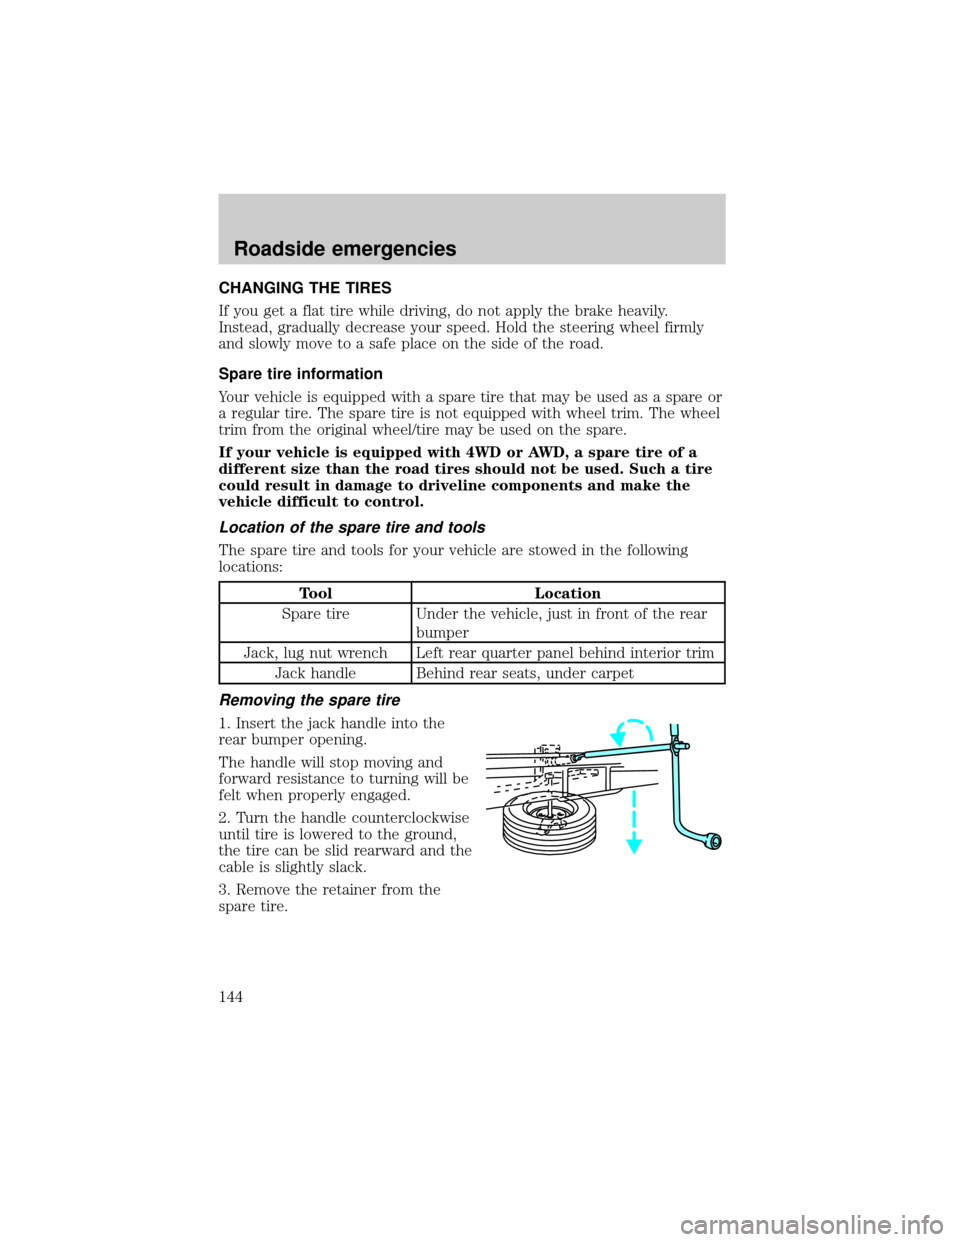
Removing the spare tire
1. Insert the jack handle into the
rear bumper opening.
The handle will stop moving and
forward resistance to turning will be
felt when properly engaged.
2. Turn the handle counterclockwise
until tire is lowered to the ground,
the tire can be slid rearward and the
cable is slightly slack.
3. Remove the retainer from the
spare tire.
Roadside emergencies
144
Page 156 of 210
SERVICE RECOMMENDATIONS
To help you service your vehicle:
²We highlight do-it-yourself items in the engine compartment for easy
location.
²We provide a ``Service Guide'' which makes tracking routine service
easy.
If your vehicle requires professional service, your dealership can provide
necessary parts and service. Check your ``Warranty Guide'' to find out
which parts and services are covered.
Use only recommended fuels, lubricants, fluids and service parts
conforming to specifications. Motorcraft parts are designed and built to
provide the best performance in your vehicle.
PRECAUTIONS WHEN SERVICING YOUR VEHICLE
Be especially careful when inspecting or servicing your vehicle.
²Do not work on a hot engine.
²When the engine is running, make sure that loose clothing, jewelry or
long hair does not get caught up in moving parts.
²Do not work on a vehicle with the engine running in an enclosed
space, unless you are sure you have enough ventilation.
²Keep all lit cigarettes, open flames and other lit material away from
the battery and all fuel related parts.
If you disconnect the battery, the engine must ``relearn'' its idle
conditions before your vehicle will drive properly, as explained inBattery
in this chapter.
Working with the engine off
²Automatic transmission:
1. Set the parking brake and
ensure the gearshift is securely latched in P (Park).
2. Turn off the engine and remove the key.
3. Block the wheels to prevent the vehicle from moving unexpectedly.
²Manual transmission:
1. Set the parking brake.
2. Depress the clutch and place the gearshift in 1 (First).
Maintenance and care
156
Page 166 of 210
WINDSHIELD WASHER FLUID
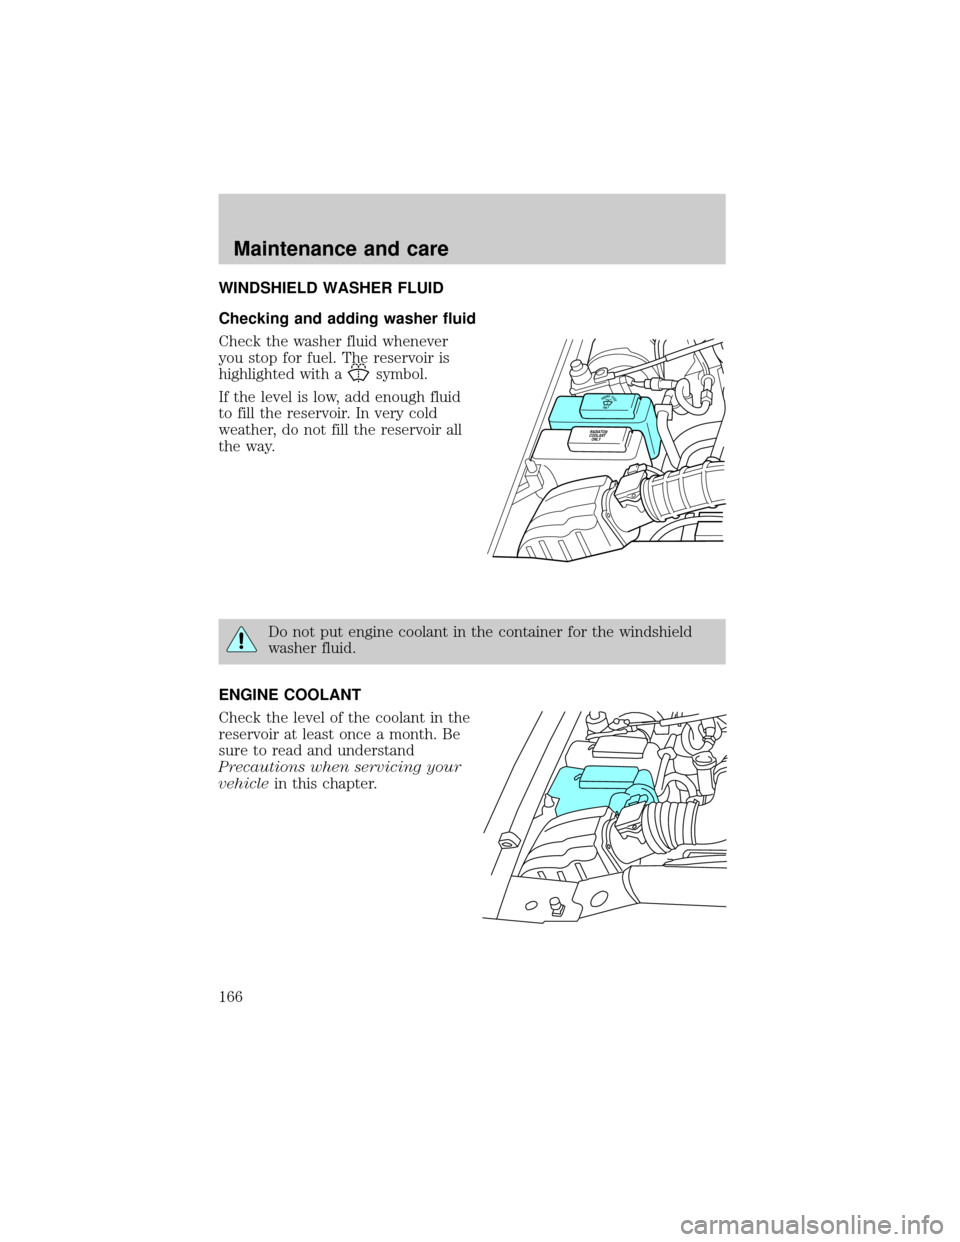
Checking and adding washer fluid
Check the washer fluid whenever
you stop for fuel. The reservoir is
highlighted with a
symbol.
If the level is low, add enough fluid
to fill the reservoir. In very cold
weather, do not fill the reservoir all
the way.
Do not put engine coolant in the container for the windshield
washer fluid.
ENGINE COOLANT
Check the level of the coolant in the
reservoir at least once a month. Be
sure to read and understand
Precautions when servicing your
vehiclein this chapter.
RADIATOR
COOLANT
ONLY
WASHERFLUIDONLY
Maintenance and care
166
Page 183 of 210
²If fuel is splashed in the eyes, remove contact lenses, flush with water
for 15 minutes and seek medical attention.
²Be particularly careful if you are taking ``Antabuse'' or other forms of
disulfiram for the treatment of alcoholism. Breathing gasoline vapors
or skin contact could cause an adverse reaction. Consult a physician
immediately.
Choosing the right fuel
Use only UNLEADED FUEL. The use of leaded fuel is prohibited by law
and could damage your vehicle.
Your vehicle was not designed to use fuel or fuel additives with metallic
compounds, including manganese-based compounds containing MMT.
Vehicles certified to California emission standards (indicated on the
underhood Vehicle Emissions Control Information label) are designed to
operate on California reformulated gasolines. If California reformulated
gasoline is not available when you refuel, your vehicle can be operated
on non-California fuels. However, even though your engine will perform
adequately on other gasolines, the performance of the emission control
devices and systems may be adversely affected.
Repair of damage caused by using a fuel that your vehicle was not
designed for may not be covered by your warranty.
Octane recommendations
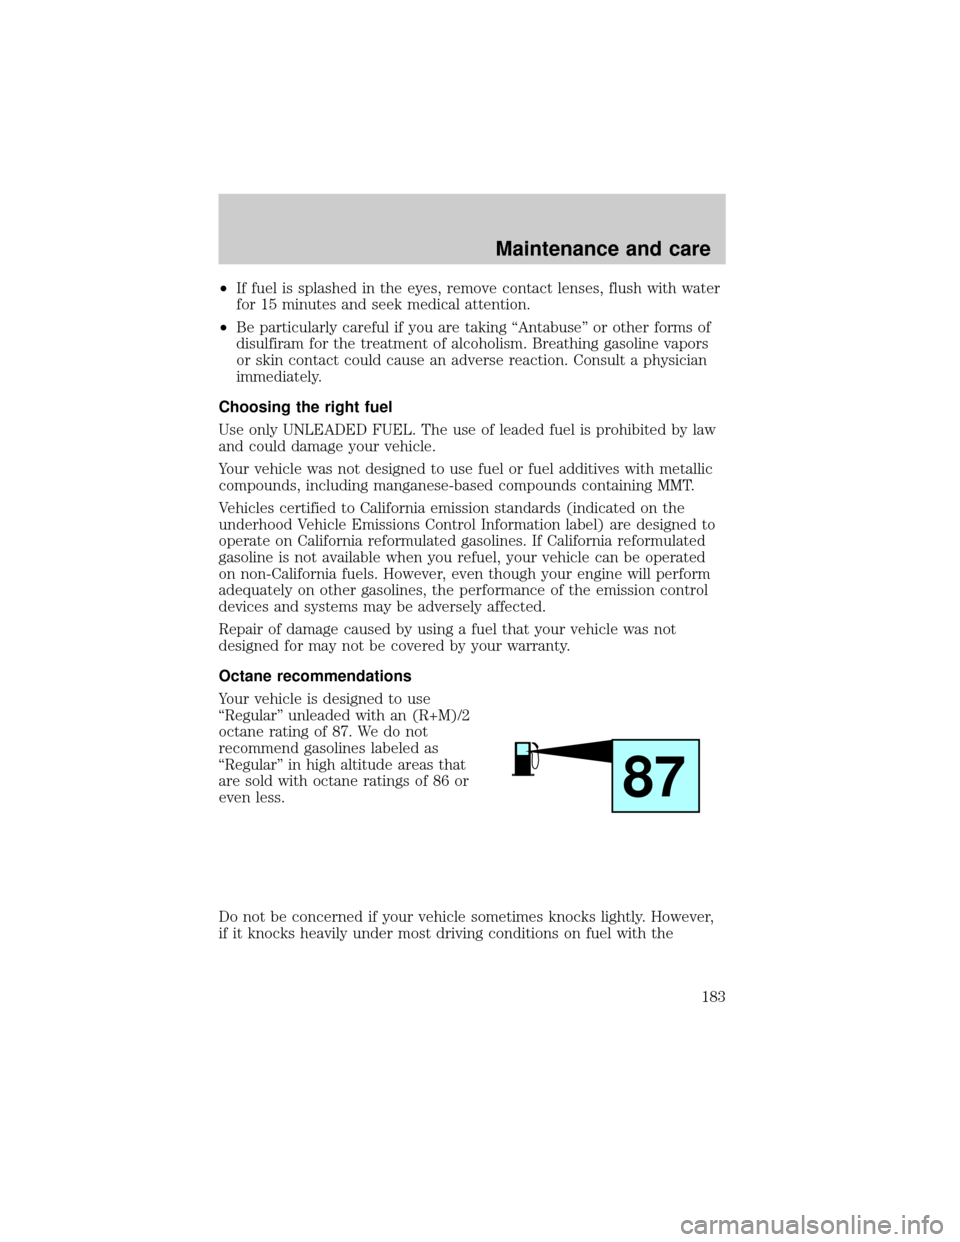
Your vehicle is designed to use
``Regular'' unleaded with an (R+M)/2
octane rating of 87. We do not
recommend gasolines labeled as
``Regular'' in high altitude areas that
are sold with octane ratings of 86 or
even less.
Do not be concerned if your vehicle sometimes knocks lightly. However,
if it knocks heavily under most driving conditions on fuel with the
87
Maintenance and care
183
Page 185 of 210

EMISSION CONTROL SYSTEM
Your vehicle is equipped with various emission control components and a
catalytic converter which will enable your vehicle to comply with
applicable exhaust emission standards. To make sure that the catalytic
converter and other emission control components continue to work
properly:
²Use only unleaded fuel.
²Avoid running out of fuel.
²Do not turn off the ignition while your vehicle is moving, especially at
high speeds.
²Have the services listed in your ``Service Guide'' performed according
to the specified schedule.
The Scheduled Maintenance Services listed in the ``Service Guide'' are
required because they are considered essential to the life and
performance of your vehicle and to its emissions system.
If other than Ford, Motorcraft or Ford authorized parts are used for
maintenance replacements or for service of components affecting
emission control such non-Ford parts should be equivalent to genuine
Ford Motor Company parts in performance and durability.
Do not park, idle, or drive your vehicle in dry grass or other dry
ground cover. The emission system heats up the engine
compartment and exhaust system, which can start a fire.
Watch for fluid leaks, strange odors, smoke, loss of oil pressure, the
charging system warning light, the ``Check Engine'' light or the
temperature warning light. These events could indicate that the emission
control system is not working properly.
If you smell exhaust fumes of any kind inside your vehicle, have
the dealer inspect and fix your vehicle immediately. Do not drive
if you smell exhaust fumes. These fumes are harmful and could kill
you.
Do not make any unauthorized changes to your vehicle or engine. By
law, vehicle owners and anyone who manufactures, repairs, services,
sells, leases, trades vehicles, or supervises a fleet of vehicles are not
permitted to intentionally remove an emission control device or prevent
it from working. Information about your vehicle's emission system is on
Maintenance and care
185
Page 186 of 210

the Vehicle Emission Control Information Decal located on or near the
engine. This decal identifies engine displacement and gives some tune up
specifications.
Please consult your ``Warranty Guide'' for complete emission warranty
information.
Readiness for inspection/maintenance (I/M) testing
In some localities, it may be a legal requirement to pass an I/M test of
the on-board diagnostic (OBD-II) system. If your ``check engine/service
engine soon'' light is on, reference the applicable light description in the
Warning Lights and Chimessection of your owners guide. Your vehicle
may not pass the I/M test with the ``check engine/service engine soon''
light on.
If the vehicle's powertrain system or its battery has just been serviced,
the OBD-II system is reset to a ``not ready for I/M test'' condition. To
ready the OBD-II system for I/M testing, a minimum of 30 minutes of city
and highway driving is necessary as described below:
²First, at least 10 minutes of driving on an expressway or highway.
²Next, at least 20 minutes driving in stop and go, city type traffic with
at least four idle periods.
Allow the vehicle to sit for at least eight hours without starting the
engine. Then, start the engine and complete the above driving cycle. The
engine must warm up to its normal operating temperature. Once started,
do not turn off the engine until the above driving cycle is complete.
EXTERIOR BULBS
Replacing exterior bulbs
Check the operation of the following lamps frequently:
²headlamps
²foglamps
²high-mount brakelamp
²brakelamps
²turn signals
²license plate lamp
²tail lamps
Maintenance and care
186
Page 188 of 210
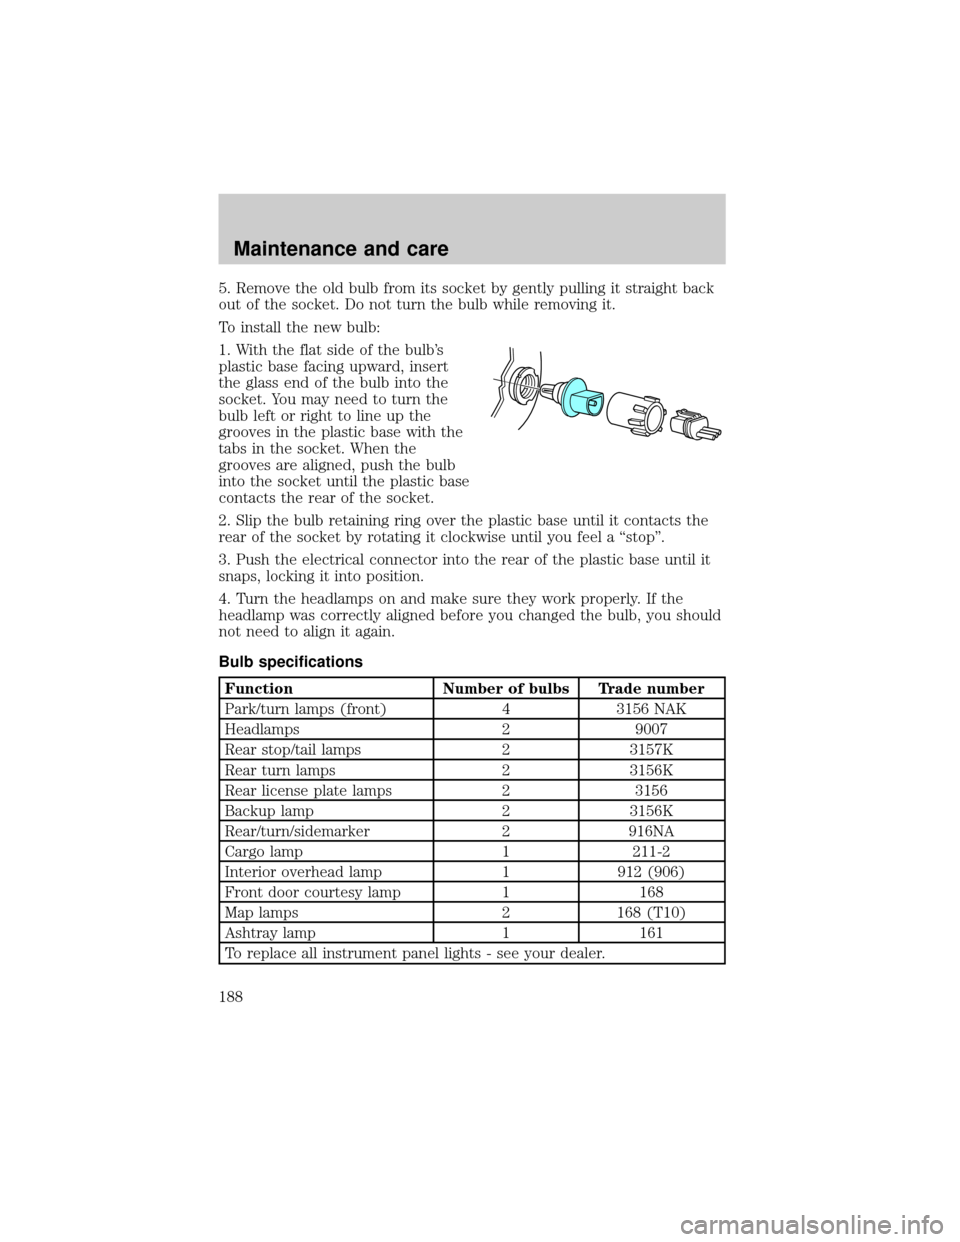
5. Remove the old bulb from its socket by gently pulling it straight back
out of the socket. Do not turn the bulb while removing it.
To install the new bulb:
1. With the flat side of the bulb's
plastic base facing upward, insert
the glass end of the bulb into the
socket. You may need to turn the
bulb left or right to line up the
grooves in the plastic base with the
tabs in the socket. When the
grooves are aligned, push the bulb
into the socket until the plastic base
contacts the rear of the socket.
2. Slip the bulb retaining ring over the plastic base until it contacts the
rear of the socket by rotating it clockwise until you feel a ``stop''.
3. Push the electrical connector into the rear of the plastic base until it
snaps, locking it into position.
4. Turn the headlamps on and make sure they work properly. If the
headlamp was correctly aligned before you changed the bulb, you should
not need to align it again.
Bulb specifications
Function Number of bulbs Trade number
Park/turn lamps (front) 4 3156 NAK
Headlamps 2 9007
Rear stop/tail lamps 2 3157K
Rear turn lamps 2 3156K
Rear license plate lamps 2 3156
Backup lamp 2 3156K
Rear/turn/sidemarker 2 916NA
Cargo lamp 1 211-2
Interior overhead lamp 1 912 (906)
Front door courtesy lamp 1 168
Map lamps 2 168 (T10)
Ashtray lamp 1 161
To replace all instrument panel lights - see your dealer.
Maintenance and care
188