Page 109 of 210

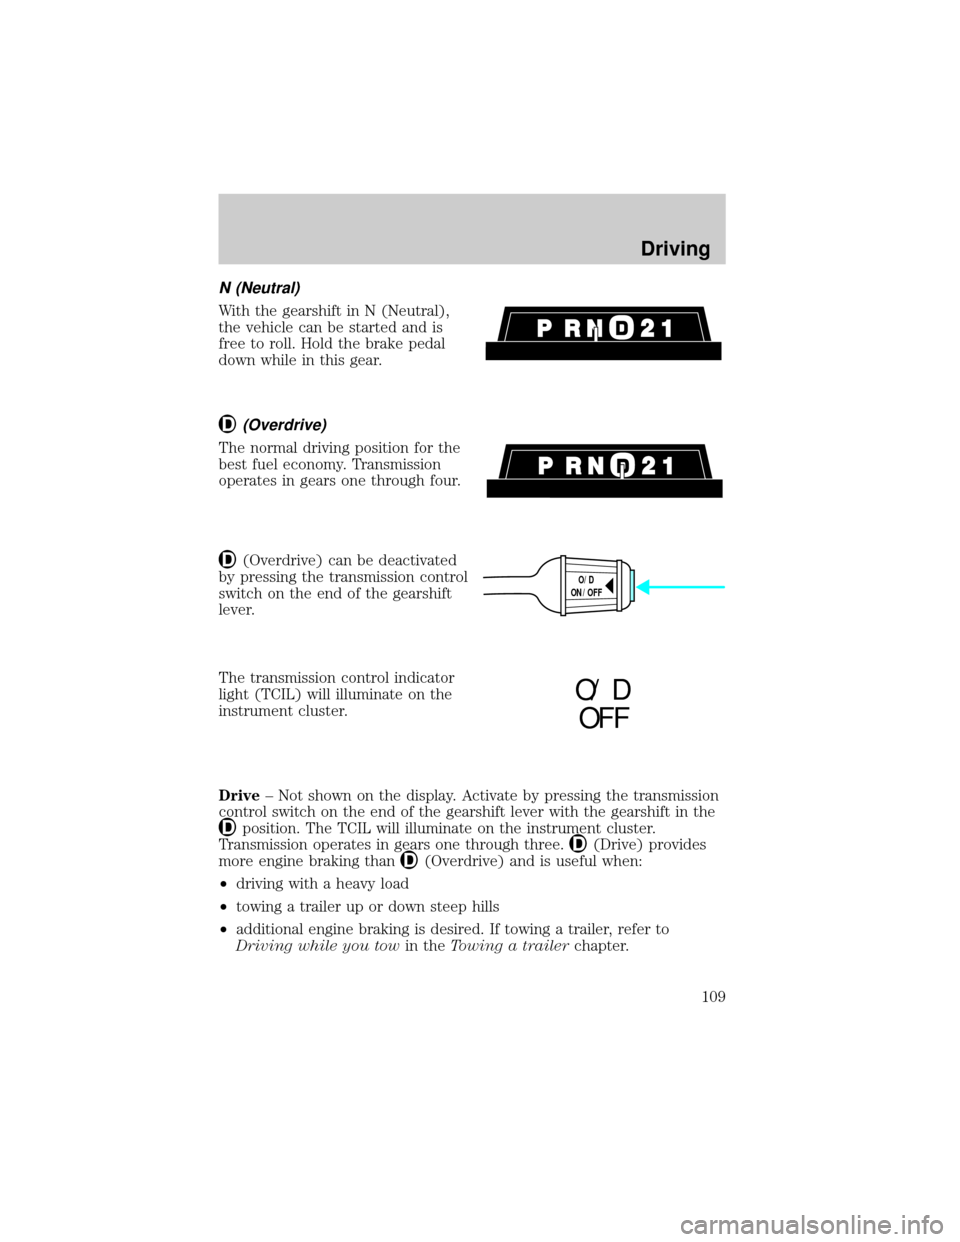
N (Neutral)
With the gearshift in N (Neutral),
the vehicle can be started and is
free to roll. Hold the brake pedal
down while in this gear.
(Overdrive)
The normal driving position for the
best fuel economy. Transmission
operates in gears one through four.
(Overdrive) can be deactivated
by pressing the transmission control
switch on the end of the gearshift
lever.
The transmission control indicator
light (TCIL) will illuminate on the
instrument cluster.
Drive± Not shown on the display. Activate by pressing the transmission
control switch on the end of the gearshift lever with the gearshift in the
position. The TCIL will illuminate on the instrument cluster.
Transmission operates in gears one through three.
(Drive) provides
more engine braking than
(Overdrive) and is useful when:
²driving with a heavy load
²towing a trailer up or down steep hills
²additional engine braking is desired. If towing a trailer, refer to
Driving while you towin theTowing a trailerchapter.
O/D
ON/OFF
O/ D
OFF
Driving
109
Page 112 of 210

The transmission control indicator
light (TCIL) will illuminate on the
instrument cluster.
Drive± Not shown on the display. Activate by pressing the transmission
control switch on the end of the gearshift lever with the gearshift in the
position. The TCIL will illuminate on the instrument cluster.
Transmission operates in gears one through four.
(Drive) provides
more engine braking than
(Overdrive) and is useful whenever driving
conditions (i.e., city traffic, hilly terrain, etc.) cause the transmission to
excessively shift between
(Overdrive) and(Drive). Also deactivate
(Overdrive) when:
²driving with a heavy load
²towing a trailer up or down steep hills
²additional engine braking is desired.
To return to
(Overdrive) mode, press the transmission control switch.
The TCIL will no longer be illuminated.
Each time the vehicle is started, the transmission will automatically
return to normal overdrive mode.
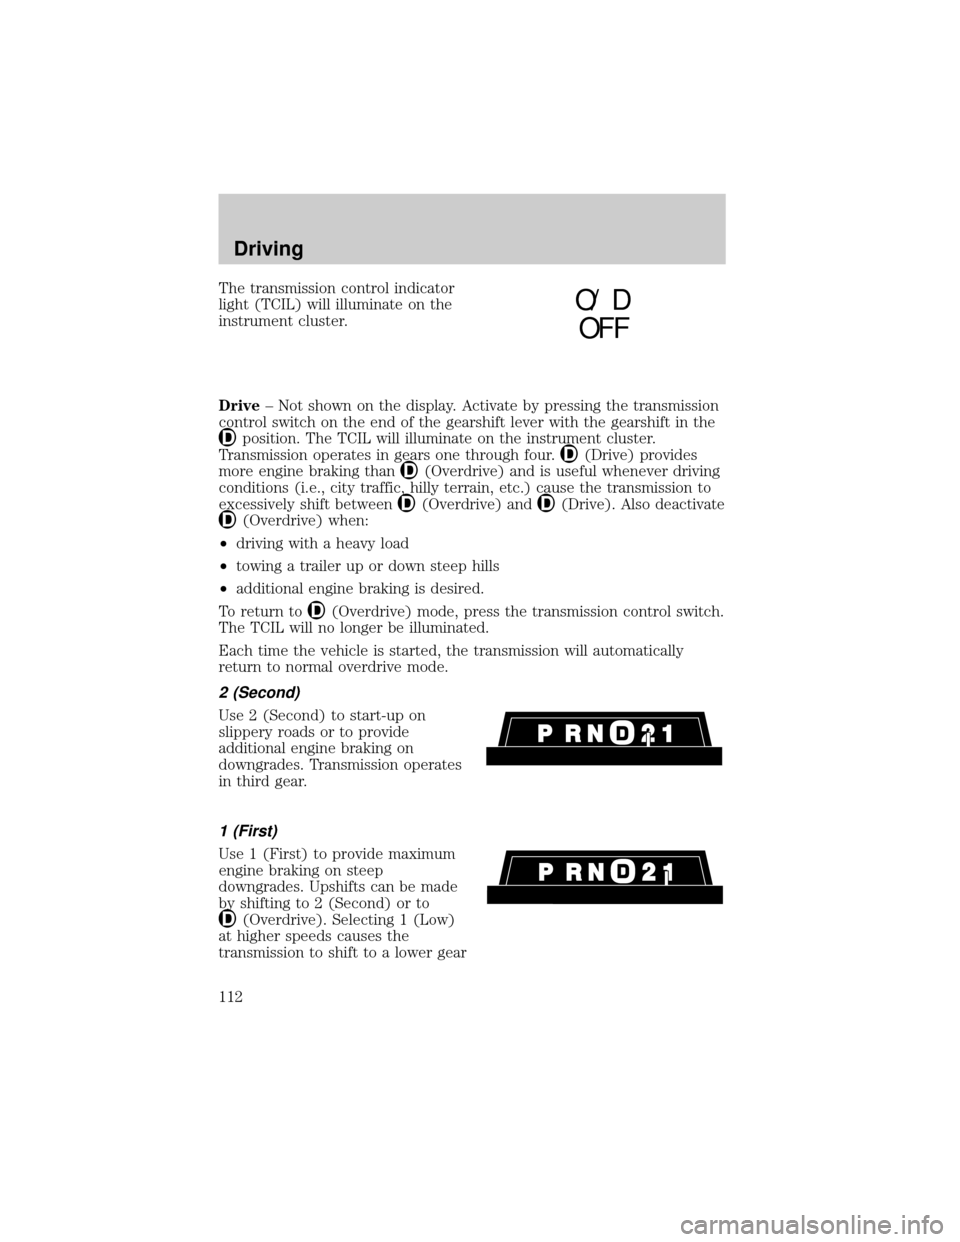
2 (Second)
Use 2 (Second) to start-up on
slippery roads or to provide
additional engine braking on
downgrades. Transmission operates
in third gear.
1 (First)
Use 1 (First) to provide maximum
engine braking on steep
downgrades. Upshifts can be made
by shifting to 2 (Second) or to
(Overdrive). Selecting 1 (Low)
at higher speeds causes the
transmission to shift to a lower gear
O/ D
OFF
Driving
112
Page 118 of 210
Using the Control-Trac system
Shifting between 4WD AUTO and 4WD HIGH
When you move the control to 4WD
HIGH, the indicator light will
illuminate in the instrument cluster.
When you move the control to 4WD
AUTO, the indicator light will turn
off.
Either shift can be done at a stop or
while driving at any speed.
Shifting from 4WD AUTO or 4WD HIGH to 4WD LOW
1. Bring the vehicle to a stop.
2. Depress the brake.
3. Place the gearshift in N (Neutral)
(automatic transmission) or depress
the clutch (manual transmission).
4. Move the 4WD control to the
4WD LOW position.
HIGH
LOW AUTO
HIGH
LOW AUTO
Driving
118
Page 135 of 210

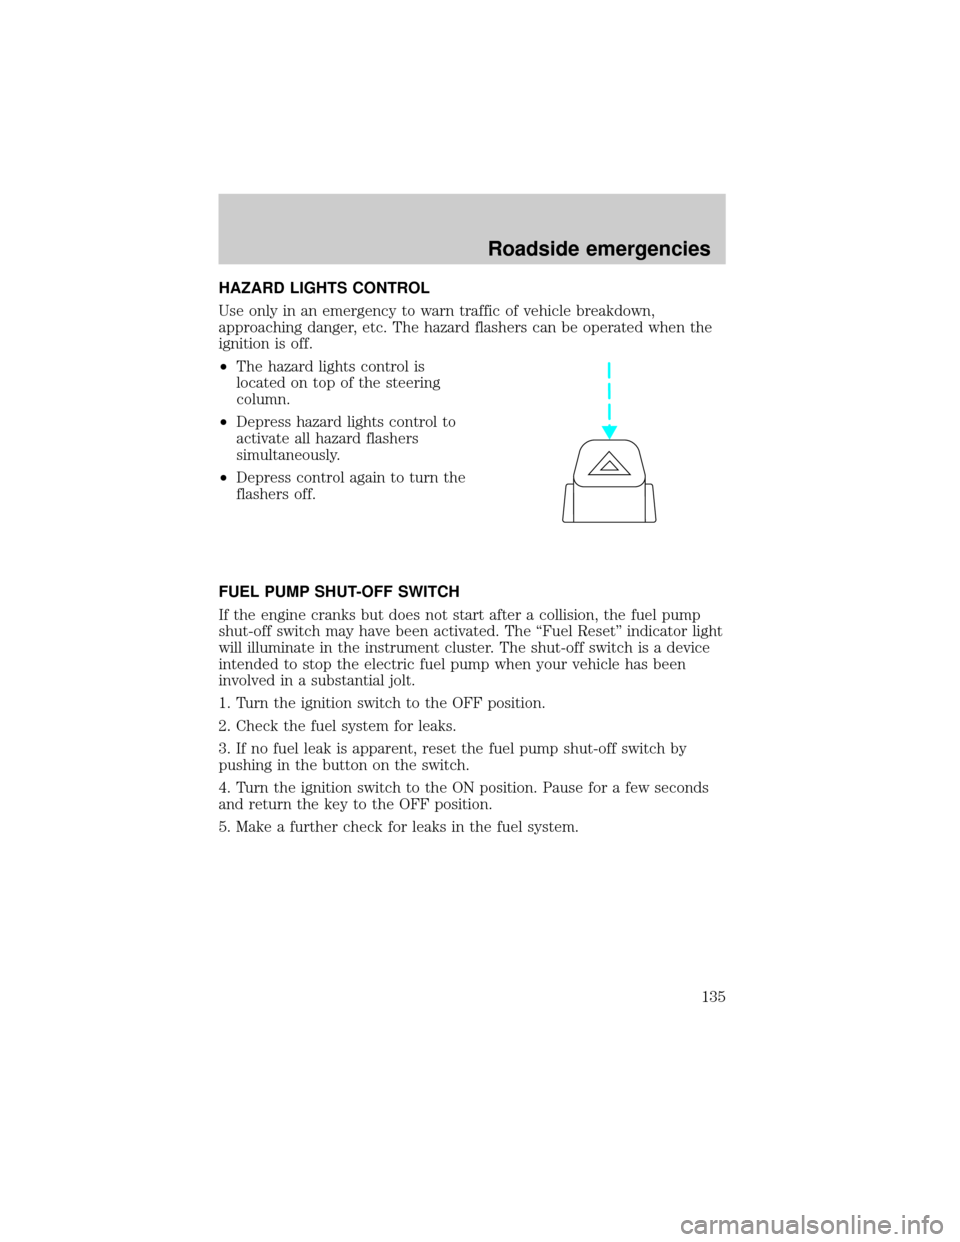
HAZARD LIGHTS CONTROL
Use only in an emergency to warn traffic of vehicle breakdown,
approaching danger, etc. The hazard flashers can be operated when the
ignition is off.
²The hazard lights control is
located on top of the steering
column.
²Depress hazard lights control to
activate all hazard flashers
simultaneously.
²Depress control again to turn the
flashers off.
FUEL PUMP SHUT-OFF SWITCH
If the engine cranks but does not start after a collision, the fuel pump
shut-off switch may have been activated. The ``Fuel Reset'' indicator light
will illuminate in the instrument cluster. The shut-off switch is a device
intended to stop the electric fuel pump when your vehicle has been
involved in a substantial jolt.
1. Turn the ignition switch to the OFF position.
2. Check the fuel system for leaks.
3. If no fuel leak is apparent, reset the fuel pump shut-off switch by
pushing in the button on the switch.
4. Turn the ignition switch to the ON position. Pause for a few seconds
and return the key to the OFF position.
5. Make a further check for leaks in the fuel system.
Roadside emergencies
135
Page 139 of 210

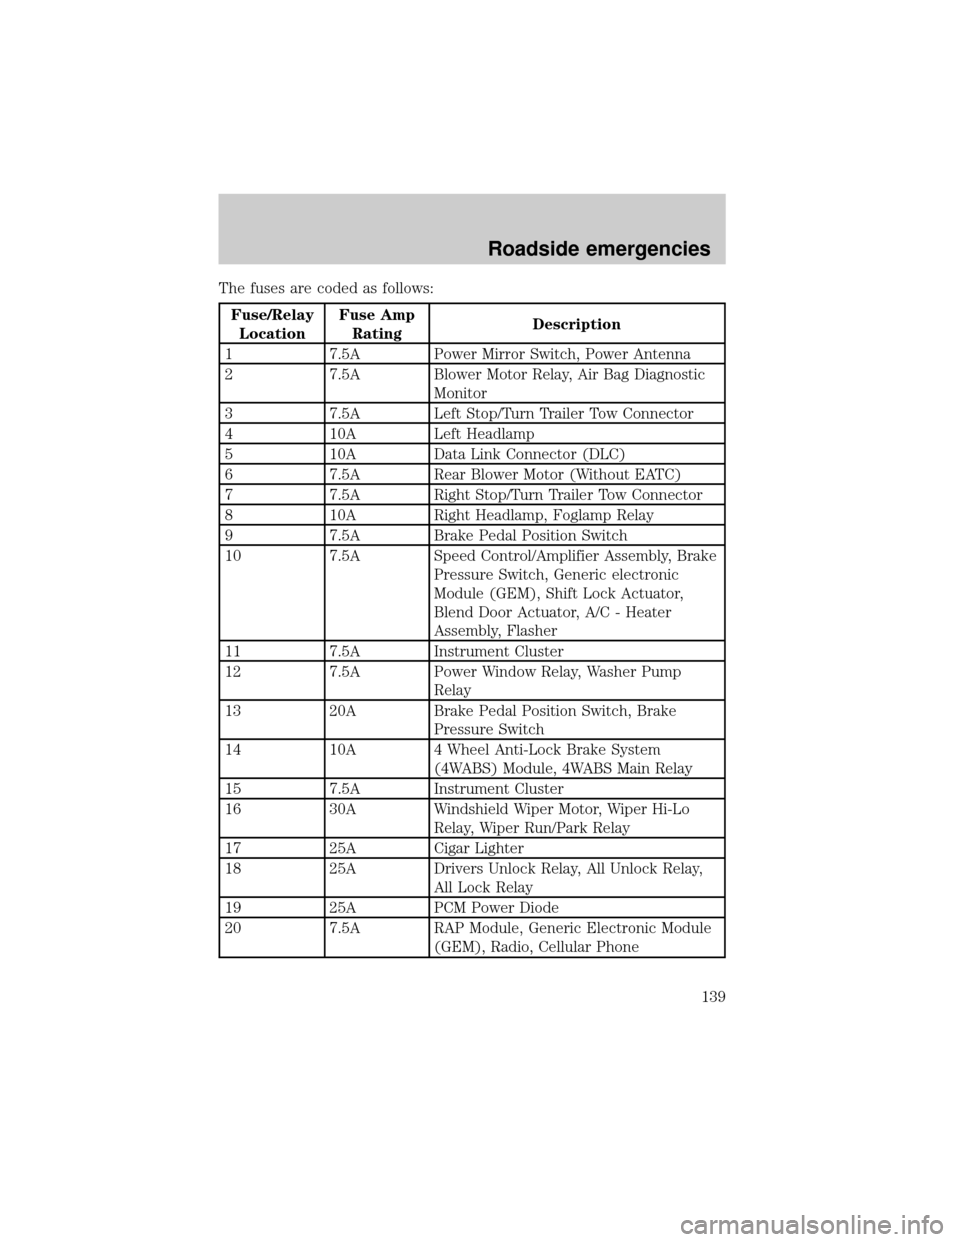
The fuses are coded as follows:
Fuse/Relay
LocationFuse Amp
RatingDescription
1 7.5A Power Mirror Switch, Power Antenna
2 7.5A Blower Motor Relay, Air Bag Diagnostic
Monitor
3 7.5A Left Stop/Turn Trailer Tow Connector
4 10A Left Headlamp
5 10A Data Link Connector (DLC)
6 7.5A Rear Blower Motor (Without EATC)
7 7.5A Right Stop/Turn Trailer Tow Connector
8 10A Right Headlamp, Foglamp Relay
9 7.5A Brake Pedal Position Switch
10 7.5A Speed Control/Amplifier Assembly, Brake
Pressure Switch, Generic electronic
Module (GEM), Shift Lock Actuator,
Blend Door Actuator, A/C - Heater
Assembly, Flasher
11 7.5A Instrument Cluster
12 7.5A Power Window Relay, Washer Pump
Relay
13 20A Brake Pedal Position Switch, Brake
Pressure Switch
14 10A 4 Wheel Anti-Lock Brake System
(4WABS) Module, 4WABS Main Relay
15 7.5A Instrument Cluster
16 30A Windshield Wiper Motor, Wiper Hi-Lo
Relay, Wiper Run/Park Relay
17 25A Cigar Lighter
18 25A Drivers Unlock Relay, All Unlock Relay,
All Lock Relay
19 25A PCM Power Diode
20 7.5A RAP Module, Generic Electronic Module
(GEM), Radio, Cellular Phone
Roadside emergencies
139
Page 140 of 210
Fuse/Relay
LocationFuse Amp
RatingDescription
21 15A Flasher (Hazard)
22 20A Auxiliary Power Socket
23 - NOT USED
24 7.5A Clutch Pedal Position (CPP) Switch,
Starter Interrupt Relay, Anti-Theft
25 7.5A Generic Electronic Module (GEM),
Instrument Cluster, Securi-Lock
26 10A Battery Saver Relay, Electronic Shift
Relay, Interior Lamp Relay, Power
Window Relay, Electronic Shift Control
Module
27 15A DRL, Backup Lamps Switch, DTR
Sensor, GEM, Electric Shift
28 7.5A Generic Electronic Module (GEM),
Radio, Memory Seat
29 25A Radio
30 15A Park Lamp/Trailer Tow Relay
31 - NOT USED
32 10A Heated Mirror
33 15A Headlamps, Daytime Running Lamps
(DRL) Module, Instrument Cluster
34 7.5A Rear Integrated Control Panel, CD
35 7.5A Rear Blower Motor (With EATC)
36 7.5A EATC Memory, CD, Rear Integrated
Control Panel, Memory Seat, Message
Center
Roadside emergencies
140