1998 CHEVROLET VENTURE instrument panel
[x] Cancel search: instrument panelPage 138 of 474
NOTICE:
Be sure there are no overhead obstructions, such
as
a garage door, before you open the liftgate.
You could slam the liftgate into something and
break the glass.
I
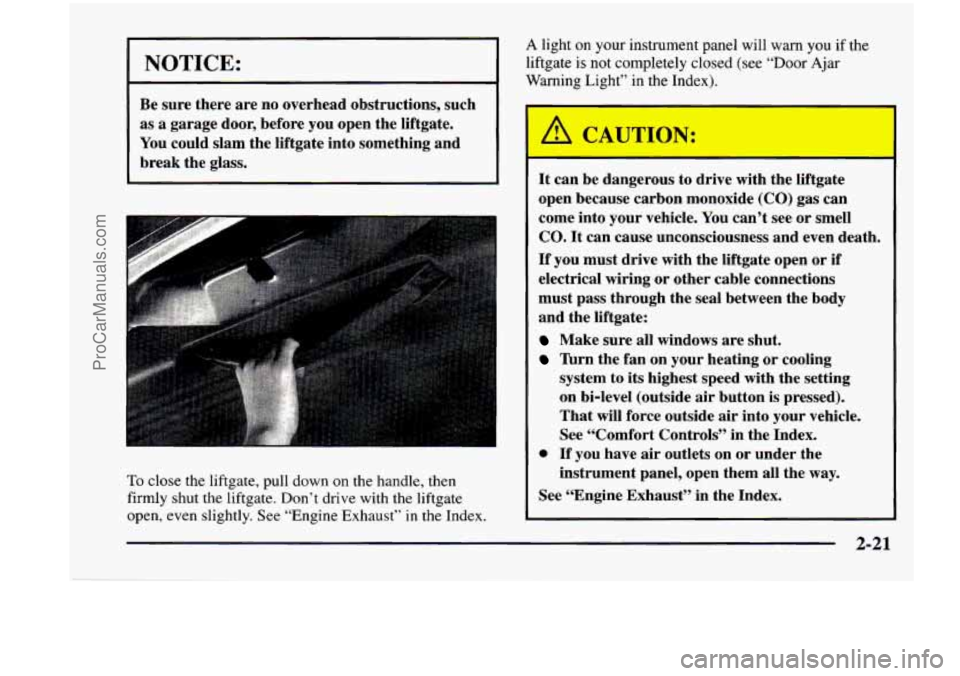
To close the liftgate, pull down on the handle, then
firmly shut the liftgate. Don’t drive with the liftgate
open, even slightly. See “Engine Exhaust” in the Index.
A light on your instrument panel will warn you if the
liftgate is not completely closed (see “Door Ajar
Warning Light” in the Index).
It can be dangerous to drive with the liftgate
open because carbon monoxide (CO) gas can
come into your vehicle. You can’t see or smell
CO. It can cause unconsciousness and even death.
If you must drive with the liftgate open or if
electrical wiring or other cable connections
must pass through the seal between the body
and the liftgate:
Make sure all windows are shut.
lbrn the fan on your heating or cooling
system to
its highest speed with the setting
on bi-level (outside air button is pressed).
That will force outside air into your vehicle.
See “Comfort Controls” in the Index.
0 If you have air outlets on or under the
instrument panel, open them all the way.
See “Engine Exhaust’’ in the Index.
2-21
ProCarManuals.com
Page 140 of 474
Content Theft-Deterrent (Option)
If your vehicle has this option, it has a theft-deterrent
alarm system.
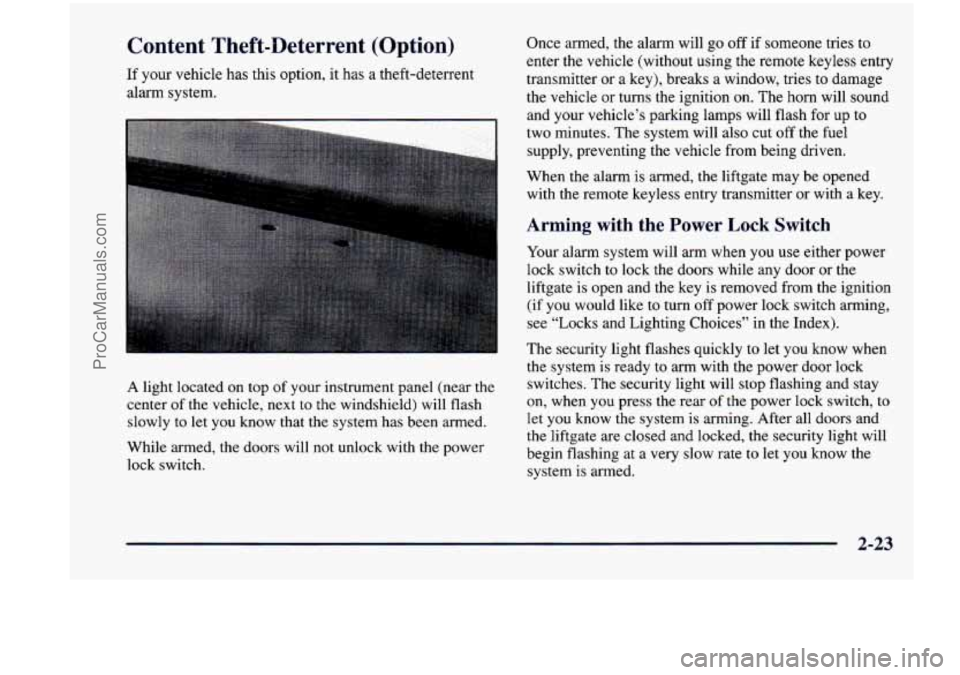
A light located on top of your instrument panel (near the
center of the vehicle, next to the windshield) will flash
slowly to let you know that the system has been armed.
While armed, the doors will not unlock with the power
lock switch. Once
armed, the alarm will go off if someone tries to
enter the vehicle (without using
the remote keyless entry
transmitter or a key), breaks a window, tries to damage
the vehicle or turns the ignition on. The
horn will sound
and your vehicle’s parking lamps will flash for up
to
two minutes. The system will also cut off the fuel
supply, preventing the vehicle from being driven.
When the alarm is armed, the liftgate may be opened
with the remote keyless entry transmitter or with a key.
Arming with the Power Lock Switch
Your alarm system will arm when you use either power
lock switch to lock the doors while any door
or the
liftgate is open and the key is removed from the ignition
(if you would like to turn off power lock switch arming,
see “Locks and Lighting Choices” in the Index).
The security light flashes quickly to let you know when
the system is ready to arm with the power door lock
switches. The security light will stop flashing and stay
on, when you press the rear of the power lock switch, to
let
you know the system is arming. After all doors and
the liftgate are closed and locked, the security light will
begin flashing at a very slow rate
to let you know the
system
is armed.
2-23
ProCarManuals.com
Page 143 of 474
Ignition Positions
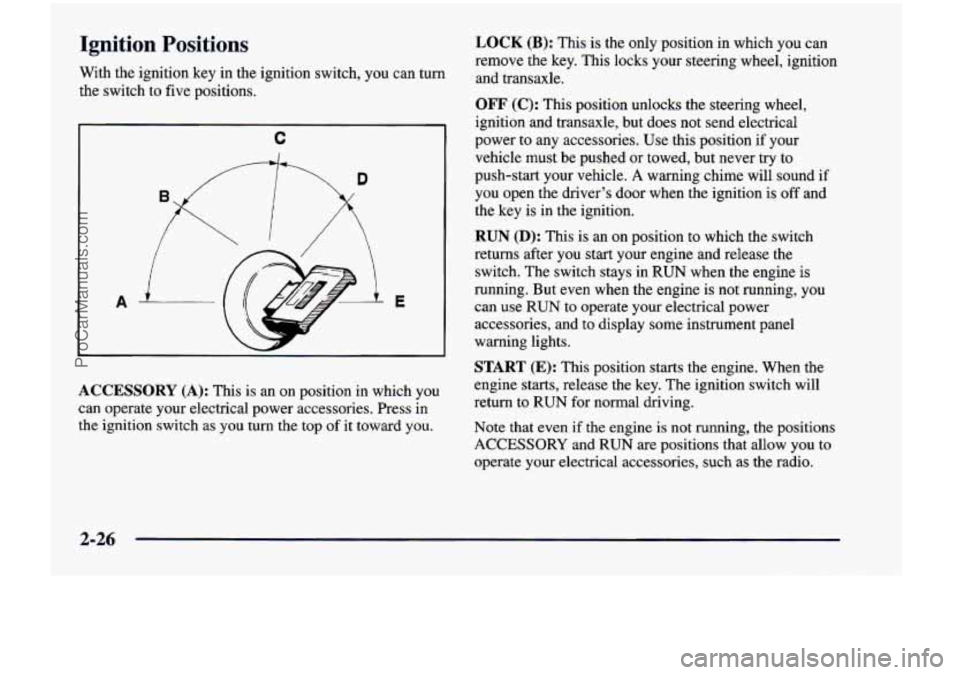
With the ignition key in the ignition switch, you can turn
the switch to five positions.
C
A E
ACCESSORY
(A): This is an on position in which you
can operate your electrical power accessories. Press in
the ignition switch as you
turn the top of it toward you.
LOCK (B): This is the only position in which you can
remove the key. This locks your steering wheel, ignition
and transaxle.
OFF (C): This position unlocks the steering wheel,
ignition and transaxle, but does not send electrical
power to any accessories. Use this position if your
vehicle must be pushed or towed, but never try to
push-start your vehicle.
A warning chime will sound if
you open the driver’s door when the ignition is off and
the key is
in the ignition.
RUN (D): This is an on position to which the switch
returns after you start your engine and release
the
switch. The switch stays in RUN when the engine is
running. But even when the engine
is not running, you
can use
RUN to operate your electrical power
accessories, and
to display some instrument panel
warning lights.
START (E): This position starts the engine. When the
engine starts, release
the key. The ignition switch will
return
to RUN for normal driving.
Note that even if
the engine is not running, the positions
ACCESSORY and RUN are positions that allow you to
operate your electrical accessories, such as the radio.
2-26
ProCarManuals.com
Page 158 of 474

Entering Programming Mode
To program features, your vehicle must be in the
programming mode. Follow these steps:
1.
2.
3.
4.
5.
The Content Theft-Deterrent system (if equipped)
must be disarmed. See “Content Theft-Deterrent
System” in this section.
Remove the
BCM PRGRM fuse from the instrument
panel fuse block, located to the right of the glove
box. (See “Fuses and Circuit Breakers” in the Index.)
Close the driver’s door.
Turn the ignition switch towards you to
ACCESSORY.
Count the number of chimes you hear. You will
hear two to four chimes depending on the features
your vehicle is equipped with. Refer to the chart
shown previously.
You can now program your choices.
To exit the programming mode, follow the steps
listed under “Exiting Programming Mode” later in
this section.
Delayed Illumination and Exit Lighting
With Delayed Illumination, the interior lamps will stay
on for about
25 seconds after all the doors and the
liftgate are closed.
With Exiting Lighting, the interior lamps will come on
and stay on for about
25 seconds whenever you remove
the key from the ignition.
To customize these features to your preference, see
“Programmable Modes” following.
Programmable Modes
Your vehicle can be programmed to one of the
following modes.
Mode 1: Both Features Off (The interior lamps will
turn on or
off at the same instant that a door is opened
or closed.)
Mode 2: Delayed Illumination Only (The interior lamps
will stay on for about
25 seconds after all the doors and
liftgate are closed, or until you lock the doors.)
Mode 3: Exit Lighting Only (The interior lamps
will come on whenever you remove the key from the
ignition and stay on for about
25 seconds, or until you
lock the doors.)
2-41
ProCarManuals.com
Page 167 of 474
To change the mode:
1. Follow the instructions for “Entering Programming
Mode” listed previously.
2. Insert your second key fully into any door key
cylinder and
turn it to the unlock position.
This step is inconvenient, but necessary to prevent
accidental programming
of this feature to Mode 2.
Do not program this feature to Mode 2 without first
reading the special note contained in the description
for that mode. The door key cylinder must remain
in
the unlock position during Steps 2 through 4.
entry transmitter.
3. Press the horn symbol on the remote keyless
4. Count the number of chimes you hear. The number
of chimes tells you which mode your vehicle is
in. You can change the mode by pressing the
horn symbol on the remote keyless entry
transmitter again.
6. Remove your key from the door key cylinder.
The mode you selected is now set. You can either exit
the programming mode by following the instructions
later in this section or program the next feature
available
on your vehicle.
Exiting Programming Mode
To exit programming mode, just turn the key from
ACCESSORY to
OFF and put the BCM PRGRM fuse
back into the instrument panel fuse block.
NOTE: After programming a feature, you can exit the
programming mode at anytime.
Windows
Manual Windows
Use the manual crank to open and close the fiont windows.
5. Repeat Step 3 until you hear the number of chimes
that matches the mode
you want.
2-50
ProCarManuals.com
Page 173 of 474
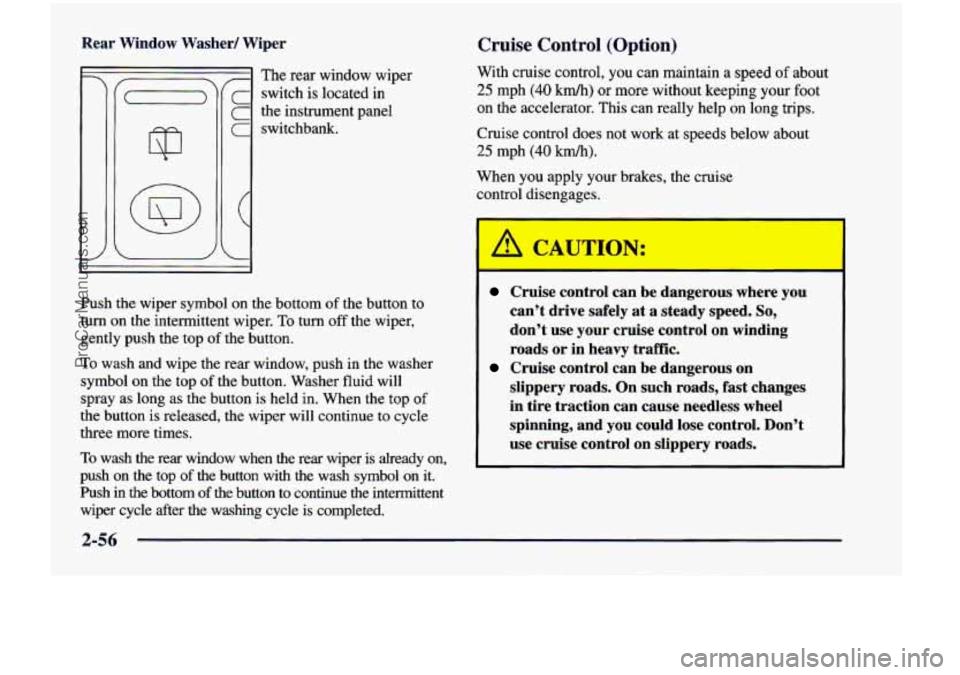
Rear Window Washer/ Wiper
! The rear window wiper
- switch is located in
the instrument panel
1 switchbank.
Cruise Control (Option)
With cruise control, you can maintain a speed of about
25 mph (40 km/h) or more without keeping your foot
on the accelerator. This can really help on long trips.
Cruise control does not work at speeds below about
25 mph (40 km/h).
When you apply your brakes, the cruise
control disengages.
Push
the wiper symbol on the bottom of the button to
turn on the intermittent wiper. To
turn off the wiper,
gently push the top
of the button.
To wash and wipe the rear window, push in the washer
symbol on the top
of the button. Washer fluid will
spray as long as the button is held in. When the top
of
the button is released, the wiper will continue to cycle
three more times.
To wash the rear window when the rear wiper is already on,
push on the top
of the button with the wash symbol on it.
Push in the bottom
of the button to continue the intermittent
wiper cycle after the washing cycle is completed.
Cruise control can be dangerous where you
can’t drive safely at a steady speed.
So,
don’t use your cruise control on winding
roads or in heavy
traffic.
slippery roads. On such roads, fast changes
in tire traction can cause needless wheel
spinning, and
you could lose control. Don’t
use cruise control on slippery roads.
Cruise control can be dangerous on
ProCarManuals.com
Page 177 of 474
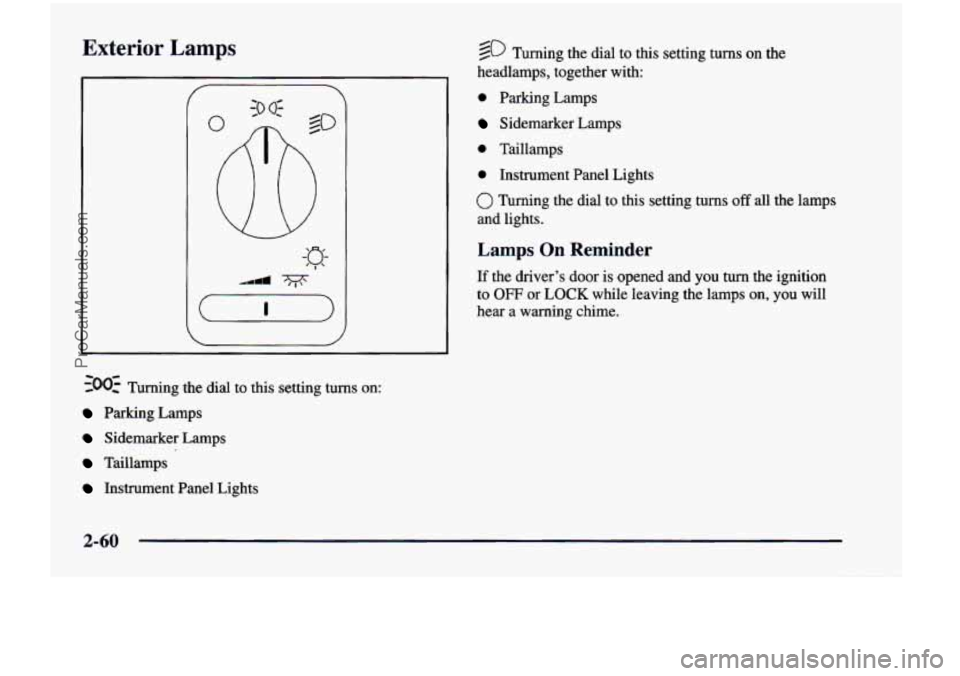
Exterior Lamps
~00~ Turning the dial to this setting turns on:
Parking Lamps
Sidemarker Lamps
Taillamps
Instrument Panel Lights
@ Turning the dial to this setting turns on the
headlamps, together with:
0 Parking Lamps
Sidemarker Lamps
0 Taillamps
0 Instrument Panel Lights
0 Turning the dial to this setting turns off all the lamps
and lights.
Lamps On Reminder
If the driver’s door is opened and you turn the ignition
to
OFF or LOCK while leaving the lamps on, you will
hear a warning chime.
2-60
ProCarManuals.com
Page 178 of 474

Daytime Running Lamps
Daytime Running Lamps (DRL) can make it easier
for others to see the front of your vehicle during the
day. DRL can be helpful in many different driving
conditions, but they can be especially helpful in the
short periods after dawn and before sunset.
A light sensor on top of the instrument panel makes the
DRL work,
so be sure it isn’t covered. The DRL system
will make front parking and turn signal lamps come on
in daylight when:
The ignition is on,
0 the headlamp switch is off and
0 the parking brake is released.
When the DRL are on, only your front parking and turn
signal lamps will be on. Your instrument panel won’t be
lit up.
When it’s dark enough outside, the exterior lamps will
come on automatically. When
it’s bright enough outside,
the exterior lamps will go out and the DRL will turn
on.
Of course, you may still turn on the headlamps any time
you need to.
To idle your vehicle with the DRL or exterior lamps
off, set the parking brake while the ignition is in
OFF
or LOCK. Then start the vehicle. The DRL will stay off
until you release the parking brake.
As with any vehicle, you should turn on the regular
headlamp system when
you need it.
Interior Lamps
Instrument Panel Intensity Control
Turn the control, located below the headlamps switch,
to the right to increase the brightness of the instrument
panel lights, and
to the left to decrease the brightness.
Turn the control all the way to the left to turn them
off.
Interior Lamps Control
Turn the dial all the way to the right to turn on the
interior lamps, if the interior lamps override switch is
off. Turn the dial to
the left to turn the lamps off.
2-61
ProCarManuals.com