1998 CHEVROLET CORVETTE low oil pressure
[x] Cancel search: low oil pressurePage 137 of 378
Downloaded from www.Manualslib.com manuals search engine Engine Oil Pressure Gage
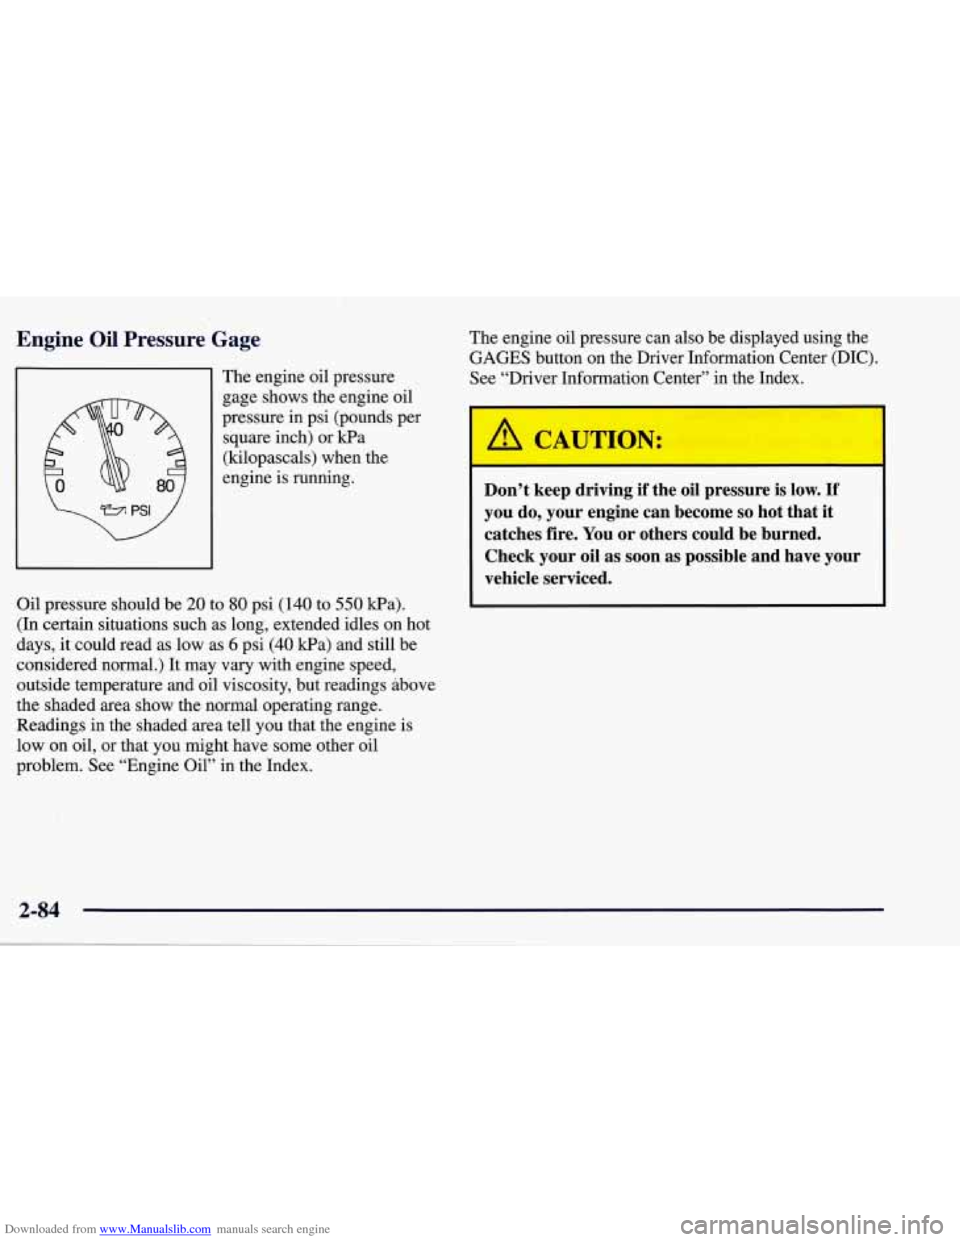
The engine oil pressure
gage shows the engine oil
pressure in psi (pounds per
square inch) or kPa
(kilopascals) when the
engine is running.
Oil pressure should be
20 to 80 psi (140 to 550 Wa).
(In certain situations such as long, extended idles on hot
days, it could read as low as
6 psi (40 kPa) and still be
considered normal.) It may vary with engine speed,
outside temperature and oil viscosity, but readings above
the shaded area show the normal operating range.
Readings in the shaded area tell you that the engine is
low on oil, or that you might have some other oil
problem. See “Engine Oil” in the Index. The
engine oil pressure can also be displayed using the
GAGES button on the Driver Information Center (DIC).
See “Driver Information Center” in the Index.
A CAUTION:
Don’t keep driving if the oil pressure is low. If
you do, your engine can become so hot that it
catches fire. You or others could be burned.
Check your oil as soon as possible and have your
vehicle serviced.
2-84
Page 138 of 378
Downloaded from www.Manualslib.com manuals search engine I NOTICE:
Damage to your engine from neglected oil
problems can be costly and
is not covered by
your warranty.
Security Light
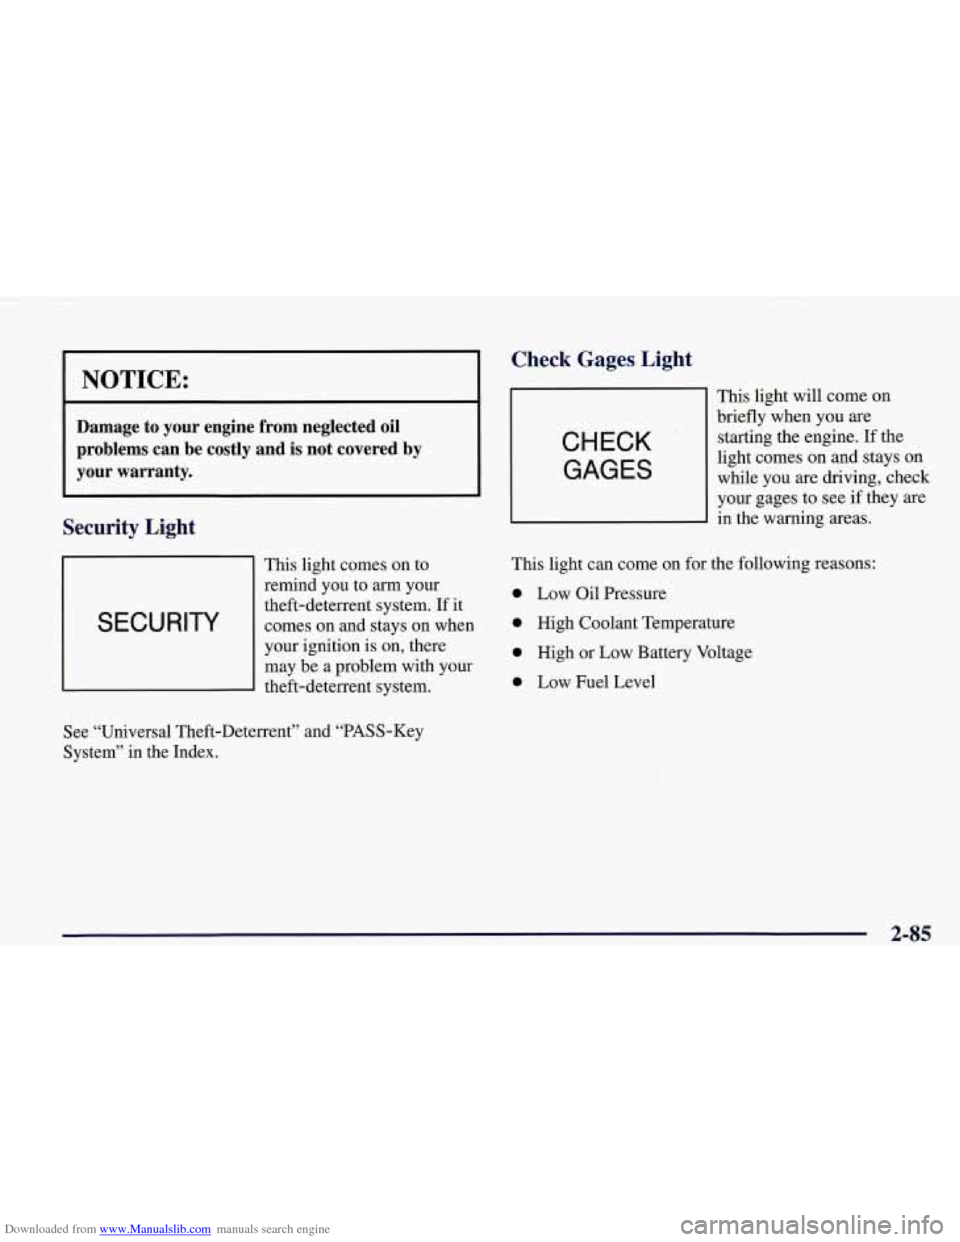
This light comes on to
remind you to
arrn your
I SECURITY
theft-deterrent system. If it
comes on and stays on when
I
your ignition is on, there
may be a problem with your
theft-deterrent system.
Check Gages, Light
CHECK
GAGES
This light will come on
briefly when you are
starting the engine. If the
light comes on and stays on
while you are driving, check
your gages to see
if they are
in the warning areas.
This light can come on for the following reasons:
0 Low Oil Pressure
0 High Coolant Temperature
0 High or Low Battery Voltage
0 Low Fuel Level
See “Universal Theft-Deterrent” and “PASS-Key
System” in the Index.
2-85
Page 140 of 378
Downloaded from www.Manualslib.com manuals search engine Driver Information Center (DIC)
The Driver Information Center (DIC) will display
information about how your vehicle is functioning, as
well as warning messages if a system problem is
detected. The DIC display area is located in the
instrument cluster below the speedometer and
tachometer, directly above the steering column.
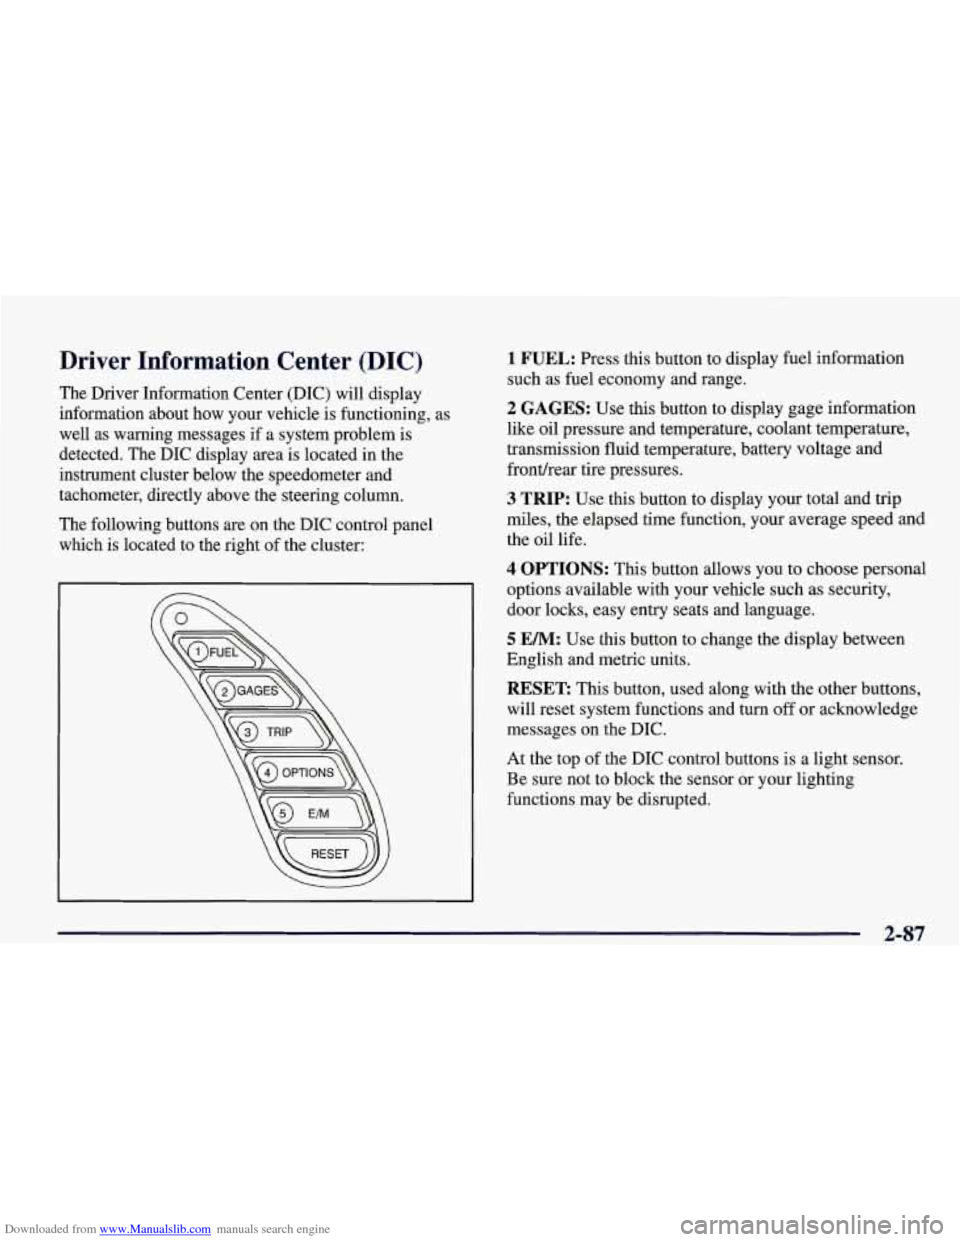
The following buttons are on the DIC control panel which is located to the right of the cluster:
1 FUEL: Press this button to display fuel information
such as fuel economy and range.
2 GAGES: Use this button to display gage information
like oil pressure and temperature, coolant temperature,
transmission fluid temperature, battery voltage and
fronthear tire pressures.
3 TRIP: Use this button to display your total and trip
miles, the elapsed time function, your average speed and
the oil life.
4 OPTIONS: This button allows you to choose personal
options available with your vehicle such as security,
door locks, easy entry seats and language.
5 EM: Use this button to change the display between
English and metric units.
RESET: This button, used along with the other buttons,
will reset system functions and turn
off or acknowledge
messages on the DIC.
At the top of the DIC control buttons is a light sensor.
Be sure not to block the sensor or your lighting
functions may be disrupted.
2-87
Page 142 of 378

Downloaded from www.Manualslib.com manuals search engine Press FUEL again to display instantaneous fuel
economy, such as:
0 INST. 20.1 MPG or
0 INST. 5.3 WlOO km
Press FUEL again to display the range, such as:
0 RANGE 20 MI or
RANGE32km
The range calculates the remaining distance you can
drive without refueling. It's based on fuel economy and
the fuel remaining in the tank.
If the range is lower than 30 miles (48 krn), the display
will read RANGE LOW.
The fuel economy data used to determine fuel range is
an average of recent driving conditions.
As your driving
conditions change, this data is gradually updated.
Resetting the fuel range causes the fuel economy data to
be updated immediately. Press RESET to reset the
fuel range.
2 GAGES
The GAGES button allows you to scroll through the
functions listed below when you press it.
GAGES
2 OIL PRESSURE 40 PSI
- OILTEMP. 234" F
- COOLANT TEMP 123 "F
- TRANS FLUID 123°F
- BATTERY VOLTS 13.5
- FRONT L 34 R 33 PSI
- REAR L 34 R 33 PSI
-,
Press the GAGE button to display the oil pressure,
such as:
0 OIL PRESSURE 40 PSI or
0 OIL PRESSURE 276 kPa
2-89
Page 151 of 378
Downloaded from www.Manualslib.com manuals search engine ABS ACTIVE (Anti-Lock Brake System Active) - :
When your anti-lock system is adjusting brake pressure
to help avoid a braking skid, the ABS ACTIVE message
will be displayed.
Slippery road conditions may exist if this message is
displayed,
so adjust your driving accordingly. The
message will stay on for a few seconds after the system
stops adjusting brake pressure.
SERVICE ABS (Anti-Lock Brake System) - : If the
SERVICE ABS message is displayed when you
are
driving, stop as soon as possible and turn the ignition
off. Then start the engine again to reset the system. If
the message stays on, or comes back on again while you
are driving, your vehicle is in need of service. If the
regular brake system warning light isn’t on, you still
have brakes, but don’t have anti-lock brakes. If the
regular brake system light is also on, you don’t have
anti-lock brakes and there is a problem with your
brakes.
See “Brake System Warning Light” earlier in
this section.
If the SERVICE ABS message is being displayed, your
traction control system and the optional active handling system will also be disabled. The driver information
center will scroll three messages SERVICE ABS,
SERVICE TRACTION SYS. and SERVICE ACTIVE
HNDLG and the instrument cluster car icon will be illuminated.
The driver can acknowledge these messages
by pressing the reset button three times. When the
service message is displayed the computer controlled
systems will not assist the driver and you should have
the system repaired as soon as possible. Adjust your
driving accordingly.
SERVICE COLUMN LOCK: The system that
controls the locking and unlocking of the steering
column may not work properly. Have the vehicle towed
to a dealer for service.
LOW OIL PRESSURE: You will hear four chimes and
the CHECK GAGES telltale will come on when this
message is displayed.
To acknowledge the warning,
press the RESET button. After you press the
RESET
button, a message will be displayed and you will hear a
chime every minute until the vehicle is serviced.
If you
do not press RESET, the message will remain on the
digital display until the vehicle is serviced.
Low oil pressure may be the result of a combination of
low oil level and abrupt changes in the vehicle’s
direction. When this warning
is displayed, you should
not operate the engine at high
RPM or make fast abrupt
moves. When convenient, you should check the oil
level. See “Engine Oil” in the Index.
Page 212 of 378
Downloaded from www.Manualslib.com manuals search engine The exit speed is usually posted.
Reduce your speed according to your speedometer, not
to your sense
of motion. After driving for any distance
at higher speeds, you may tend to think you are going slower than you actually are.
Before Leaving on a Long Trip
Make sure you’re ready. Try to be well rested. If you
must start when you’re not fresh
-- such as after a day’s
work
-- don’t plan to make too many miles that first part
of the journey. Wear comfortable clothing and shoes you
can easily drive in.
Is your vehicle ready for a long trip?
If you keep it
serviced and maintained, it’s ready
to go. If it needs
service, have it done before starting out. Of course,
you’ll find experienced and able service experts in
GM
dealerships all across North America. They’ll be ready
and willing to help if you need it. Here are some things you can check before a
trip:
0
0
0
0
0
0
0
Windshield Washer Fluid: Is the reservoir full? Are
all windows clean inside and outside?
Wiper Blades: Are they in good shape?
Fuel, Engine Oil, Other Fluids: Have you checked
all levels?
Lamps: Are they all working? Are the lenses clean?
Tires: They are vitally important to a safe,
trouble-free trip.
Is the tread good enough for
long-distance driving? Are the tires all inflated to the
recommended pressure?
Weather Forecasts: What’s the weather outlook
along your route? Should you delay your trip a short’
time to avoid a major storm system?
Maps: Do you have up-to-date maps?
4-21
Page 302 of 378
Downloaded from www.Manualslib.com manuals search engine Your Corvette has a “basecoatlclearcoat” paint finish.
The clearcoat gives more depth and gloss to the colored
basecoat. Always use waxes and polishes that
are
non-abrasive and made for a basecoatklearcoat
paint finish.
NOTICE: I
Machine compounding or aggressive polishing on
a basecoat/clearcoat paint finish may dull the
finish or leave swirl marks.
1
Foreign materials such as calcium chloride and other
salts, ice melting agents, road oil and tar, tree sap, bird
droppings, chemicals from industrial chimneys, etc., can
damage your vehicle’s finish if they remain on painted
surfaces. Wash the vehicle as soon as possible.
If
necessary, use non-abrasive cleaners that are marked
safe for painted surfaces to remove foreign matter.
Exterior painted surfaces are subject to aging, weather
and chemical fallout that can take their toll over a period
of years.
You can help to keep the paint finish looking
new by keeping your vehicle garaged or covered
whenever possible.
Cleaning Your Convertible Top
Your convertible top should be cleaned often. If you use
an automatic car wash, use one with water jets and
hanging cloths. High pressure car washes may cause
water to enter your vehicle.
When you hand wash the top, do it in partial shade. Use
a mild soap, lukewarm water and a soft sponge.
A
chamois or cloth may leave lint on the top, and a brush
can chafe the threads in the top fabric. Don’t use
detergents, harsh cleaners, solvents or bleaching agents.
Wet the entire vehicle and wash the top evenly to avoid
spots or rings. Let the soap remain on the fabric for a
few minutes. When the top is really dirty, use a mild
foam-type cleaner. Thoroughly rinse the entire vehicle,
then let the top dry in direct sunlight.
To protect the convertible top:
After you wash the vehicle, make sure the top is
completely dry before you lower it.
Don’t get any cleaner on the vehicle’s painted finish;
If you decide to go through an automatic car wash,
ask the manager if the equipment could damage
your top. it could leave streaks.
6-57
Page 330 of 378
Downloaded from www.Manualslib.com manuals search engine Part B: Owner Checks and Services
Listed below are owner checks and services which
should be performed at the intervals specified to help
ensure the safety, dependability and emission control
performance of your vehicle.
Be sure any necessary repairs are completed at once.
Whenever any fluids or lubricants are added to your
vehicle, make sure they
are the proper ones, as shown
in
Part D.
At Each Fuel Fill
It is important for you or a service station attendant to
pe$om these underhood checks at each fuel
fill.
Engine Oil Level Check
Check the engine oil level and add the proper oil
if necessary. See “Engine Oil” in the Index for
further details.
Engine Coolant Level Check
Check the engine coolant level and add DEX-COOL@
coolant mixture
if necessary. See “Engine Coolant” in
the Index for further details.
Windshield Washer Fluid Level Check
Check the windshield washer fluid level in the
windshield washer tank and add the proper fluid if
necessary.
See “Windshield Washer Fluid” in the Index
for further details.
At Least Once a Month
Tire Inflation Check
Make sure tires are inflated to the correct pressures. See
“Tires” in the Index for further details.
Cassette Deck Service
Clean cassette deck. Cleaning should be done every
50 hours of tape play. See “Audio Systems” in the
Index for further details.
Power Antenna Service
Clean power antenna mast. See “Audio Systems” in the
Index for further details.
7-11