1998 CHEVROLET ASTRO window
[x] Cancel search: windowPage 210 of 414

Downloaded from www.Manualslib.com manuals search engine Then, shut the engine off and close the window almost
all the way to preserve the heat. Start the engine again
and repeat this only when you feel really uncomfortable
from the cold.
But do it as little as possible. Preserve the
fuel as long as you can. To help keep warm, you can get
out of the vehicle and
do some fairly vigorous exercises
every half hour or
so until help comes.
Loading Your Vehicle
no
GAWR FRT
(SEE dc
RIM COLD TIRE PRESSURE
--
VNERIS MANUAL FOR ADDITIONAL INFORMATION. -I
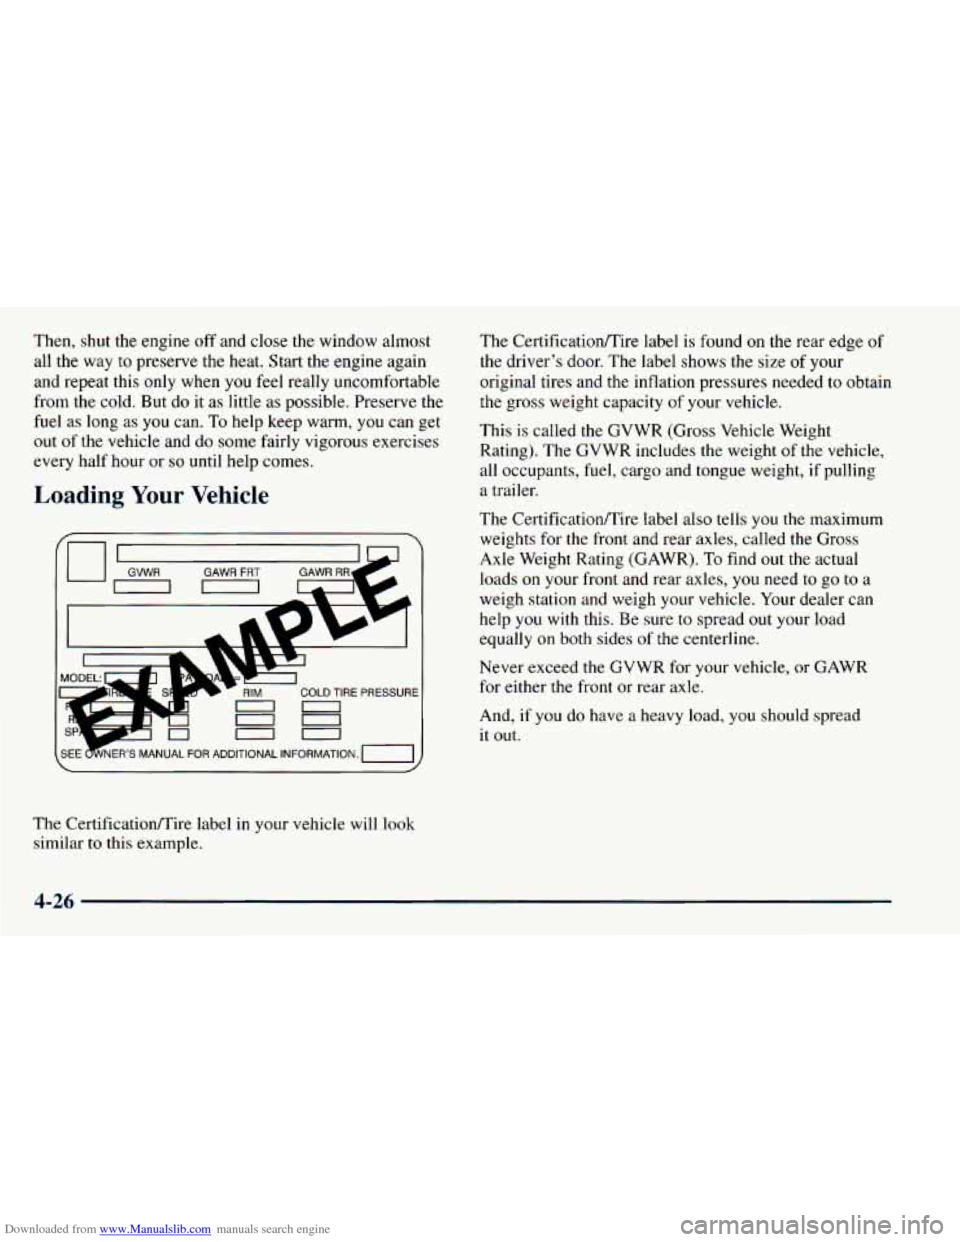
The CertificatiodTire label in your vehicle will look
similar
to this example. The
Certification/Tire label is found on the rear edge
of
the driver’s door. The label shows the size of your
original tires and the inflation pressures needed to obtain
the gross weight capacity of your vehicle.
This is called the GVWR (Gross Vehicle Weight
Rating). The GVWR includes the weight of the vehicle,
all occupants, fuel, cargo and tongue weight, if pulling
a trailer.
The Certificationnire label also tells you the maximum
weights for the front and rear axles, called the Gross
Axle Weight Rating (GAWR). To find out the actual
loads on your front and rear axles,
you need to go to a
weigh station and weigh your vehicle. Your dealer can
help
you with this. Be sure to spread out your load
equally
on both sides of the centerline.
Never exceed the GVWR for your vehicle, or GAWR
for either the front or rear axle.
And,
if you do have a heavy load, you should spread
it out.
4-26
Page 217 of 414

Downloaded from www.Manualslib.com manuals search engine Your trailer brake system can tap into your vehicle’s
hydraulic brake system, except:
.; 0
1
e
0
Don’t tap into your vehicle’s brake system if the
trailer’s brake system will use more than
0.02 cubic
inch
(0.3 cc) of fluid from your vehicle’s master
cylinder. If it does, both braking systems won’t work
well. You could even lose your brakes.
Will the trailer
parts take 3,000 psi (20 650 kPa) of
pressure? If not, the trailer brake system must not be
used with your vehicle.
If everything checks out this far, then make the brake
fluid tap at the port on the master cylinder that sends
fluid to the rear brakes. But don’t use copper tubing
for this. If you do, it will bend and finally break off.
Use steel brake tubing.
Driving with a Trailer
I
you have a rear-most window open and you
pull
a trailer with your vehicle, carbon monoxide
(CO) could come into your vehicle. You can’t see
or smell CO. It can cause unconsciousness or
death. (See “Engine Exhaust” in the Index.) To
maximize your safety when towing
a trailer:
Have your exhaust system inspected for leaks, and make necessary repairs before
starting on your trip.
Keep the rear-most windows closed.
0 If exhaust does come into your vehicle
through
a window in the rear or another
opening, drive with your front, main
heating or cooling system on and with the
fan on any speed. This will bring fresh,
outside air into your vehicle.
Do not use
MAX A/C because it only recirculates the
air inside your vehicle. (See “Comfort
Controls” in the Index.)
4-33
Page 236 of 414

Downloaded from www.Manualslib.com manuals search engine If No Steam Is Coming From Your Engine
If you get the overheat warning but see or hear no
steam, the problem may not be too serious. Sometimes
the engine can get a little too hot when you:
Climb a long hill on a hot day.
Stop after high-speed driving.
Idle for long periods in traffic.
0 Tow a trailer. See “Driving on Grades” in the Index.
If
you get the overheat warning with no sign of steam,
try this for a minute or
so:
I. Turn off your air conditioner.
2. Turn on your heater to full hot at the highest fan
speed and open the window as necessary.
3. If you’re in a traffic jam, shift to NEUTRAL (N);
otherwise, shift to the highest gear while
driving
-- DRIVE (D).
If you no longer have the overheat warning, you
can drive. Just
to be safe, drive slower for about
10 minutes. If the warning doesn’t come back on,
you can drive normally.
If
the warning continues, pull over, stop, and park
your vehicle right away.
If there’s still
no sign of steam, push the accelerator
until the engine speed is about twice as fast as normal
idle speed. Bring the engine speed back
to normal idle
speed after two or three minutes. Now see if the warning
stops. But then,
if you still have the warning, turn ofs
the engine nncl get everyone out of the vehicle until it
cools down.
You
may decide not to lift the hood but to get service
help right away.
5-14
Page 295 of 414

Downloaded from www.Manualslib.com manuals search engine Checking Brake Fluid
You can check the brake fluid without taking off the cap.
Just look at the brake fluid reservoir. The fluid level
should be above MIN.
If it isn’t, have your brake system
checked to see if there is a leak.
After work is done on the brake hydraulic system,
make sure the level is above the MIN but not over the
MAX mark or the top of the window on the side of
the reservoir.
What to Add
When you do need brake fluid, use only DOT-3 brake
fluid
-- such as Delco Supreme ll@ (GM Part
No. 12377967). Use new brake fluid from a sealed
container only.
Always clean the brake fluid reservoir cap and the area
around the cap before removing it. This will help keep
dirt from entering the reservoir.
I A CAUTION:
With the wrong kind of fluid in your brake
system, your brakes may not work well, or they
may not even work at all. This could cause a
crash. Always use the proper brake fluid.
I
6-33
Page 313 of 414

Downloaded from www.Manualslib.com manuals search engine Appearance Care
Remember, cleaning products can be hazardous. Some
are toxic. Others can burst into flame if
you strike a
match or get them on a hot part
of the vehicle. Some are
dangerous if you breathe their fumes in
a closed space.
When you use anything from a container to clean your
vehicle, be sure to follow the manufacturer’s warnings
and instructions. And always open your doors or
windows when you’re cleaning the inside.
Never use these to clean your vehicle:
0 Gasoline
Benzene
Naphtha
0 Carbon Tetrachloride
Acetone
0 Paint Thinner
Turpentine
0 Lacquer Thinner
0 Nail Polish Remover
They can all be hazardous
-- some more than
others
-- and they can all damage your vehicle, too. Don’t
use any of these
unless this manual says you can.
In many uses, these will damage your vehicle:
0 Alcohol
0 Laundry Soap
0 Bleach
0 Reducing Agents
Cleaning the Inside of Your Vehicle
Use a vacuum cleaner often to get rid of dust and loose
dirt. Wipe vinyl, leather, plastic and painted surfaces
with a clean, damp cloth.
Your dealer has two cleaners, Multi-Purpose Interior
Cleaner and Capture Non-Solvent Dry Spot and Soil
Remover for cleaning fabric and carpet. They will clean
normal spots and stains very well. You can get
GM-approved cleaning products from your dealer. (See
“Appearance Care and Materials”
in the Index.)
Here are some cleaning tips:
0 Always read the instructions on the cleaner label.
Clean up stains as soon as you can -- before they set.
Carefully scrape off any excess stain.
Use a clean cloth or sponge, and change to a clean area
If a ring forms after spot cleaning, clean the entire
often.
A soft brush may be used if stains are stubborn.
area immediately or
it will set.
Page 316 of 414

Downloaded from www.Manualslib.com manuals search engine Care of Safety Belts and Built-in
Child Restraint Harness
Keep the safety belts and the built-in child restraint
harness clean and dry.
Do not bleach or dye safety belts or the built-in
child restraint harness. If you do, they may be
severely weakened. In a crash, they might not be
able to provide adequate protection. Clean the
safety belts and the child restraint harness only
with mild soap and lukewarm water.
Cleaning Glass Surfaces
Glass should be cleaned often. GM Glass Cleaner (GM
Part
No. 1050427) or a liquid household glass cleaner
will remove normal tobacco smoke and dust films on
interior glass.
Don’t use abrasive cleaners
on glass, because they may
cause scratches. Avoid placing decals on the inside rear window, since they may have
to be scraped off later. If
abrasive
cleaners are used on the inside of the rear
window, an electric defogger element may be damaged.
Any temporary license should not be attached across the
defogger grid.
Cleaning the Outside of the
Windshield, Backglass and
Wiper Blades
If the windshield is not clear after using the windshield
washer, or
if the wiper blade chatters when running, wax,
sap or other material may be on the blade or windshield.
Clean the outside of the windshield
with GM
Windshield Cleaner, Bon Ami@ Powder (non-scratching
glass cleaning powder),
GM Part No. 105001 1. The
windshield
is clean if beads do not form when you rinse
it
with water.
Grime from the windshield will stick to the wiper blades
and affect their performance. Clean the blade by wiping
vigorously
with a cloth soaked in full-strength windshield
washer solvent. Then rinse the blade with water.
Check the wiper blades and clean them as necessary;
replace blades that look worn.
6-54
Page 322 of 414

Downloaded from www.Manualslib.com manuals search engine Electrical System
Add-on Electrical Equipment
I NOTICE:
Don’t add anything electrical to your vehicle
unless you check with your dealer first. Some
electrical equipment can damage your vehicle
and the damage wouldn’t be covered by your warranty. Some add-on electrical equipment can
keep other components from working as
they should.
Your vehicle has an air bag system. Before attempting to
add anything electrical to your vehicle, see “Servicing
Your Air Bag-Equipped Vehicle” in the Index.
Headlamp Wiring
The headlamp wiring is protected by a circuit breaker in
the lamp switch. An electrical overload will cause the
lamps to go on and off, or in some cases to remain off. If
this happens, have your headlamp wiring checked
right away.
Windshield Wiper Fuses
The windshield wiper motor is protected by a circuit
breaker and a fuse. If the motor overheats due to heavy
snow, etc., the wiper will stop until the motor cools. If
the overload is caused by some electrical problem and
not snow, etc., be sure to get it fixed.
Power Windows and Other Power Options
Circuit breakers in the fuse panel protect the power
windows and other power accessories. When the current
load is
too heavy, the circuit breaker opens and closes,
protecting the circuit until the problem is fixed or
goes away.
6-60
Page 325 of 414

Downloaded from www.Manualslib.com manuals search engine FuseKircuit Breaker Usage
12
13
14
15
16
17
L, M 1, M2 Blower Motor, Rear A/C
Relay Coil, Front Cont. Temp. Door
Motor,
HI Blower Relay, Defogger
Timer Coil
Cigar Lighter, Door Lock Switches,
Dutch Door Release Module
Cluster Illum, HVAC Controls, Chime
Module, Radio Illumination, Rear Heat
Switch Illumination, Rear
Wiper/Washer Switch Illumination,
Rear Liftgate Switch Illumination,
Remote Cassette Illumination, O/H
Console
DRL Lamps
Front Turn Signals, Rear Turn Signals,
Trailer Turn Signals, Back-up Lamps,
BTSI Solenoid
Radio: ATC (Standby), 2000 Series
(Main Feed), Rear Seat Audio Controls 19
20
FuseKircuit
Breaker Usage
18 VCM-Ign 3, VCM-Brake, LCWAL,
Cruise Stepper Motor Signal
Radio: ATC (Main Feed),
2000 Series
(Standby)
PRNDL/ Odometer, TCC Enable and
PWM Solenoid, Shift A and Shift B
Solenoids, 3-2 Downshift Solenoid
21
22
23
24
A
B Not Used
Security/Steering Module
Rear Wiper, Rear Washer Pump
Not Used (Circuit Breaker) Power Door
Lock
Relay, 6-way Power Seat, Remote
Control Door Lock Receiver, Dutch
Door Module, Dutch Door Release
(Circuit Breaker) Power Windows
6-63