1998 CADILLAC ELDORADO oil level
[x] Cancel search: oil levelPage 143 of 380

Downloaded from www.Manualslib.com manuals search engine CHECK BRAKE FLUID LEVEL - 37: This message
will display if the ignition is in
RUN to inform the
driver that the brake fluid level is low. Check the brake
reservoir level and add fluid as needed. Have the brake
system serviced by a technician as soon as possible. If
the brake warning light is on, follow the directions in
that part.
CHECK COOLANT LEVEL - 2: This message will
appear when there is a low level
of engine coolant.
Have
the cooling system serviced by a technician as
soon as possible.
CHECK FUEL GAUGE - 39: This message will
appear when the fuel supply is less than
4 gallons
( 15.2 L) and the display is turned off (digital clusters
only).
A single chime will also sound when this
message is displayed.
CHECK GAS CAP - 61: This message will appear if
the gas cap has not been fully tightened. You should
recheck your gas cap to ensure that it’s fully tightened.
CHECK OIL LEVEL - 36: For correct operation of
the low oil sensing system, your vehicle should be on a
level surface. A false CHECK OIL LEVEL message
may appear if the vehicle is parked on grades. The oil
level sensing system does not check for actual oil level
if
the engine has been off for a short period of time, and
the oil level is never sensed while the engine is running. If
the CHECK
OIL LEVEL message appears and your
vehicle has been parked on level ground with the engine
off for at least 30 minutes, the oil level should be
checked by observing
the oil dipstick. Prior to checking
the oil level,
be sure the engine has been off for five
minutes and your vehicle is on
a level surface. Then
check the dipstick and add oil
if necessary. See “Engine
Oil” in the Index.
CHECK WASHER FLUID - 25: This message will
appear for several seconds indicating that you need
washer solvent.
CRUISE ENGAGED - 43: This message will
appear for a few seconds when
you select a speed at
which to cruise.
DOOR A JAR - 141: A door other than the driver’s
is open or ajar when this message appears. The
vehicle’s engine must be running and the transaxle not
in PARK (P) for this message to display. A chime will
also sound when the vehicle’s speed is greater than
5 mph (8 km/h).
DRIVER DOOR AJAR - 140: This message will
display when the vehicle
is being shifted out of
PARK (P) with the engine running to signal that the
driver’s
door is open or ajar. A chime will also sound
when the vehicle’s speed is greater
than 5 mph (8 km/h).
Page 145 of 380

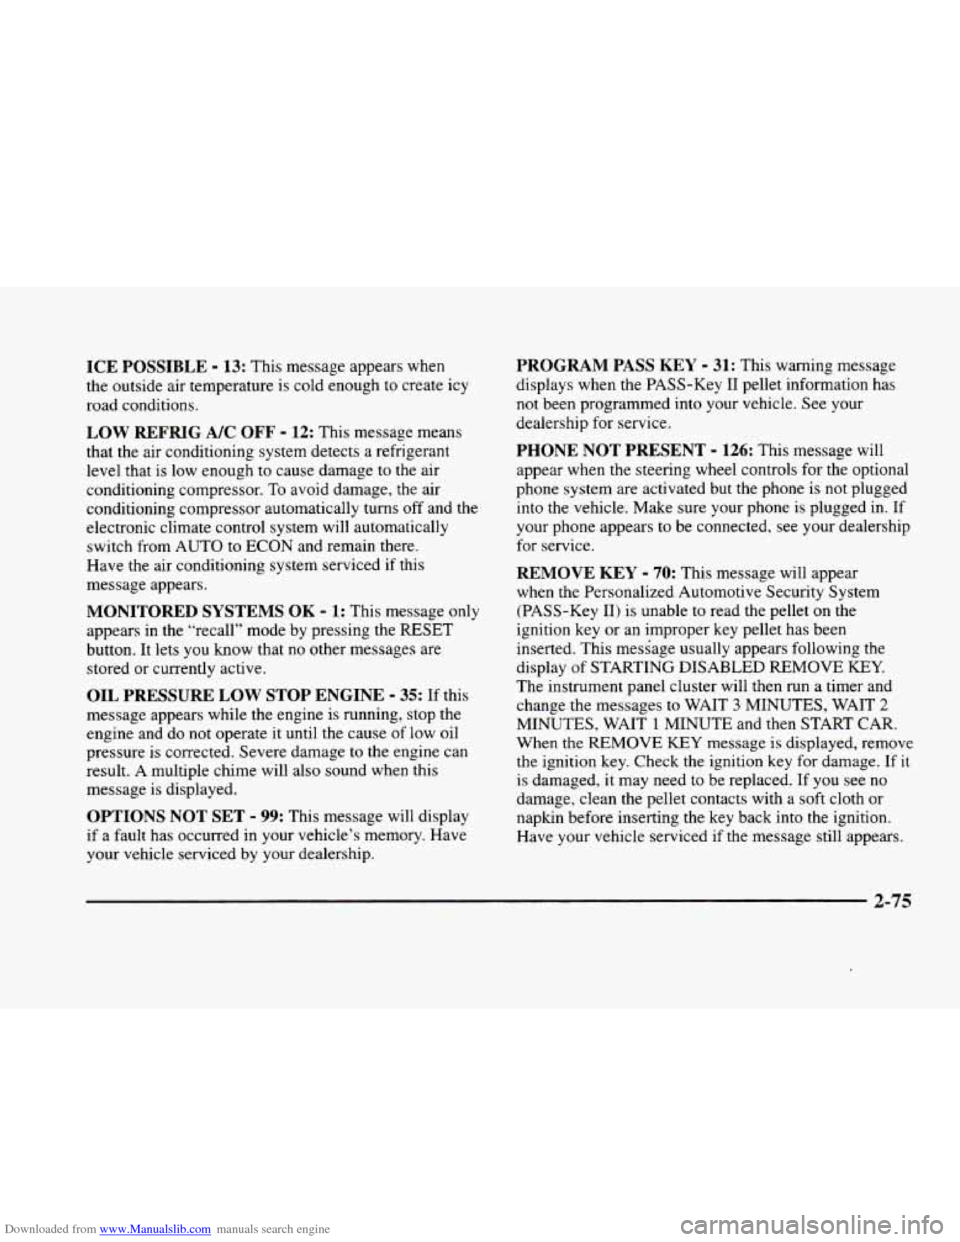
Downloaded from www.Manualslib.com manuals search engine ICE POSSIBLE - 13: This message appears when
the outside air temperature is cold enough
to create icy
road conditions.
LOW REFRIG A/C OFF - 12: This message means
that the air conditioning system detects a refrigerant
level that is low enough
to cause damage to the air
conditioning compressor.
To avoid damage, the air
conditioning compressor automatically turns
off and the
electronic climate control system will automatically
switch from AUTO to
ECON and remain there.
Have the air conditioning system serviced if this
message appears.
MONITORED SYSTEMS OK - 1: This message only
appears in the “recall” mode by pressing the RESET
button. It lets you know that no other messages are
stored or currently active.
OIL PRESSURE LOW STOP ENGINE - 35: If this
message appears while the engine is running, stop the
engine and do not operate it until the cause of low oil
pressure
is corrected. Severe damage to the engine can
result.
A multiple chime will also sound when this
message is displayed.
OPTIONS NOT SET - 99: This message will display
if a fault has occurred in your vehicle’s memory. Have
your vehicle serviced
by your dealership.
PROGRAM PASS KEY - 31: This warning message
displays when the PASS-Key I1 pellet information has
not been programmed into your vehicle. See your
dealership for service.
PHONE NOT PRESENT - 126: This message will
appear when the steering wheel controls for the optional
phone system are activated but the phone is not plugged
into
the vehicle. Make sure your phone is plugged in. If
your phone appears
to be connected, see your dealership
for service.
REMOVE KEY - 70: This message will appear
when the Personalized Automotive Security System
(PASS-Key
11) is unable to read the pellet on the
ignition key
or an improper key pellet has been
inserted. This message usually appears following the
display of STARTING DISABLED
REMOVE KEY.
The instrument panel cluster will then run a timer and
change the messages
to WAIT 3 MINUTES, WAIT 2
MINUTES, WAIT 1 MINUTE and then START CAR.
When the REMOVE
KEY message is displayed, remove
the ignition key. Check the ignition key for damage. If it
is damaged, it may need to be replaced. If
you see no
damage, clean the pellet contacts with a soft cloth or
napkin before inserting the key back into the ignition.
Have your vehicle serviced
if the message still appears.
2-75
Page 221 of 380

Downloaded from www.Manualslib.com manuals search engine Is your vehicle ready for a long trip? If you keep it
serviced and maintained. it's ready to go. If it needs
service, have
it done before starting out. Of course.
you'll find experienced and able service experts in
Cadillac dealerships ail across North America. They'll
be ready and willing to help if you need it.
Here are some things you can check before a trip:
0
0
0
0
a
0
a
Windshield Washer Fluid: Is the reservoir full? Are
all windows clean inside and outside'?
Wiper Blcrdes: Are they in good shape?
Fuel, Engine Oil, Other Fluids: Have you checked
all levels?
Lamps: Are they all working? Are the lenses clean'?
Tires: They are vitally important to a safe,
trouble-free trip. Is the tread good enough for
long-distance driving? Are the tires all inflated to the
recommended pressure'?
Wenfher- Forecusts: What's the weather outlook
along
your route? Should you delay your trip a short
time to avoid a major storm system?
Mups: Do you have up-to-date maps?
Highway Hypnosis
Is there actually such a condition as "highway hypnosis"?
Or
is it just plain t'alling asleep at the wheel? Cali it
highway hypnosis, lack of awareness, or whatever.
There
is something about an easy stretch of road with the
same scenery, along with the hum of the tires on the road,
the drone of the engine. and the rush of the wind against
the vehicle thdt can make you sleepy. Don't let it happen
to
you! If it does. your vehicle can leave the road in less
th~~ a second, and you could crash and be injured.
What can you
do about highway hypnosis? First, be
aware that
it can happen.
Then here are some tips:
0 Make sure your vehicle is well ventilated, with a
comfortabiy cool interior.
Keep your eyes moving. Scan the road ahead and to
the sides.
Check your rearview mirrors and your
instruments frequently.
a If you get sleepy, pull off the road into a rest, service
or parking
area and take a nap, get some exercise. or
both. For safety, treat drowsiness on the highway as
an emergency.
4-23
Page 260 of 380

Downloaded from www.Manualslib.com manuals search engine How to Add Coolant to the Coolant
Surge
Tank
If you haven’t found a problem yet, but the coolant level
isn’t at the proper level
(2.5 inches (6.4 cm) below the
base
of the fill neck), add a 50/50 mixture of clean
water (preferably distilled) and DEX-COOL@ coolant at
the coolant surge tank, but be sure the cooling system,
including the coolant surge tank pressure cap,
is cool
before you do it. (See “Engine Coolant’‘ in
the Index for
more information.)
A CAUTION:
Steam and scalding liquids from a hot cooling
system can blow out and burn you badly. They
are under pressure, and if
you turn the coolant
surge tank pressure cap
-0 even a little -- they
can come out at high speed. Never turn the
cap when the cooling system, including the
coolant surge tank pressure cap, is hot. Wait
for the cooling system and coolant surge tank
pressure cap to cool
if you ever have to turn
the pressure cap.
I
Adding only plain water to your cooling system
can be dangerous. Plain water, or some other
liquid like alcohol, can boil before the proper
coolant mixture will. Your vehicle’s coolant
warning system
is set for the proper coolant
mixture. With plain water or the wrong mixture,
your engine could get too hot but you wouldn’t
CAUTION: (Continued)
5-20
Page 281 of 380

Downloaded from www.Manualslib.com manuals search engine ,<+ --\,
Section 6 Service and Appearance Care
Here you will find information about the care of your vehicle. This section begins with service and fuel infomation,
and then it shows how
to check important fluid and lubricant levels. There is also technical information about your
vehicle, and a part devoted to its appearance care.
6-2
6-3
6-5
6-8
6-8
6-1 1
6- 15
6-18
6-22
6-26
6-28
6-3 1
6-32
6-38
6-3 8
6-47
6-47
6-49 Service
Fuel
Filling Your Tank
Filling a Portable Fuel Tank
Checking Things Under the Hood
Engine Oil
Air Cleaner
Automatic Transaxle Fluid
Engine Coolant
Windshield Washer Fluid
Brakes
Battery
Bulb Replacement
Windshield Wiper Blade Replacement
Tires Appearance Care
Cleaning the Inside
of Your Vehicle
Care
of Safety Belts 6-50
6-50
6-50
6-50
6-52
6-52
6-52
6-53
6-5
3
6-54
6-55
6-55
6-64
6-64
6-65
6-65 Cleaning
Glass Surfaces
Cleaning the Outside of the Windshield and
Wiper Blades
Weatherstrips
Cleaning the Outside
of Your Vehicle
Cleaning Aluminum or Chrome Wheels
(If Equipped)
Cleaning Tires
Sheet Metal Damage
Underbody Maintenance
Chemical Paint Spotting
Appearance Care Materials Chart
Vehicle Identification Number (VIN)
Electrical System
Replacement Bulbs Capacities and Specifications
Air Conditioning Refrigerants
Normal Maintenance Replacement
Parts
6-1
Page 291 of 380

Downloaded from www.Manualslib.com manuals search engine Underhood Lamp
Turn the parking lamps on to operate the underhood
lamp.
The underhood lamp will come on when the
hood is opened.
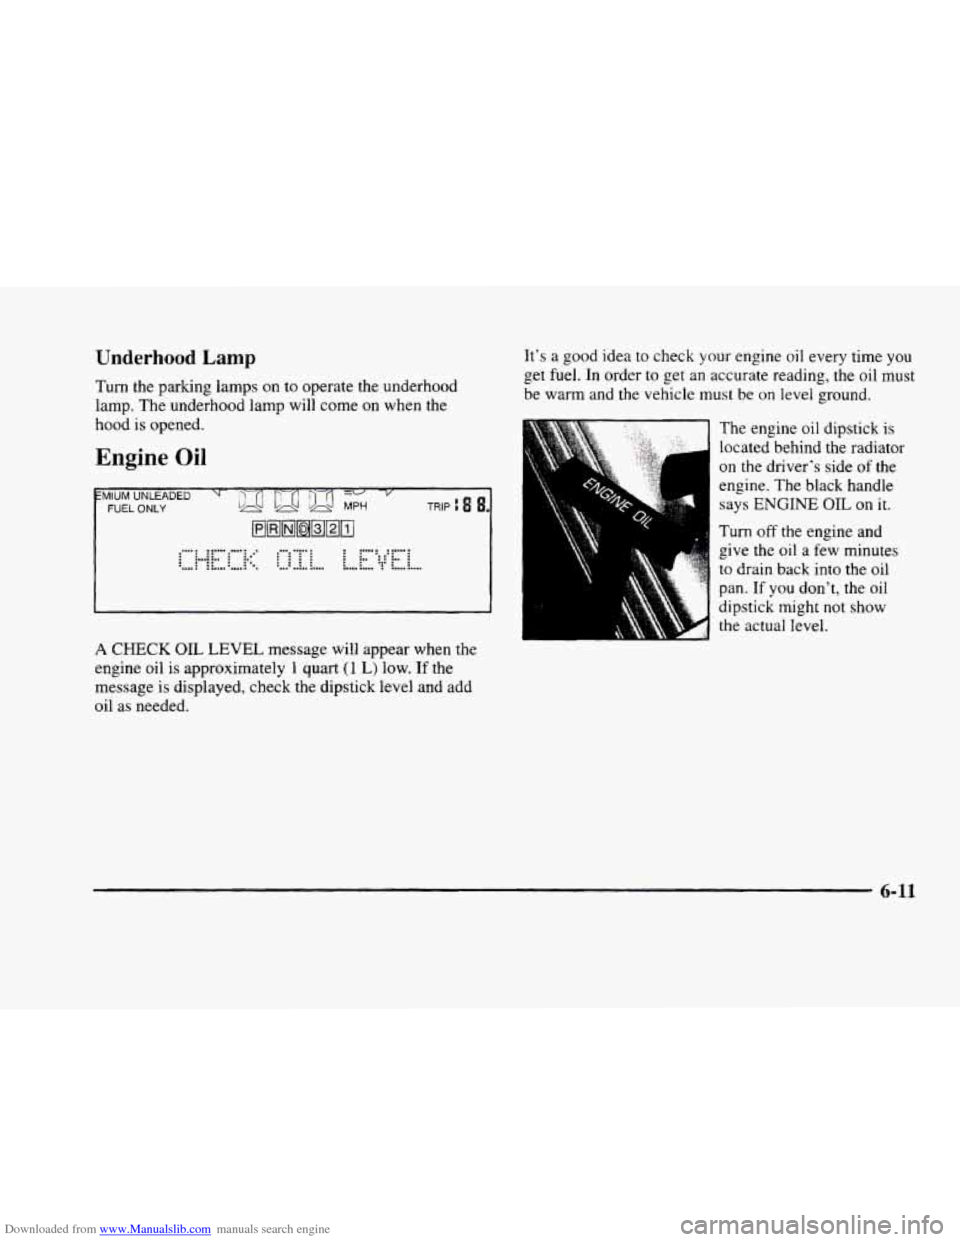
Engine Oil
1
iMlUM UNLEADED
FUEL ONLY TRIP fl fl.
@BMaBUD
.......................... .............. ....... ............ ....... .... ..... ........... ... ....... :;if i i.. *: :-i.. : i : ......................................... .".......
1 CHECK OIL LEVEL message will appear when the
engine oil is approximately
1 quart (1 L) low. If the
message is displayed, check the dipstick level and add
oil
as needed.
It's a good idea to check your engine oil every time you
get fuel. In order to get an accurate reading, the oil must
be warm and the vehicle must be on level ground.
The engine oil dipstick is
located behind
the radiator
on the driver's side of the
engine. The black handle
says ENGINE OIL on it.
Turn off the engine and
give
the oil a few minutes
to drain back into the oil
pan.
If you don't, the oil
dipstick might not show
the actual level.
6-11
Page 292 of 380

Downloaded from www.Manualslib.com manuals search engine Checking Engine Oil
Pull out the dipstick and clean it with a paper towel or
cloth, then push it back in all the way. Remove
it again,
keeping the tip down, and check the level.
When to Add Engine Oil
If the oil is at or below the ADD line, then you’ll need
to add at
least one quart of oil. But you must use the
right kind. This part explains what kind of oil to use. For
crankcase capacity,
see “Capacities and Specifications”
in the
Index.
NOTICE:
Don’t add too much oil. If your engine has so
much oil that the oil level gets above the upper
mark that shows the proper operating range,
your engine could be damaged.
A
The oil fill cap is located
behind the radiator
on the
passenger’s side
of the
engine.
Turn the cap to the
left to remove it.
Be sure to
fill it enough to put the level somewhere in
the proper operating range. Push the dipstick all the way
back in when you’re through.
6-12
Page 298 of 380

Downloaded from www.Manualslib.com manuals search engine A CAUTION:
Operating the engine with the air cleaner off can
cause you or others to be burned. The air cleaner
not only cleans the air, it stops flame
if the engine
backfires.
If it isn’t there, and the engine
backfires,
you could be burned. Don’t drive with
it
off, and be careful working on the engine with
the air cleaner off.
NOTICE:
If the air cleaner is off, a backfire can cause a
damaging engine fire. And, dirt can easily get
into your engine, which will damage it. Always
have the air cleaner in place when you’re driving.
Automatic Transaxle Fluid
When to Check and Change
A good time to check your automatic transaxle fluid
level is when the engine oil is changed.
Change both the fluid and filter every
50,000 miles
(83 000 km) if the vehicle is mainly driven under one
or more
of these conditions:
0 In heavy city traffic where the outside temperature
0 In hilly or mountainous terrain.
0 When doing frequent trailer towing.
0 Uses such as found in taxi, police or delivery service.
If you do not use your vehicle under any
of these
conditions, the fluid and filter do not require change
until the message
CHANGE TRANS FLUID appears
on the Driver Information Center.
See “Scheduled Maintenance Services” in the
Maintenance Schedule booklet.
regularly
reaches
90” F (32 O C j or higher.
6-18