1998 CADILLAC CATERA child lock
[x] Cancel search: child lockPage 32 of 346

Downloaded from www.Manualslib.com manuals search engine How to Wear Safety Belts Properly
Adults
This part is only for people of adult size.
Be aware that there are special things to know about
safety belts and children. And there
are different
rules for smaller children and babies.
If a child will
be riding in your vehicle, see the part
of this
manual called “Children.” Follow those rules for
everyone’s protection.
First, you’ll want to know which restraint systems
your vehicle has.
We’ll start with the driver position.
Driver Position
This part describes the driver’s restraint system.
Lap-Shoulder Belt
The driver has a lap-shoulder belt. Here’s how to wear
it properly.
1. Close and lock the door.
2. Adjust the seat (to see how, see “Seats” in the Index)
so you can sit up straight.
A
3.
4.
Pick up the latch plate and pull the belt across you.
Don’t let it get twisted.
The shoulder belt may lock if you pull the belt across
you very quickly. If this happens, let the belt
go back
slightly to unlock it. Then pull the belt across you
more slowly.
Push the latch plate into the buckle until it clicks.
1-19
Page 40 of 346

Downloaded from www.Manualslib.com manuals search engine The best way to protect the fetus is to protect the
mother. When a safety belt is worn properly, it’s more
likely that the fetus won’t be hurt in a crash. For
pregnant women, as for anyone, the key to making
safety belts effective is wearing them properly.
Right Front Passenger Position
To learn how to wear the right front passenger’s
safety belt properly, see “Driver Position” earlier in
this section.
The right front passenger’s safety belt works the same
way as the driver’s safety belt
-- except for one thing.
If you ever pull the shoulder portion of the belt out all
the way,
you will engage the child restraint locking
feature.
If this happens, just let the belt go back all
the way and start again.
Air Bag Systems
This part explains the frontal and side impact air
bag systems.
Your vehicle has air bags
-- a “Next Generation” frontal
air bag for the driver and another “Next Generation”
reduced-force frontal air bag for the right front
passenger. Your vehicle may also have side impact air
bags
-- a side impact air bag for the driver and another
side impact air bag for the right front passenger.
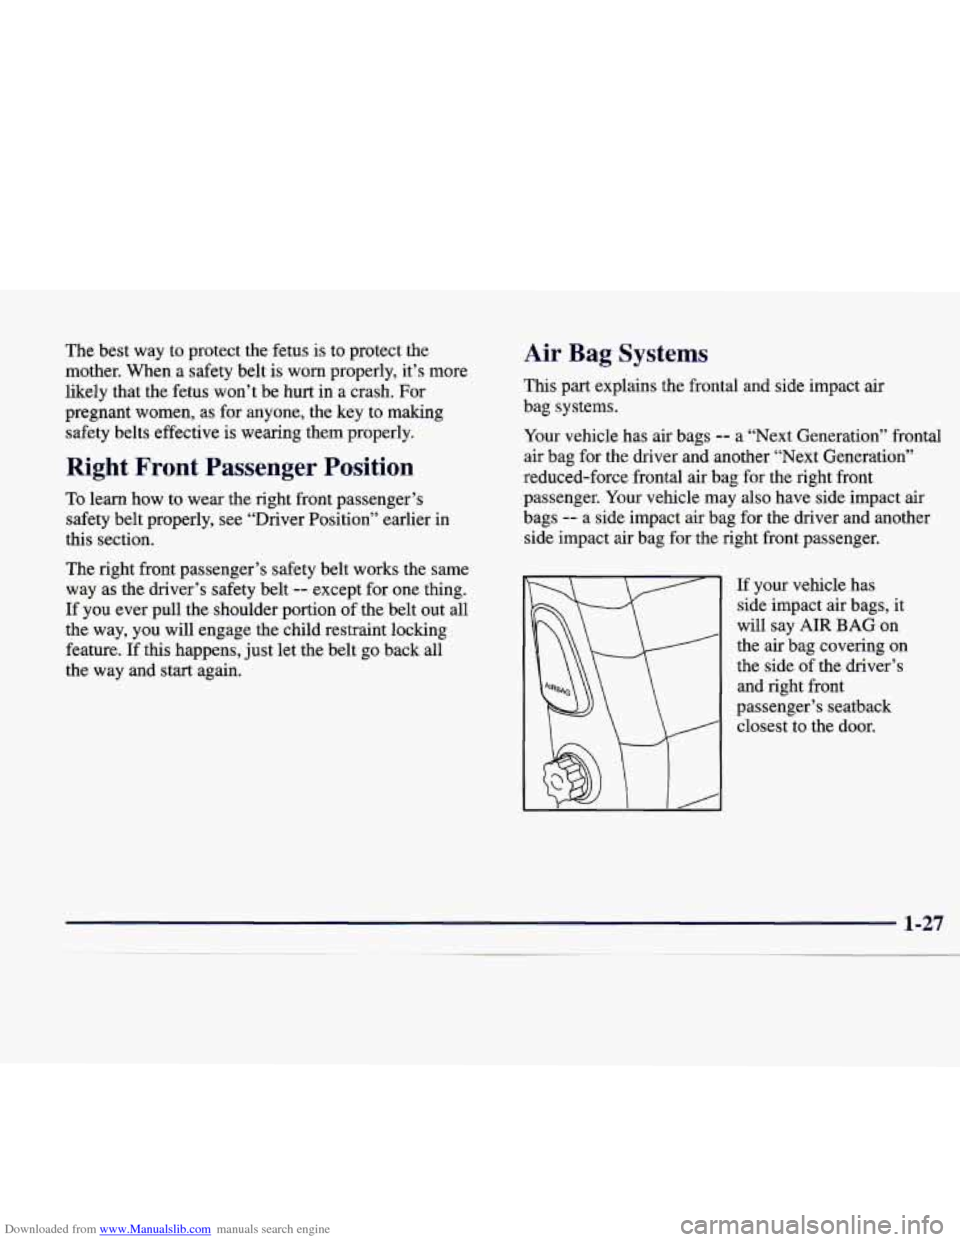
If your vehicle has
side impact
air bags, it
will say AIR BAG on
the air bag covering on
the side of the driver’s
and right front
passenger’s seatback closest to the door.
Page 63 of 346

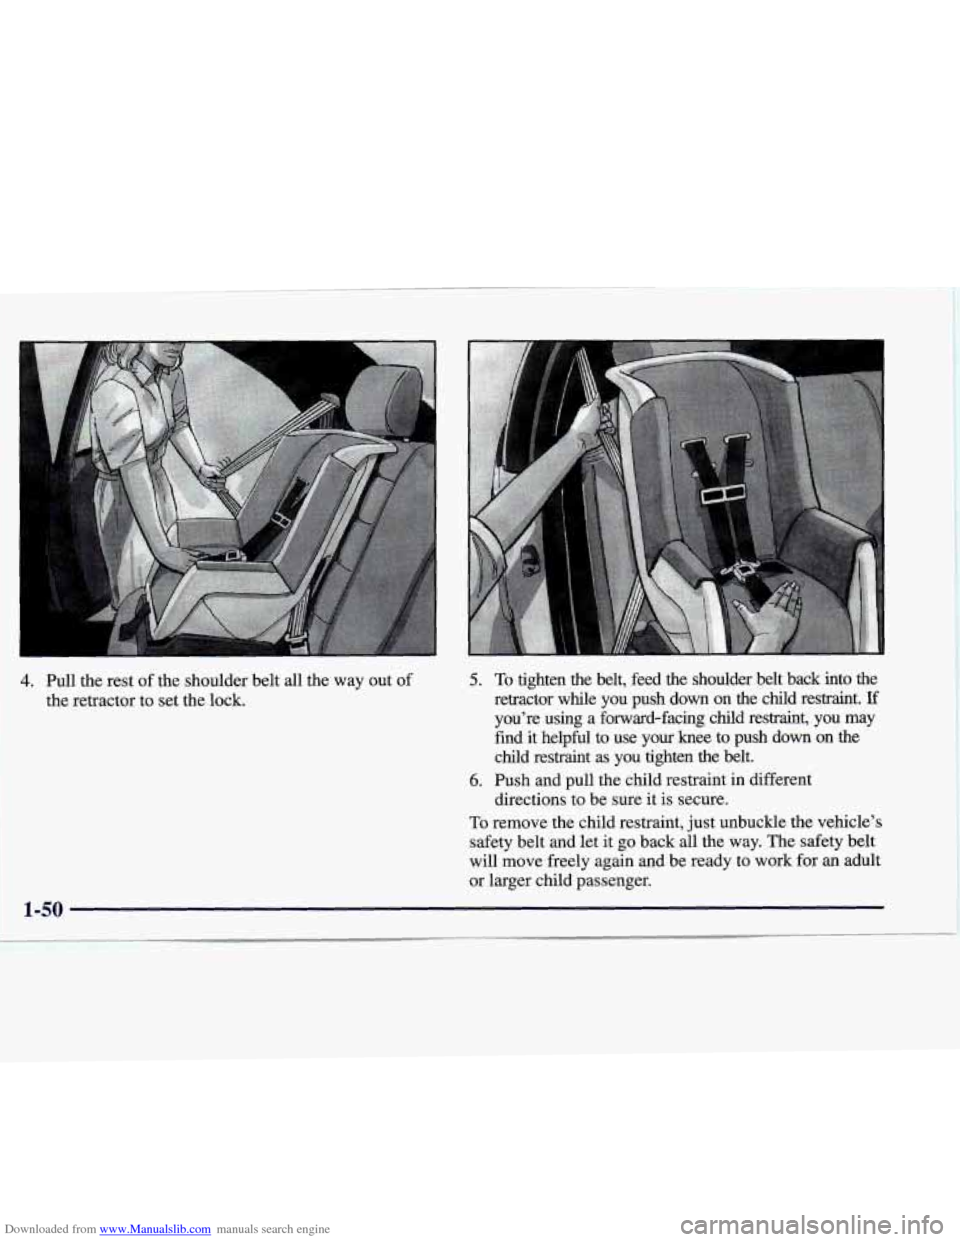
Downloaded from www.Manualslib.com manuals search engine 4. Pull the rest of the shoulder belt all the way out of
the retractor to set the lock. 5. To tighten the belt, feed the shoulder belt back into the
retractor while you push down on the child restraint.
If
you’re using a forward-facing child restraint, you may
find it helpful to use your knee to push down
on the
child restraint as you tighten the belt.
directions to be sure it is secure.
6. Push and pull the child restraint in different
To remove the child restraint, just unbuckle the vehicle’s
safety belt and let it go back all the way. The safety belt
will move freely again and be ready to work for an adult
or larger child passenger.
I 1-50
Page 75 of 346

Downloaded from www.Manualslib.com manuals search engine Door Locks
A CAUTION:
-- - -
Unlocked doors can be dangerous.
Passengers
-0 especially children 0- can easily
open the doors and fall out. When
a door is
locked, the inside handle won’t open it.
Outsiders can easily enter through an unlocked
door when you slow down or stop your vehicle.
This may not be
so obvious: You increase the
chance
of being thrown out of the vehicle in a
crash if the doors aren’t locked. Wear safety belts
properly, lock your doors, and you will be far
better
off whenever you drive your vehicle. There
are several ways to lock and unlock your vehicle.
From the outside,
use your key or the remote keyless
entry transmitter. This will avoid setting
off the optional
theft-deterrent
alarrn.
From inside your vehicle,
slide the lock lever down to
lock the door.
To unlock the
door, slide the lock lever up.
Page 103 of 346

Downloaded from www.Manualslib.com manuals search engine Anti-Pinch Feature
If a hand, an am or another object is in the
way of the
power window express-closing, the window will
immediately stop at the obstruction and express-open to
a preset factory position.
LA C. LJTION:
Pressing and holding the power window control
button will turn
off the anti-pinch feature. If this
happens,
a power window won’t stop if
something gets in the
way. You or others could be
injured, and your window could be damaged. Be
careful not to press and hold the power window
control button.
I
Rear Window Lockout
I
Pressing this button
rearward will disable the
rear passenger window controls. This is a useful
feature
if you have children
as passengers. Press the
button forward to allow
your passengers to use their
window controls.
Horn
The horn can be sounded by pressing either horn symbol
on the steering wheel. The symbols are located at about
the 9 and
3 o’clock positions.
Page 190 of 346

Downloaded from www.Manualslib.com manuals search engine If you need to reduce your speed as you approach a
curve, do it before you enter the curve, while your front
wheels are straight ahead.
Try to adjust your speed
so you can “drive” through the
curve. Maintain a reasonable, steady speed. Wait to
accelerate until you are out of the curve, and then
accelerate gently into the straightaway.
Steering in Emergencies
There are times when steering can be more effective
than braking. For example, you come over a hill and
find a truck stopped in your lane, or a car suddenly
pulls out from nowhere, or a child darts out from
between parked cars and stops right in front of you.
You can avoid these problems by braking
-- if you
can stop in time. But sometimes you can’t; there isn’t
room. That’s the time for evasive action
-- steering
around the problem.
Your vehicle can perform very well in emergencies like
these. First apply your brakes. (See “Braking
in
Emergencies” earlier in this section.) It is better to
remove as much speed as you can from a possible
collision. Then steer around the problem, to the left or
right depending on the space available. An
emergency like this requires close attention and a
quick decision. If you are holding the steering wheel at
the recommended
9 and 3 o’clock positions, you can
turn it a full
180 degrees very quickly without removing
either hand. But you have to act fast, steer quickly, and
just as quickly straighten the wheel once you have
avoided the object.
The fact that such emergency situations
are always
possible is a good reason to practice defensive driving at
all times and wear safety belts properly.
4-11
Page 331 of 346

Downloaded from www.Manualslib.com manuals search engine BBB Auto Line ................................ 7-1 1
Better Business Bureau Mediation
.................. 7-11
Blizzard
...................................... 4-26
Brake
Adjustment
.................................. 6-29
Fluid
....................................... 6-26
Master Cylinder
.............................. 6-26
Pad Wear Indicator Light
....................... 2-76
Parking
..................................... 2-24
Pedal Travel
................................. 6-29
Replacing System Parts
........................ 6-29
System Warning Light
......................... 2-65
To Shift Light
................................ 2-74
Transmission Shift Interlock
.................... 2-27
Wear
....................................... 6-28
Brakes,Anti -Lock
............................... 4-7
Braking
........................................ 4-6
Braking in Emergencies
........................... 4-9
Break-In, New Vehicle
.......................... 2-16
Brightness Control
.............................. 2-45
BTSI
......................................... 2-27
Bulb Replacement
.............................. 6-30
Capacities and Specifications
.................... 6-63
CarbonMonoxide
.............................. 4-27
Care
of Your Cassette Tape Player .................. 3-28
Care
of Your Compact Disc Player ................. 3-30 Care
of
Your Compact Discs ...................... 3-30
Cassette Tape Player
Errors .................. 3.11. 3. 18
CD Adapter Kits ............................... 3-25
CD Changer
................................... 3-22
Center Console Storage Area
...................... 2-48
Bulb Replacement
............................. 6-35
Central Door Unlocking System
.................... 2-5
CertificationLabel
.............................. 4-29
Chains, Safety
................................. 4-34
Changing a Flat Tire
............................. 5-21
Charging System Indicator Light
................... 2-65
Check Engine Light
............................. 2-70
Check Oil Light
................................ 2-74
Checking Your Restraint Systems
.................. 1-56
Chemical Paint Spotting
.......................... 6-52
Child Restraints
................................ 1-43
Securing in a Rear Seat Position
................. 1-48
Securing in the Right Front Seat Position
.......... 1-51
Top Strap ................................... 1-48
Chrome Wheels, Cleaning
........................ 6-50
Cigarette Lighter
............................... 2-49
CellularTelephone
.............................. 2-50
Center High-Mounted Stoplamp,
Chains, Tire
................................... 6-45
Wheretoht
.........,...................... l-47
CHMSL ...................................... 6-35
Cleaner, Air
................................... 6-15
Page 341 of 346

Downloaded from www.Manualslib.com manuals search engine warning Devices. Other ......................... 5-2
Warning Lights. Gages and Indicators
............... 2-63
Warranty Information
............................ 7- 12
Washing Your Vehicle
........................... 6-49
Weatherstrips
.................................. 6-49
Weight
of the Trailer ............................ 4-32
Weight
of the Trailer Tongue ...................... 4-32
Wheel Alignment and
Tire Balance .................... 6-43
Bolt Torque
............................ 5-29. 6-63
Replacement
................................. 6-43
Wrench
..................................... 5-23
Where to Put Child Restraints
..................... 1-47 Windows
..................................... 2-31
Anti-Pinch Feature
....................... 2.32. 2.53
Power
...................................... 2-31
Programming the Power Windows
............... 2-31
RearLockout
................................ 2-32
Windshield Washer
............................. 2-35
Fluid .................................. 2-35. 6.25
Windshield Wipers
.............................. 2-34
Blade Replacement
........................... 6-36
Fuses
...................................... 6-55
Winter Driving ................................. 4-24
Wiper-Activated Headlamps
...................... 2-41
Wiring. Headlamp
.............................. 6-55
Wrench. Wheel ................................. 5-23
8-12
~ .. ... .