1998 BMW CONVERTIBLE brake
[x] Cancel search: brakePage 129 of 179
12 8
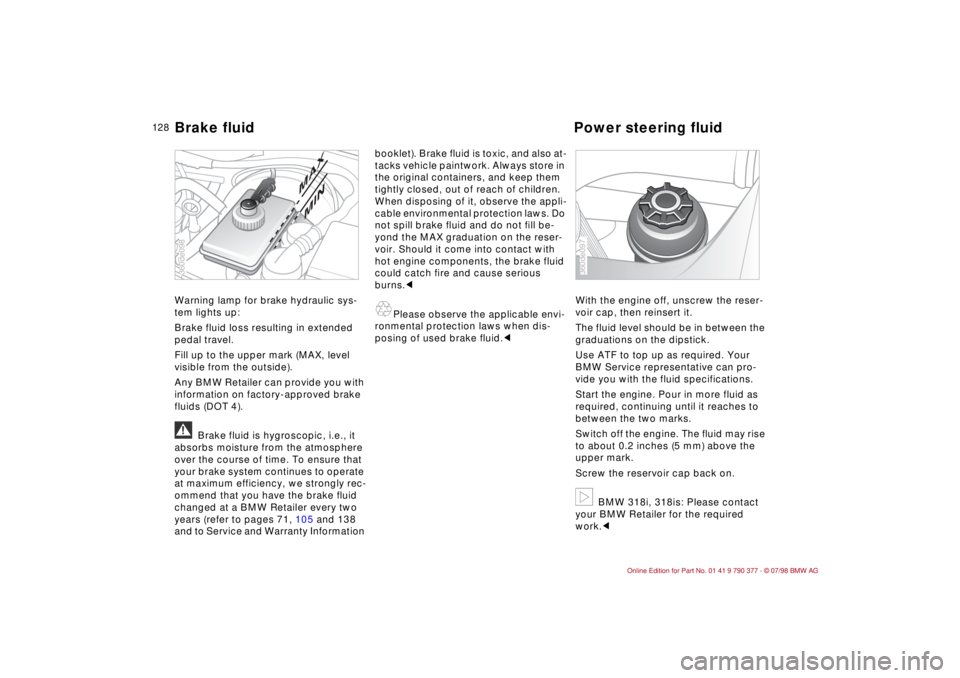
Warning lamp for brake hydraulic sys-
tem lights up:
Brake fluid loss resulting in extended
pedal travel.
Fill up to the upper mark (MAX, level
visible from the outside).
Any BMW Retailer can provide you with
information on factory-approved brake
fluids (DOT 4).
a
Brake fluid is hygroscopic, i.e., it
absorbs moisture from the atmosphere
over the course of time. To ensure that
your brake system continues to operate
at maximum efficiency, we strongly rec-
ommend that you have the brake fluid
changed at a BMW Retailer every two
years (refer to pages 71, 105 and 138
and to Service and Warranty Information booklet). Brake fluid is toxic, and also at-
tacks vehicle paintwork. Always store in
the original containers, and keep them
tightly closed, out of reach of children.
When disposing of it, observe the appli-
cable environmental protection laws. Do
not spill brake fluid and do not fill be-
yond the MAX graduation on the reser-
voir. Should it come into contact with
hot engine components, the brake fluid
could catch fire and cause serious
burns.c
A
Please observe the applicable envi-
ronmental protection laws when dis-
posing of used brake fluid.cWith the engine off, unscrew the reser-
voir cap, then reinsert it.
The fluid level should be in between the
graduations on the dipstick.
Use ATF to top up as required. Your
BMW Service representative can pro-
vide you with the fluid specifications.
Start the engine. Pour in more fluid as
required, continuing until it reaches to
between the two marks.
Switch off the engine. The fluid may rise
to about 0.2 inches (5 mm) above the
upper mark.
Screw the reservoir cap back on.
b
BMW 318i, 318is: Please contact
your BMW Retailer for the required
work.c
MAXMIN
360de098
360de097
Brake fluid Power steering fluid
Page 132 of 179

13 1
At a glanceControlsCar careRepairsTechnicalDataIndex
Washing your carRight from the start, you can wash your
new BMW either by hand or in an auto-
matic car wash. BMW Convertible: For
instructions on cleaning and care of the
convertible top, refer to page 136 ff.
To prevent spots, avoid washing when
the hood is still warm, or immediately
after and during exposure to strong
sunlight.
When using an automatic car wash,
ensure that
dno damage occurs to vehicles with
add-on body elements (e.g., spoilers,
telephone aerials). Consult the car
wash operator if necessary
dthe vehicle is cleaned with minimum
brush pressure, and that ample water
is available for washing and rinsing.
Loosen and remove stubborn dirt and
dead insects before washing the car.
a
Always maintain an adequate dis-
tance between the spray source and the
vehicle's surface when using spray
wands and high-pressure washers. In-
adequate distance and excessive pres-
sure can damage or weaken the finish,
making it more susceptible to subse-
quent attack. In addition, moisture could
penetrate to vehicle components, lead-
ing to long-term damage.c
Parts of the car which are inaccessible
to the automatic washer - such as door
sills, door and hood edges, etc. -
should be cleaned by hand.
b
Please observe the following
when cleaning the headlamp covers:
dDo not clean by wiping with a dry
cloth (scratches). Never use abra-
sives or strong solvents to clean the
covers.
dRemove dirt and contamination (such
as insects) by soaking with BMW Car
Shampoo and then rinsing with
plenty of water.
dAlways use a de-icer spray to remove
accumulated ice and snow Ð Never
use a scraper!cIn the winter months, it is especially
important to ensure that the car is
washed on a regular basis. Large quan-
tities of dirt and road salt are difficult to
remove, and they also cause damage to
the vehicle.
a
After washing, the brakes may be
wet and thus less effective! Apply the
brakes briefly to dry them.c
Caring for your car
Page 133 of 179
13 2
Exterior finishTo provide effective corrosion protec-
tion, multilayer paintwork is applied at
the factory. Cataphoretic immersion
priming techniques are supplemented
using special body-cavity protectants,
with the application of specially-devel-
oped and extensively tested materials.
The entire underbody is sprayed with a
flexible PVC layer before final compre-
hensive application of a wax-based
protectant.
Regular maintenance makes an impor-
tant contribution to maintaining the
safety and value of your vehicle.
Increasing awareness of the effects of
harmful environmental factors on vehi-
cle finishes have led paint and vehicle
manufacturers to initiate ongoing pro-
grams designed to further improve the
durability of their finishes. Despite the
high quality of the resulting products,
local and regional factors can still have
a negative effect on your car's paint-
work. These should guide you in deter-
mining the frequency and extent of your
efforts to maintain the vehicle finish.
Depending upon material and type of
impact (perforation of paint layer), phys-
ical stresses from sand, road salt,
gravel, etc. can cause corrosion to start extending beneath the finish, starting at
the point of impact.
Road dirt, tar spots, dead insects, ani-
mal droppings (strong alkali effect) and
tree excretions (resins and pollen) all
contain substances capable of causing
damage when allowed to remain on
your car's finish for any period of time
(spots, etching, flaking, separation in
the top coat).
In industrial areas, deposits from ßy ash,
lime, oily soot, sulphur dioxide in pre-
cipitation (acid rain) and other environ-
mental pollutants will damage the car's
surface (usually limited to the external
horizontal surfaces) unless adequate
protection is provided.
In coastal regions, high levels of atmo-
spheric salt and humidity promote cor-
rosion.
In tropical zones, temperatures of over
100 5F (approx. 406) in the shade pre-
vail, in addition to heavy ultraviolet radi-
ation and high humidity. Under those
circumstances, light-colored paints
reach temperatures of up to 175 5F
(approx. 806) and dark paints up to
250 5F (approx. 1206).
Caring for the vehicle finishAs a precaution against damage result-
ing from exposure to aggressive sub-
stances, we recommend that you wash
the car weekly when it is used in an
area with high levels of air pollution or
aggressive natural substances (tree
resin, pollen).
Remove particularly aggressive sub-
stances immediately in order to prevent
changes to, and discoloration of, the
paint. Such substances are e.g., gaso-
line spilled during refueling, oil, grease,
brake fluid and bird droppings.
Any contamination remaining on the
surface of the vehicle will be especially
conspicuous after washing. Use clean-
ing fluid or alcohol with a clean cloth or
cotton pad to remove. You can use tar
remover to remove any spots on the fin-
ish of the vehicle, but should never
apply it or any other aggressive
cleanser to lenses or headlamp covers.
These areas should then be waxed to
maintain protection.b
A full range of car-care products is
available from your BMW Retailer.c
Caring for your car
Page 139 of 179
13 8
Conduct the following work immedi-
ately prior to storing the vehicle:
1 Activate the parking brake and foot-
brake to dry them; this will prevent
the brake disks and drums from cor-
roding.
2 Store the vehicle in a dry, well-venti-
lated room, shift into reverse gear or
set the selector lever to position P
and chock the wheels to prevent roll-
ing. Do not set the parking brake.
3 Remove the battery, recharge and
store in a cool, frost-free room.
During storage, recharge the battery
every three months, as otherwise it will
become unusable. Every time the bat-
tery is discharged, especially over
extended periods, its service life is
reduced.
Removing vehicle from storageRecharge the battery and replace if
necessary.
Then have Inspection I carried out by
your BMW Retailer.a
Storage periods during which the
battery is disconnected are not taken
into consideration by the Service Inter-
val Display for changing the brake fluid.
Therefore, make sure that the brake fluid
is changed every two years at the latest,
regardless of the display. Additional
notes: refer to page 128.c
Vehicle storage
Page 144 of 179

14 3
At a glanceControlsCar careRepairsTechnicalDataIndex
Taillamps 1 Turn signal yellow
21 watt bulb
2 Backup lamp white
21 watt bulb
3 Brake lamp red
21 watt bulb
4 Taillamp red
5 watt bulbdRemove the lamp cover after releas-
ing the locking device.
dOnce you have found the lamp
holder for the defective bulb, push it
gently to the rear while turning to the
left to remove.
dUse the same procedure to remove
the bulb.
Center brake lamp
*
21 watt bulb
dOpen the luggage compartment lid.
dPush the bulb holder's release knob
gently to the rear while turning to the
left to remove.
dUse the same procedure to remove
the bulb.
BMW Convertible:
LED strip in luggage compartment lid.
Please contact a BMW Retailer in the
case of a malfunction.
12
3
4
360us093
360de119
360de120
Bulb replacement
Page 147 of 179
14 6
a
Change tires only on a flat, hard
surface affording good traction. Avoid
jacking the car on a soft or slippery sup-
port surface (snow, ice, loose gravel,
etc.), as it could slide sideways.
Take extra care to ensure that the base
of the jack is positioned on a solid sup-
port surface.
Never use wooden blocks or similar
objects to support the base of the jack,
as the weight of the car could exceed
their support capacity.
Never lie beneath the vehicle or start
the engine while the car is supported by
the jack - risk of fatal injury.
Additional precautions to observe when
changing flat tires:
When pulling over on the roadside to
change a tire, always try to park the car
as far as possible from passing traffic.
Switch on the hazard flashers.
All passengers should be outside the
car and well away from your immediate
working area (e.g., behind the guard-
rail).Turn the steering wheel to the straight-
ahead position, remove the key and
engage the steering lock. Shift into 1st
or reverse (selector lever in Park with
automatic) and engage the parking
brake.
If a warning triangle or portable hazard
warning lamp is available, set it up on
the roadside at an appropriate distance
from the rear of the vehicle. Observe all
safety guidelines and regulations.c
b
To avoid rattling noises, note the
positions of the tools and return them to
their original positions.c
To change the tire you will need
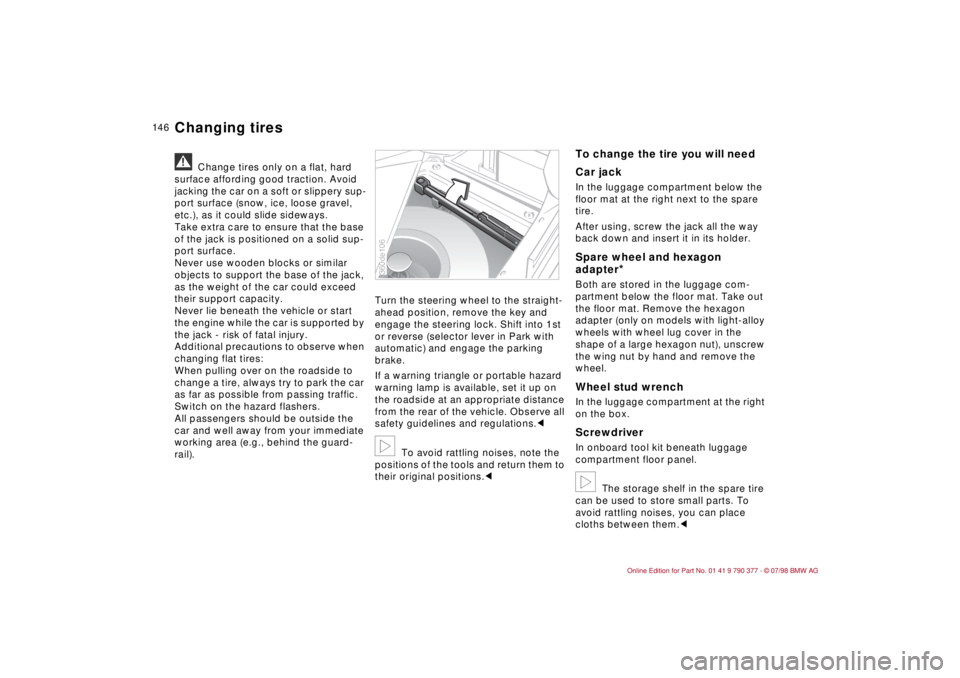
Car jackIn the luggage compartment below the
floor mat at the right next to the spare
tire.
After using, screw the jack all the way
back down and insert it in its holder.Spare wheel and hexagon
adapter
*
Both are stored in the luggage com-
partment below the floor mat. Take out
the floor mat. Remove the hexagon
adapter (only on models with light-alloy
wheels with wheel lug cover in the
shape of a large hexagon nut), unscrew
the wing nut by hand and remove the
wheel.Wheel stud wrench In the luggage compartment at the right
on the box. ScrewdriverIn onboard tool kit beneath luggage
compartment floor panel.b
The storage shelf in the spare tire
can be used to store small parts. To
avoid rattling noises, you can place
cloths between them.c
360de106
Changing tires
Page 151 of 179
15 0
Removal and installationa
Do not disconnect the battery
cable from its terminal while the engine
is running, as the resulting voltage surge
would destroy the vehicle's electronic
systems.c
When disconnecting, start with the neg-
ative terminal, then proceed to the pos-
itive side. Unscrew the battery retaining
clamp.
When installing the battery, connect the
positive terminal first, then proceed to
the negative pole.
a
When installing, always ensure that
the battery is properly mounted.
Otherwise it will not be sufficiently
secured in an accident.c
Charging the battery Always ensure that the engine is off
before recharging an installed battery. a
To avoid short circuits, always
disconnect the cable from the battery's
negative terminal before working on the
electrical system.cOn vehicles with a connecting point in
the engine compartment, it is easiest to
charge the battery by using this con-
necting point (positive pole), and a
ground in the engine compartment
(refer to "Jump-starting" on page 15 3).
If you are planning to remove the vehi-
cle from service for more than four
weeks, you should disconnect the bat-
tery at the negative terminal.
If you intend to store your car for longer
than six weeks: remove the battery,
charge it and store it in a cool (but frost-
free) room. Recharge the battery after
three months at the latest, as it will oth-
erwise be damaged beyond use. Every
time the battery is discharged, espe-
cially over extended periods, its service
life is reduced.
A
Bring used batteries to an autho-
rized collection point or a BMW Re-
tailer. Always maintain the battery in an
upright position for transport and stor-
age. Secure the battery against tilting
when transporting.c
a
Storage periods during which the
battery is disconnected are not taken
into consideration by the Service Inter-
val Display for changing the brake fluid.
Therefore, make sure that the brake fluid
is changed every two years at the latest,
regardless of the display. Additional
notes: refer to page 128.c
Battery
Page 155 of 179
15 4
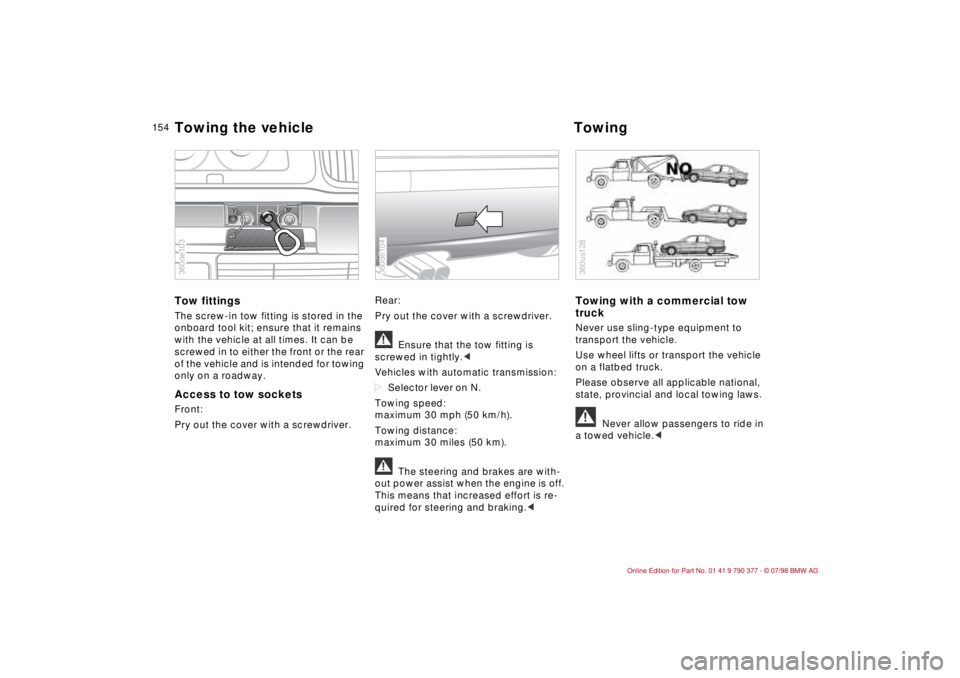
Tow fittingsThe screw-in tow fitting is stored in the
onboard tool kit; ensure that it remains
with the vehicle at all times. It can be
screwed in to either the front or the rear
of the vehicle and is intended for towing
only on a roadway. Access to tow socketsFront:
Pry out the cover with a screwdriver.Rear:
Pry out the cover with a screwdriver.
a
Ensure that the tow fitting is
screwed in tightly.c
Vehicles with automatic transmission:
dSelector lever on N.
Towing speed:
maximum 30 mph (50 km/h).
Towing distance:
maximum 30 miles (50 km).
a
The steering and brakes are with-
out power assist when the engine is off.
This means that increased effort is re-
quired for steering and braking.c
Towing with a commercial tow
truckNever use sling-type equipment to
transport the vehicle.
Use wheel lifts or transport the vehicle
on a flatbed truck.
Please observe all applicable national,
state, provincial and local towing laws.a
Never allow passengers to ride in
a towed vehicle.c
360de103
360de104
360us128
Towing the vehicle Towing