1998 BMW CONVERTIBLE ESP
[x] Cancel search: ESPPage 53 of 179
52
Notes on safetyNever attempt to remove the gas gener-
ator for the airbag passenger-restraint
system from the vehicle. Testing and
service procedures are to be performed
exclusively by qualified technicians. In
the event of malfunction, deactivation
or triggering (in response to an acci-
dent), always entrust repair and service
operations to your authorized BMW
Retailer.
Do not modify or tamper with either the
wiring or the individual components in
the airbag system; these include also
the padded covers on the steering
wheel, on the instrument panel or on
the side trim panels of the front doors.
Never apply adhesive materials to these
components and never cover or modify
them in any way. Do not remove or dis-
mantle the steering wheel.
The airbag generator can be disposed
of only by a BMW Retailer.
Unprofessional attempts to service the
system could lead to failure in an emer-
gency or undesired airbag activation,
either of which could result in personal
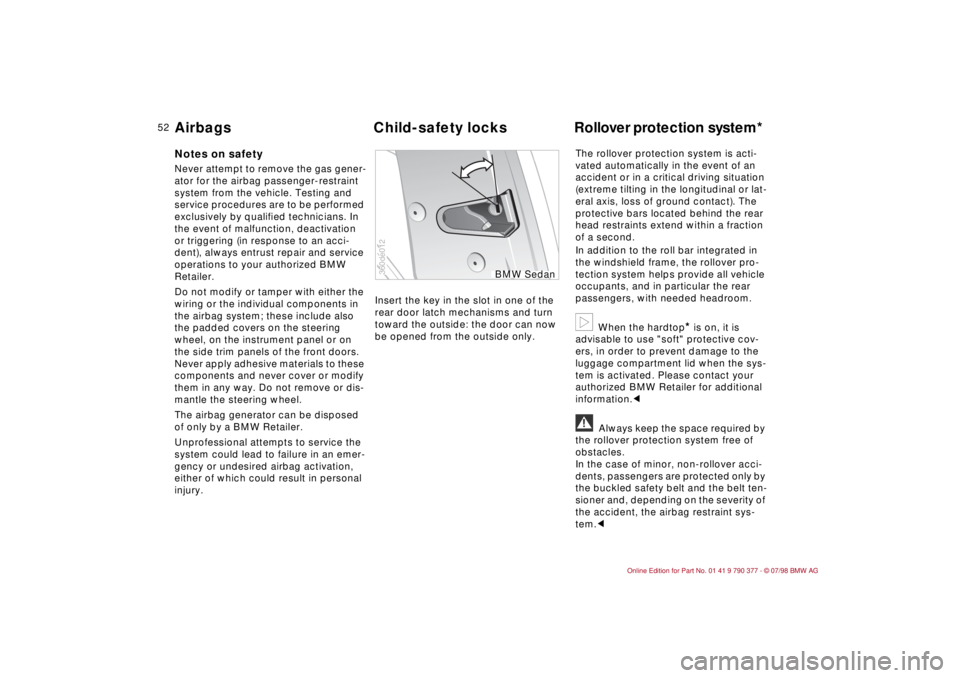
injury.Insert the key in the slot in one of the
rear door latch mechanisms and turn
toward the outside: the door can now
be opened from the outside only.The rollover protection system is acti-
vated automatically in the event of an
accident or in a critical driving situation
(extreme tilting in the longitudinal or lat-
eral axis, loss of ground contact). The
protective bars located behind the rear
head restraints extend within a fraction
of a second.
In addition to the roll bar integrated in
the windshield frame, the rollover pro-
tection system helps provide all vehicle
occupants, and in particular the rear
passengers, with needed headroom.
b
When the hardtop
* is on, it is
advisable to use "soft" protective cov-
ers, in order to prevent damage to the
luggage compartment lid when the sys-
tem is activated. Please contact your
authorized BMW Retailer for additional
information.c
a
Always keep the space required by
the rollover protection system free of
obstacles.
In the case of minor, non-rollover acci-
dents, passengers are protected only by
the buckled safety belt and the belt ten-
sioner and, depending on the severity of
the accident, the airbag restraint sys-
tem.c
360de012
BMW Sedan
Airbags Child-safety locks Rollover protection system*
Page 60 of 179

59
At a glanceControls Car careRepairsTechnicalDataIndex
D - Drive (automatic shift program)This position is designed for driving
under all normal operating conditions.
All forward gears are selected by the
transmission as necessary. 3 - Sport Program, direct controlThis position is designed for perfor-
mance-oriented driving, and features
delayed upshifts for optimal utilization
of the vehicle's power reserves.
When D is engaged, the transmission
may respond to certain conditions by
repeatedly shifting between 3rd and 4th
gears. You can select this position to
suppress upshifts into 4th gear and pre-
vent the transmission from "hunting" in
this way.
2 and 1 - Mountain ascents and
engine brakingSelect these positions to prevent un-
desired shifts on mountain roads or
extended uphill and downhill stretches.
These ranges let you use the engine's
braking effect to maximum advantage.
The transmission upshifts only as far as
the selected gear (1st or 2nd).
Do not move the selector lever to either
of these positions when traveling at
speeds of 108 mph (170 km/h) or
above. The transmission downshifts
only at correspondingly low speeds."Kickdown" (automatic downshift)To obtain maximum acceleration, the
accelerator pedal can be depressed
beyond the normal to the full-throttle
position, at which a pressure point must
be overcome.
Shift programsA - Automatic program
For economical driving. This is the initial
position each time the engine is started.
M - Manual program
This program is for driving conditions
under which the selected gear is to be
retained. The transmission then remains
in this gear both when starting off and
during acceleration. With this program
you drive only in 3rd gear in position D.
It is advantageous, e.g., on slopes or
when towing a trailer, to drive in selec-
tor lever position 1 or 2, or in winter on
slippery roads in selector lever position
3, which enables gentle starts and pre-
vents undesirable shifting.
Automatic transmission*
Page 63 of 179
62
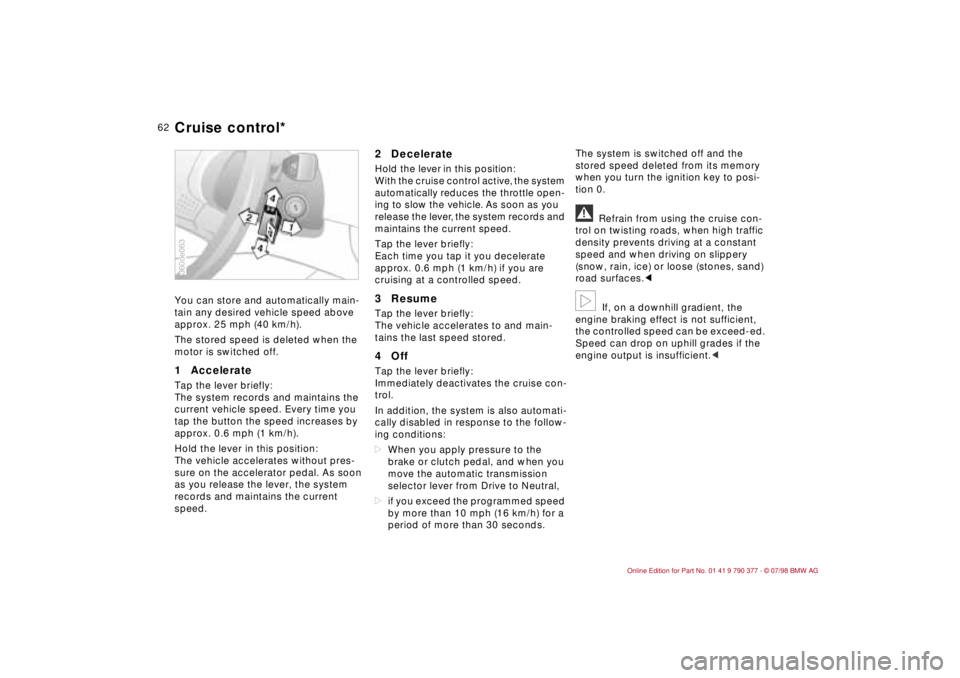
You can store and automatically main-
tain any desired vehicle speed above
approx. 25 mph (40 km/h).
The stored speed is deleted when the
motor is switched off.
1 Accelerate Tap the lever briefly:
The system records and maintains the
current vehicle speed. Every time you
tap the button the speed increases by
approx. 0.6 mph (1 km/h).
Hold the lever in this position:
The vehicle accelerates without pres-
sure on the accelerator pedal. As soon
as you release the lever, the system
records and maintains the current
speed.
2 DecelerateHold the lever in this position:
With the cruise control active, the system
automatically reduces the throttle open-
ing to slow the vehicle. As soon as you
release the lever, the system records and
maintains the current speed.
Tap the lever briefly:
Each time you tap it you decelerate
approx. 0.6 mph (1 km/h) if you are
cruising at a controlled speed.3 ResumeTap the lever briefly:
The vehicle accelerates to and main-
tains the last speed stored.4 OffTap the lever briefly:
Immediately deactivates the cruise con-
trol.
In addition, the system is also automati-
cally disabled in response to the follow-
ing conditions:
dWhen you apply pressure to the
brake or clutch pedal, and when you
move the automatic transmission
selector lever from Drive to Neutral,
dif you exceed the programmed speed
by more than 10 mph (16 km/h) for a
period of more than 30 seconds.The system is switched off and the
stored speed deleted from its memory
when you turn the ignition key to posi-
tion 0.
a
Refrain from using the cruise con-
trol on twisting roads, when high traffic
density prevents driving at a constant
speed and when driving on slippery
(snow, rain, ice) or loose (stones, sand)
road surfaces.c
b
If, on a downhill gradient, the
engine braking effect is not sufficient,
the controlled speed can be exceed-ed.
Speed can drop on uphill grades if the
engine output is insufficient.c
360de063Cruise control*
Page 65 of 179
64
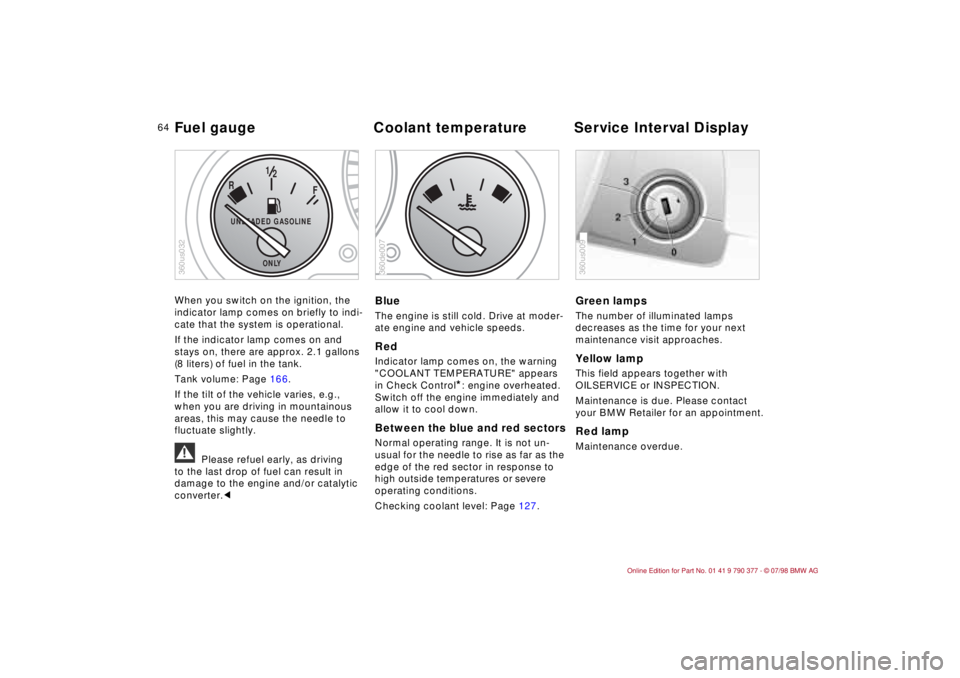
When you switch on the ignition, the
indicator lamp comes on briefly to indi-
cate that the system is operational.
If the indicator lamp comes on and
stays on, there are approx. 2.1 gallons
(8 liters) of fuel in the tank.
Tank volume: Page 166.
If the tilt of the vehicle varies, e.g.,
when you are driving in mountainous
areas, this may cause the needle to
fluctuate slightly.
a
Please refuel early, as driving
to the last drop of fuel can result in
damage to the engine and/or catalytic
converter.c
BlueThe engine is still cold. Drive at moder-
ate engine and vehicle speeds.RedIndicator lamp comes on, the warning
"COOLANT TEMPERATURE" appears
in Check Control
*: engine overheated.
Switch off the engine immediately and
allow it to cool down.
Between the blue and red sectorsNormal operating range. It is not un-
usual for the needle to rise as far as the
edge of the red sector in response to
high outside temperatures or severe
operating conditions.
Checking coolant level: Page 127.
Green lampsThe number of illuminated lamps
decreases as the time for your next
maintenance visit approaches.Yellow lamp This field appears together with
OILSERVICE or INSPECTION.
Maintenance is due. Please contact
your BMW Retailer for an appointment.Red lampMaintenance overdue.
F
R
12
UNLEADED GASOLINE
ONLY
360us032
360de007
360us009
Fuel gauge Coolant temperature Service Interval Display
Page 73 of 179
72
Priority 3These status reports usually appear
after the car is parked and the ignition
key returned to position 0 (if several
messages have been recorded, they will
appear consecutively, with Priority 3
messages following Priority 1 and 2
messages).
Messages remain available for a period
of approx. two minutes after the display
goes out and the ignition key has been
removed, and can be displayed by
pressing the CHECK key.
The messages can also be displayed
before you start driving with the ignition
key in position 2. The texts then go out
after a short time or when you start driv-
ing, and no warning symbols remain.
Messages are not displayed again until
the ignition key is turned to position 0.
If a plus symbol appears: display addi-
tional messages by pressing the CHECK
key.Check coolant levelIndicates that coolant is almost down to
minimum level. Top up at the next
opportunity. Refer to page 127.To check the Check Control display
(only when no messages are displayed):
Press the CHECK key with the ignition
key in position 2: CHECK CONTROL
OK appears in the display.
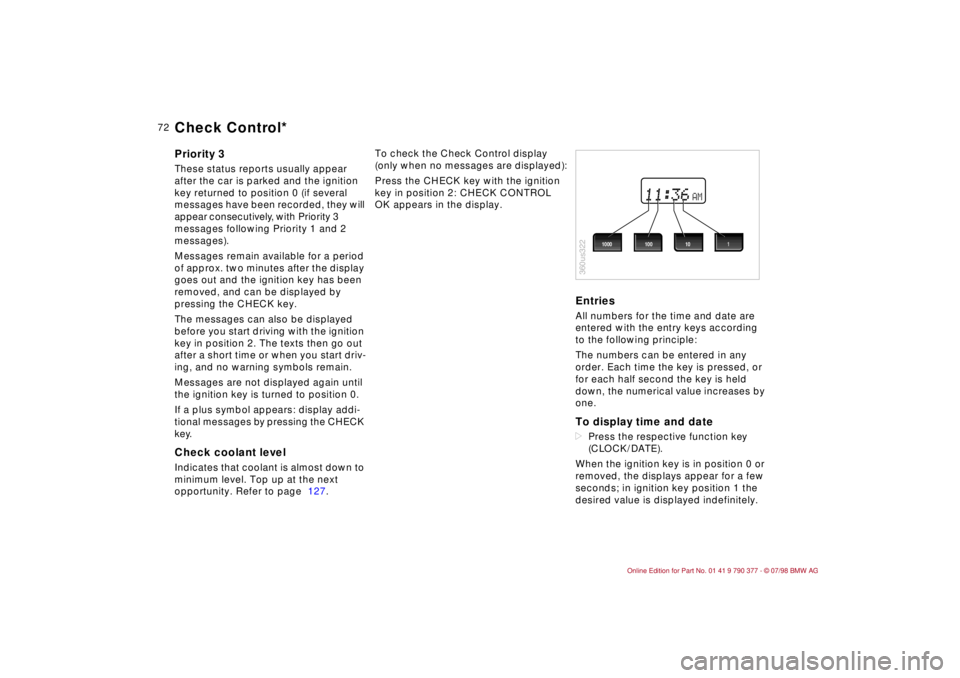
EntriesAll numbers for the time and date are
entered with the entry keys according
to the following principle:
The numbers can be entered in any
order. Each time the key is pressed, or
for each half second the key is held
down, the numerical value increases by
one.To display time and datedPress the respective function key
(CLOCK/DATE).
When the ignition key is in position 0 or
removed, the displays appear for a few
seconds; in ignition key position 1 the
desired value is displayed indefinitely.
AM
360us322
1000 1001 10
Check Control*
Page 75 of 179
74
The Check Control uses texts with mes-
sages and warnings to alert the driver
to defective systems. In addition, an
indicator lamp is provided in the instru-
ment cluster. For details and operating
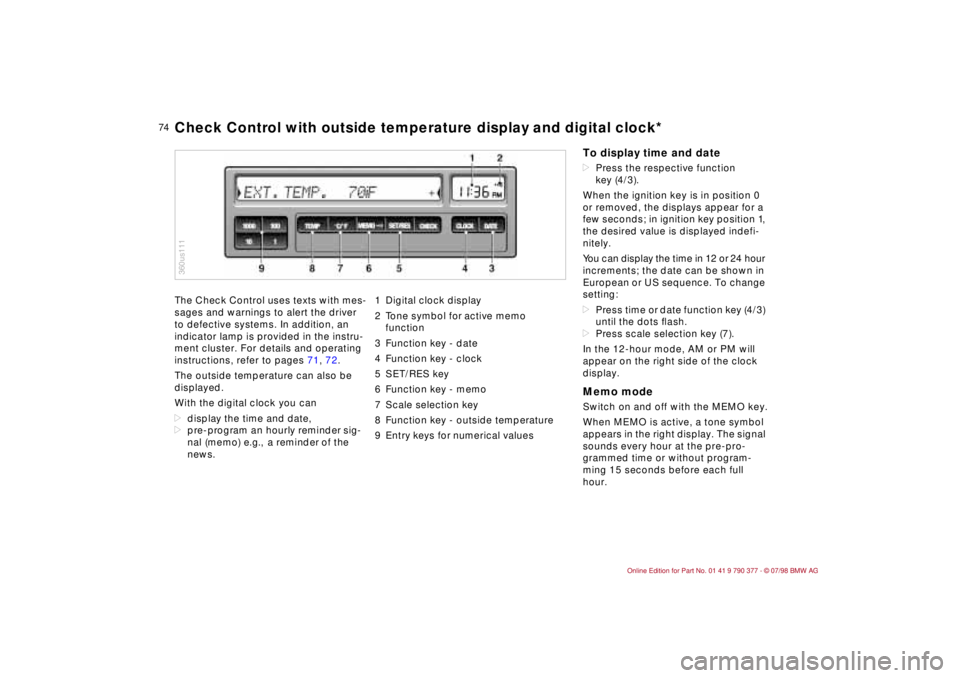
instructions, refer to pages 71, 72.
The outside temperature can also be
displayed.
With the digital clock you can
ddisplay the time and date,
dpre-program an hourly reminder sig-
nal (memo) e.g., a reminder of the
news.1 Digital clock display
2 Tone symbol for active memo
function
3 Function key - date
4 Function key - clock
5 SET/RES key
6 Function key - memo
7 Scale selection key
8 Function key - outside temperature
9 Entry keys for numerical values
360us111Check Control with outside temperature display and digital clock*
To display time and datedPress the respective function
key (4/3).
When the ignition key is in position 0
or removed, the displays appear for a
few seconds; in ignition key position 1,
the desired value is displayed indefi-
nitely.
You can display the time in 12 or 24 hour
increments; the date can be shown in
European or US sequence. To change
setting:
dPress time or date function key (4/3)
until the dots ßash.
dPress scale selection key (7).
In the 12-hour mode, AM or PM will
appear on the right side of the clock
display.Memo modeSwitch on and off with the MEMO key.
When MEMO is active, a tone symbol
appears in the right display. The signal
sounds every hour at the pre-pro-
grammed time or without program-
ming 15 seconds before each full
hour.
Page 81 of 179
80
Speed limit warning (Limit)You are alerted when you exceed the
maximum speed that you entered ear-
lier (e.g., posted speed limit). An acous-
tic signal sounds, the corresponding
LED flashes and the stored limit briefly
appears in the display.
Vehicle speed must drop back to at
least 3 mph (5 km/h) below the pro-
grammed speed to reset the system for
repeat warnings.
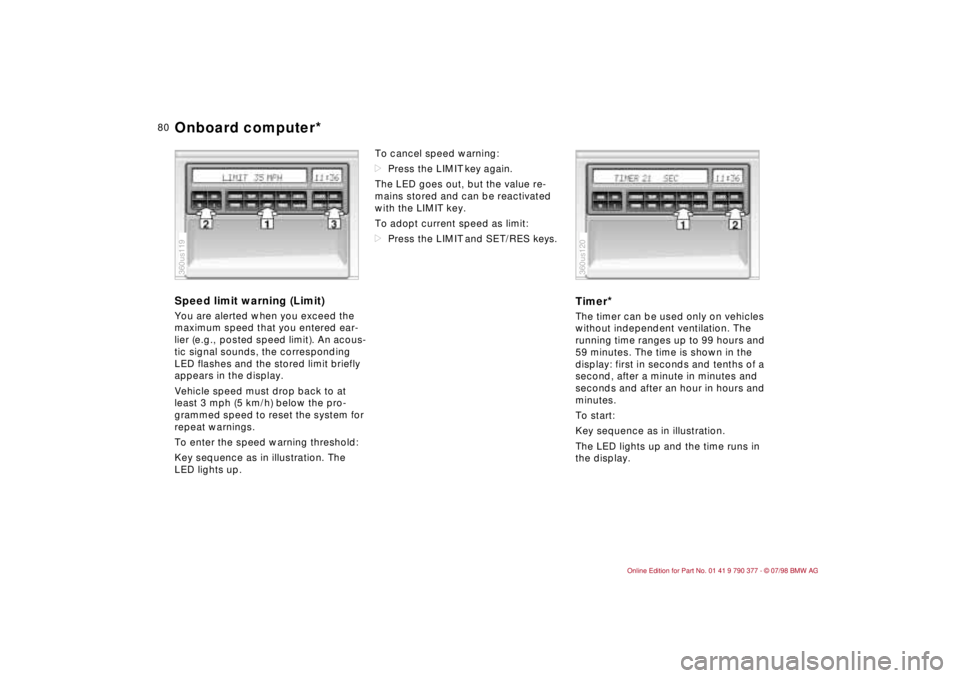
To enter the speed warning threshold:
Key sequence as in illustration. The
LED lights up.To cancel speed warning:
dPress the LIMIT key again.
The LED goes out, but the value re-
mains stored and can be reactivated
with the LIMIT key.
To adopt current speed as limit:
dPress the LIMIT and SET/RES keys.
Timer
*
The timer can be used only on vehicles
without independent ventilation. The
running time ranges up to 99 hours and
59 minutes. The time is shown in the
display: first in seconds and tenths of a
second, after a minute in minutes and
seconds and after an hour in hours and
minutes.
To start:
Key sequence as in illustration.
The LED lights up and the time runs in
the display.
360us119
360us120
Onboard computer*
Page 83 of 179
82
Switch on directlyAvailable only with ignition key at posi-
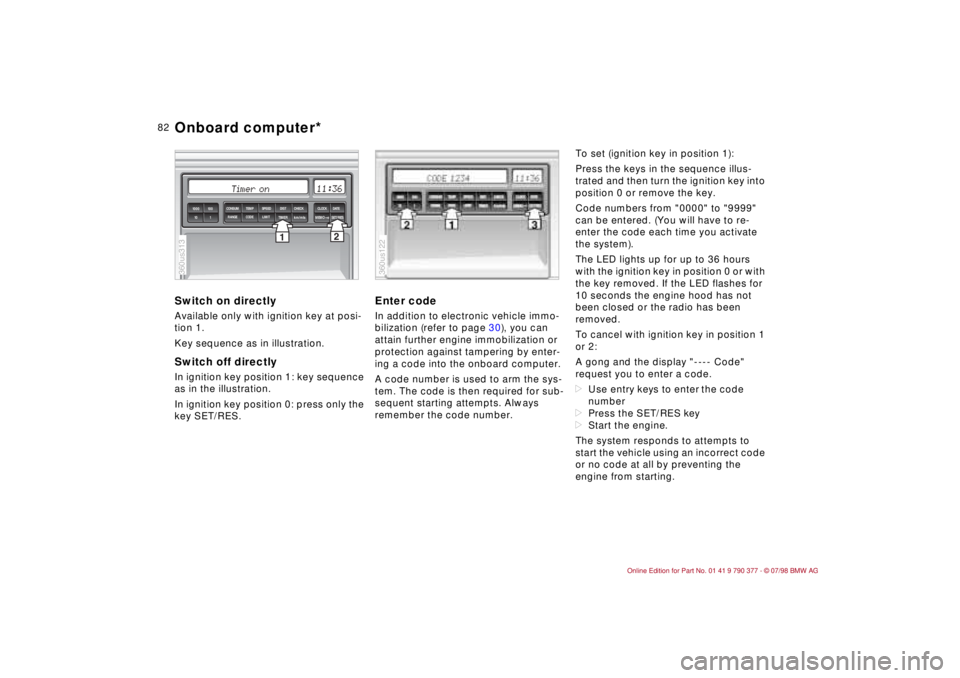
tion 1.
Key sequence as in illustration.Switch off directlyIn ignition key position 1: key sequence
as in the illustration.
In ignition key position 0: press only the
key SET/RES.
Enter codeIn addition to electronic vehicle immo-
bilization (refer to page 30), you can
attain further engine immobilization or
protection against tampering by enter-
ing a code into the onboard computer.
A code number is used to arm the sys-
tem. The code is then required for sub-
sequent starting attempts. Always
remember the code number.To set (ignition key in position 1):
Press the keys in the sequence illus-
trated and then turn the ignition key into
position 0 or remove the key.
Code numbers from "0000" to "9999"
can be entered. (You will have to re-
enter the code each time you activate
the system).
The LED lights up for up to 36 hours
with the ignition key in position 0 or with
the key removed. If the LED flashes for
10 seconds the engine hood has not
been closed or the radio has been
removed.
To cancel with ignition key in position 1
or 2:
A gong and the display "---- Code"
request you to enter a code.
dUse entry keys to enter the code
number
dPress the SET/RES key
dStart the engine.
The system responds to attempts to
start the vehicle using an incorrect code
or no code at all by preventing the
engine from starting.
2
1TIMER
km/mls
MEMOSET/RES 1000 100
10 1
SPEED CONSUM TEMP DIST CHECK CLOCK
DATE
LIMIT RANGE CODE
360us313
360us122
Onboard computer*