1997 PONTIAC GRAND AM change time
[x] Cancel search: change timePage 144 of 371
RDM (3): Press this button to hear the tracks in random. Remote Cassette Tape Player (If Equipped)
rather than sequential, order. The display will show
RDM. Press RDM again to turn
off random play. Playing a Cassette Tape
REV (5): Press and hold this button to quickly reverse
within a track. Release it to play the passage. You will
hear sound at a reduced volume. The display will show
elapsed time.
FWD (6): Press and hold this button to quickly advance
within a track. You will hear sound at a reduced volume.
The display will show elapsed time.
RECALL: Press this button to see what track is
currently playing. Press RECALL again within
five
seconds to see how long the track has been playing.
When a new track starts to play, the track number will
also appear. Press RECALL a third time and the time
of
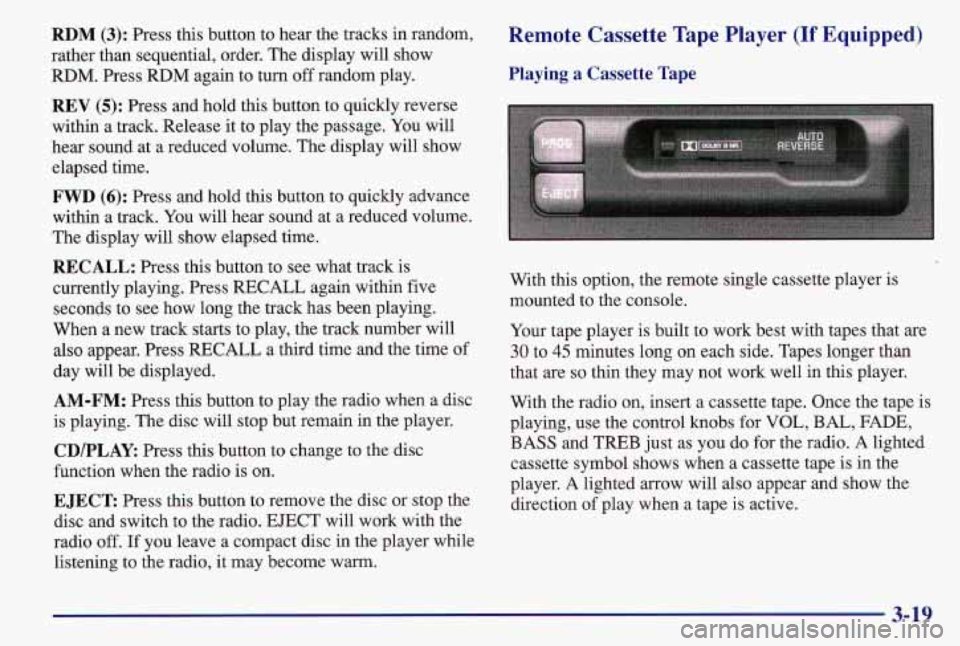
day will be displayed. With this option,
the remote single cassette player is
mounted to the console.
Your tape player is built to work best with tapes that are
30 to 45 minutes long on each side. Tapes longer than
that are
so thin they may not work well in this player.
AM-FM: Press this button to play the radio when a disc With the rad\
io on, insert a cassette tape. Once the tape is
is playing. The disc will stop but remain in the player. playing, use the con\
trol knobs for VOL, BAL,
FADE,
CD/PLAY Press this button to change to the disc BASS and
TREB just as you do for the radio. A lighted
function when the radio is on. cassette symbol shows when a cassette tape is
in the
player. A lighted arrow will also appear and show the
EJECT Press this button to remove the disc or stop the direction of play when a tape is active,
disc and switch to the radio. EJECT will work with the
radio
off. If you leave a compact disc in the player while
listening to the radio, it may become warm.
3-19
Page 160 of 371
As you brake, your computer keeps receiving updates on
wheel speed and controls braking pressure accordingly.
Remember: Anti-lock doesn’t change the time you need
to get your foot up to the brake pedal or always decrease
stopping distance. If you get too close
to the vehicle in
front of you, you won’t have time to apply your brakes
if that vehicle suddenly slows or stops. Always leave
enough room up ahead to
stop, even though you have
anti-lock brakes.
Using Anti-Lock
Don’t pump the brakes. Just hold the brake pedal down
and let anti-lock work for you. You may feel the system
working, or you may notice some noise, but this is normal.
Enhanced Traction System (If Equipped)
If your vehicle has the optional four-speed automatic
transaxle, it also has an Enhanced Traction System
(ETS) that limits wheel spin. This is especially useful in
slippery road conditions. The system operates only
if it
senses that one or both
of the front wheels are spinning
or beginning to lose traction. When this happens, the
system reduces engine power and may also upshift the
transaxle to limit wheel spin.
LOW
TRAC
This light will come on
when your Enhanced
Traction System is limiting
wheel spin. See “Enhanced
Traction System Active Light” in the Index.
You
may feel or hear the system
working, but this is normal.
The Enhanced Traction System operates in all transaxle shift lever positions. But the system can upshift the
transaxle only as high
as the shift lever position you’ve
chosen,
so you should use the lower gears only when
necessary. See “Automatic Transaxle” in the Index.
4-9
Page 162 of 371
Braking in Emergencies
With anti-lock, you can steer and brake at the same
time. In many emergencies, steering can help you more
than even the very best braking.
Steering
Power Steering
If you lose power steering assist because the engine
stops or the system is not functioning, you can steer but
it will take much more effort.
Variable Effort Steering (If Equipped)
This steering system provides lighter steering effort for
parking and at low vehicle speeds. Steering effort will
increase at higher speeds for improved road feel.
Steering Tips
Driving on Curves
It’s important to take curves at a reasonable speed.
A lot of the “driver lost control” accidents mentioned on
the news happen on curves. Here’s why:
Experienced driver or beginner, each of us is subject to
the same laws
of physics when driving on curves. The
traction of the tires against the road surface makes it possible for the vehicle to change its path
when you turn
the front wheels. If there’s no traction, inertia will keep
the vehicle going in the same direction. If you’ve ever
tried to steer a vehicle on wet ice, you’ll understand this.
The traction you can get
in a curve depends on the
condition of your tires and the road surface, the angle at
which the curve is banked, and your speed. While you’re
in a curve, speed is the one factor you can control.
Suppose you’re steering through a sharp curve.
Then you suddenly accelerate.
Both control
systems
-- steering and acceleration -- have to do their .-
work where the tires meet the road. Adding the sudden
acceleration can demand too much of those places. You
can lose control. Refer to “Enhanced Traction System”
in the Index.
What should you do
if this ever happens? Ease up on the
accelerator pedal, steer the vehicle the way you want it
to
go, and slow down.
Speed limit signs near curves warn that you should
adjust your speed. Of course, the posted speeds are
based on good weather and road conditions. Under less
favorable conditions you’ll want to go slower.
If you need to reduce your speed as you approach a
curve, do it before you enter the curve, while your front
wheels are straight ahead.
4-11
Page 165 of 371
Do not get too close to the vehicle you want to pass
while you’re awaiting an opportunity. For one thing,
following too closely reduces your area of vision,
especially if you’re following a larger vehicle.
Also, you won’t have adequate space
if the vehicle
ahead suddenly slows or stops. Keep back a
reasonable distance.
When it looks like a chance to pass is coming up,
start to accelerate but stay in the right lane and don’t
get too close. Time your move
so you will be
increasing speed as the time comes to move into the
other lane.
If the way is clear to pass, you will have a
“running start” that more than makes up for the
distance you would lose by dropping back. And
if
something happens to cause you to cancel your pass,
you need only slow down and drop back again and
wait for another opportunity.
If other cars are lined up to pass a slow vehicle, wait
your turn. But take care that someone isn’t trying to
pass you as you pull out to pass the slow vehicle.
Remember to glance over your shoulder and check
the blind spot.
Check your mirrors, glance over your shoulder, and
start your left lane change signal before moving out
of the right lane to pass. When you are far enough
ahead of the passed vehicle to see its front in your
inside mirror, activate your right lane change signal
and move back into the right lane. (Remember that
your right outside mirror
is convex. The vehicle you
just passed may seem to be farther away from you
than it really is.)
Try not to pass more than one vehicle at a time on
two-lane roads. Reconsider before passing the
next vehicle.
Don’t overtake a slowly moving vehicle too rapidly.
Even though the brake lamps are not flashing, it may
be slowing down or starting to turn.
following driver to get ahead of you. Perhaps you
can ease a little to the right.
If you’re being passed, make it easy for the
4-14
Page 221 of 371
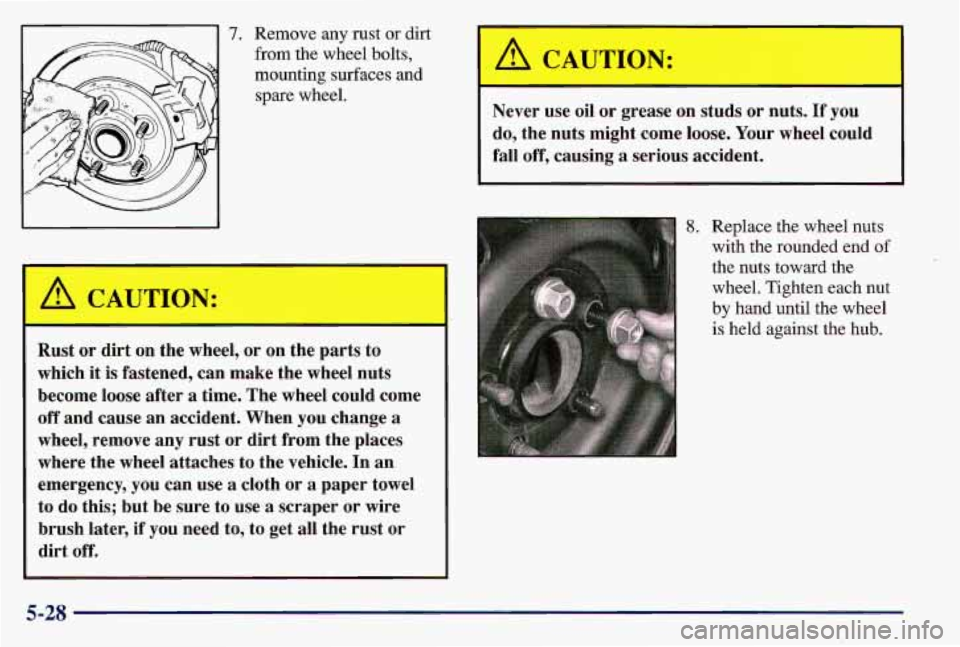
7. Remove any rust or dirt
from the wheel bolts,
mounting surfaces and spare wheel.
A CAUTION:
Rust or dirt on the wheel, or on the pa
which
it is fastened, can make the wheel nuts
become loose after
a time. The wheel could come
off and cause an accident. When
you change a
wheel, remove any rust or dirt from the places
where the wheel attaches to the vehicle. In an
emergency, you can use
a cloth or a paper towel
to do this; but be sure to use
a scraper or wire
brush later, if
you need to, to get all the rust or
dirt off.
I A CAUTION:
Never use oil or grease on studs or nuts. If you
do, the nuts might come loose. Your wheel could
fall off, causing a serious accident. 1
8. Replace the wheel nuts
with the rounded end
of
the nuts toward the
wheel. Tighten each nut
by hand until the wheel
is held against the hub.
5-28 1
Page 246 of 371
Automatic Transaxle Fluid
When to Check and Change
A good time to check your automatic transaxle fluid
level is when the engine oil is changed.
Change both the fluid and filter every
50,000 miles
(83
000 lun) if the vehicle is mainly driven under one or
more of these conditions:
In heavy city traffic where the outside temperature
regularly reaches 90°F (32°C) or higher.
In hilly or mountainous terrain.
When doing frequent trailer towing.
Uses such as found in taxi, police or delivery service.
If you do not use your vehicle under any of these
conditions, the fluid and filter do not require changing.
See “Scheduled Maintenance Services” in the Index.
How to Check
Because this operation can be a little difficult, you may
choose to have this done at your Pontiac dealership
Service Department.
If you do it yourself, be sure to follow all the instructions
here, or you could get a false reading on the dipstick.
NOTICE:
Too much or too little fluid can damage your
transaxle.
Too much can mean that some of the
fluid could come out and fall on hot engine parts
or exhaust system parts, starting
a fire. Be sure to
get an accurate reading if you check your
transaxle fluid.
Wait at least 30 minutes before checking the transaxle
fluid level
if you have been driving:
When outside temperatures are above 90°F (32°C).
At high speed for quite a while.
In heavy traffic -- especially in hot weather.
While pulling a trailer.
To get the right reading, the fluid should be at normal
operating temperature, which is 180°F to
200°F (82°C
to 93°C).
Get the vehicle warmed up by driving about 15 miles
(24 km) when outside temperatures are above 50°F
(10°C). If it’s colder than 50°F (lO”C), you may have
to drive longer.
6-19
Page 248 of 371
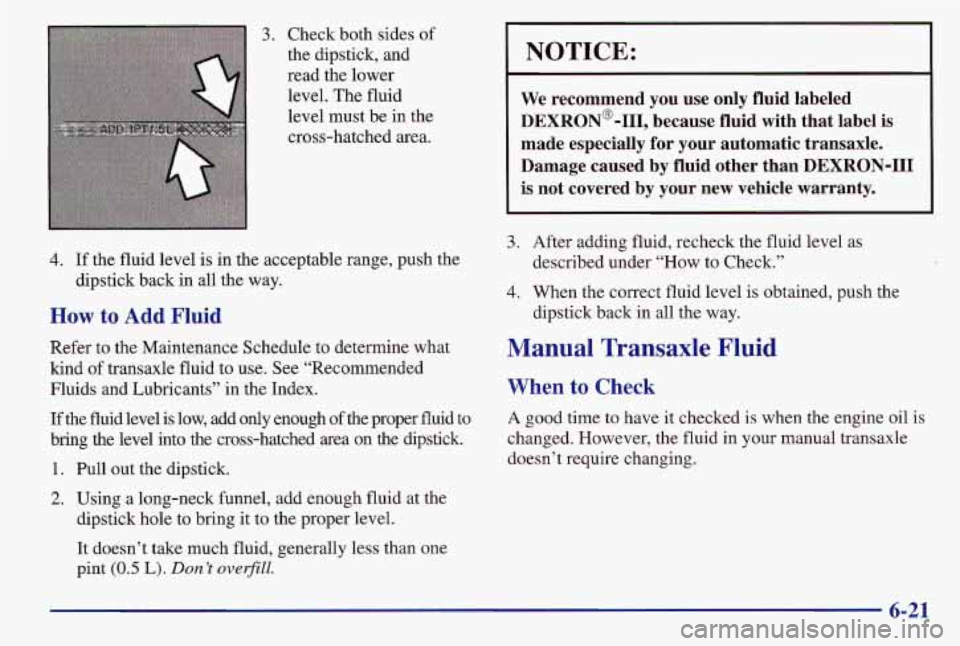
3. Check both sides of
the dipstick, and
read the lower
level. The fluid
level must be in the
cross-hatched area.
4. If the fluid level is in the acceptable range, push the
dipstick back in all the way.
How to Add Fluid
Refer to the Maintenance Schedule to determine what
kind
of transaxle fluid to use. See “Recommended
Fluids and Lubricants” in the Index.
If the fluid level is low, add only enough of the proper fluid to
bring the level into the cross-hatched area on the dipstick.
1. Pull out the dipstick.
2. Using a long-neck funnel, add enough fluid at the
dipstick hole to bring
it to the proper level.
It doesn’t take much fluid, generally less than one
pint
(0.5 L). Don’t overfill.
NOTICE:
We recommend you use only fluid labeled
DEXRON@-111, because fluid with that label
is
made especially for your automatic transaxle.
Damage caused by fluid other than DEXRON-I11
is not covered by your new vehicle warranty.
3. After adding fluid, recheck the fluid level as
described under
“How to Check.”
4. When the correct fluid level is obtained, push the
dipstick back in all the way.
Manual Transaxle Fluid
When to Check
A good time to have it checked is when the engine oil is
changed. However, the fluid in your manual transaxle
doesn’t require changing.
6-21
Page 261 of 371
Brake Pedal Travel
See your dealer if the brake pedal does not return to
normal height, or if there is a rapid increase in pedal
travel. This could be a sign of brake trouble.
Brake Adjustment
Every time you make a moderate brake stop, your disc
brakes adjust for wear.
If you rarely make a moderate or
heavier stop, then your brakes might not adjust correctly.
If you drive in that way, then -- very carefully -- make a
few moderate brake stops about every
1,000 miles
(1 600 km), so your brakes will adjust properly.
If your brake pedal goes down farther than normal, your
rear drum brakes may need adjustment. Adjust them by
backing up and firmly applying the brakes a few times.
Replacing Brake System Parts
The braking system on a modern vehicle is complex. Its
many parts have to be of top quality and work well
together
if the vehicle is to have really good braking.
Your vehicle was designed and tested with top-quality
GM brake parts. When you replace parts of your braking
system
-- for example, when your brake linings wear
down and you have to have new ones put in
-- be sure
you get new approved
GM replacement parts. If you
don’t, your brakes may no longer work properly. For
example, if someone puts in brake linings that are
wrong for your vehicle, the balance between your front
and rear brakes can change
-- for the worse. The
braking performance you’ve come to expect can change
in many other ways if someone puts in the wrong
replacement brake parts.
Battery
Every new Pontiac has a Delco Freedom’ battery. You
never have to add water to one
of these. When it’s time
for a new battery, we recommend a Delco Freedom
battery. Get one that has the replacement number shown
on the original battery’s label.
Vehicle Storage
If you’re not going to drive your vehicle for 25 days or
more, take off the black, negative
(-) cable from the
battery. This will help keep your battery from
running down.
6-34