1997 PONTIAC BONNEVILLE clock
[x] Cancel search: clockPage 66 of 405
Matching Transmitter(s) To Your Vehicle
Each key chain transmitter is coded to prevent another
transmitter from unlocking your vehicle.
If a transmitter
is lost or stolen,
a replacement can be purchased through
your dealer. Remember to bring any remaining
transmitters with you when you
go to your dealer.
When the dealer matches the replacement transmitter
to your vehicle, any remaining transmitters must also
be matched. Once your dealer has coded the new
transmitter, the lost transmitter will not unlock your
vehicle. Each vehicle can have only four transmitters
matched to it.
Battery Replacement
Under normal use, the battery in your key chain
transmitter should last about two years.
You can tell the battery is weak if the transmitter won’t
work at the
normal range in any location. If you have to
get close to your vehicle before the transmitter works,
it’s probably time to change the battery. For
battery replacement, use one Duracell@ battery, type
DL-2032, or
a similar type.
To replace the battery:
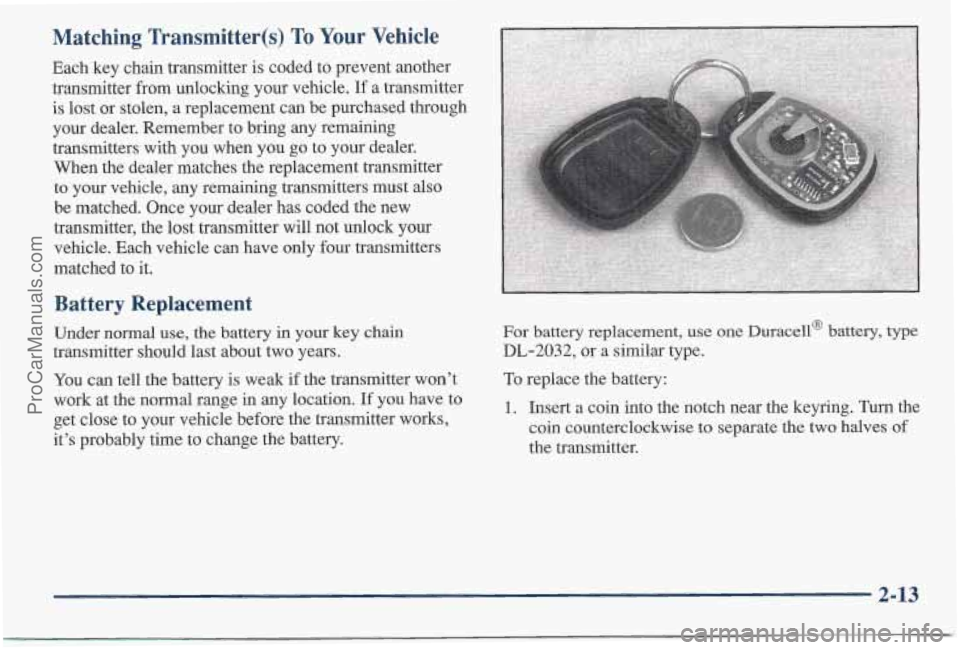
1. Insert a coin into the notch near the keyring. Turn the
coin counterclockwise to separate
the two halves of
the transmitter.
2-13
ProCarManuals.com
Page 99 of 405
Twilight Sentinel Also, it's possible that your headlamps may go out if
you drive from a dark area into a bright area like a
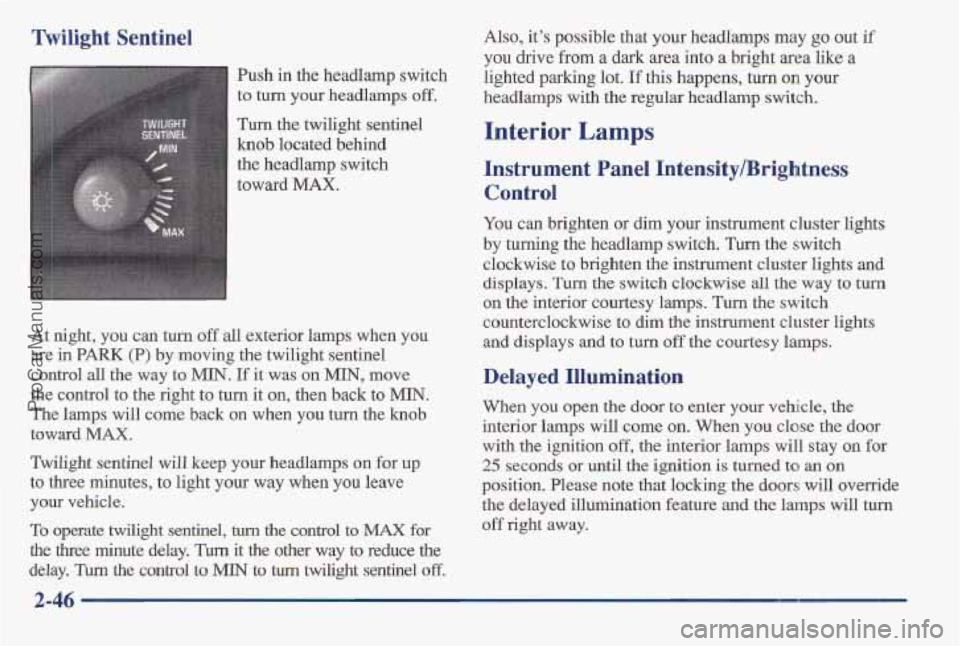
fish in the headlamp switch
lighted parking lot.
If this happens, turn on your
to turn your headlamps
off. headlamps with the regular headlamp switch,
Turn the twilight sentinel
knob located behind
the headlamp switch
Instrument Panel Intensity/Brightness
toward MAX.
Interior Lamps
Control
You can brighten or dim your instrument cluster lights
by turning the headlamp switch. Turn the switch
clockwise to brighten the instrument cluster lights
and
displays. Turn the switch clockwise all the way to turn
on the interior courtesy lamps. Turn the switch
counterclockwise to dim the instrument cluster lights
and displays and
to turn off the courtesy lamps.
At
night, you can turn off all exterior lamps when you
are in PARK (P) by moving the twilight sentinel
control
all the way to MIN. If it was on MIN, move
the control to the right to turn it on, then back to MIN.
The lamps will come back on when you turn the knob
toward MAX.
Twilight sentinel will keep your headlamps on for up
to three minutes, to light your way when you leave
your vehicle.
To operate twilight sentinel, turn the control to MAX for
the three minute delay. Tm it the other way to reduce the
delay.
Turn the control to MIN to turn twilight sentinel off.
Delayed Illumination
When you open the door to enter your vehicle, the
interior lamps will corne on. When you close the door
with the ignition
off, the interior lamps will stay on for
25 seconds or until the ignition is turned to an on
position. Pleas'e note that locking the doors will override
the delayed illumination feature and
the lamps will turn
off right away.
2-46
ProCarManuals.com
Page 142 of 405
Section 3 Comfort Controls and Audio Systems
In this section, you’ll find out how to operate the comfort control and audio systems offered with your Pontiac. Be
sure to read about the particular systems supplied with your vehicle.
3-2 3-2
3-3
3-6 3-6
3-6
3-8
3-9
3-10 3-10
3-10 Comfort Controls
Standard Climate Control System
Electronic Climate Control System Air Conditioning
Heating
Ventilation System
Defogging and Defrosting
Rear Window Defogger
Setting the Clock for AM-FM Stereo
Setting the Clock for All Systems Except
AM-FM Stereo
AM-FM Stereo 3-16
3-19 3-22
3-25 3-27
3-28
3-28 3-29 3-29
3-30 AM-FM Stereo with Cassette
Tape Player
and Equalizer
AM-FM Stereo with Compact Disc Player AM-FM Stereo with Compact Disc Player
and Equalizer
Theft-Deterrent Feature Steering Wheel Controls
Understanding Radio Reception
Tips About Your Audio System
Care of Your Cassette Tape Player
Care
of Your Compact Discs
Fixed Mast Antenna
3-1
ProCarManuals.com
Page 143 of 405
Comfort Controls
This section tells you how to make your air system
work for
you. Your comfort control system uses
ozone-friendly
R- 134a refrigerant.
With these systems, you can control the heating, cooling
and ventilation
in your Pontiac. Your vehicle also has a
flow-through ventilation system described later in
this section.
Standard Climate Control System
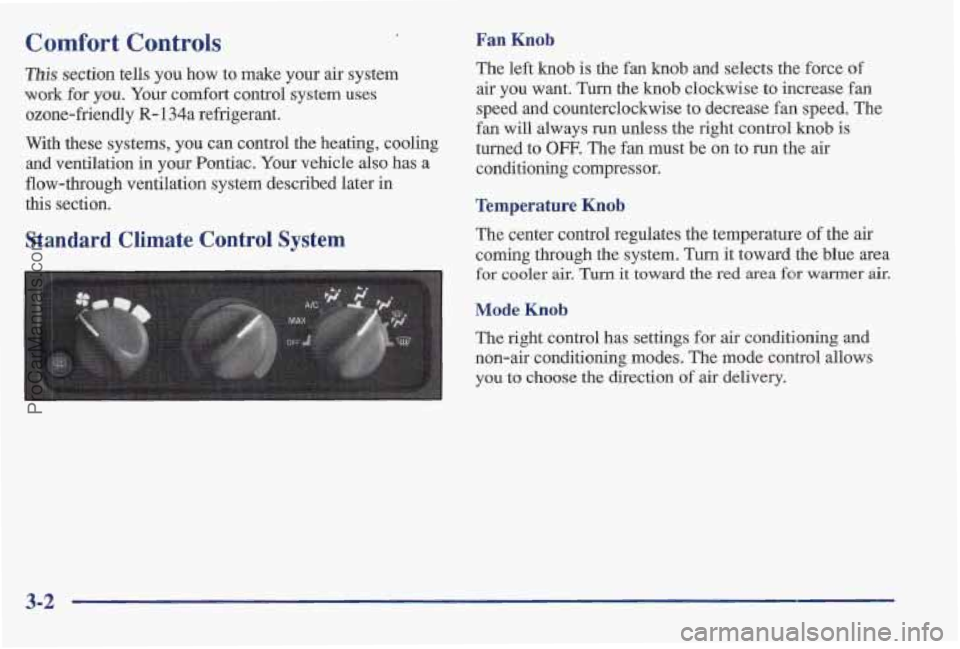
Fan Knob
The left knob is the fan knob and selects the force of
air you want. Turn the knob clockwise to increase fan
speed
and counterclockwise to decrease fan speed. The
fan will always
run unless the right control knob is
turned to
OFF. The fan must b'e on to run the air
conditioning compressor.
Temperature Knob
The center control regulates the temperature of the air
coming through the system. Turn it toward the blue area
for cooler air. Turn it toward the red area for warmer air.
Mode Knob
The right control has settings for air conditioning and
non-air conditioning modes. The mode control allows
you to choose
the direction of air delivery.
3-2
ProCarManuals.com
Page 151 of 405
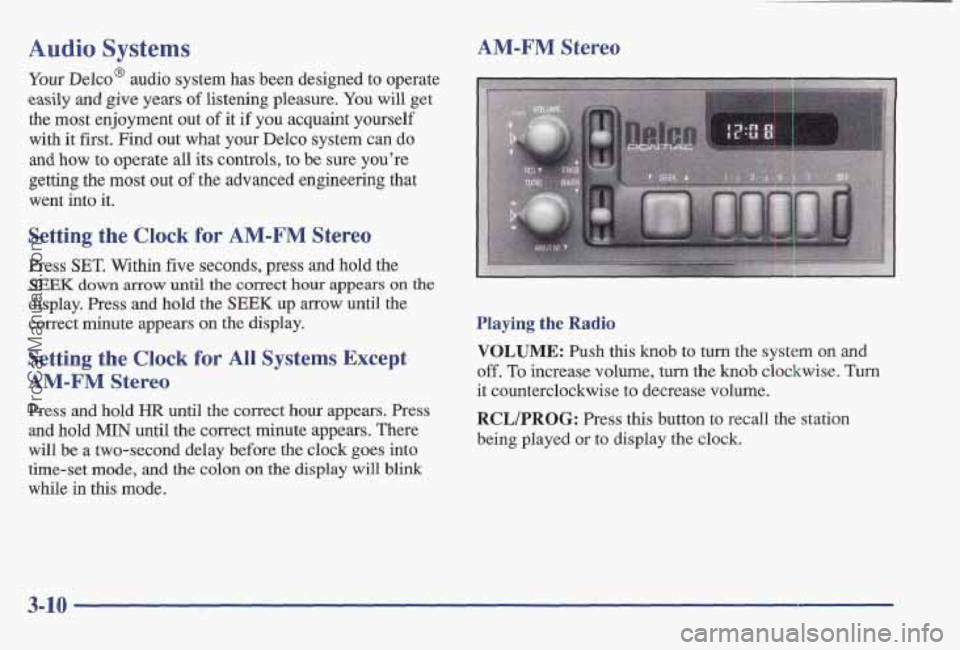
Audio Systems
Your Delco@ audio system has been designed to operate
easily and give yeass of listening pleasure. You will get
the most enjoyment out
of it if you acquaint yourself
with it first. Find out what your Delco system can do
and how to operate all its controls, to be sure you're
getting the most out of the advanced engineering that
went into it,
AMmFM Stereo
Setting the
Clock for AM-FM Stereo
Press SET. Within five seconds, press and hold the
SEEK down arrow until the correct hour appears on the
display. Press and hold the SEEK up arrow until the
correct minute appears
on the display.
Setting the Clock for All Systems Except
AM-FM Stereo
Press and hold HR until the correct hour appears. Press
and hold MIN until the correct minute appears. There
will be a two-second delay before the clock goes int'o
time-set
mode, and the colon on the display will blink
while in
this mode.
Playing the Radio
VOLUME: Push this knob to turn the system on and
off. To increase volume, turn the kn0b clockwise. Turn
it counterclockwise to decrease volume.
RCL/PROG: Press this button to recall the station
being played or to display the clock.
3-10
ProCarManuals.com
Page 153 of 405
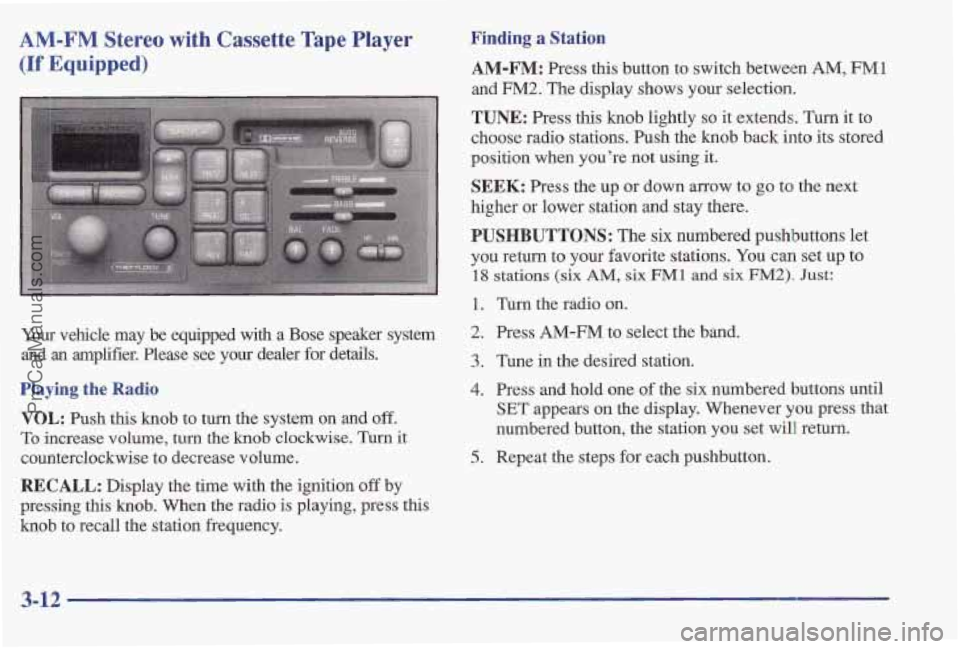
AM-FM Stereo with Cassette Tape Player
(If Equipped)
Your vehicle may be equipped with a Bose speaker system
and an amplifier. Please see your dealer for details.
Playing the Radio
VOL: Push this knob to turn the system on and off.
To increase volume, turn the knob clockwise. Turn it
counterclockwise to decrease volume.
RECALL: Display the time with the ignition off by
pressing this
knob. When the radio is playing, press this
knob to recall the station frequency.
Finding a Station
AM-FM: Press this button to switch between AM, FM1
and FM2. The display shows your selection.
TUNE: Press this knob lightly so it extends. Turn it to
choose radio stations. Push the knob back into its stored
position when you’re not using
it.
SEEK: Press the up or down arrow to go to the next
higher or lower station
and stay there.
PUSHBUTTONS: The six numbered pushbuttons let
you return to your favorite stations. You can set up to
18 stations (six AM, six FM1 and six FM2). Just:
1. Turn the radio on.
2. Press AM-EM to select the band.
3. Tune in the desired station.
4. Press and hold one of the six numbered buttons until
SET appears on the display. Whenever you press that
numbered button, the station you set will return.
5. Repeat the steps for each pushbutton.
3-12
ProCarManuals.com
Page 154 of 405
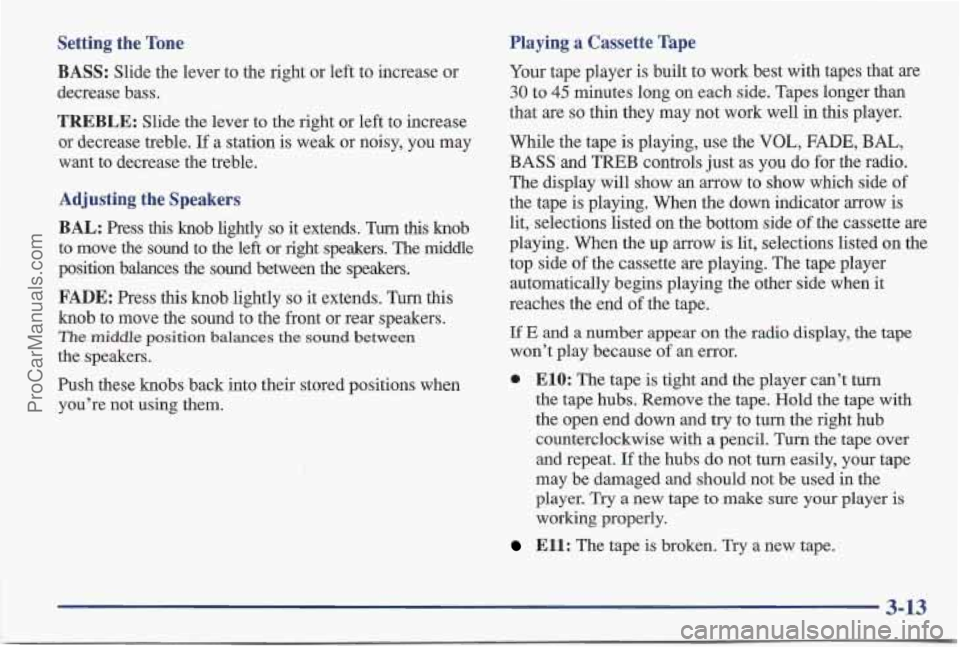
Setting the Tone
BASS:
Slide the lever to the right or left to increase or
decrease bass.
Playing a Cassette Tape
TREBLE: Slide the lever to the right or left to increase
or decrease treble. If a station is weak or noisy, you may
want to decrease the treble.
Adjusting the Speakers
BAL:
Press this knob lightly so it extends. Turn this knob
to move the
sound to the left or right speakers. The middle
position balances the sound between the speakers.
FADE: Press this knob lightly so it extends. Turn this
knob to move the sound to the front or rear speakers.
The middle position balances the sound between
the speakers.
Push these knobs back into their stored positions when
you’re not using them.
Your tape player is built to work best with tapes that are
30 to 45 minutes long on each side. Tapes longer than
that are
so thin they may not work well in this player.
While the tape is playing, use the
VOL, FADE, BAL,
BASS and TREB controls just as you do for the radio.
The display will show an arrow to show which side
of
the tape is playing. When the down indicator arrow is
lit, selections listed on the bottom side
of the cassette are
playing. When the up arrow is lit, selections listed on the
top side of the cassette are playing. The tape player
automatically begins playing the other side when
it
reaches the end of the tape.
If E and a number appear on the radio display, the tape
won’t play because
of an error.
0 E10: The tape is tight and the player can’t turn
the tape hubs. Remove the tape. Hold the tape with
the open end down and try to turn the right hub
counterclockwise with
a pencil. Turn the tape over
and repeat.
If the hubs do not turn easily, your tape
may be darnaged and should not be used in the
player. Try
a new tape to make sure your player is
working properly.
Ell: The tape is broken. Try a new tape.
3-13
ProCarManuals.com
Page 157 of 405
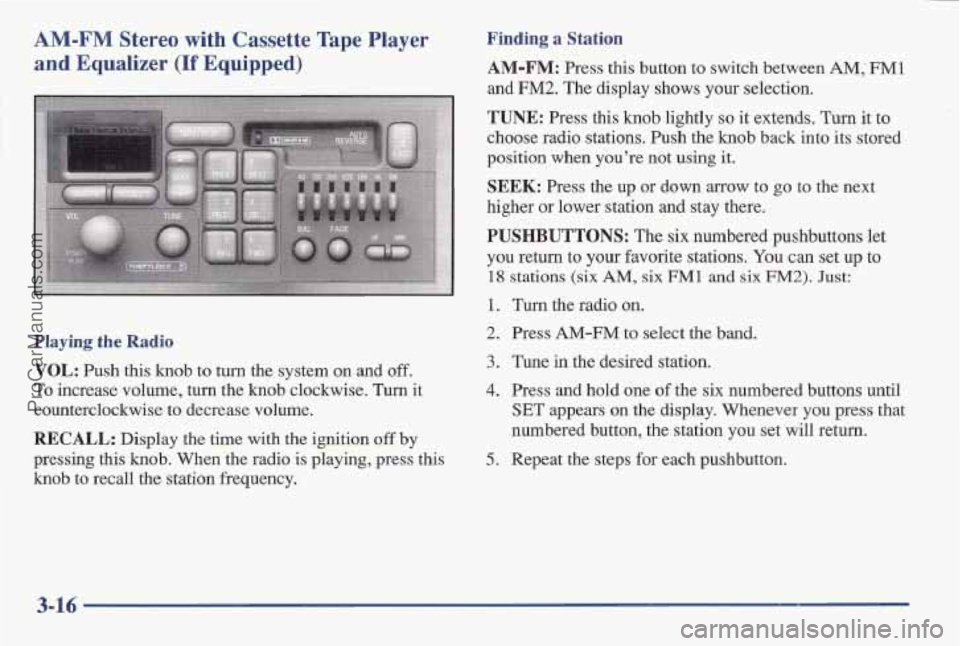
AM-FM Stereo with Cassette Tape Player
and Equalizer (If Equipped)
Playing the Radio
VOL: Push this knob to turn the system on and off,
To increase volume, turn the knob clockwise. Turn it
counterclockwise to decrease volume.
RECALL: Display the time with the ignition off by
pressing this
knob. When the radio is playing, press this
knob to recall the station frequency.
Finding a Station
AM-FM: Press this button to switch between AM; EM1
and FM2. The display shows your selection.
TUNE: Press this knob lightly so it extends. Turn it to
choose radio stations. Push the knob back
into its stored
position when you’re not using
it.
SEEK: Press the up or down arrow to go to the next
higher or lower station and stay there.
PUSHBUTTONS: The six numbered pushbuttons let
you return to your favorite stations.
You can set up to
18 stations (six AM, six FM1 and six FM2). Just:
1. Turn the radio on.
2. Press AM-FM to select the band.
3. Tune in the desired station.
4. Press and hold one of the six numbered buttons until
SET appears on the display. Whenever you press that
numbered button,
the station you set will return.
5, Repeat the steps for each pushbutton.
ProCarManuals.com