1997 PONTIAC BONNEVILLE light
[x] Cancel search: lightPage 131 of 405
When the ignition key is turned to RUN, all possible
HUD images will come on, then the Head-Up Display
will operate normally.
If you never look at your instrument panel, you may not
see something important, such as a warning light. So be
sure to
scan your displays and controls and the driving
environment just as
you would in a vehicle without HUD.
NOTICE:
Although the HUD image appears to be near the
front
of the vehicle, do not use it as a parking aid.
The
HUD was not designed for that purpose.
If you try to use it that way, such as in a
parking lot,
you may misjudge distance
and run into something.
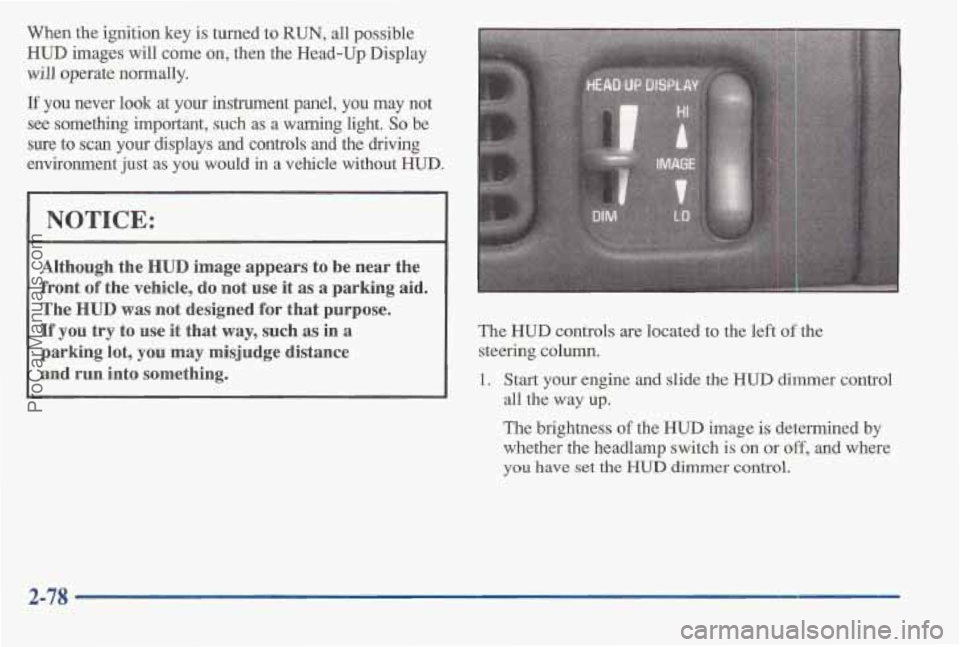
The HUD controls are located to the left of the
steering
column.
1. Start your engine and slide the HUD dimmer control
all the way up.
The brightness of the HUD image is determined by
whether the headlamp switch
is on or off, and where
you have set the HUD dimmer control.
ProCarManuals.com
Page 133 of 405
Driver Information Centerloption
CHECK OIL LEVEL
WASHER FLUID
Law COOLANT
CHECK PAOEB
HOOD DOOR
TRUNK AJAR
I
MONITOR
LAMP I HI BEAM HEAD
PARK LAMP
TURN SIQNAL
BACK UP TAIL
BRAKE LAMP
TRIP
8 8 8 8.8
3
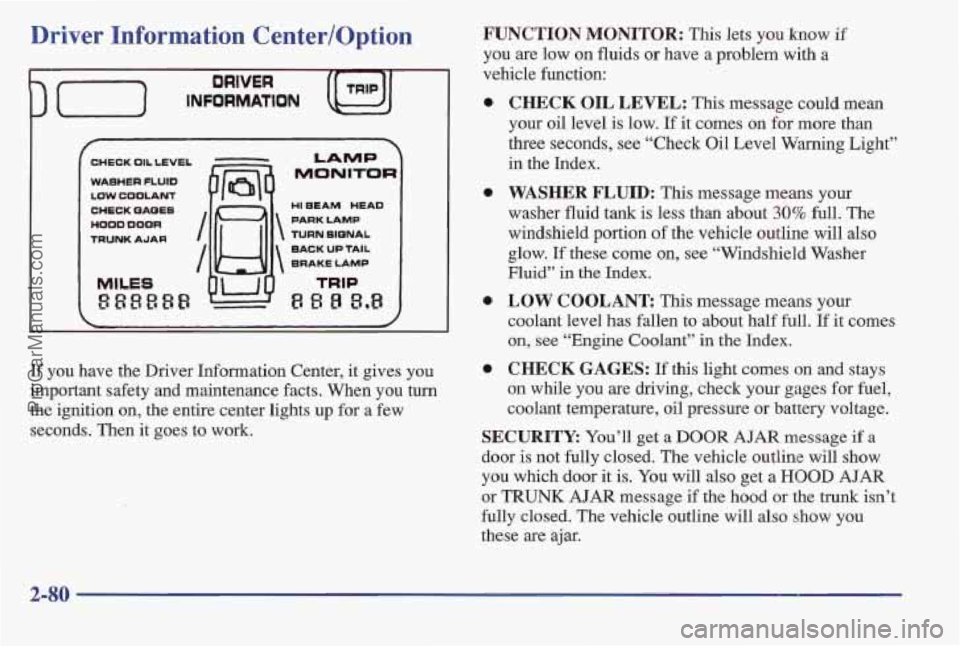
If you have the Driver Information Center, it gives you
important safety and maintenance facts. When you turn
the ignition on, the entire center lights up for a
few
seconds. Then it goes to work.
FUNCTION MONITOR: This lets you know if
you are low on fluids or have a problem with a
vehicle function:
a
a
CHECK OIL LEVEL: This message could mean
your oil level
is low. If it comes on for more than
three seconds, see “Check Oil Level Warning Light”
in the Index.
WASHER FLUID: This message means your
washer fluid tank is less than about 30% full. The
windshield portion
of the vehicle outline will also
glow. If these come on, see “Windshield Washer
Fluid”
in the Index.
LOW COOLANT This message means your
coolant level has fallen to about half full.
If it comes
on, see “Engine Coolant” in the Index.
CHECK GAGES: If this light comes on and stays
on while you are driving, check your gages for fuel,
coolant temperature, oil pressure or battery voltage.
SECURITY: You’ll get a DOOR AJAR message if a
door is not fully closled. The vehicle outline will show
you which door it is. You will also get a HOOD AJAR
or TRUNK AJAR message if the hood or the trunk isn’t
fully lclosed. The vehicle outline will also show you
these are ajar.
2-80
ProCarManuals.com
Page 134 of 405
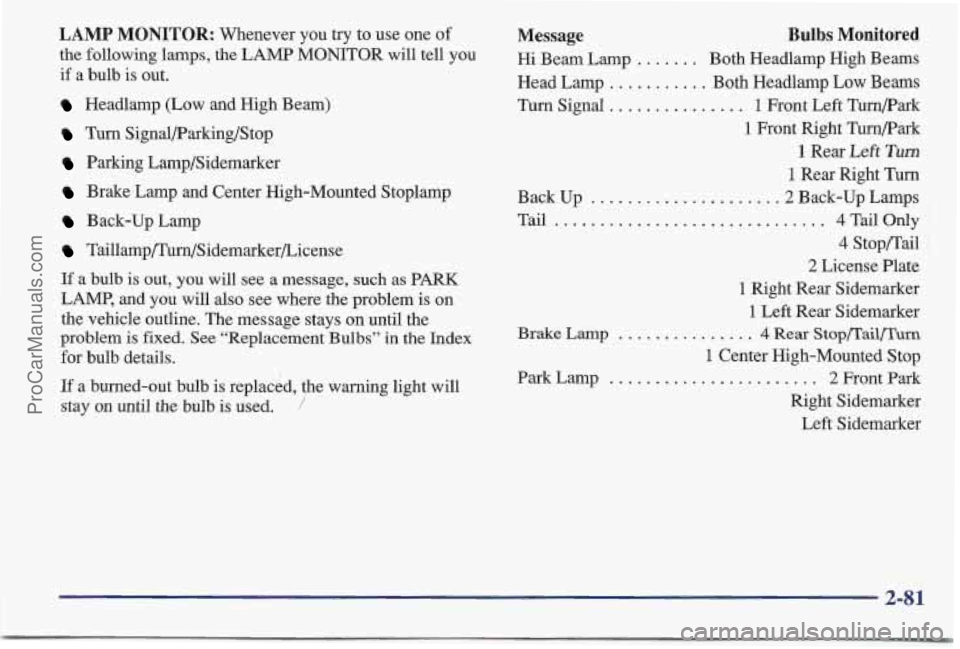
LAMP MONITOR: Whenever you try to use one of
the following lamps, the LAMP MONITOR will tell you
if a bulb is out.
Headlamp (Low and High Beam)
Turn Signal/Parking/Stop
Parking Lamp/Sidemarker
Brake Lamp and Center High-Mounted Stoplamp
Back-up Lamp
Taillamp/Turn/Sidemarker/License
If a bulb is out, you will see a message, such as PARK
LAMP, and you will also see where the problem is on
the vehicle outline. The message stays
on until the
problem is fixed. See “Replacement Bulbs” in
the Index
for bulb details.
If a burned-out bulb is replaced, the warning light will
stay
on until the bulb is used. ’
Back Up . .
Tail . . .......
Message Bulbs Monitored
Hi Beam Lamp ....... Both Headlamp High Beams
Head Lamp
........... Both Headlamp Low Beams
Turn Signal
............. 1 Front Left Turnpark
1 Front Right Turnpark
1 Rear Left Turn
1 Rear Right Turn
....... .2 Back-up Lamps
........... 4 Tail Only
4 Stop/Tail
2 License Plate
1 Right Rear Sidemarker
1 Left Rear Sidemarker
Brake Lamp ............... 4 Rear Stop/Tail/Turn
1 Center High-Mounted Stop
................... 2 Front Park
Right Sidemarker Left Sidemarker
Park Lamp . .
2-81
ProCarManuals.com
Page 137 of 405
Calibrating the Compass
[MoDE)
CALIBRATE >
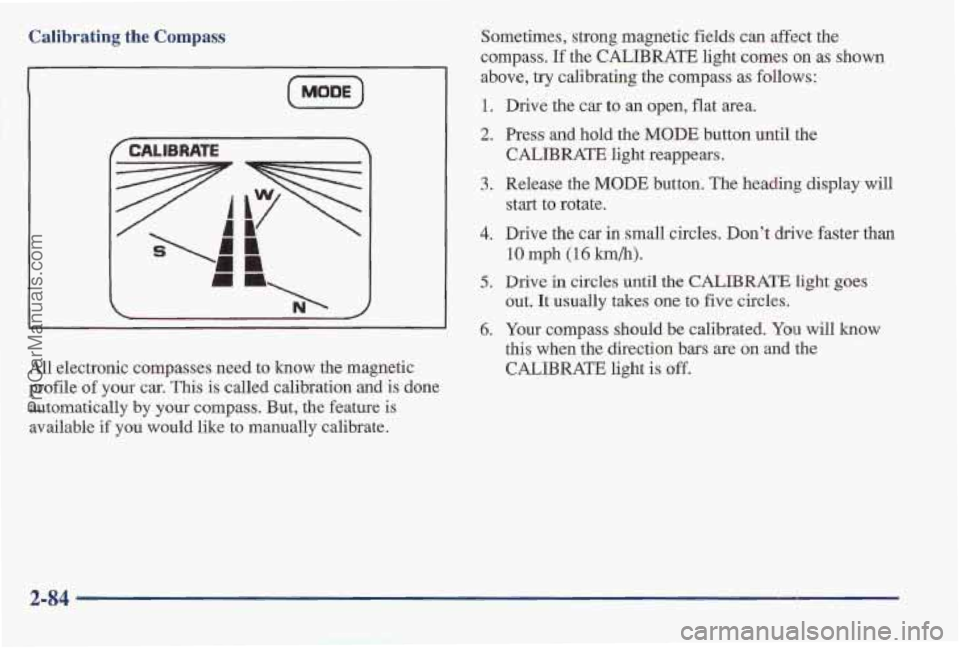
All electronic compasses need to kn'ow the magnetic
profile
of your car. This is called calibration and is done
automatically
by your compass. But, the feature is
available
if you would like to manually calibrate. Sometimes,
strong magnetic fields can affect the
compass. If the CALIBRATE light comes
on as shown
above, try calibrating the compass as follows:
1. Drive the car to an open, flat area.
2. Press and hold the MODE button until the
CALIBRATE light reappears,
3. Release the MODE button. The heading display will
4. Drive the car in small circles. Don't drive faster than
start to rotate.
10 mph (16 km/h).
out.
It usually takes one to five circles.
this when the direction bars are on and
the
CALIBRATE light is off.
5. Drive in circles until the CALIBRATE light goes
6. Your compass should be calibrated. You will know
ProCarManuals.com
Page 147 of 405
Air Conditioning
On hot days, open the windows long enough to let hot
inside
air escape. This reduces the time it takes for your
vehicle to cool down. Then keep your windows closed
for the air conditioner to work its best.
If
you have the standard system, for 'quick cool-down on
very hot days, use
MAX with the temperature knob in
the blue
area. If this setting is used for long periods of
time, the air in your vehicle may become too cold and
dry. For normal cooling on hot
days, use A/C with the
temperature
knob in the blue area. This setting cools the
air entering your vehicle and directs it through the
instrument panel outlets.
If you have the electronic system, press the A/C button
to turn
the system on. The system will cool and
dehumidify the air inside the vehicle.
Also while in
AUTO mode, the system will use RECIRC as necessary
to cool the air.
On cool but
sunny days, with the standard system or
through manual operation
of the electronic system, use
BI-LEVEL to deliver warm air to the floor and cooler air
to the middle instrument panel outlets. To warm or cool
the air delivered, push
the TEMP button up or down.
When the air conditioning system is in
AUTO mode,
the
A/C light will always be on. When the ambient
-/
temperature outside the vehicle reaches 40°F (4" C),
the compressor will remain on continuously.
Heating
If you have the standard system, on cold days use
HEATER with the temperature knob in the red area. If
you have the electronic system, press AUTO and adjust
the temperature by pressing the
TEMP up or down
arrow. You may also adjust the electronic system
nmnually
by pressing the MODE button and selecting
HEAT. Again, adjust the temperature by pressing the
TEMP up or down arrow.
With each system, outside air will
be brought in and sent
through the floor outlets. The heater works best if you
keep your windows closed while using it.
Ventilation System
For mild outside temperatures when little heating or
cooling
is needed, use VENT (on the standard system)
to direct outside air through your vehicle. Air will flow
through the middle instrument panel 'outlets.
Your vehicle's flow-through ventilation system supplies
outside air into the vehicle when
it's moving, When the
vehicle is not moving, you can get outside air to flow
through by selecting any air choice (except the rear
window defogger) and any fan
speed.
5-6
ProCarManuals.com
Page 150 of 405
Rear Window Defogger
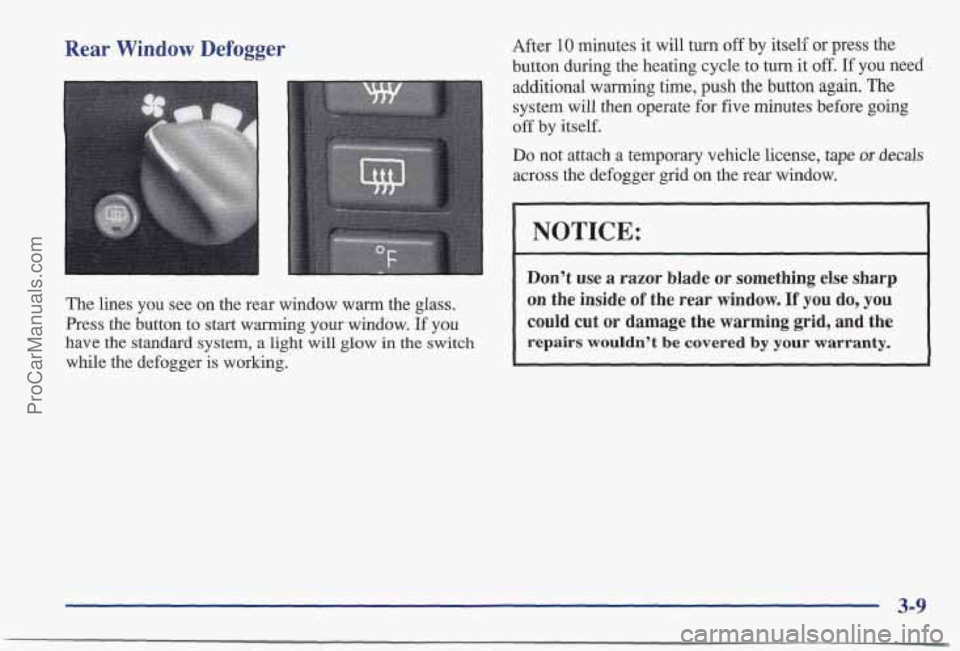
The lines you see on the rea window warm the glass.
Press the button to start warming your window. If you
have
the standard system, a light will glow in the switch
while the defogger is working. After
10 minutes
it will turn off by itself or press the
button during the heating cycle to turn it off.
If you need
additional warming time, push the button again.
The
system will then operate for five minutes before going
off by itself.
Do not attach a temporary vehicle license, tape or decals
across the defogger grid on the rear window.
NOTICE:
Don’t use a razor blade or something else sharp
on the inside
of the rear window. If you do, you
could cut or damage the warming grid, and the
repairs wouldn’t be covered by your warranty.
3-9
ProCarManuals.com
Page 153 of 405
AM-FM Stereo with Cassette Tape Player
(If Equipped)
Your vehicle may be equipped with a Bose speaker system
and an amplifier. Please see your dealer for details.
Playing the Radio
VOL: Push this knob to turn the system on and off.
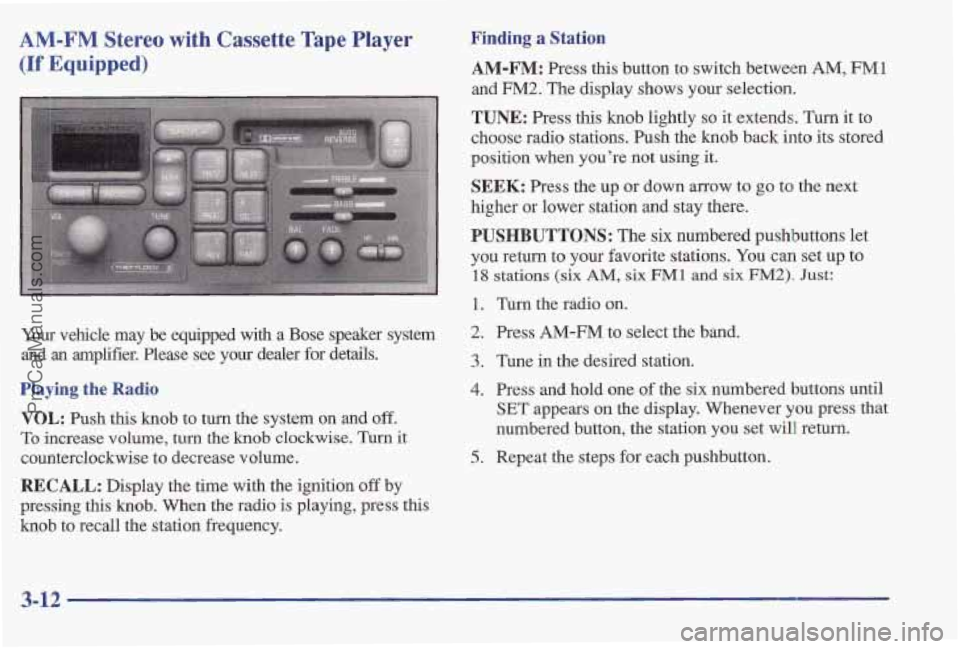
To increase volume, turn the knob clockwise. Turn it
counterclockwise to decrease volume.
RECALL: Display the time with the ignition off by
pressing this
knob. When the radio is playing, press this
knob to recall the station frequency.
Finding a Station
AM-FM: Press this button to switch between AM, FM1
and FM2. The display shows your selection.
TUNE: Press this knob lightly so it extends. Turn it to
choose radio stations. Push the knob back into its stored
position when you’re not using
it.
SEEK: Press the up or down arrow to go to the next
higher or lower station
and stay there.
PUSHBUTTONS: The six numbered pushbuttons let
you return to your favorite stations. You can set up to
18 stations (six AM, six FM1 and six FM2). Just:
1. Turn the radio on.
2. Press AM-EM to select the band.
3. Tune in the desired station.
4. Press and hold one of the six numbered buttons until
SET appears on the display. Whenever you press that
numbered button, the station you set will return.
5. Repeat the steps for each pushbutton.
3-12
ProCarManuals.com
Page 154 of 405
Setting the Tone
BASS:
Slide the lever to the right or left to increase or
decrease bass.
Playing a Cassette Tape
TREBLE: Slide the lever to the right or left to increase
or decrease treble. If a station is weak or noisy, you may
want to decrease the treble.
Adjusting the Speakers
BAL:
Press this knob lightly so it extends. Turn this knob
to move the
sound to the left or right speakers. The middle
position balances the sound between the speakers.
FADE: Press this knob lightly so it extends. Turn this
knob to move the sound to the front or rear speakers.
The middle position balances the sound between
the speakers.
Push these knobs back into their stored positions when
you’re not using them.
Your tape player is built to work best with tapes that are
30 to 45 minutes long on each side. Tapes longer than
that are
so thin they may not work well in this player.
While the tape is playing, use the
VOL, FADE, BAL,
BASS and TREB controls just as you do for the radio.
The display will show an arrow to show which side
of
the tape is playing. When the down indicator arrow is
lit, selections listed on the bottom side
of the cassette are
playing. When the up arrow is lit, selections listed on the
top side of the cassette are playing. The tape player
automatically begins playing the other side when
it
reaches the end of the tape.
If E and a number appear on the radio display, the tape
won’t play because
of an error.
0 E10: The tape is tight and the player can’t turn
the tape hubs. Remove the tape. Hold the tape with
the open end down and try to turn the right hub
counterclockwise with
a pencil. Turn the tape over
and repeat.
If the hubs do not turn easily, your tape
may be darnaged and should not be used in the
player. Try
a new tape to make sure your player is
working properly.
Ell: The tape is broken. Try a new tape.
3-13
ProCarManuals.com