1997 PONTIAC BONNEVILLE engine
[x] Cancel search: enginePage 129 of 405
Here are some things that some owners ask about. None
of these show a problem with your fuel gage:
At the service station, the gas pump shuts off before
It takes a little more or less fuel to fill up than the
the
gage reads
FULL (F).
gage indicated. For example, the gage may have
indicated the tank was
half full, but it actually took a
little more or less than half the tank's capacity to fill
the tank.
The gage moves a little when you turn a corner,
The gage doesn't go back to EMPTY (E) when you
0 If you have the large span (220") gage, the needle
moves
more for a given amount of fuel. This does
not indicate excessive fuel consumption, and
is normal.
speed
up, or make
a hard stop.
turn off the ignition.
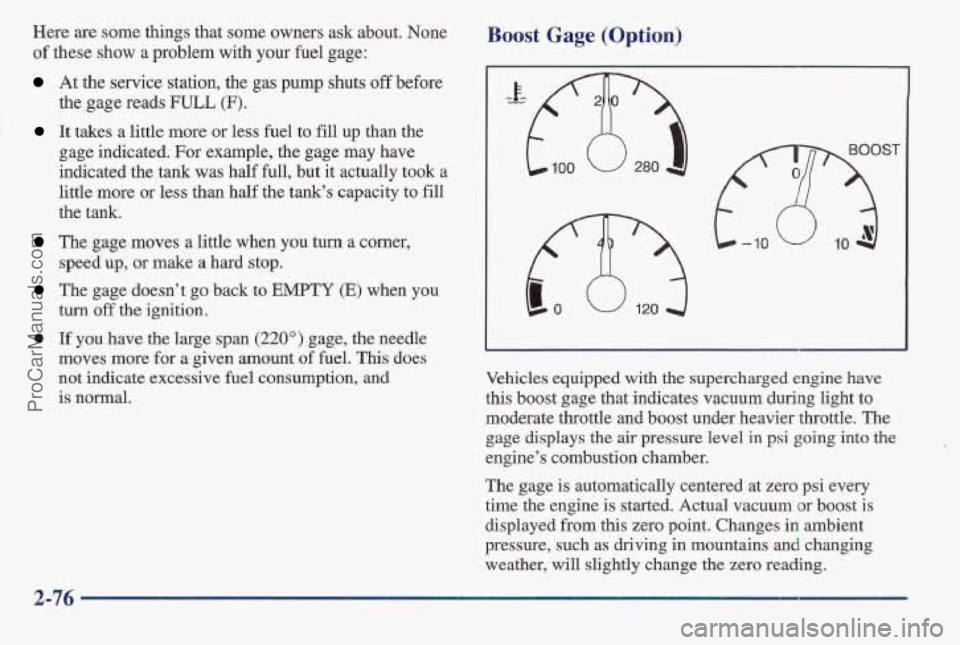
Boost Gage (Option)
msT -10
Vehicles equipped with the supercharged engine have
this boost gage that indicates vacuum during light to
moderate throttle an'd boost under heavier throttle. The
gage displays
the air pressure level in psi going into the
engine's combustion chamber.
The gage is automatically centered at zero psi every
time the engine is started. Actual vacuum or boost is
displayed from this zero point. Changes in ambient
pressure, such as driving in mountains and changing
weather, will slightly change the zero reading.
2-76
ProCarManuals.com
Page 131 of 405
When the ignition key is turned to RUN, all possible
HUD images will come on, then the Head-Up Display
will operate normally.
If you never look at your instrument panel, you may not
see something important, such as a warning light. So be
sure to
scan your displays and controls and the driving
environment just as
you would in a vehicle without HUD.
NOTICE:
Although the HUD image appears to be near the
front
of the vehicle, do not use it as a parking aid.
The
HUD was not designed for that purpose.
If you try to use it that way, such as in a
parking lot,
you may misjudge distance
and run into something.
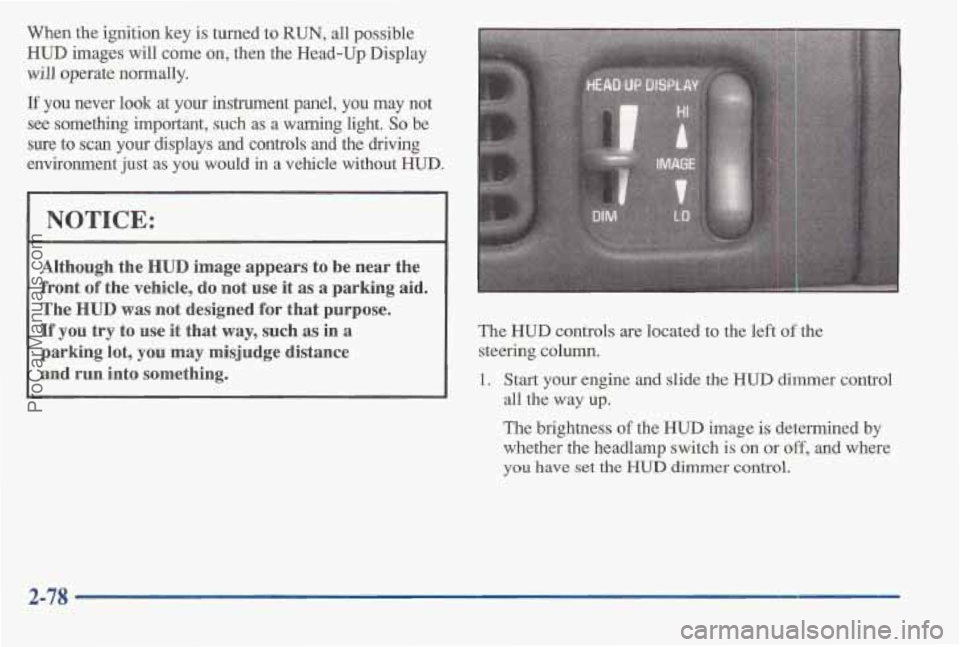
The HUD controls are located to the left of the
steering
column.
1. Start your engine and slide the HUD dimmer control
all the way up.
The brightness of the HUD image is determined by
whether the headlamp switch
is on or off, and where
you have set the HUD dimmer control.
ProCarManuals.com
Page 133 of 405
Driver Information Centerloption
CHECK OIL LEVEL
WASHER FLUID
Law COOLANT
CHECK PAOEB
HOOD DOOR
TRUNK AJAR
I
MONITOR
LAMP I HI BEAM HEAD
PARK LAMP
TURN SIQNAL
BACK UP TAIL
BRAKE LAMP
TRIP
8 8 8 8.8
3
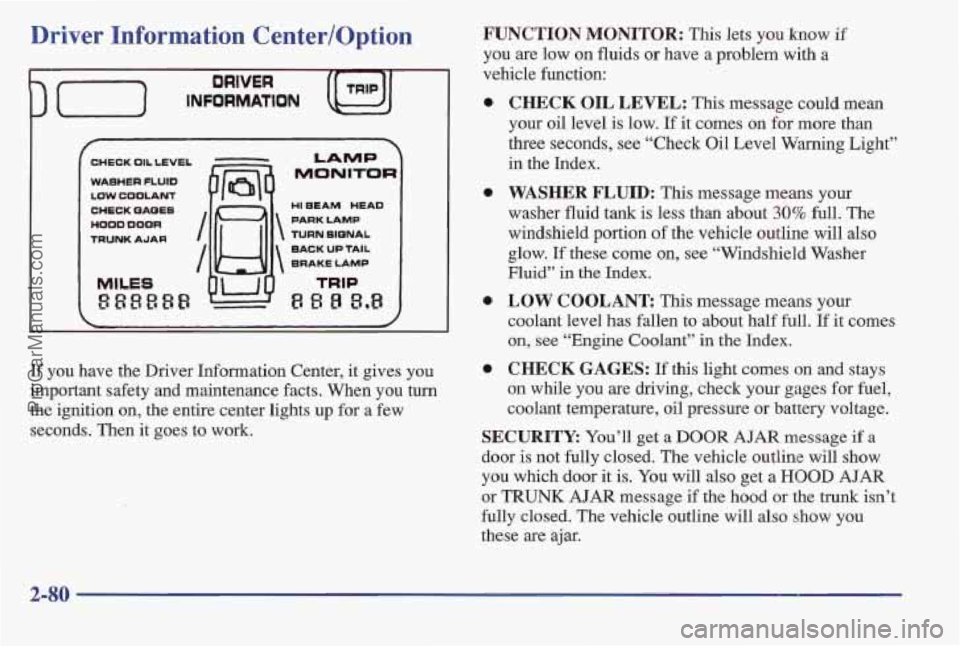
If you have the Driver Information Center, it gives you
important safety and maintenance facts. When you turn
the ignition on, the entire center lights up for a
few
seconds. Then it goes to work.
FUNCTION MONITOR: This lets you know if
you are low on fluids or have a problem with a
vehicle function:
a
a
CHECK OIL LEVEL: This message could mean
your oil level
is low. If it comes on for more than
three seconds, see “Check Oil Level Warning Light”
in the Index.
WASHER FLUID: This message means your
washer fluid tank is less than about 30% full. The
windshield portion
of the vehicle outline will also
glow. If these come on, see “Windshield Washer
Fluid”
in the Index.
LOW COOLANT This message means your
coolant level has fallen to about half full.
If it comes
on, see “Engine Coolant” in the Index.
CHECK GAGES: If this light comes on and stays
on while you are driving, check your gages for fuel,
coolant temperature, oil pressure or battery voltage.
SECURITY: You’ll get a DOOR AJAR message if a
door is not fully closled. The vehicle outline will show
you which door it is. You will also get a HOOD AJAR
or TRUNK AJAR message if the hood or the trunk isn’t
fully lclosed. The vehicle outline will also show you
these are ajar.
2-80
ProCarManuals.com
Page 145 of 405
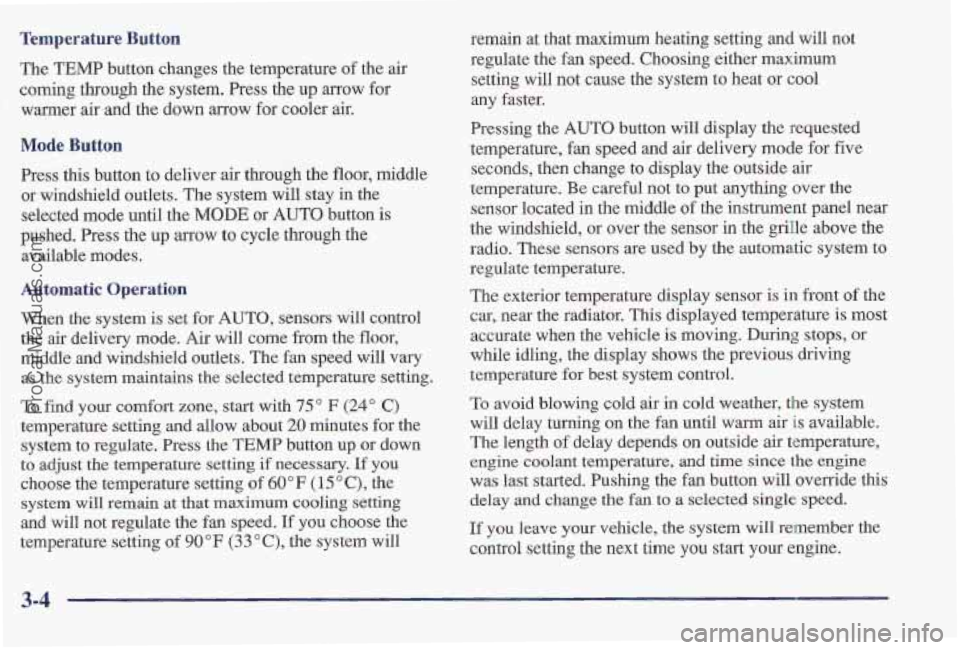
Tempmerature Button
The TEMP button changes the temperature of the air
coming
through the system. Press the up arrow for
warmer air-and the down arrow for cooler air.
Mode Button
Press this button to deliver air through the floor, middle
or windshiel'd outlets. The system will stay in the
selected mode until the
MODE or AUTO button is
pushed. Press the up arrow to cycle through the
available modes.
Automatic Operation
When the system is set for AUTO, sensors will control
the air delivery mode. Air will come from the floor,
middle and windshield outlets. The fan speed will vary
as the system maintains the selected temperature setting.
To find your comfort zone, start with 75 O F (24" C)
temperature setting and allow about 20 minutes for the
system to regulate. Press the TEMP button up or down
to adjust the temperature setting if necessary. If you
choose the temperature setting of 60°F (15 O C), the
system
will remain at that maximum cooling setting
and will not regulate the fan speed.
If you choose the
temperature setting
of 90°F (33 "C), the system will remain at that maximum heating setting and will not
regulate the
fan speed. Choosing either maximum
setting will not cause the system to heat or cool
any faster.
Pressing the
AUTO button will display the requested
temperature, fan speed and
air delivery mode for five
seconds, then change to display the outside air
temperature. Be careful not
to put anything over the
sensor located in the middle of the instrument panel near
the windshield, or over the sensor in the grille above the
radio. These sensors are used by the automatic system to
regulate temperature.
The exterior temperature display sensor is in front
of the
car, near the radiator. This displayed temperature is most
accurate when the vehicle is moving. During
stops, or
while idling, the display shows the previous dsaving
temperature
for best system control.
To avoid blowing cold air in cold weather, the system
will delay turning on the fan until warm air
is available.
The length
of delay depends on outside air temperature,
engine coolant temperature,
and time since the engine
was last started. Pushing the fan button will override this
delay and change the fan to a selected single speed.
If you leave your vehicle, the system will remember the
control setting the next time you start your engine.
3-4
ProCarManuals.com
Page 149 of 405
Ventilation Tips
0
0
0
0
Keep the hood and front air inlet free of ice, snow or
any other obstruction such as leaves. The heater and
defroster will work better, reducing the chance
of
fogging your windows.
When you enter a vehicle with the standard system
in
cold weather, select HEATER to supply air through
the floor outlets. Then turn the fan
on high for a few
moments before driving away. This will blow moist
air from the intake outlets toward the floor, not the
windshield. It reduces
the chance #of fogging your
windows. If you have the electronic system, the
AUTO
setting will do this for you. Manual operation
of the electronic system
in the HEAT mode will also
supply air though the floor outlets.
Keep the air path under the front 'seats clear of objects.
This helps air to circulate throughout your vehicle.
When the engine idles for a long time, the exterior
temperature sensor may cause the system
to blow air
that is. too cool. Once the vehicle is moving again the
system will try to maintain the set temperature inside
your vehicle.
When you start your vehicle
and the EXT TEMP
display flashes (electronic system only) for some time,
the system may need repair. See your Pontiac dealer.
Defogging and Defrosting
On cool, humid days, use DEFOG to keep the
windshield
and side windows clear. Use DEFROST to
remove fog or ice from the windshield quickly in
extremely humid or cold conditions.
If you have the standard system, use
DEFOG and adjust
the
fan speed to your comfort level. Use DEFROST
with the temperature toward'the red area and the fan
control toward high.
If you have the electronic system, press the
DEFOG
button and adjust the fan speed by pressing the fan
button up or down to your comfort level. Adjust
fan
speed by pressing the fan up or down mow. If you
select DEFROST from AUTO, the system will control
the fan speed. Adjust the temperature to your comfort
level by pressing the
TEMP up or down arrow.
3-8
ProCarManuals.com
Page 151 of 405
Audio Systems
Your Delco@ audio system has been designed to operate
easily and give yeass of listening pleasure. You will get
the most enjoyment out
of it if you acquaint yourself
with it first. Find out what your Delco system can do
and how to operate all its controls, to be sure you're
getting the most out of the advanced engineering that
went into it,
AMmFM Stereo
Setting the
Clock for AM-FM Stereo
Press SET. Within five seconds, press and hold the
SEEK down arrow until the correct hour appears on the
display. Press and hold the SEEK up arrow until the
correct minute appears
on the display.
Setting the Clock for All Systems Except
AM-FM Stereo
Press and hold HR until the correct hour appears. Press
and hold MIN until the correct minute appears. There
will be a two-second delay before the clock goes int'o
time-set
mode, and the colon on the display will blink
while in
this mode.
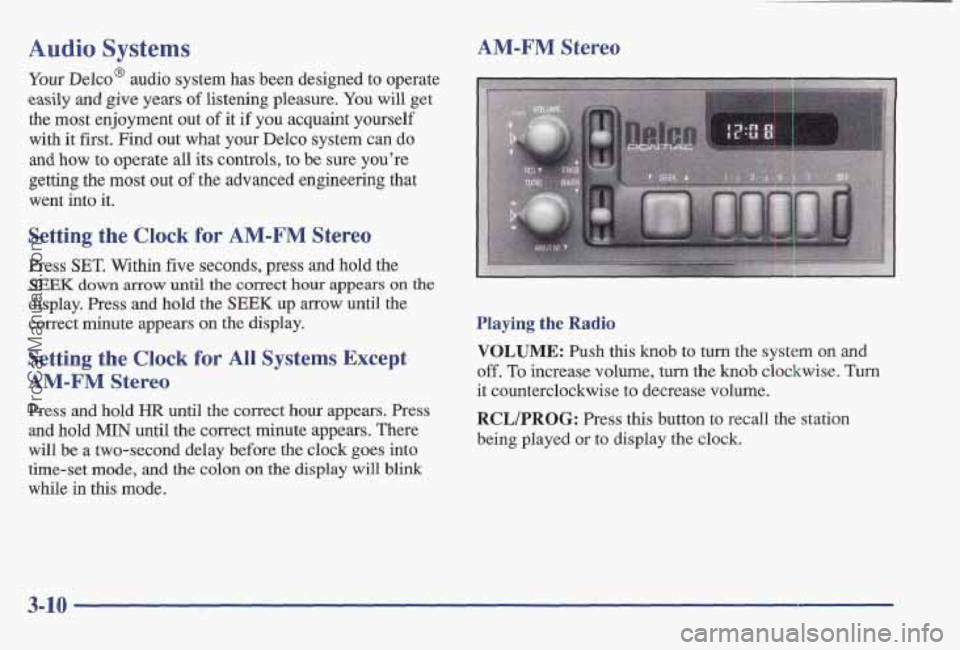
Playing the Radio
VOLUME: Push this knob to turn the system on and
off. To increase volume, turn the kn0b clockwise. Turn
it counterclockwise to decrease volume.
RCL/PROG: Press this button to recall the station
being played or to display the clock.
3-10
ProCarManuals.com
Page 169 of 405
Understanding Radio Reception
FM Stereo
FM stereo will give you the best sound. But mcl signals
will reach only about
10 to 40 miles (16 to 65 km). Tall
buildings
or hills can interfere with FM signals, causing
the sound
to come and go.
AM
The range for most AM stations is greater than for FM,
especially at night. The longer range, however, can
cause stations to interfere
with each other. AM can pick
up noise from things like storms and power lines. Try
reducing the treble to reduce this noise if
you ever get it.
Tips About Your Audio System
Hearing damage from loud noise is almost undetectable
until it is too late. Your hearing can adapt to higher
volumes of sound. Sound that
seems normal cin be loud
and harmful to your hearing. Take precautions by
adjusting the volume control on your radio to a safe
sound level before your hearing adapts to it.
To help avoid hearing loss or damage:
Adjust the volume control to the lowest setting.
Increase volume slowly until you hear comfortably
and clearly.
I NOTICE:
Before you add any sound equipment to your
vehicle
-- like a tape player, CB radio, mobile
telephone or two-way radio
-- be sure you can add
what you want. If you can, it’s very important to
do it properly. Added sound equipment may
interfere with the operation
of your vehicle’s
engine, Delco radio or other systems, and even
damage them. Your vehicle’s systems may
interfere with the operation
of sound equipment
that has been added improperly.
So, before adding sound equipment, check with
your dealer and be sure to check Federal rules
covering mobile radio and telephone unit,s.
3-28 J--
ProCarManuals.com
Page 180 of 405
Avoid needless heavy braking. Some people drive in
spurts
-- heavy acceleration followed by heavy
braking
-- rather than keeping pace with traffic. This is a
mistake. Your brakes may not have time to cool between
hard stops. Your brakes will wear out much faster
if you
do a lot of heavy braking.
If you keep pace with the
traffic and allow realistic following distances, you will
eliminate a lot of unnecessary braking. That means
better braking and longer brake life.
If your engine ever stops while you’re driving, brake
normally but don’t pump your brakes.
If you do, the
pedal may get harder to pus’h down.
If your engine
stops, you will still have some power brake assist. But
you will use
it when you brake. Once the power assist is
used up, it may take longer to stop and the brake pedal
will be harder to push.
Anti-Lock Brakes (ABS)
Your vehicle has anti-lock brakes (ABS). ABS is an
advanced electronic braking system that will help
prevent a braking skid.
When you start your engine, or when you begin to drive
away, your anti-lock brake system will check itself. You
may hear a momentary motor or clicking noise while
this test is going on, and you may even notice that
your
brake pedal moves a little. This is normal.
ANTILOCK (e)
If there’s a problem with the
anti-lock brake system, this
warning light will stay
on.
See “Anti-Lock Brake
System
Warning Light” in
the Index.
4-7
ProCarManuals.com