1997 NISSAN QUEST tow
[x] Cancel search: towPage 15 of 247
the ``Do-it-yourself operations'' section.
2. If the brake fluid level is correct, have the
warning system checked by your NIS-
SAN dealer.
WARNING
cYour brake system may not be work-
ing properly if the warning light is
on. Driving could be dangerous. If
you judge it to be safe, drive care-
fully to the nearest service station
for repairs. Otherwise, have your ve-
hicle towed.
cPressing the brake pedal with the
engine stopped and/or low brake
fluid level may increase your stop-
ping distance and braking will re-
quire greater pedal effort as well as
pedal travel.
cIf the brake fluid level is below the
minimum mark on the brake fluid
reservoir, do not drive until the brake
system has been checked at a NIS-
SAN dealer.
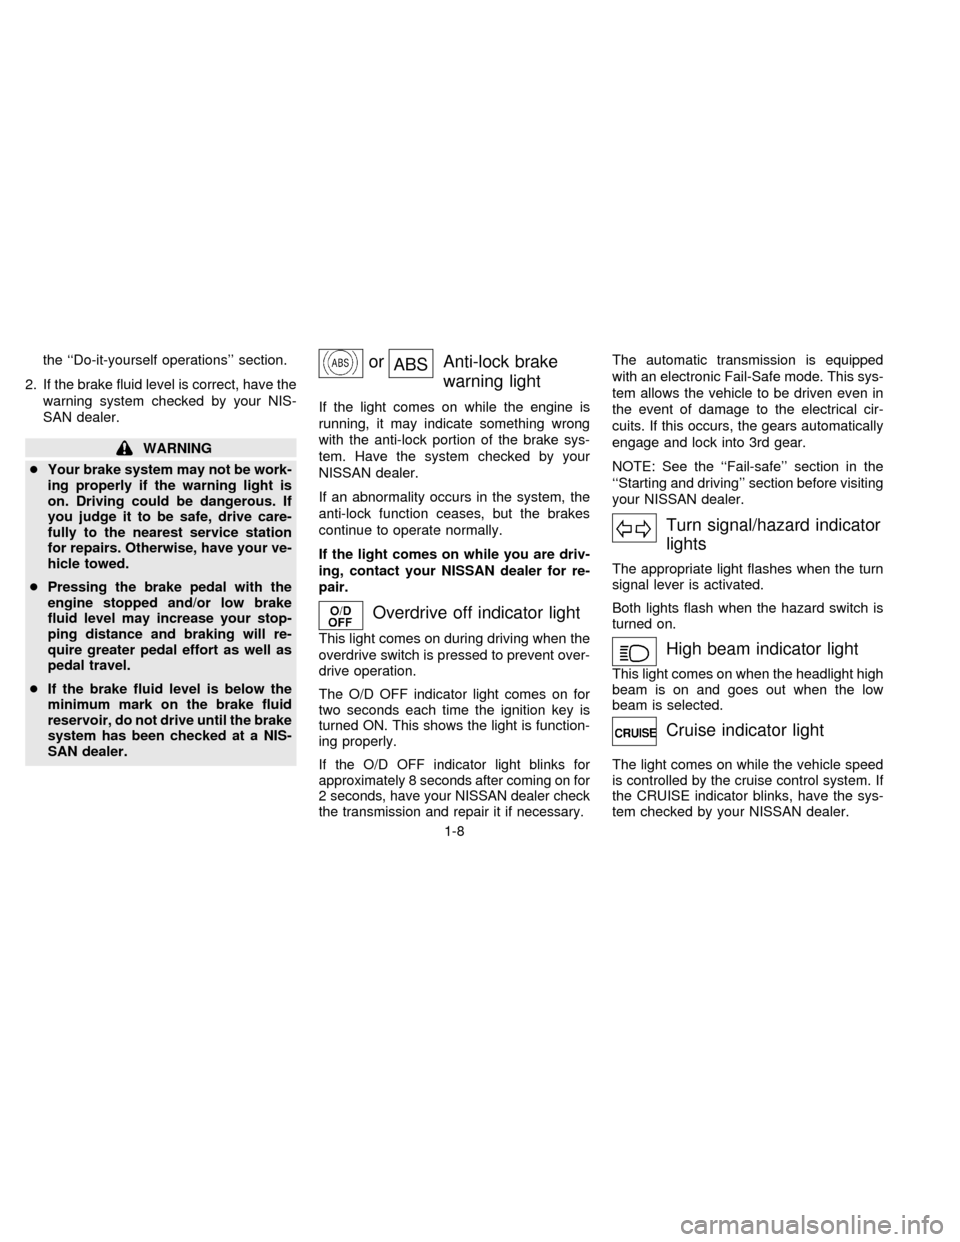
orABSAnti-lock brake
warning light
If the light comes on while the engine is
running, it may indicate something wrong
with the anti-lock portion of the brake sys-
tem. Have the system checked by your
NISSAN dealer.
If an abnormality occurs in the system, the
anti-lock function ceases, but the brakes
continue to operate normally.
If the light comes on while you are driv-
ing, contact your NISSAN dealer for re-
pair.
Overdrive off indicator light
This light comes on during driving when the
overdrive switch is pressed to prevent over-
drive operation.
The O/D OFF indicator light comes on for
two seconds each time the ignition key is
turned ON. This shows the light is function-
ing properly.
If the O/D OFF indicator light blinks for
approximately 8 seconds after coming on for
2 seconds, have your NISSAN dealer check
the transmission and repair it if necessary.
The automatic transmission is equipped
with an electronic Fail-Safe mode. This sys-
tem allows the vehicle to be driven even in
the event of damage to the electrical cir-
cuits. If this occurs, the gears automatically
engage and lock into 3rd gear.
NOTE: See the ``Fail-safe'' section in the
``Starting and driving'' section before visiting
your NISSAN dealer.
Turn signal/hazard indicator
lights
The appropriate light flashes when the turn
signal lever is activated.
Both lights flash when the hazard switch is
turned on.
High beam indicator light
This light comes on when the headlight high
beam is on and goes out when the low
beam is selected.
Cruise indicator light
The light comes on while the vehicle speed
is controlled by the cruise control system. If
the CRUISE indicator blinks, have the sys-
tem checked by your NISSAN dealer.
1-8
ZX
Page 16 of 247
Key reminder chime
The chime sounds if the driver's or passen-
ger's door is opened while the key is left in
the ignition switch. Remove the key and
take it with you when leaving the vehicle.
Light reminder chime
A chime sounds when the driver's or pas-
senger's door is opened if the headlight
control switch is turned on (ignition switch is
turned OFF).
Turn the headlight control switch to OFF
when you leave the vehicle.
Brake pad wear warning
The disc brake pads have audible wear
warnings. When a brake pad requires re-
placement, it makes a high pitched scraping
sound when the vehicle is in motion whether
or not the brake pedal is depressed. Have
the brakes checked as soon as possible if
the warning sound is heard.
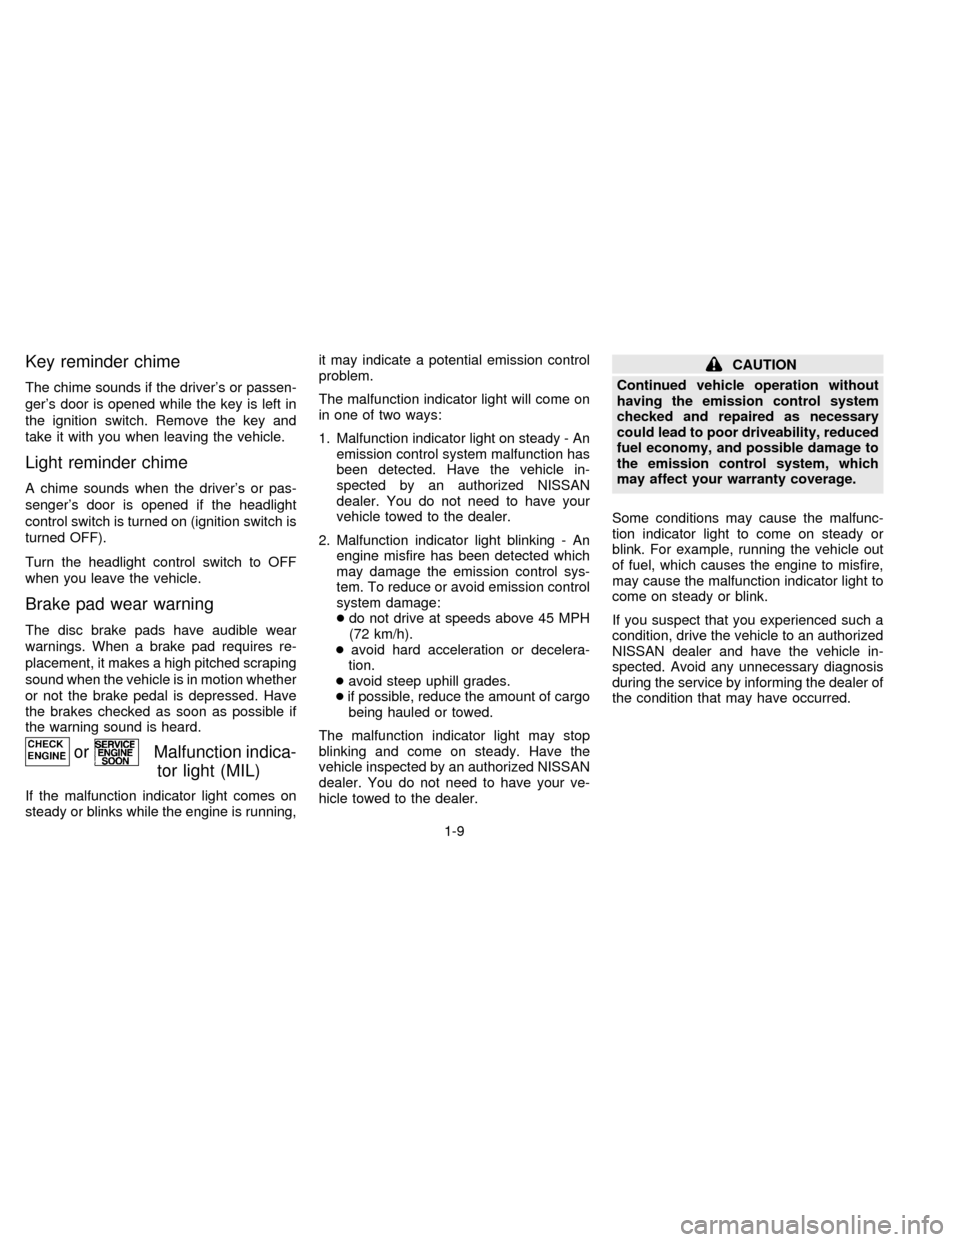
orMalfunction indica-
tor light (MIL)
If the malfunction indicator light comes on
steady or blinks while the engine is running,it may indicate a potential emission control
problem.
The malfunction indicator light will come on
in one of two ways:
1. Malfunction indicator light on steady - An
emission control system malfunction has
been detected. Have the vehicle in-
spected by an authorized NISSAN
dealer. You do not need to have your
vehicle towed to the dealer.
2. Malfunction indicator light blinking - An
engine misfire has been detected which
may damage the emission control sys-
tem. To reduce or avoid emission control
system damage:
cdo not drive at speeds above 45 MPH
(72 km/h).
cavoid hard acceleration or decelera-
tion.
cavoid steep uphill grades.
cif possible, reduce the amount of cargo
being hauled or towed.
The malfunction indicator light may stop
blinking and come on steady. Have the
vehicle inspected by an authorized NISSAN
dealer. You do not need to have your ve-
hicle towed to the dealer.
CAUTION
Continued vehicle operation without
having the emission control system
checked and repaired as necessary
could lead to poor driveability, reduced
fuel economy, and possible damage to
the emission control system, which
may affect your warranty coverage.
Some conditions may cause the malfunc-
tion indicator light to come on steady or
blink. For example, running the vehicle out
of fuel, which causes the engine to misfire,
may cause the malfunction indicator light to
come on steady or blink.
If you suspect that you experienced such a
condition, drive the vehicle to an authorized
NISSAN dealer and have the vehicle in-
spected. Avoid any unnecessary diagnosis
during the service by informing the dealer of
the condition that may have occurred.
1-9
ZX
Page 21 of 247

3. Use the autolamp switch to activate the
autolamp feature. It is to the left of the
steering wheel.
4. Turn the switch to the right. A slight
detent in the switch indicates it has been
turned past the off position. After the
switch is turned past the detent, the
autolamp automatically turns the lamps
on and off.
Shut-off delay
The length of time the autolamps stay on
after the ignition is turned to OFF depends
on how far the switch is turned to the right.
If the switch is turned all the way to the right,
the headlights stay on about three minutes
after the ignition is turned to OFF. If the
switch is turned only a little way to the right,
the headlights may stay on for less than a
minute.
To turn the autolamp system off, turn the
switch all the way to the left until the detent
is felt.Be sure you do not put anything on top
of the photo sensor located in the top
right side of the instrument panel. The
photo sensor controls the autolamp; if it
is covered, the photo sensor reacts as if
it is dark out and the headlights will
illuminate.
Turn signal
Move the lever up or down to signal the
turning direction. When the turn is com-
pleted, the turn signal cancels automati-
cally.
Lane change signal
To indicate a lane change, move the lever
up or down to the point where the light
begins to flash, but the lever does not latch.
Passing signal
Pulling the lever toward you turns the head-
light high beam on. Release it and the
headlight high beam goes off.
AIC0584AIC0560
TURN SIGNAL SWITCH
1-14
ZX
Page 22 of 247
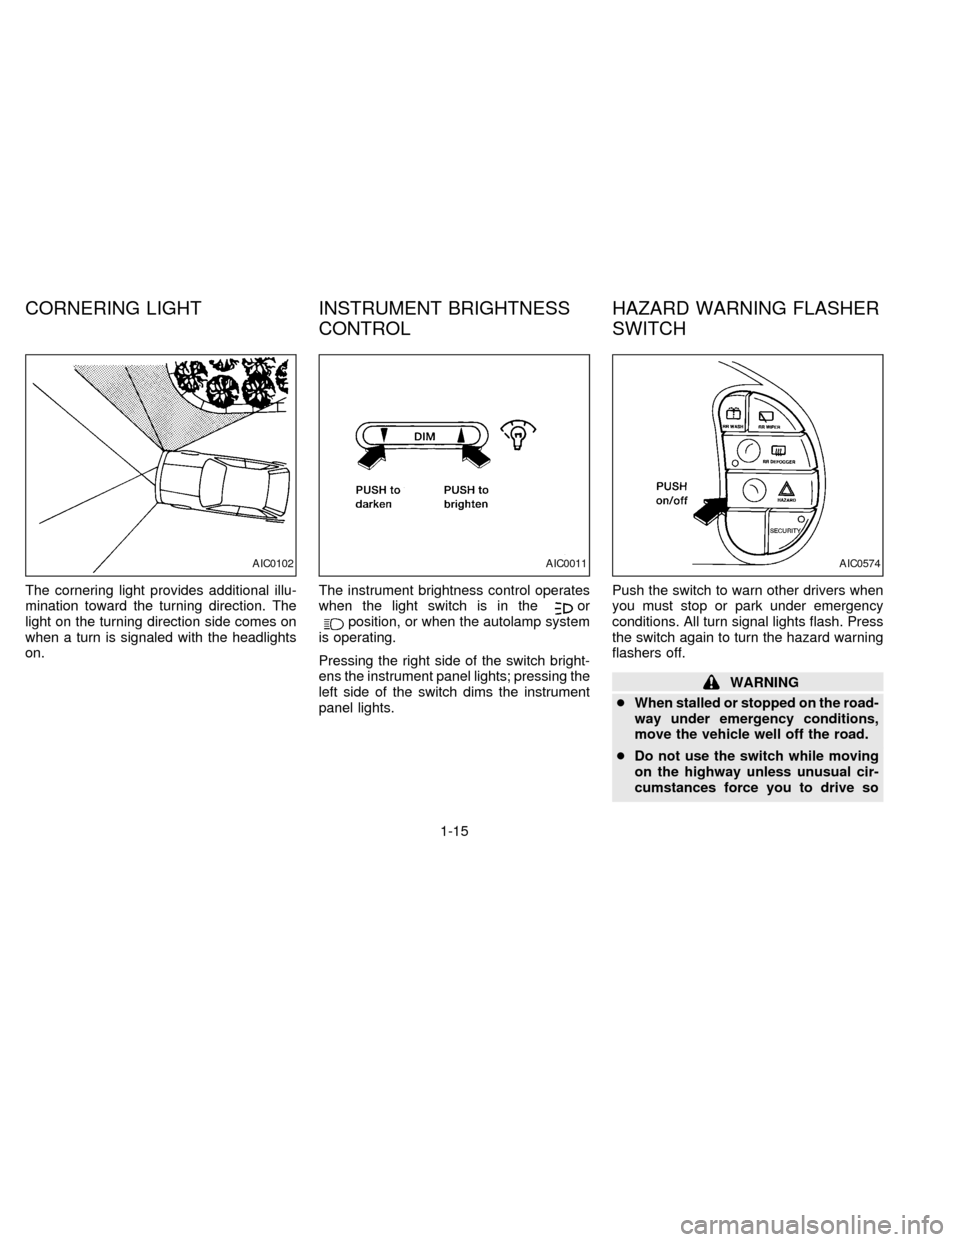
The cornering light provides additional illu-
mination toward the turning direction. The
light on the turning direction side comes on
when a turn is signaled with the headlights
on.The instrument brightness control operates
when the light switch is in theorposition, or when the autolamp system
is operating.
Pressing the right side of the switch bright-
ens the instrument panel lights; pressing the
left side of the switch dims the instrument
panel lights.Push the switch to warn other drivers when
you must stop or park under emergency
conditions. All turn signal lights flash. Press
the switch again to turn the hazard warning
flashers off.
WARNING
cWhen stalled or stopped on the road-
way under emergency conditions,
move the vehicle well off the road.
cDo not use the switch while moving
on the highway unless unusual cir-
cumstances force you to drive so
AIC0102AIC0011AIC0574
CORNERING LIGHT INSTRUMENT BRIGHTNESS
CONTROLHAZARD WARNING FLASHER
SWITCH
1-15
ZX
Page 29 of 247
CAUTION
cRemove water drops, snow, ice or
sand from the sunroof before
opening.
cDo not place any heavy object on the
sunroof or surrounding area.
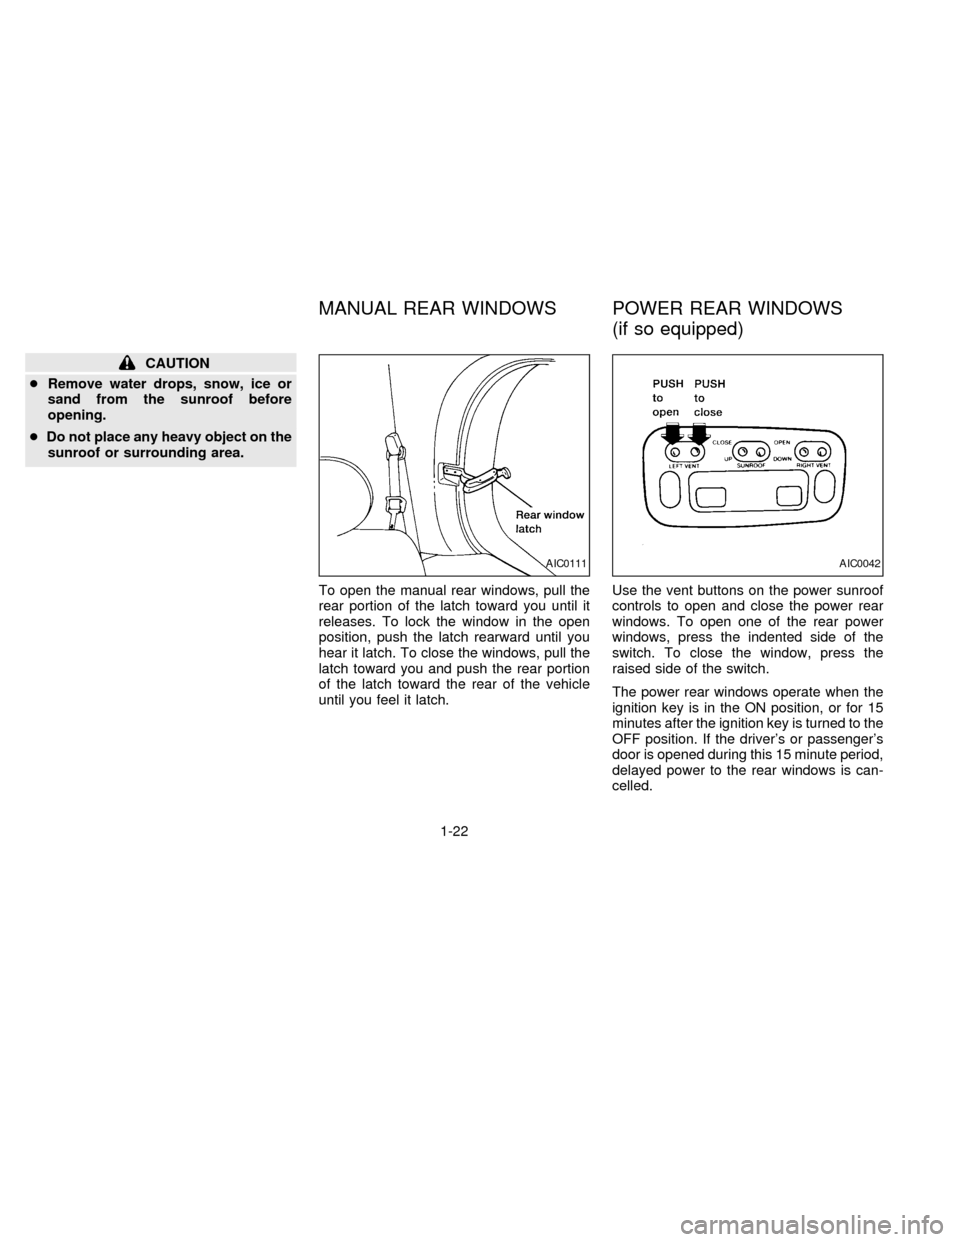
To open the manual rear windows, pull the
rear portion of the latch toward you until it
releases. To lock the window in the open
position, push the latch rearward until you
hear it latch. To close the windows, pull the
latch toward you and push the rear portion
of the latch toward the rear of the vehicle
until you feel it latch.Use the vent buttons on the power sunroof
controls to open and close the power rear
windows. To open one of the rear power
windows, press the indented side of the
switch. To close the window, press the
raised side of the switch.
The power rear windows operate when the
ignition key is in the ON position, or for 15
minutes after the ignition key is turned to the
OFF position. If the driver's or passenger's
door is opened during this 15 minute period,
delayed power to the rear windows is can-
celled.
AIC0111AIC0042
MANUAL REAR WINDOWS POWER REAR WINDOWS
(if so equipped)
1-22
ZX
Page 35 of 247

Record the key number on the key number
plate and keep it in a safe place (such as
your wallet), NOT IN THE CAR. A key
number plate is supplied with your key. Keep
the plate in a safe place. NISSAN does not
record key numbers so it is very important to
keep track of your key number plate.
A key number is necessary only when you
have lost all vehicle keys and do not have
one to duplicate. If you still have a key, this
key can be duplicated by your NISSAN
dealer or locksmith shop.
Two keys are supplied with your vehicle Ð
one has a plastic head and one is all metal.
Both keys perform the same functions.
MANUAL DOOR LOCK
To lock the front doors or sliding door from
the outside, turn the key toward the front of
the vehicle. To unlock, turn it toward the
rear.
APD0142APD0002
KEY DOOR LOCKS
2-2
ZX
Page 85 of 247
lap belt and receive serious internal
injuries.
cFor most effective protection when
the vehicle is in motion, the seat
should be upright. Always sit well
back in the seat and adjust the seat
belt properly.
Fastening the belts
1. Adjust the seat.
2. Slowly pull the seat belt out of the retrac-
tor and insert the tongue into the buckle
until it snaps.
The retractor is designed to lock during
a sudden stop or on impact. A slow
pulling motion permits the belt to move,
and allows you some freedom of move-
ment in the seat.
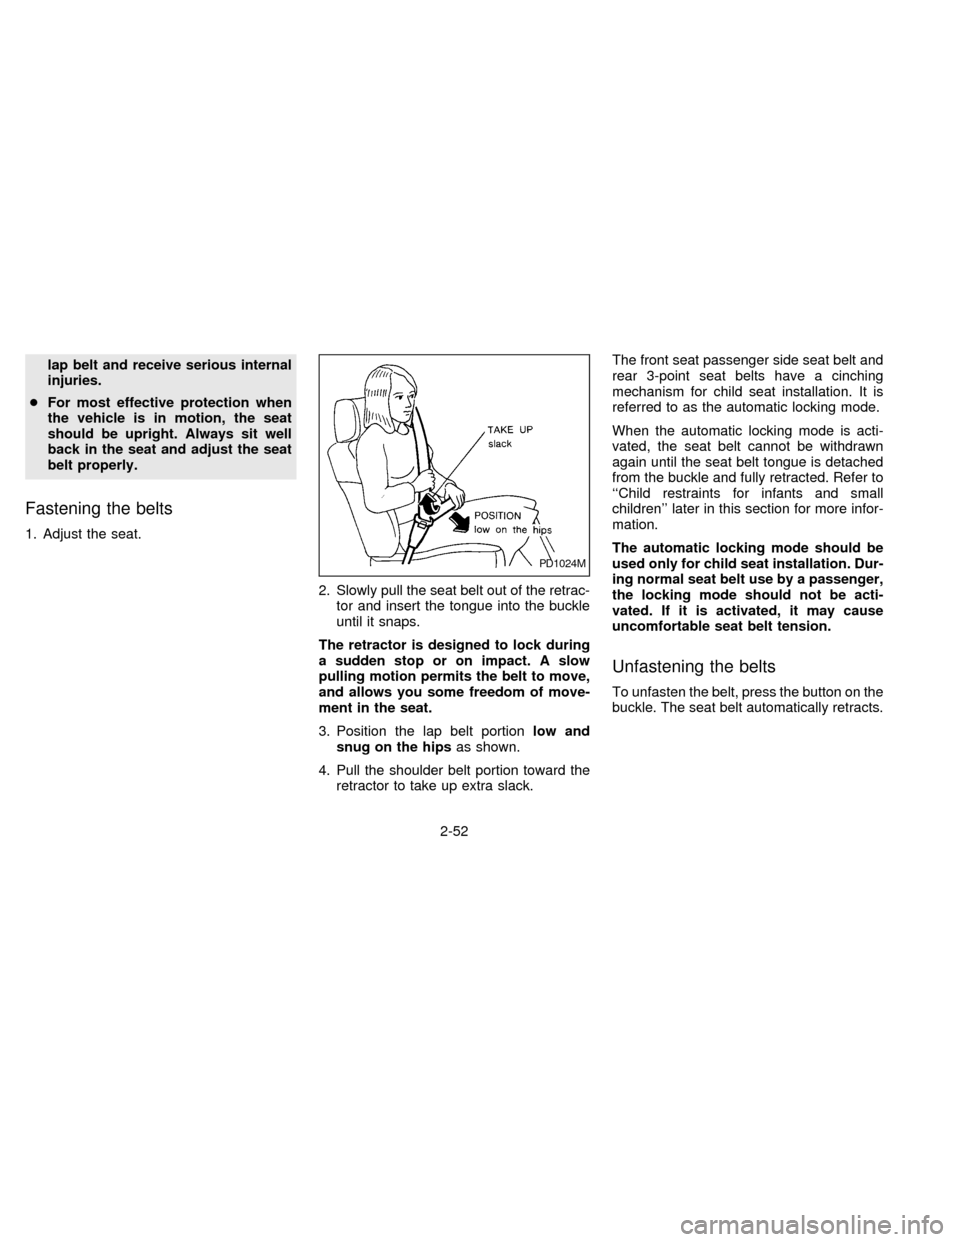
3. Position the lap belt portionlow and
snug on the hipsas shown.
4. Pull the shoulder belt portion toward the
retractor to take up extra slack.The front seat passenger side seat belt and
rear 3-point seat belts have a cinching
mechanism for child seat installation. It is
referred to as the automatic locking mode.
When the automatic locking mode is acti-
vated, the seat belt cannot be withdrawn
again until the seat belt tongue is detached
from the buckle and fully retracted. Refer to
``Child restraints for infants and small
children'' later in this section for more infor-
mation.
The automatic locking mode should be
used only for child seat installation. Dur-
ing normal seat belt use by a passenger,
the locking mode should not be acti-
vated. If it is activated, it may cause
uncomfortable seat belt tension.
Unfastening the belts
To unfasten the belt, press the button on the
buckle. The seat belt automatically retracts.
PD1024M
2-52
ZX
Page 87 of 247
receive neck or other serious inju-
ries. You could also slide under the
lap belt and receive serious internal
injuries.
cFor most effective protection when
the vehicle is in motion, the seat
should be upright. Always sit well
back in the seat and adjust the seat
belt properly.
Fastening the belts
1. Adjust the seat.
2. Slowly pull the seat belt out of the retrac-
tor and insert the tongue into the buckle
until it snaps.
The retractor is designed to lock during
a sudden stop or on impact. A slow
pulling motion permits the belt to move,
and allows you some freedom of move-
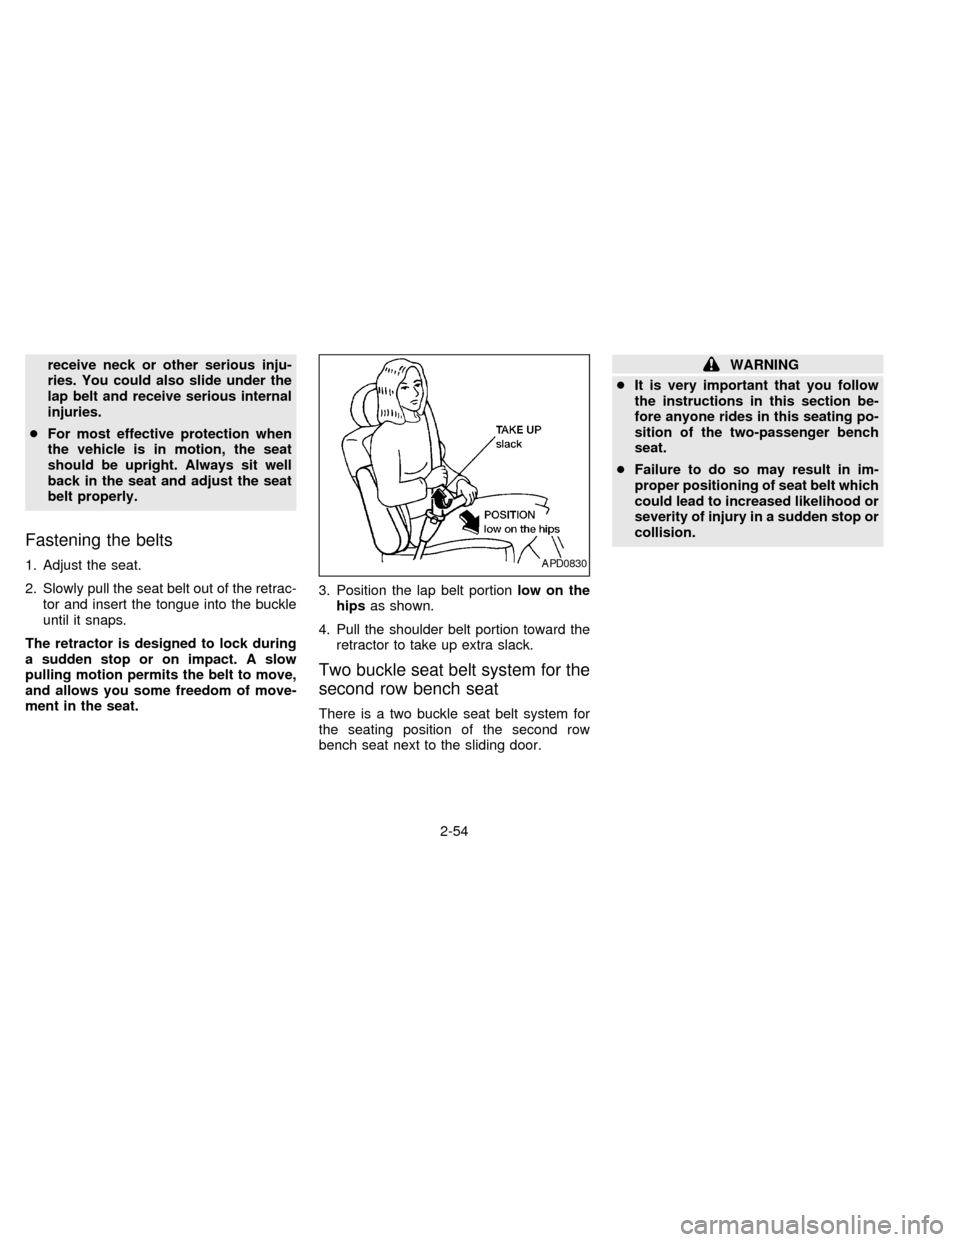
ment in the seat.3. Position the lap belt portionlow on the
hipsas shown.
4. Pull the shoulder belt portion toward the
retractor to take up extra slack.
Two buckle seat belt system for the
second row bench seat
There is a two buckle seat belt system for
the seating position of the second row
bench seat next to the sliding door.
WARNING
cIt is very important that you follow
the instructions in this section be-
fore anyone rides in this seating po-
sition of the two-passenger bench
seat.
cFailure to do so may result in im-
proper positioning of seat belt which
could lead to increased likelihood or
severity of injury in a sudden stop or
collision.
APD0830
2-54
ZX