1997 NISSAN FRONTIER fuel cap
[x] Cancel search: fuel capPage 17 of 204
CAUTION
Continued vehicle operation without hav-
ing the emission control system checked
and repaired as necessary could lead to
poor driveability, reduced fuel economy,
and possible damage to the emission
control system, which may affect your
warranty coverage.
Some conditions may cause the malfunction
indicator light to come on steady or blink.
Examples are as follows:
cvehicle ran out of fuel, which caused the
engine to misfire.
cfuel filler cap was left off or improperly
installed, allowing fuel to evaporate into
the atmosphere.
If you suspect that you experienced one or
both of the above conditions, drive the ve-
hicle to an authorized NISSAN dealer and
have the vehicle inspected. Avoid any un-
necessary diagnosis during the service by
informing the dealer of the conditions listed
above that may have cccurred.
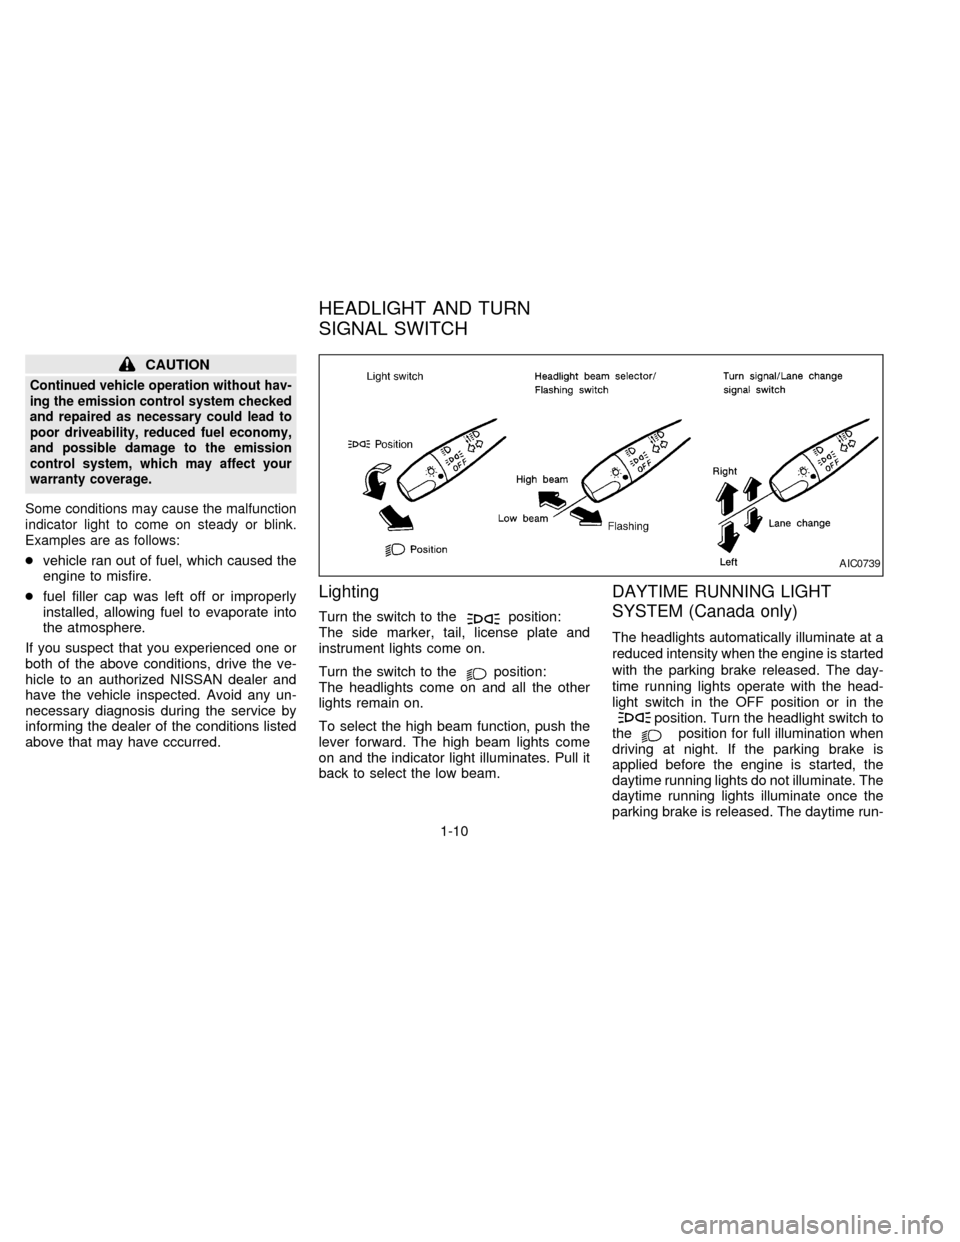
Lighting
Turn the switch to theposition:
The side marker, tail, license plate and
instrument lights come on.
Turn the switch to the
position:
The headlights come on and all the other
lights remain on.
To select the high beam function, push the
lever forward. The high beam lights come
on and the indicator light illuminates. Pull it
back to select the low beam.
DAYTIME RUNNING LIGHT
SYSTEM (Canada only)
The headlights automatically illuminate at a
reduced intensity when the engine is started
with the parking brake released. The day-
time running lights operate with the head-
light switch in the OFF position or in the
position. Turn the headlight switch to
theposition for full illumination when
driving at night. If the parking brake is
applied before the engine is started, the
daytime running lights do not illuminate. The
daytime running lights illuminate once the
parking brake is released. The daytime run-
AIC0739
HEADLIGHT AND TURN
SIGNAL SWITCH
1-10
ZX
Page 28 of 204

2Pre-driving checks and adjustments
Key .........................................................................2-2
Door locks ..............................................................2-2
Power door lock (if so equipped) ...........................2-3
Hood release ..........................................................2-4
Glove box lock (if so equipped) .............................2-4
Fuel filler cap ..........................................................2-5
Tailgate latch ..........................................................2-5
Tie down hooks ......................................................2-7
Front separate seats ..............................................2-8
Seat adjustment .....................................................2-8
Head restraints .....................................................2-11
Tilting front separate seat ....................................2-11
Bench seat ...........................................................2-12
Seat adjustment ...................................................2-12
Tilting bench seat .................................................2-12
Jump seat .............................................................2-13
Supplemental restraint system (supplemental
air bag system).....................................................2-14
Supplemental air bag system...............................2-15
Warning labels......................................................2-17
Supplemental air bag warning light......................2-17Seat belts .............................................................2-19
Precautions on seat belt usage ...........................2-19
Child safety...........................................................2-20
3-point type with retractor ....................................2-21
2-point type without retractor (center of bench
seat and jump seats)............................................2-23
Seat belt extenders ..............................................2-24
Seat belt maintenance .........................................2-24
Child restraints for infants and small children......2-24
Installation on front passenger seat (3-point
type with retractor) ...............................................2-26
Installation in center of bench seat (2-point
type without retractor) ..........................................2-27
Top strap child restraint .......................................2-28
Tilting steering wheel (if so equipped) .................2-29
Outside mirror remote control
(if so equipped) ....................................................2-30
Outside mirrors .....................................................2-30
Inside mirror .........................................................2-31
Vanity mirror (if so equipped)...............................2-31
ZX
Page 32 of 204
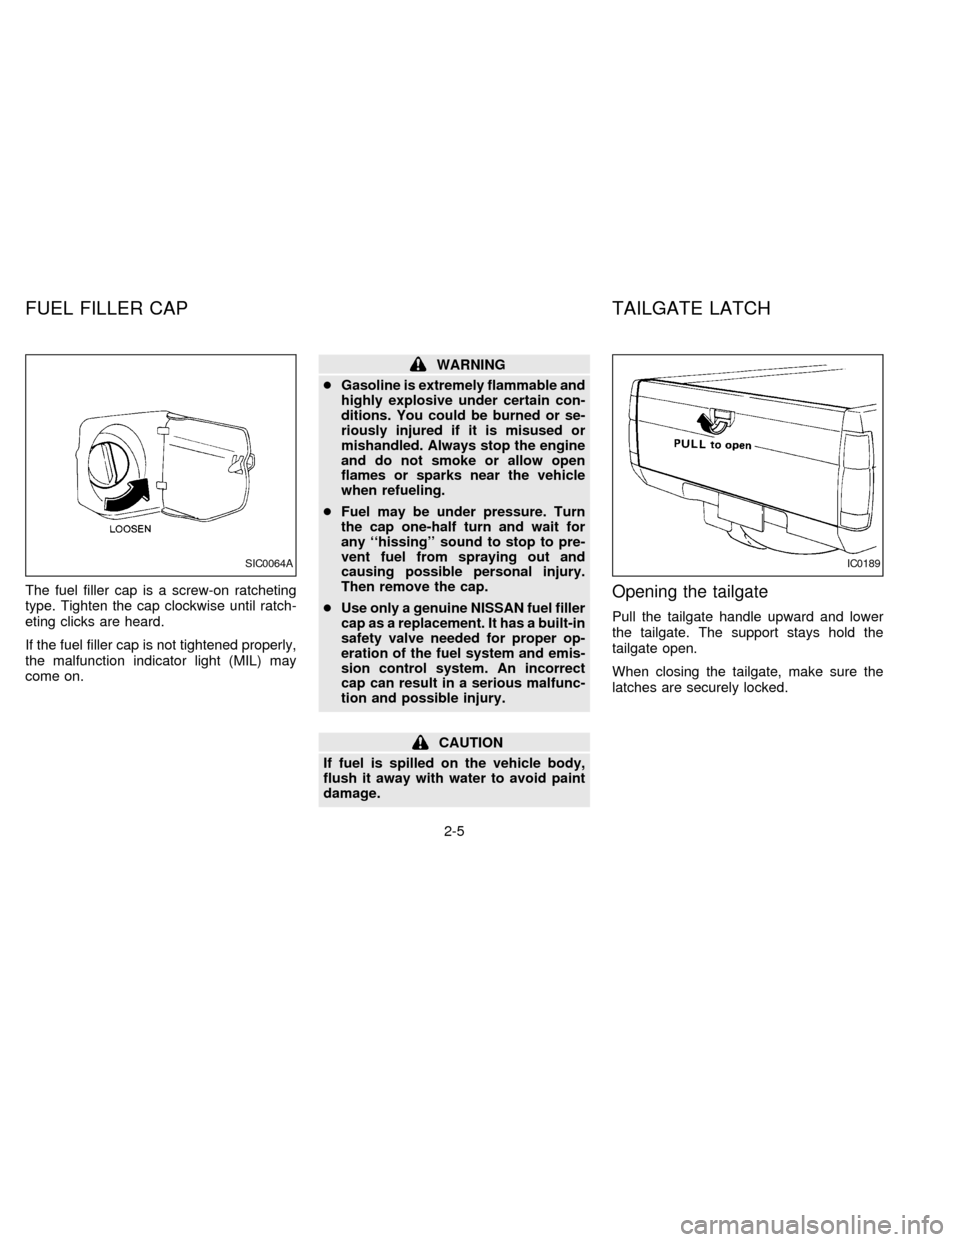
The fuel filler cap is a screw-on ratcheting
type. Tighten the cap clockwise until ratch-
eting clicks are heard.
If the fuel filler cap is not tightened properly,
the malfunction indicator light (MIL) may
come on.
WARNING
cGasoline is extremely flammable and
highly explosive under certain con-
ditions. You could be burned or se-
riously injured if it is misused or
mishandled. Always stop the engine
and do not smoke or allow open
flames or sparks near the vehicle
when refueling.
cFuel may be under pressure. Turn
the cap one-half turn and wait for
any ``hissing'' sound to stop to pre-
vent fuel from spraying out and
causing possible personal injury.
Then remove the cap.
cUse only a genuine NISSAN fuel filler
cap as a replacement. It has a built-in
safety valve needed for proper op-
eration of the fuel system and emis-
sion control system. An incorrect
cap can result in a serious malfunc-
tion and possible injury.
CAUTION
If fuel is spilled on the vehicle body,
flush it away with water to avoid paint
damage.
Opening the tailgate
Pull the tailgate handle upward and lower
the tailgate. The support stays hold the
tailgate open.
When closing the tailgate, make sure the
latches are securely locked.
SIC0064AIC0189
FUEL FILLER CAP TAILGATE LATCH
2-5
ZX
Page 84 of 204
driving if the engine misfires, or if
noticeable loss of performance or
other unusual operating conditions
are detected. Have the vehicle in-
spected promptly by an authorized
NISSAN dealer.
cAvoid driving with an extremely low
fuel level. Running out of fuel could
cause the engine to misfire, damag-
ing the three-way catalyst.
cDo not race the engine while warm-
ing it up.
cDo not push or tow your vehicle to
start the engine.
ON-PAVEMENT AND OFF-ROAD
DRIVING PRECAUTIONS
Utility vehicles have higher ground clear-
ance than passenger cars in order to make
them capable of performing in a wide variety
of off-road applications. Specific design
characteristics give them a higher center of
gravity than ordinary cars. Higher ground
clearance provides a better view of the
road, allowing you to anticipate problems.
Utility vehicles are not designed for corner-
ing at the same speeds as conventional2-wheel drive vehicles any more than low-
slung sports cars are designed to perform
satisfactorily under off-road conditions. If at
all possible, avoid sharp turns or abrupt
maneuvers. As with other vehicles of this
type, failure to operate this vehicle correctly
may result in loss of control or vehicle
rollover.
Avoiding Collision and Rollover
WARNING
Failure to operate this vehicle in a safe
and prudent manner may result in loss
of control or an accident.
Be alert and drive defensively at all times.
Obey all traffic regulations. Avoid excessive
speed, high speed cornering, or sudden
steering maneuvers, because these driving
practices could cause you to lose control of
your vehicle.As with any vehicle, a loss
of control could result in a collision with
other vehicles or objects, or cause the
vehicle to roll over, particularly if the
loss of control causes the vehicle to
slide sideways.Be attentive at all times,
and avoid driving when tired. Never drive
when under the influence of alcohol ordrugs (including prescription or over-the-
counter drugs which may cause drowsi-
ness). Always wear your seat belt as out-
lined in the ``Seat belts'' section of this
manual, and instruct your passengers to do
the same.
4-3
ZX
Page 134 of 204
If the cooling system frequently requires
coolant, have it checked by your NISSAN
dealer.
CHANGING ENGINE COOLANT
cMajor cooling system repairs should be
performed by your NISSAN dealer. The
service procedures can be found in the
appropriate NISSAN Service Manual.
cImproper servicing can result in reduced
heater performance and engine over-
heating.
WARNING
cTo avoid the danger of being
scalded, never change the coolant
when the engine is hot.cNever remove the radiator cap when
the engine is hot. Serious burns
could be caused by high pressure
fluid escaping from the radiator.
1. Move the heater or air conditioner tem-
perature control to the maximum hot
position.
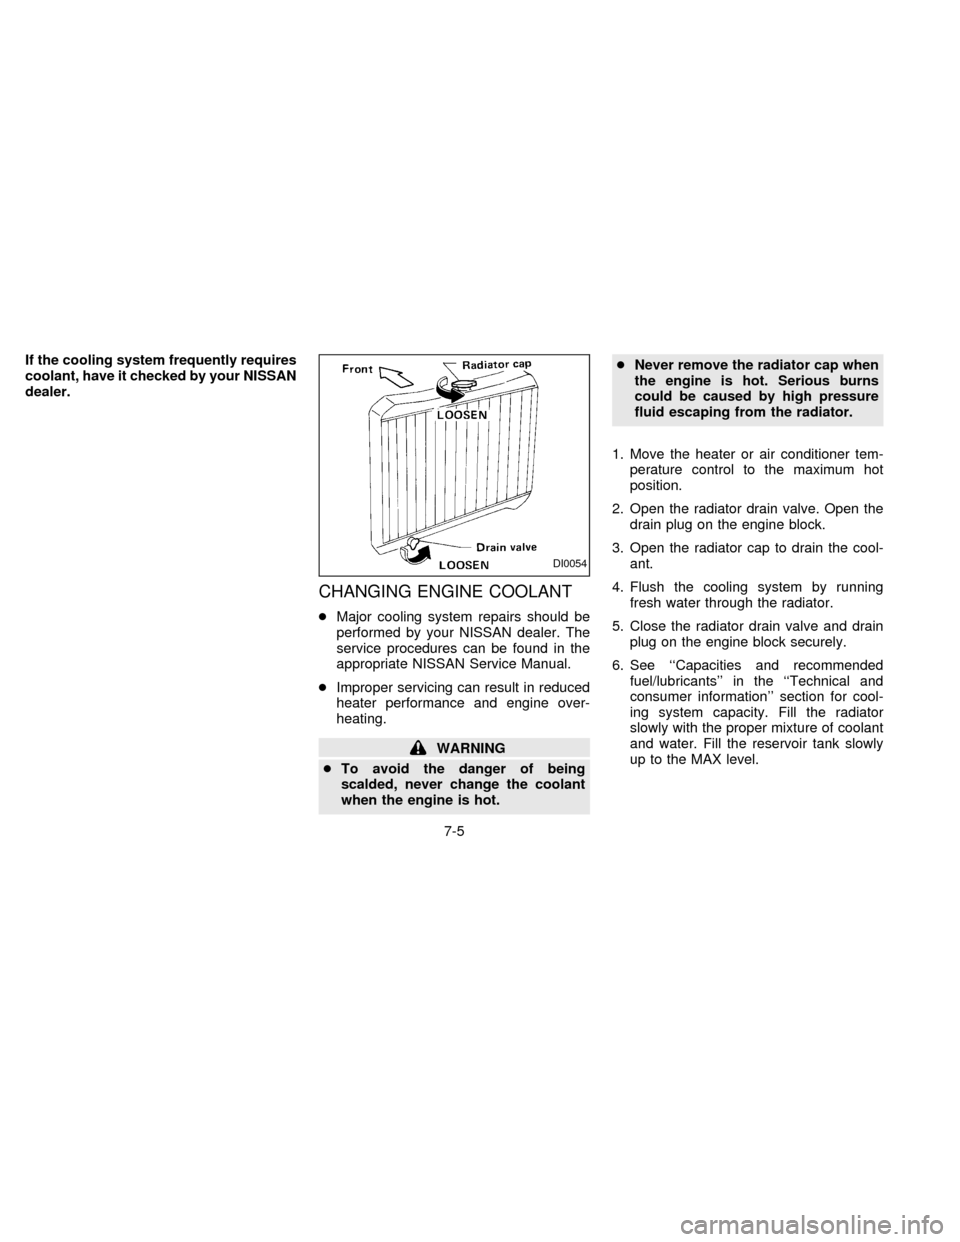
2. Open the radiator drain valve. Open the
drain plug on the engine block.
3. Open the radiator cap to drain the cool-
ant.
4. Flush the cooling system by running
fresh water through the radiator.
5. Close the radiator drain valve and drain
plug on the engine block securely.
6. See ``Capacities and recommended
fuel/lubricants'' in the ``Technical and
consumer information'' section for cool-
ing system capacity. Fill the radiator
slowly with the proper mixture of coolant
and water. Fill the reservoir tank slowly
up to the MAX level.
DI0054
7-5
ZX
Page 137 of 204
WARNING
cProlonged and repeated contact with
used engine oil may cause skin
cancer.
cTry to avoid direct skin contact with
used oil. If skin contact is made,
wash thoroughly with soap or hand
cleaner as soon as possible.
cKeep used engine oil out of reach of
children.
CAUTION
Be careful not to burn yourself, as the
engine oil is hot.
Waste oil must be disposed of properly.
Check your local regulations.
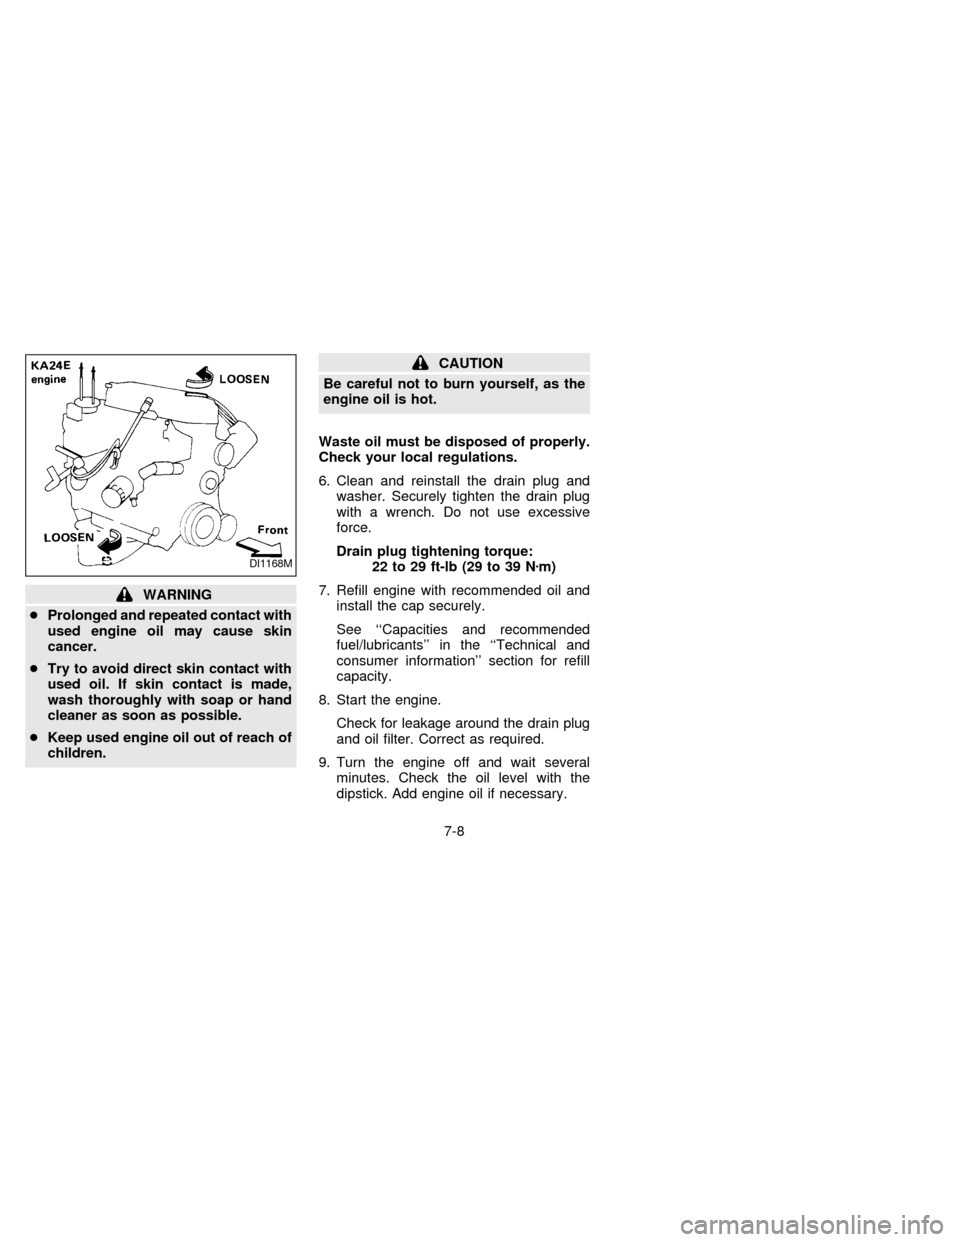
6. Clean and reinstall the drain plug and
washer. Securely tighten the drain plug
with a wrench. Do not use excessive
force.
Drain plug tightening torque:
22 to 29 ft-lb (29 to 39 Nzm)
7. Refill engine with recommended oil and
install the cap securely.
See ``Capacities and recommended
fuel/lubricants'' in the ``Technical and
consumer information'' section for refill
capacity.
8. Start the engine.
Check for leakage around the drain plug
and oil filter. Correct as required.
9. Turn the engine off and wait several
minutes. Check the oil level with the
dipstick. Add engine oil if necessary.
DI1168M
7-8
ZX
Page 141 of 204
For further brake and clutch fluid specifica-
tion information, refer to ``Capacities and
recommended fuel/lubricants'' in the ``Tech-
nical and consumer information'' section of
this manual.
WARNING
Use only new fluid from a sealed con-
tainer. Old, inferior or contaminated
fluid may damage the brake and clutch
systems. The use of improper fluids
can damage the brake system and af-
fect the vehicle's stopping ability.
CAUTION
Do not spill the fluid on any painted
surfaces. This will damage the paint. If
fluid is spilled, wash with water.For USA
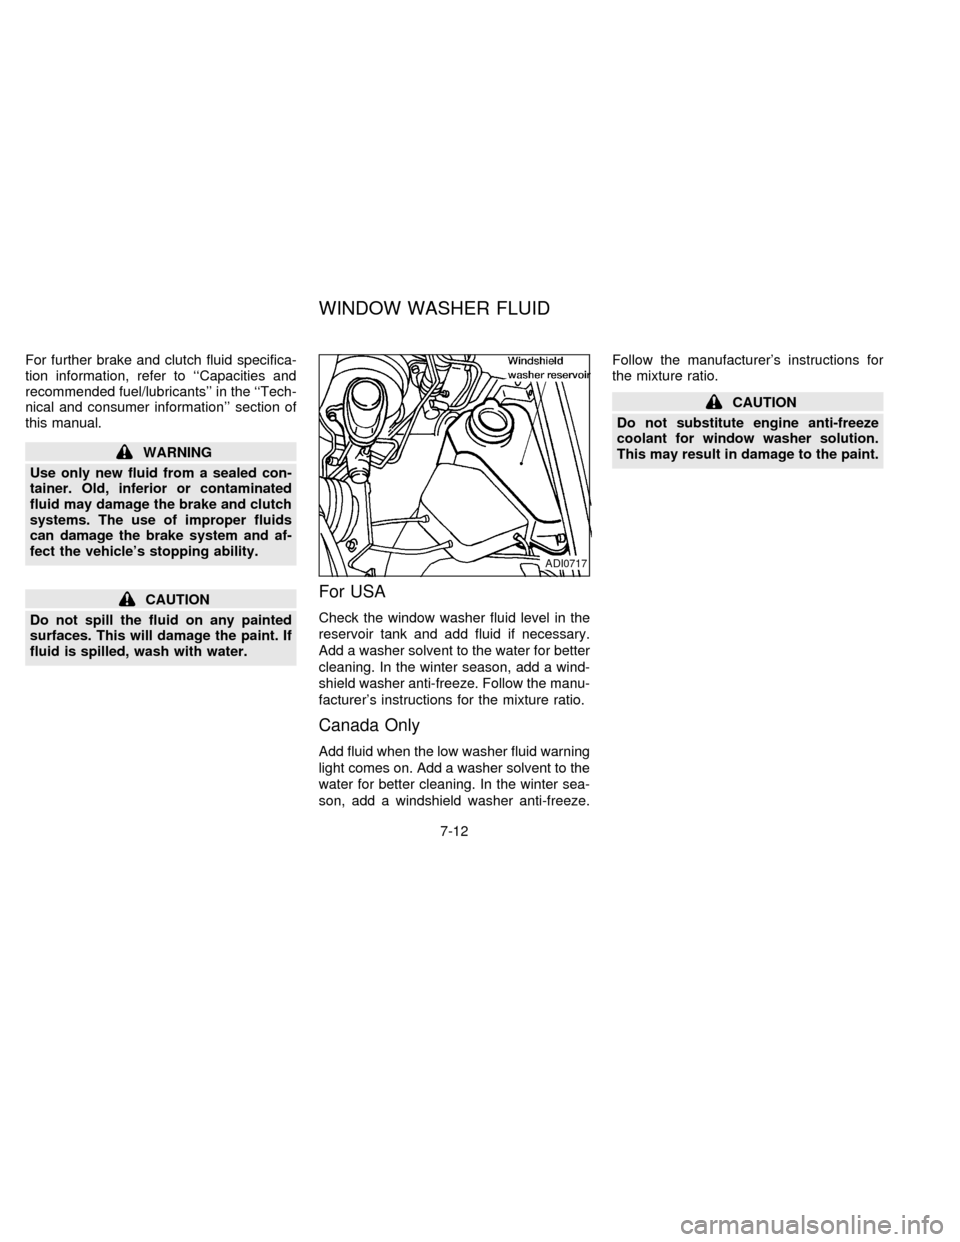
Check the window washer fluid level in the
reservoir tank and add fluid if necessary.
Add a washer solvent to the water for better
cleaning. In the winter season, add a wind-
shield washer anti-freeze. Follow the manu-
facturer's instructions for the mixture ratio.
Canada Only
Add fluid when the low washer fluid warning
light comes on. Add a washer solvent to the
water for better cleaning. In the winter sea-
son, add a windshield washer anti-freeze.Follow the manufacturer's instructions for
the mixture ratio.
CAUTION
Do not substitute engine anti-freeze
coolant for window washer solution.
This may result in damage to the paint.
ADI0717
WINDOW WASHER FLUID
7-12
ZX
Page 172 of 204

9Technical and consumer information
Capacities and recommended fuel/lubricants ........9-2
Fuel recommendation.............................................9-4
Engine oil and oil filter recommendation................9-6
Recommended SAE viscosity number...................9-7
Air conditioner system refrigerant and
lubricant recommendations ....................................9-8
Engine ....................................................................9-9
Wheel/tire size ......................................................9-10
Dimensions and weights ......................................9-11
Registering your vehicle in another country ........9-12
Vehicle identification ............................................9-12
Vehicle identification number (VIN) plate.............9-12
Vehicle identification number (chassis
number) ................................................................9-12
Engine serial number ...........................................9-13Fmvss certification label .......................................9-13
Emission control information label .......................9-14
Tire placard ..........................................................9-14
Air conditioner specification label.........................9-14
Vehicle loading information ..................................9-15
Securing the load .................................................9-16
Truck-camper loading...........................................9-16
Trailer towing ........................................................9-18
Towing load/specification chart ............................9-20
Uniform tire quality grading ..................................9-23
Emission control system warranty .......................9-24
Reporting safety defects (USA) ...........................9-24
Readiness for inspection/maintenance (I/M)
test ........................................................................9-25
ZX