1997 NISSAN ALTIMA change time
[x] Cancel search: change timePage 1 of 203
Foreword
Welcome to the growing family of new NISSAN owners. This vehicle is delivered to you with confidence. It was produced using the latest
techniques and strict quality control.
This manual was prepared to help you understand the operation and maintenance of your vehicle so that you may enjoy many miles of
driving pleasure. Please read through this manual before operating your vehicle.
A separate Warranty Information and Maintenance Log Booklet explains details about the warranties covering your vehicle and vehicle
maintenance schedules.
Your NISSAN dealer knows your vehicle best. When you require any service or have any questions, he will be glad to assist you with the
extensive resources available to him.
WARNING
IMPORTANT SAFETY INFORMATION
REMINDERS FOR SAFETY!
Follow these five important rules to help ensure a safe and
complete trip for you and your passengers!
cNEVER drive under the influence of alcohol or drugs.
cALWAYS observe posted speed limits and never drive too
fast for conditions.
cALWAYS use your seat belts and appropriate child restraint
systems.
cALWAYS provide information about the proper use of
vehicle safety features to all occupants of the vehicle.
cALWAYS review this Owner's Manual for important safety
information.
1996 NISSAN NORTH AMERICA, INC.
TORRANCE, CALIFORNIA
All rights reserved. No part of this Owner's Manual may be reproduced
or stored in a retrieval system, or transmitted in any form, or by any
means, electronic, mechanical, photocopying, recording or otherwise,
without the prior written permission of Nissan North America, Inc.
NOTES ON THE INFORMATION CONTAINED IN
THIS OWNER'S MANUAL
This owner's manual contains descriptions and operating in-
structions for all systems, features and optional equipment that
might appear in any model of this vehicle built for any destina-
tion in North America, including the continental United States,
Canada and Hawaii. Therefore, you may very well find informa-
tion in this manual that does not apply to your vehicle.
MODIFICATION OF YOUR VEHICLE
This vehicle should not be modified. Modification could affect
its performance, safety or durability, and may even violate
governmental regulations. In addition, damage or perfor-
mance problems resulting from modifications may not be
covered under NISSAN warranties.
All information, specifications and illustrations in this manual are
those in effect at the time of printing. NISSAN reserves the right to
change specifications or design without notice and without obligation.
The inside pages of this manual contain
a minimum of 50% recycled fibers,
including 10% post-consumer fibers.
Page 20 of 203
DAYTIME RUNNING LIGHT SYS-
TEM (for Canada)
The headlights automatically illuminate at a
reduced intensity when the engine is started
with the parking brake released. The day-
time running lights operate with the head-
light switch in the ``OFF'' position or in the
``
'' position. Turn the headlight switch
to the ``
'' position for full illumination
when driving at night.
If the parking brake is applied before the
engine is started, the daytime running lights
do not illuminate. The daytime running lights
illuminate once the parking brake is re-
leased. The daytime running lights will re-
main on until the ignition switch is turned off.
WARNING
When the daytime running light system
is active, tail lights on your vehicle are
not on. It is necessary at dusk to turn
on your headlights. Failure to do so
could cause an accident injuring your-
self and others.
Passing signal
Pulling and releasing the lever flashes the
headlight high beams on and off.
Turn signal
Move the lever up or down to signal the
turning direction. When the turn is com-
pleted, the turn signals cancel automati-
cally.
Lane change signal
To signal a lane change, move the lever up
or down to the point where the indicator light
begins to flash, but the lever does not latch.
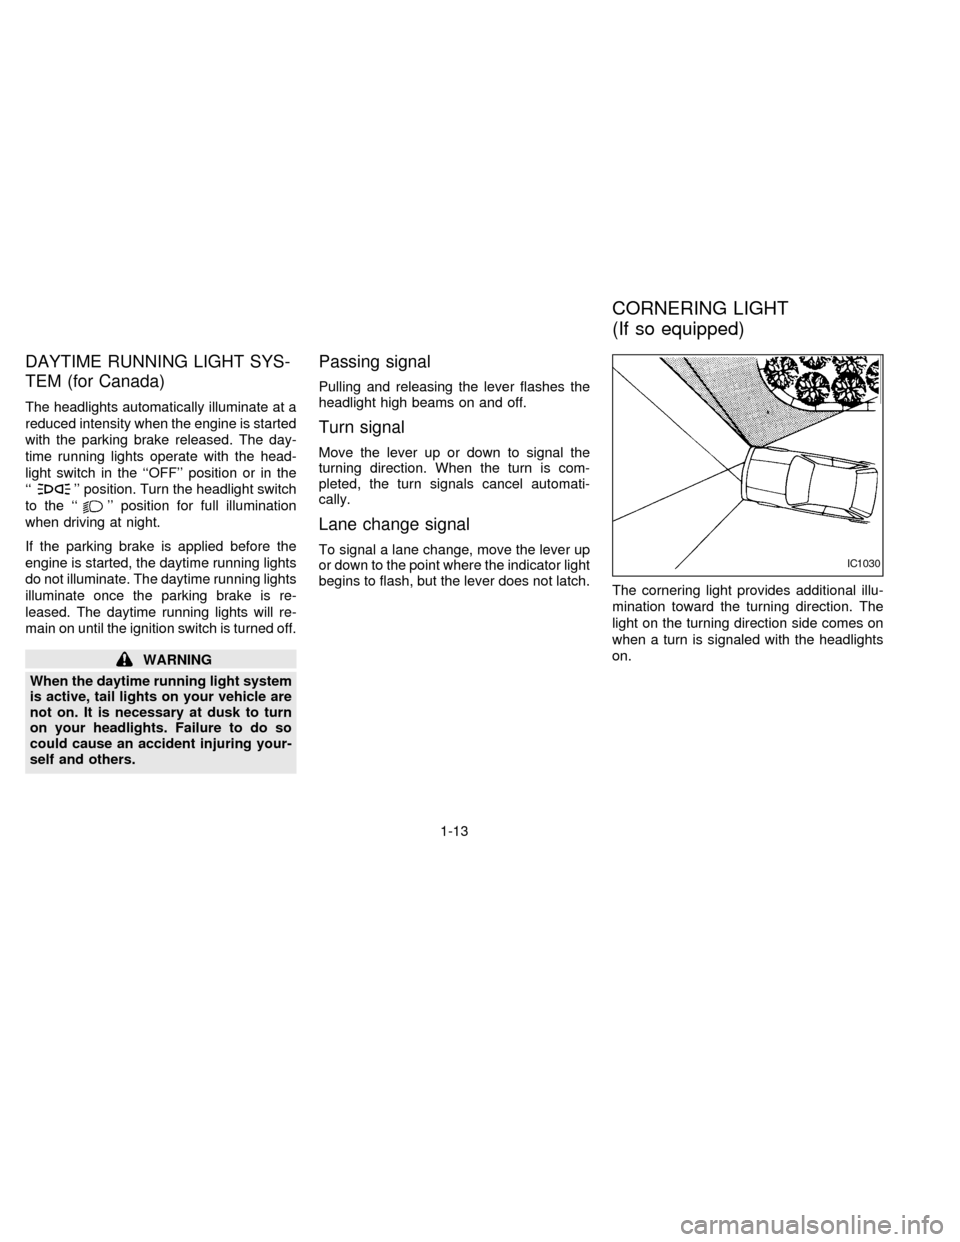
The cornering light provides additional illu-
mination toward the turning direction. The
light on the turning direction side comes on
when a turn is signaled with the headlights
on.IC1030
CORNERING LIGHT
(If so equipped)
1-13
ZX
Page 83 of 203
indicating tape side illuminates in the dis-
play window.
CAUTION
Do not force the cassette tape into the
tape door.
This could cause player damage.
The cassette tape automatically changes
directions to play the other side when the
first side is complete. At this time, the arrow
in the display window changes direction.
cTo maintain good quality sound, NIS-
SAN recommends using cassette
tapes of 60 minutes or shorter in
length.
cCassette tapes should be removed
from the player when not in use. Store
cassettes in their protective cases
and away from direct sunlight, heat,
moisture and magnetic sources.
cDirect sunlight can cause the cassette
to become deformed. The use of de-
formed cassettes may cause the cas-
sette to jam in the player.
cDo not use cassettes with labels
which are peeling and loose. If used,the label could jam in the player.
cIf a cassette has loose tape, insert a
pencil through one of the cassette
hubs and rewind the tape firmly
around the hubs. Loose tape may
cause tape jamming and wavering
sound quality.
cOver a period of time, the playback
head, capstan and pinch roller may
collect a tape coating residue as the
tape passes over the head. This resi-
due accumulation can cause weak or
wavering sound, and should be re-
moved periodically with a head clean-
ing tape. If the residue is not removed
periodically, the player may need to
be disassembled for cleaning.
Fast forwarding or rewinding the
tape
Push either the FF (fast forward) or REW
(rewind) button for the desired direction.
The
orsymbol illuminates in the
display.
To stop the FF or REW function, press the
PLAY/STOP button.
Automatic Program Search (APS)
fast forwarding or APS rewinding
the tape
Push either the APS FF or APS REW button
while the cassette tape is playing. The tape
runs quickly, stops, then plays the next
selection. The indicator light flashes on and
off while searching for the selection. The
orsymbol illuminates in the
display.
This system searches at the blank intervals
between selections. If there is a blank inter-
val within one selection or there is no inter-
val between selections, the system may not
stop in the desired or expected location.
Changing the direction of tape play
Push the PROG (program) select button.
The
orsymbol illuminates in the
display to indicate side of program play.
Playing and stopping the cassette
tape
Push the PLAY/STOP button while the cas-
sette tape is playing to stop the tape. Push
the button again to play the tape.
3-15
ZX
Page 88 of 203
If the system is turned off by pushing thePOWERbutton with the cassette tape still in
the player, the tape resumes playing when
the POWER button is pushed once again.
TAPE button
When this button is pushed with the system
turned off and a tape loaded, the system
comes on and the tape plays.
When this button is pushed with either the
radio or compact disc turned on and the
tape loaded, the compact disc or the radio
automatically turns off and the tape plays.
While the tape is playing, pushing the TAPE
button stops tape play. Pushing the button
again resumes tape play.
FF (fast forward) and REW (rewind)
buttons
Push the FF (fast forward) button to fast
forward the tape. Push the REW (rewind)
button to rewind the tape. Either the
orindicator light comes on when
the FF or REW function is started. To stop
the FF or REW function, press the TAPE
button.
Automatic Program Search (APS)
FF and APS REW buttons
When the APS FF button is pushed while
the tape is being played, the next selection
starts to play from the beginning. Push the
APS FF button several times to skip several
selections. The tape advances the number
of selections the button is pushed (up to 9
selections).
When the APS REW button is pushed, the
selection being played starts over from the
beginning. Push several times to fast rewind
several selections. The tape rewinds the
number of selections the button is pushed.
Either the
orindicator light
comes on when the APS FF or APS REW
function is started.
This system searches for the blank intervals
between selections. If there is a blank inter-
val within one selection or there is no inter-
val between selections, the system may not
stop in the desired or expected location.
PROG (program) button
Push the PROG (program) button to change
the tape side while the tape is being played.The cassette tape automatically changes
directions to play the other side when the
first side is complete.
Dolby NR (noise reduction)
button
Push theDOLBY NR button for
Dolby NR encoded tapes to reduce high
frequency tape noise. The indicator light
comes on.
Dolby NR is manufactured under license
from Dolby Laboratories Licensing Corpora-
tion. DOLBY NR and the double-D symbol
are trademarks of Dolby Laboratories Li-
censing Corporation.
TAPE EJECT button
Push this button to eject an inserted tape.
When the tape ejects while playing, the
system turns off.
Precautions on cassette player op-
eration
cTo maintain good quality sound,
NISSAN recommends using cassette
tapes of 60 minutes or shorter in
length.
3-20
ZX
Page 90 of 203
selections. The compact disc goes back the
number of selections the button is pushed.
PROG (program) button
When this button is pushed while listening
to the compact disc, the play pattern
changes as follows:
ALL: All selections are played repeatedly in
sequence.
1: Only one selection (the one playing when
the PROG button is pushed) is repeated.
RANDOM: Selections are played at ran-
dom, not following the sequence on the
compact disc. The same program may be
repeated twice.
h(no mark): All selections are played in
sequence, and the compact disc stops
when the last selection is finished.
When the compact disc is ejected, the
play pattern automatically changes to
ALL.
CD EJECT button
When the CD EJECT button is pushed with
a compact disc loaded, the compact disc
ejects.When this button is pushed while the com-
pact disc is playing, the compact disc ejects
and the system turns off.
If the compact disc ejects and is not
removed within 10 seconds, it is pulled
back into the slot.
CD (DISC) indicator light
This light comes on when a compact disc is
loaded into the player.
CAUTION
cDuring cold weather or rainy days,
the player may malfunction due to
the humidity. If this occurs, remove
the CD and dehumidify or ventilate
the player completely.
cThe player may skip while driving on
rough roads.
cThe CD player sometimes cannot
function when the compartment tem-
perature is extremely high. Decrease
the temperature before use.
cDo not expose the CD to direct sun-
light.
Power antenna (If so equipped)
The power antenna automatically extends
when the radio is turned on, and retracts
when the radio is turned off. If the radio is
left on, the antenna retracts and extends
with the ignition key OFF-ON operation.
CAUTION
cBefore turning the radio on, make
sure that there is no one near the
antenna outlet and there is enough
space for it to extend.
cTo prevent damage, be sure that an-
tenna is fully retracted before the
vehicle enters an automated car
wash.
cDirt and other foreign matter on the
power antenna rod may interrupt its
operation. Clean the rod periodically
with a damp cloth. This type of
cleaning is especially important dur-
ing the winter seasons in areas
where road salt and other chemicals
may be spread on road surfaces and
splashed onto the antenna rod.
ANTENNA
3-22
ZX
Page 94 of 203
WARNING
Do not leave children, unreliable
adults, or pets alone in your vehicle.
They could accidentally injure them-
selves or others through inadvertent
operation of the vehicle. Also, on hot,
sunny days, temperatures in a closed
vehicle could quickly become high
enough to cause severe or possibly
fatal injuries to people or animals.
EXHAUST GAS
(Carbon Monoxide)
WARNING
Do not breathe exhaust gases; they
contain colorless and odorless carbon
monoxide. Carbon monoxide is dan-
gerous. It can cause unconsciousness
or death.
cIf you suspect that exhaust fumes
are entering the vehicle, drive with
all windows fully open, and have the
vehicle inspected immediately.
cDo not run the engine in closed
spaces such as a garage.cDo not park the vehicle with the
engine running for any extended
length of time.
cKeep the trunk lid closed while driv-
ing, otherwise exhaust gases could
be drawn into the passenger com-
partment. If you must drive in this
manner for some reason, take the
following steps:
1. Open all the windows.
2. Set the air recirculation switch to
off and the fan control at 4 (high)
to circulate the air.
3. Be sure the rear seat armrest and
tray are closed.
cIf electrical wiring or other cable
connections must pass to a trailer
through the seal on the trunk lid or
the body, follow the manufacturer's
recommendation to prevent carbon
monoxide entry into the vehicle.
cThe exhaust system and body
should be inspected by a qualified
mechanic whenever:
a. The vehicle is raised for service.b. You suspect that exhaust fumes
are entering into the passenger
compartment.
c. You notice a change in the sound
of the exhaust system.
d.
You have had an accident involv-
ing damage to the exhaust system,
underbody, or rear of the vehicle.
THREE WAY CATALYST
The three way catalyst is an emission con-
trol device installed in the exhaust system.
Exhaust gases in the three way catalyst are
burned at high temperatures to help reduce
pollutants.
WARNING
cThe exhaust gas and the exhaust
system are very hot. Keep people or
flammable materials away from the
exhaust pipe.
cDo not stop or park the vehicle over
flammable materials such as dry
grass, waste paper or rags. They
may ignite and cause a fire.
PRECAUTIONS WHEN
STARTING AND DRIVING
4-2
ZX
Page 100 of 203

1 (Low gear):
Use this position when climbing steep hills
slowly or driving slowly through deep snow,
sand or mud, or for maximum engine brak-
ing on steep downhill grades.
Do not shift into the 1 position at speeds
over 41 MPH (66 km/h). Do not exceed 41
MPH (66 km/h) in the 1 position.
Accelerator downshift
Ð In D position Ð
For rapid passing or hill climbing, fully de-
press the accelerator pedal to the floor. This
shifts the transmission down into second
gear or first gear, depending on the vehicle
speed.
OVERDRIVE SWITCH
ON: For normal driving, push the over-
drive switch ON with the selector
lever in the D position. The transmis-
sion is upshifted into OVERDRIVE
as the vehicle speed increases.
The overdrive does not engage until the
engine has warmed up.OFF: For driving up and down long slopes
where engine braking would be ad-
vantageous, push the switch OFF.
When cruising at a low speed or
climbing a gentle slope, you may feel
uncomfortable shift shocks as the
transmission shifts between 3rd and
overdrive repeatedly. In this case,
set the overdrive switch in the OFF
position. The O/D OFF indicator light
on the instrument panel comes on at
this time.
When driving conditions change, reset the
overdrive switch to the ON position.
Remember not to drive at high speeds for
extended periods of time with the overdrive
switch set in the OFF position. This reduces
fuel economy.
ASD0511
4-8
ZX
Page 135 of 203
If the cooling system frequently requires
coolant, have it checked by your NISSAN
dealer.
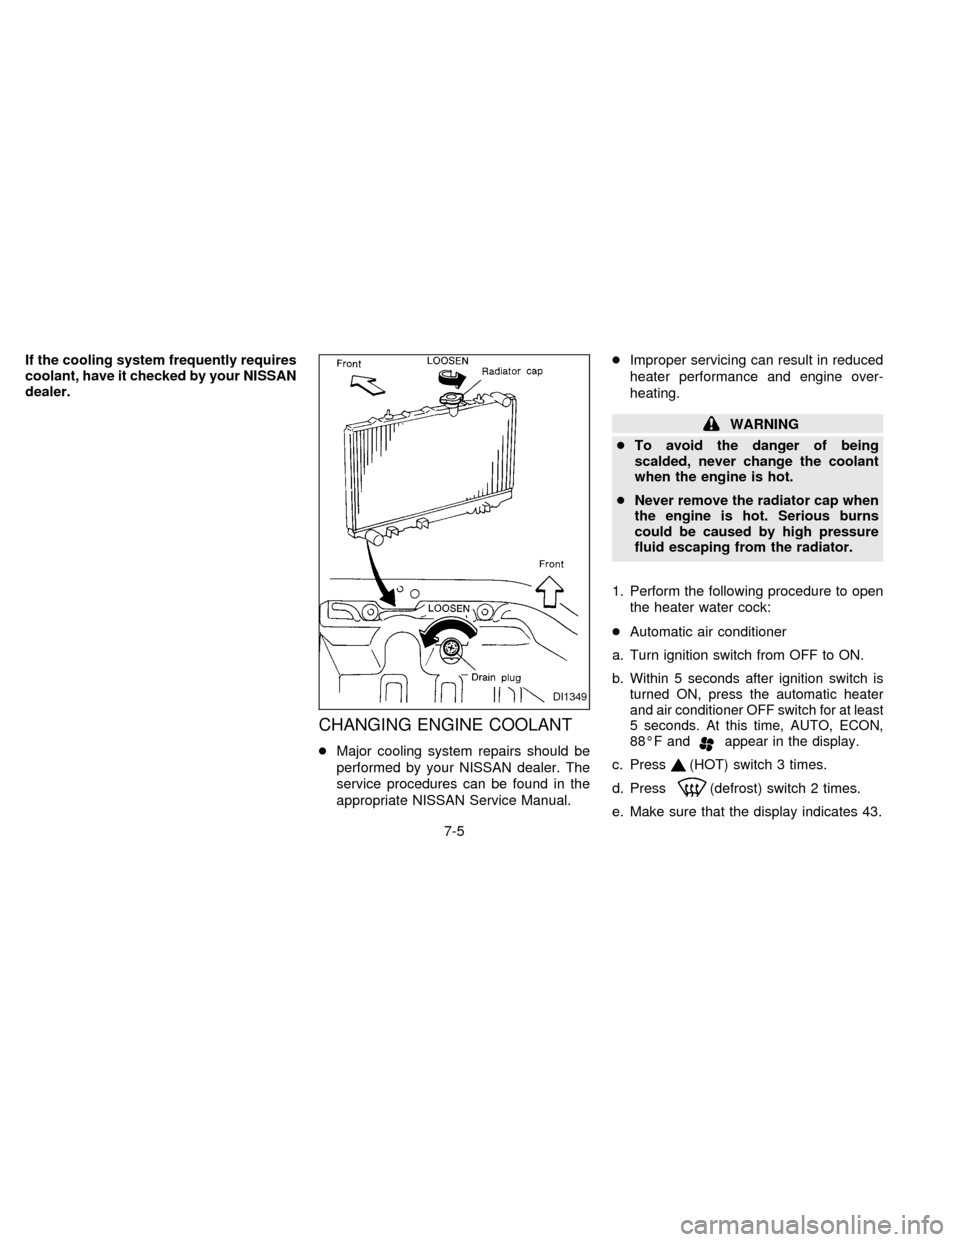
CHANGING ENGINE COOLANT
cMajor cooling system repairs should be
performed by your NISSAN dealer. The
service procedures can be found in the
appropriate NISSAN Service Manual.cImproper servicing can result in reduced
heater performance and engine over-
heating.
WARNING
cTo avoid the danger of being
scalded, never change the coolant
when the engine is hot.
cNever remove the radiator cap when
the engine is hot. Serious burns
could be caused by high pressure
fluid escaping from the radiator.
1. Perform the following procedure to open
the heater water cock:
cAutomatic air conditioner
a. Turn ignition switch from OFF to ON.
b.
Within 5 seconds after ignition switch is
turned ON, press the automatic heater
and air conditioner OFF switch for at least
5 seconds. At this time, AUTO, ECON,
88ÉF and
appear in the display.
c. Press(HOT) switch 3 times.
d. Press
(defrost) switch 2 times.
e. Make sure that the display indicates 43.
DI1349
7-5
ZX