Page 110 of 4133

60 Restraint systems
Te ch n ica l
data Instruments
and controlsOperationDrivingInstrument
cluster displayPractical hints Car care Index
Your vehicle was originally equipped with airbags
which are designed to activate in certain impacts
exceeding a preset threshold to reduce the potential
and severity of injury. It is important to your safety
and that of your passenger that you replace deployed
airbags and repair any malfunctioning airbags to
ensure the vehicle will continue to provide crash
protection for occupants.
Wa r n i n g !
Airbags are designed to reduce the potential of
injury in certain frontal (front airbags) impacts,
and side (side impact airbags) impacts which may
cause significant injuries, however, no system
available today can totally eliminate injuries and
fatalities.The activation of the “SRS” temporarily releases a
small amount of dust from the airbags. This dust,
however, is neither injurious to your health, nor
does it indicate a fire in the vehicle. The dust might
cause some temporary breathing difficulty for
people with asthma or other breathing trouble. To
avoid this, you may wish to get out of the vehicle as
soon as it is safe to do so. If you have any breathing
difficulty but cannot get out of the vehicle after the
airbag inflates, then get fresh air by opening a
window or door.
Wa r n i n g !
To reduce the risk of injury when the front airbags
inflate, it is very important for the driver and front
passenger to always be in a properly seated
position and to wear their seat belts.For maximum protection in the event of a collision
always be in normal seated position with your back
against the backrest. Fasten your seat belt and
ensure that it is properly positioned on your body.Since the airbag inflates with considerable speed
and force, a proper seating and hands on steering
wheel position will help to keep you at a safe
distance from the airbag. Occupants who are
unbelted, out of position or too close to the airbag
can be seriously injured by an airbag as it inflates
with great force in the blink of an eye:
Page 136 of 4133

86 Trip computer
Te ch n ica l
data Instruments
and controlsOperationDrivingInstrument
cluster displayPractical hints Car care Index
To calibrate the compass:
If the vehicle was exposed to a significant magnetic
zone, such as high voltage power lines, the compass
may have to be calibrated.
Calibration of the compass should be done in an area
free of steel superstructures and power lines. All
electrical consumers (e.g. exterior lamps, climate
control, etc.) should be switched off, doors and liftgate
closed. Do not open or close the roof. An open door or
liftgate triggers the display “–––”.
1. Start and run the engine.
2. Press MODE key repeatedly until the compass
display appears in the trip computer display.
3. Press RESET key to select the compass zone display.
4. Press RESET repeatedly until the correct zone, as
determined from the zone map (see page 85), is
shown in the display.
5. Press MODE key, “CAL–” appears in the display.
6. Press and hold RESET for a minimum of 2 seconds.7. Without interruption drive two or more full circles
at a speed between 3 mph (5 km / h) and 7 mph
(10 km / h) during which the message “CAL” is
replaced with a compass bearing (e.g. N, SW etc.),
immediately followed by three full circles at the
same speed, with only the rear window defroster
switched on. The defroster can be switched off
again. The calibration of the compass is now
complete.
•Stop watch –
Press RESET key to start the count. Press again to
stop the count. Press and hold RESET key to reset
sto p watch.
•Average fuel consumption –
Press RESET key to delete present reading.
•Language –
Press RESET key to set the language used in the
display.
Page 146 of 4133
96 Rear window wiper/washer
Te ch n ica l
data Instruments
and controlsOperationDrivingInstrument
cluster displayPractical hints Car care Index
Rear window wiper/washer
The rear window wiper / washer switch is located in the
instrument panel.With key in steering lock position 2:
1Press for interval wiping,
2Press to switch off,
or
press briefly for approx. 5 seconds wiper operation,
or
press and hold for simultaneous operation of wiper
and washer. After releasing the switch the wiper
operates for additional 5 seconds.
The rear window wiper will also automatically engage if
the windshield wiper is engaged and the gear selector
lever is placed in “R” Reverse.
12
Page 147 of 4133
97 Rear window wiper/washer
Te ch n ica l
data Instruments
and controlsOperationDrivingInstrument
cluster displayPractical hints Car care Index Windshield wipers smear
If the windshield wipers smear the windshield, even
during rain, activate the washer system as often as
necessary. The fluid in the washer reservoir should be
mixed in the correct ratio.
Note:
For windshield and headlamp washer fluid mixing ratio
see page 237.Blocked windshield wipers
If the windshield wipers become blocked (for example,
due to snow), switch off the wipers.
For safety reasons before removing ice or snow, remove
key from steering lock. Remove blockage.
Activate windshield wiper / washer switch again (key in
steering lock position 1).
Page 150 of 4133
100 Climate control
Te ch n ica l
data Instruments
and controlsOperationDrivingInstrument
cluster displayPractical hints Car care Index
Basic setting - Heater
Select temperature.
Select air volume with control switch Q, set at least
to position 2 to prevent windows from fogging up.
Set air distribution control switch to position shown
above.
Turn wheels (7) to position l to open left and right
side air outlets (9). Adjust air outlets upward.
Open center air outlets as desired.Basic setting - Air Conditioner
Switch on air conditioner with control buttonœ.
Select temperature.
Select air volume with control switchQ, set at least
to position 1.
Set air distribution control switch to positiona.
Open side air outlets.
Open center air outlets.
Page 151 of 4133
101 Climate control
Te ch n ica l
data Instruments
and controlsOperationDrivingInstrument
cluster displayPractical hints Car care Index Special setting (use only for short duration)
Defrosting windshield
Set temperature selector and switches for air volume
and air distribution to position P.
Turn wheels (7) to position l to open left and right
side air outlets (9). Adjust air outlets upward.
Close center air outlets.Defogging windows
Windows fogged up on inside.
Switch on air conditioning mode with controlœ.
Switch off air recirculationO. Indicator lamp in
button goes out.
Set air distribution control switch to positionc.
Increase air volume with control switch.
Turn side air outlet wheels (7) to position l.
Close center air outlets.
Page 152 of 4133

102 Climate control
Te ch n ica l
data Instruments
and controlsOperationDrivingInstrument
cluster displayPractical hints Car care Index
Windshield fogged up on outside.
Switch on wiper motor.
Set air distribution control switch to positiond
ora.
Dust filter
Nearly all dust particles and pollen are filtered out
before outside air enters the passenger compartment
through the air distribution system.
Note:
Keep the air intake grille in front of windshield free of
snow and debris.
Climate control – OFF
To switch the climate control off, set air volume control
switch to position0.
Switch off air conditioning mode œ. Control lamp in
button goes out.Air recirculation
This mode can be selected to temporarily reduce the
entry of annoying odors or dust into the vehicle’s
interior.
Outside air is not supplied to the vehicles’s interior.
To select, press O button. Indicator lamp in button
lights up.
To cancel, press O button again. Indicator lamp in
button goes out.
If the windows should fog up from the inside, switch
from recirculated air back to fresh air.
Page 153 of 4133

103 Climate control
Te ch n ica l
data Instruments
and controlsOperationDrivingInstrument
cluster displayPractical hints Car care Index Rear window defroster
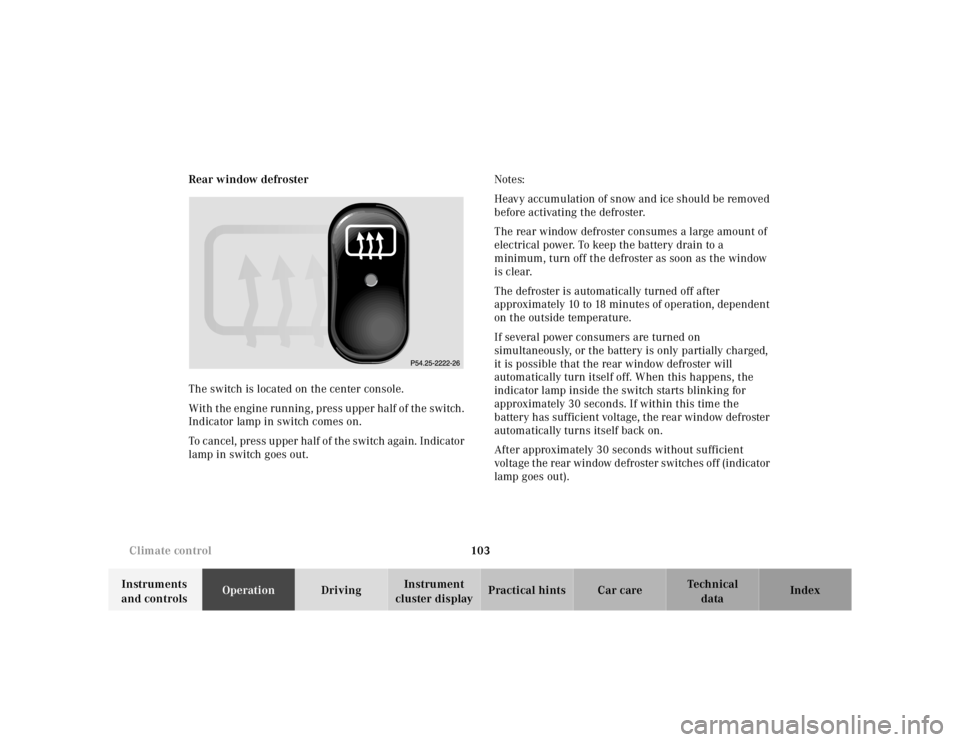
The switch is located on the center console.
With the engine running, press upper half of the switch.
Indicator lamp in switch comes on.
To cancel, press upper half of the switch again. Indicator
lamp in switch goes out.Notes:
Heavy accumulation of snow and ice should be removed
before activating the defroster.
The rear window defroster consumes a large amount of
electrical power. To keep the battery drain to a
minimum, turn off the defroster as soon as the window
is clear.
The defroster is automatically turned off after
approximately 10 to 18 minutes of operation, dependent
on the outside temperature.
If several power consumers are turned on
simultaneously, or the battery is only partially charged,
it is possible that the rear window defroster will
automatically turn itself off. When this happens, the
indicator lamp inside the switch starts blinking for
approximately 30 seconds. If within this time the
battery has sufficient voltage, the rear window defroster
automatically turns itself back on.
After approximately 30 seconds without sufficient
voltage the rear window defroster switches off (indicator
lamp goes out).