Page 179 of 241
Lights
Replacing the Front Side Marker/
Turn Signal and Parking Light Bulb
1. Use a Phillips-head screwdriver to remove the screw from the top of
the fender.
2. Move the side marker light assembly forward until it slides out
of the body. 3. Turn the socket one-quarter turn
counterclockwise to remove it
from the lens.
4. Remove the bulb by pushing it in slightly and turning it counter-
clockwise.
5. Install the new bulb in the socket.
Turn it clockwise to lock it in place.
6. Insert the socket back into the lens. Turn it clockwise to lock it in
place.
7. Put the side marker assembly back into the body. Align the four
tabs and push on the front edgeuntil it snaps into place.
Install the mounting screw and
tighten it securely.
Maintenance
SCREWProCarManuals.comMain Menu Table of Contents s t
Page 181 of 241
Lights
Replacing a Rear License Bulb
1. Remove the two screws and
remove the lens.
2. Pull the bulb straight out of its
socket. Push the new bulb in until
it bottoms in the socket.
3. Turn on the parking lights and
check that the new bulb is
working.
4. Reinstall the lens. Reinstall the two screws and tighten them
securely.
Replacing Bulbs in the Interior
Lights
The courtesy lights in the doors, tailgate and ceiling come apart thesame way. They do not all use the
same bulb.
1. Remove the lens by carefully prying on the edge of the lens witha fingernail file or a small flat-tip
screwdriver. Do not pry on the
edge of the housing around the
lens.
Door light: pry on the bottom middle of the
lens.
Ceiling light: pry on the front edge of the lens
in the middle.
MaintenanceProCarManuals.comMain Menu Table of Contents s t
Page 185 of 241

Exterior Care
Washing
Frequent washing helps preserve
your car's beauty. Dirt and grit can scratch the paint, while tree sap and
bird droppings can permanently ruin the finish.
Wash your car in a shady area, not in direct sunlight. If the car is parked in
the sun, move it into the shade and
let the exterior cool down before you start.
Only use the solvents and cleaners
recommended in this Owner's
Manual.
Chemical solvents and strong cleaners
can damage the paint, metal, and
plastic on your car.
Rinse the car thoroughly with cool
water to remove loose dirt.
Fill a bucket with cool water. Mix
in a mild detergent, such as
dishwashing liquid or a product
made especially for car washing.
Wash the car, using the water and detergent solution and a soft-
bristle brush, sponge, or soft cloth. Start at the top and work your way
down. Rinse frequently.
Check the body for road tar, tree
sap, etc. Remove these stains with
tar remover or turpentine. Rinse it off immediately so it does not
harm the finish. Remember to re-
wax these areas, even if the rest of the car does not need waxing. When you have washed and rinsed
the whole exterior, dry it with a
chamois or soft towel. Letting itair-dry will cause dulling and water
spots.
As you dry the car, inspect it for chips and scratches that could allow
corrosion to start. Repair them with
touch-up paint (see page 187).
The radio antenna on your car does not
need to be removed when you use a "drive-through'' car wash. However, if
you remove the antenna, make sure to
reinstall it and tighten it securely using
an appropriate tool.
Appearance Care
NOTICE
NOTICEProCarManuals.comMain Menu Table of Contents s t
Page 188 of 241

Interior Care
Seat Belts
If your seat belts get dirty, you can
use a soft brush with a mixture of
mild soap and warm water to clean
them. Do not use bleach, dye, or cleaning solvents. They can weaken
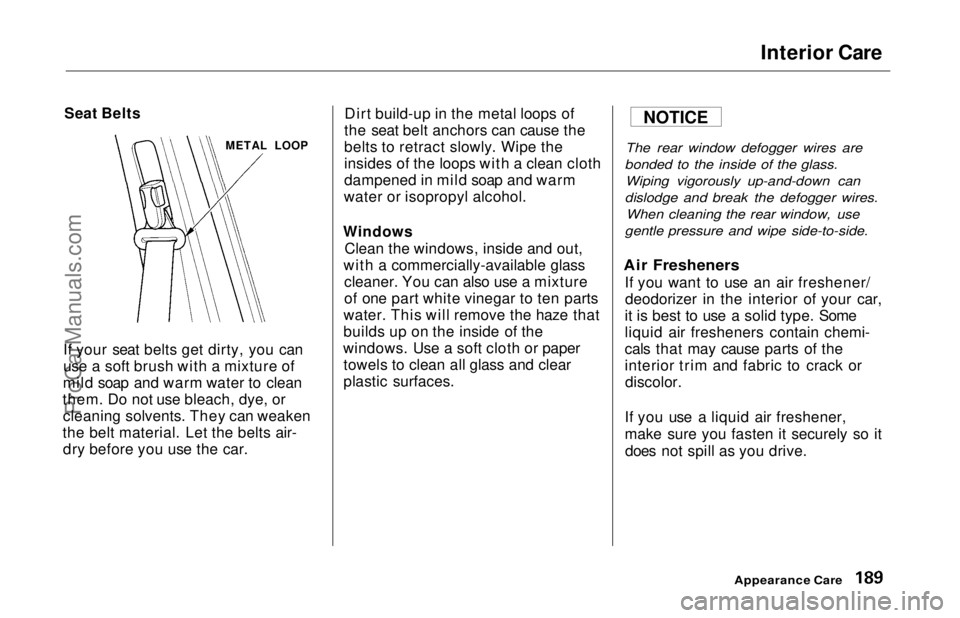
the belt material. Let the belts air- dry before you use the car. Dirt build-up in the metal loops of
the seat belt anchors can cause the
belts to retract slowly. Wipe the
insides of the loops with a clean cloth
dampened in mild soap and warm
water or isopropyl alcohol.
Windows Clean the windows, inside and out,
with a commercially-available glass cleaner. You can also use a mixture
of one part white vinegar to ten parts
water. This will remove the haze that
builds up on the inside of the
windows. Use a soft cloth or paper towels to clean all glass and clear
plastic surfaces.
The rear window defogger wires are
bonded to the inside of the glass. Wiping vigorously up-and-down can
dislodge and break the defogger wires. When cleaning the rear window, use
gentle pressure and wipe side-to-side.
Air Fresheners
If you want to use an air freshener/deodorizer in the interior of your car,
it is best to use a solid type. Some
liquid air fresheners contain chemi-
cals that may cause parts of the
interior trim and fabric to crack or discolor.
If you use a liquid air freshener,
make sure you fasten it securely so it does not spill as you drive.
Appearance Care
METAL LOOP
NOTICEProCarManuals.comMain Menu Table of Contents s t
Page 197 of 241
Changing a Flat Tire
15.Lower the car to the ground and remove the jack.
16.Tighten the wheel nuts securely in
the same crisscross pattern. Have
the wheel nut torque checked atthe nearest automotive service
facility.
Tighten the wheel nuts to: 80 lbf.ft (11 kgf.m, 108 N.m)
17.Put the flat tire in the supplied
vinyl bag.
EX model:
Remove the center cap.
CONTINUED
Taking Care of the UnexpectedProCarManuals.comMain Menu Table of Contents s t
Page 198 of 241
Changing a Flat Tire
18.Remove the spacer cone from the wing bolt, turn it over, and put itback on the bolt.
19.Install the flat tire and storage bin on the side panel as shown. Secure
them by screwing the wing bolt
back into its hole. 20. Put the spare tire cover in the
storage bin.
21. Knot the top of the vinyl bag as
shown.
22.Store the jack in its holder. Turn
the jack's end bracket clockwise to
lock it in place. Replace the tool
tray and store the tool kit. Install
the armrest pad.
23.Store the wheel cover or center cap in the cargo area. Make sure it
will not get scratched or damaged.
Taking Care of the Unexpected
STORAGE BIN
Loose items can fly around the
interior in a crash and could
seriously injure the occupants.
Store the wheel, jack and tools
securely before driving.ProCarManuals.comMain Menu Table of Contents s t