Page 53 of 236
MOON ROOF (IF EQUIPPED)
Press and hold the rear portion of
the moon roof control to open.
Press and hold the front portion of
the moon roof control to close.
The moon roof has a sliding shade
that can be manually opened or
closed when the glass panel is
shut.
To close the shade, pull it toward
the front of the vehicle.
Do not let children play
with the moon roof. They
may seriously hurt themselves.
POWER DOOR LOCKS
(IF EQUIPPED)
Press U to unlock all doors and L
to lock all doors.
Two-step unlock (if equipped)
This feature allows you to unlock
all doors of the vehicle with the
key.
1. Unlock the driver door.
MODELAMPLAMP
UL
com_power-doors uno_2step_unlock
Controls and features
54
Page 54 of 236
2. Repeat unlock procedure within
four seconds. All doors will unlock
when the key is returned to the
vertical position.
Two-step unlock can be activated
by all outside locks on vehicles
with keyless entry and anti-theft
(if equipped).
CHILDPROOF DOOR LOCKS
When these locks are set, the rear
doors cannot be opened from the
inside. The rear doors can be
opened from the outside when the
doors are unlocked.
Move lock control up to engage the
lock. Move control down to
disengage childproof locks.
uno_child-locks uno_pwr_windows
Controls and features
55
Page 78 of 236
SEATING
Adjusting bench seating
Folding rear seats (if equipped)
If your vehicle is equipped with a
built-in child safety seat, the
seatback cannot be folded down
unless the built-in child seat is
fully stowed.
1. Press the lower release control
downward to unlatch the seatback.
2. Rotate the seatback downward
into the load floor position.
3. Press down on the top outboard
area of the seatback until a click is
heard. The seat is now latched in
the load floor position.
Returning to the upright
position
1. Press downward on the upper
outboard corner of the seatback
and hold.
2. Pull the release handle upward
to unlatch the seat.
3. Rotate the seatback upward
until the seatback latches in the
upright position. The seatback will
click when it is locked into
position.
uno_adjusting_bench
uno_adjust_man_bucket
Seating and safety restraints
79
Page 82 of 236
SAFETY RESTRAINTS
Important safety restraints
precautions
The use of safety belts helps to
restrain both driver and passengers
in case of a collision. In most
states and Canada, the law
requires the use of safety belts.
Always drive and ride with
your seatback upright and
the lap belt snug and low across
the hips.
Lock the doors of your
vehicle before driving to
lessen the risk of the door
coming open in a collision.
Cargo should always be
secured to prevent it from
shifting and causing damage to
the vehicle or harm to
passengers.
To prevent the risk of
injury, make sure children
sit where they can be properly
restrained.
uno_safety_res_prec
uno_using_sr_properly
Seating and safety restraints
83
Page 84 of 236

Automatic locking mode
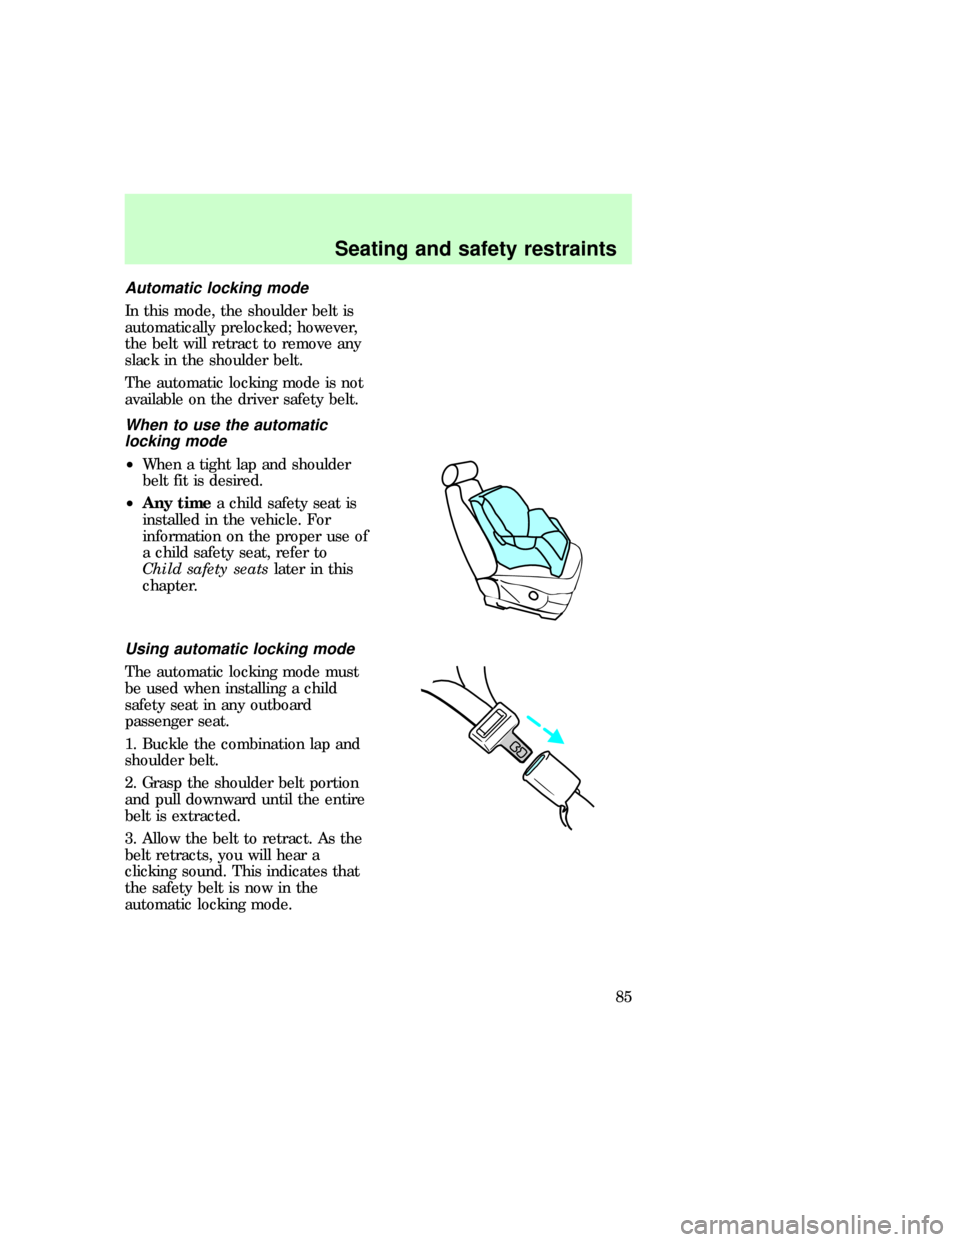
In this mode, the shoulder belt is
automatically prelocked; however,
the belt will retract to remove any
slack in the shoulder belt.
The automatic locking mode is not
available on the driver safety belt.
When to use the automatic
locking mode
²When a tight lap and shoulder
belt fit is desired.
²Any timea child safety seat is
installed in the vehicle. For
information on the proper use of
a child safety seat, refer to
Child safety seatslater in this
chapter.
Using automatic locking mode
The automatic locking mode must
be used when installing a child
safety seat in any outboard
passenger seat.
1. Buckle the combination lap and
shoulder belt.
2. Grasp the shoulder belt portion
and pull downward until the entire
belt is extracted.
3. Allow the belt to retract. As the
belt retracts, you will hear a
clicking sound. This indicates that
the safety belt is now in the
automatic locking mode.
uno_when_to_use_almode
uno_using_auto_locking_mode
uno_cancel_air
Seating and safety restraints
85
Page 97 of 236
anchorage. For more information
on top tether straps seeAttaching
safety seats with tether strapsin
this chapter.
When installing a child safety seat:
²Use the correct safety belt
buckle for that seating position.
²Make sure the tongue is
securely fastened in the buckle.
²Keep the buckle release button
pointing up and away from the
safety seat, with the tongue
between the child seat and the
release button, to prevent
accidental unbuckling.
²Place seatbacks in the upright
position.
²Put the safety belt in the
automatic locking mode. Refer
toUsing the automatic locking
modein this chapter.
Installing child safety seats in
combination lap and shoulder
belt seating positions
1. Position the child safety seat in
a seat with a combination lap and
shoulder belt.
If you choose to install a child
safety seat in the front passenger
com_installing_seats.01
Seating and safety restraints
98
Page 99 of 236
5. To put the retractor in the
automatic locking mode, grasp the
shoulder portion of the belt and
pull downward until all of the belt
is extracted and a click is heard.
6. Allow the belt to retract. The
belt will click as it retracts to
indicate it is in the automatic
locking mode.
7. Pull the lap belt portion across
the child seat toward the buckle
and pull up on the shoulder belt
while pushing down with knee on
the child seat.
8. Allow the safety belt to retract
to remove any slack in the belt.
9. Before placing the child in the
seat, forcibly tilt the seat forward
and back to make sure the seat is
securely held in place.
10. Try to pull the belt out of the
retractor to make sure the
retractor is in the automatic
locking mode (you should not be
Seating and safety restraints
100
Page 100 of 236

able to pull more belt out). If the
retractor is not locked, unbuckle
the belt and repeat steps two
through nine.
Check to make sure the child seat
is properly secured before each
use.
Attaching safety seats with
tether strap
Some manufacturers make safety
seats that include a tether strap
that goes over the back of the
vehicle seat and attaches to an
anchoring point. Other
manufacturers offer the tether
strap as an accessory. Contact the
manufacturer of your child safety
seat for information about ordering
a tether strap.
Tether anchor hardware
Attachment holes (at each rear
seating position) have been
provided in your vehicle to attach
anchor hardware, if required.
Tether anchor hardware kits (part
number 613D74), including
instructions, may be obtained at no
charge from any Ford or
Lincoln-Mercury dealer.
Only use the tether
attachment hole locations
shown in the illustrations. The
tether anchor may not perform
properly if the wrong mounting
location is used.
uno_tether_straps
uno_integrated_info
Seating and safety restraints
101