Page 116 of 191
²Manual
5. Block the diagonally opposite
wheel.
²Remove the lug wrench first.
Use the lug wrench to remove
the hold-down bolts on the
spare tire and jack.
4 25 3 1R
Roadside emergencies
116
Page 117 of 191
6. Remove the jack, jack handle
and spare tire from the vehicle's
rear cargo area.
²Locate the wheel cover
hold-down lug nut.
²Completely remove this lug nut.
Use the lug wrench provided
with the jack to loosen the
retention bolts on the spare tire.
²Do not attempt to remove the
wheel cover until lug nuts are
removed.
Roadside emergencies
117
Page 118 of 191
7. Loosen the remaining wheel lug
nuts with the lug wrench about
one half turn counterclockwise.
8. Position the jack at the jack
notch closest to the wheel.
9. Insert the jack handle and raise
the vehicle until the tire just clears
the ground.
10. Remove the wheel lug nuts and
flat tire, and install the spare with
the ``temporary use'' label facing
outward.
11. Install the same metric wheel
lug nuts as removed and tighten
until snug.
Roadside emergencies
118
Page 119 of 191
Installation of an English
thread nut on a metric
stud (or vice-versa) will not
properly secure the wheel to the
hub. Damaged studs may result
in wheel separation and possible
injury.
12. Lower the vehicle and tighten
the wheel lug nuts in the pattern
shown.
13. Unblock the wheels and put
the tire, jack, jack handle, and lug
wrench away.
Roadside emergencies
119
Page 123 of 191
WRECKER TOWING
If towing is necessary, it is
recommended that your vehicle be
towed with wheel lift or flatbed
equipment. Do not tow with
slingbelt equipment. Ford Motor
Company has not developed or
approved a T-hook or slingbelt
towing procedure.
Roadside emergencies
123
Page 126 of 191
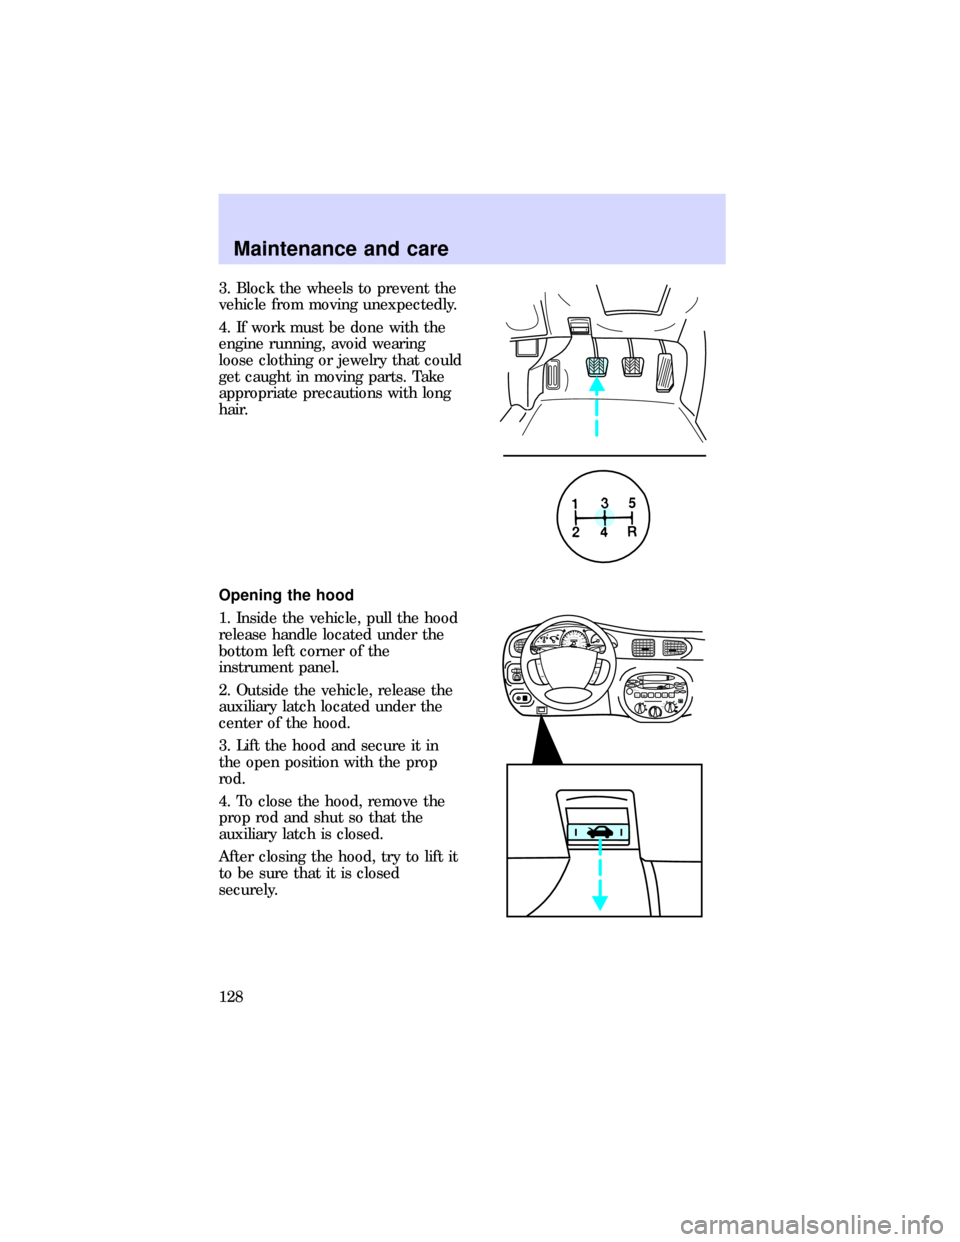
3. Block the wheels to prevent the
vehicle from moving unexpectedly.
5
Maintenance and care
126
Page 128 of 191

3. Block the wheels to prevent the
vehicle from moving unexpectedly.
4. If work must be done with the
engine running, avoid wearing
loose clothing or jewelry that could
get caught in moving parts. Take
appropriate precautions with long
hair.
Opening the hood
1. Inside the vehicle, pull the hood
release handle located under the
bottom left corner of the
instrument panel.
2. Outside the vehicle, release the
auxiliary latch located under the
center of the hood.
3. Lift the hood and secure it in
the open position with the prop
rod.
4. To close the hood, remove the
prop rod and shut so that the
auxiliary latch is closed.
After closing the hood, try to lift it
to be sure that it is closed
securely.
5
HI LOOFF*A/C*MAX
A/C
TUNE
DISCS
SEEK
TUNE
SCAN
EJ REW FF
BAL BASSTREBFADE TAPE
CD AM
FM
–+1
SIDE 1-22
345
COMP1
SIDE 1-2VOL–
PUSH ON
LMIRRORR
0000000002030405060
70
80
90
10 0
11 020 40608010 0
12 0
16 0
18 0 140FUEL FILLCHEF1/22
13RPM x 1000
RESET
SET
ACC
SET XXXX XXXOFF2INT
1 OFF MIST
Maintenance and care
128
Page 149 of 191

Traction A B C
The traction grades, from highest
to lowest, are A, B, and C; they
represent the tire's ability to stop
on wet pavement as measured
under controlled conditions on
specified government test surfaces
of asphalt and concrete. A tire
marked C may have poor traction
performance.
The traction grade
assigned to this tire is
based on braking (straightahead)
traction tests and does not
include cornering (turning)
traction.
Temperature A B C
The temperature grades are A (the
highest), B, and C; they represent
the tire's resistance to the
generation of heat and its ability to
dissipate heat when tested under
controlled conditions on a
specified indoor laboratory test
wheel. Sustained high temperature
can cause the material of the tire
to degenerate and reduce tire life.
Excessive temperature can lead to
sudden tire failure. The grade C
corresponds to a level of
performance which all passenger
car tires must meet under the
Federal Motor Vehicle Safety
Standard No. 109. Grades A and B
represent higher levels of
performance on the laboratory test
wheel than the minimum required
by law.
Maintenance and care
149