Page 15 of 433

Downloaded from www.Manualslib.com manuals search engine Rear Seats
I
~ If a head restraint is not installed on the seatback
~ or stored in the vehicle properly, it could be
1 thrown about the vehicle in a crash or sudden
maneuver. People in the vehicle could be injured.
Remove the head restraints only-when you need
to fold the seat, and be sure that the head
restraints are stored securely in the storage bag
and placed under the rear seat. When the seat is
returned to the passenger position, be sure the
head restraints are installed properly. Folding
the Rear Seat (2-Door Utility Model)
If your vehicle has a rear seat, the seat can be folded flat
for more cargo space. Before folding, make sure that
nothing is under or in front of the seat. When the seat is
folded, it will lay almost flat on the floor.
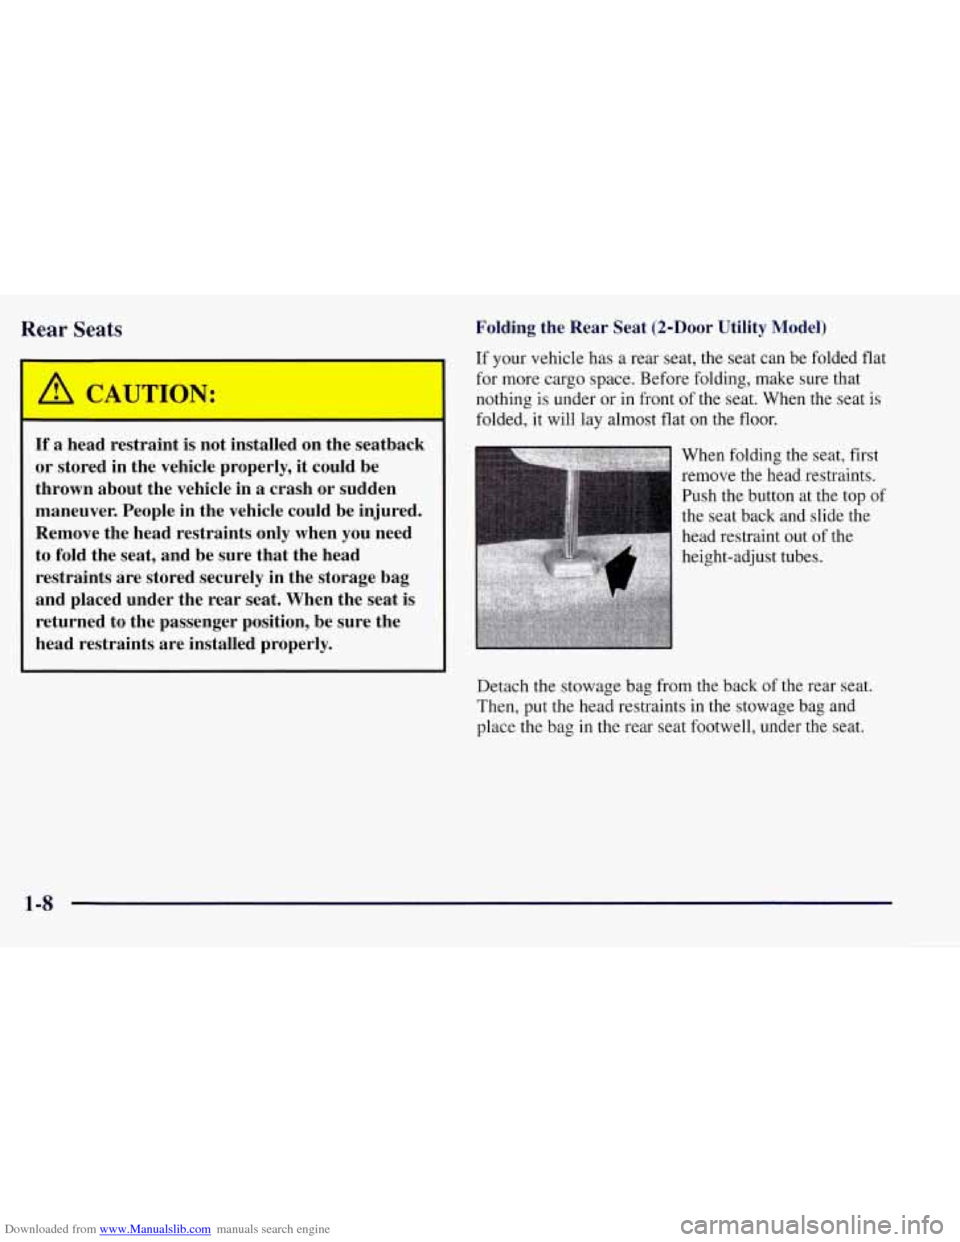
When folding the seat, first
remove the head restraints.
Push the button at the top of
the seat back and slide the
head restraint out of the
height-adjust tubes.
Detach the stowage bag from the back of the rear seat.
Then, put the head restraints in the stowage bag and
place the bag in the rear seat footwell, under the seat.
1-8
Page 18 of 433

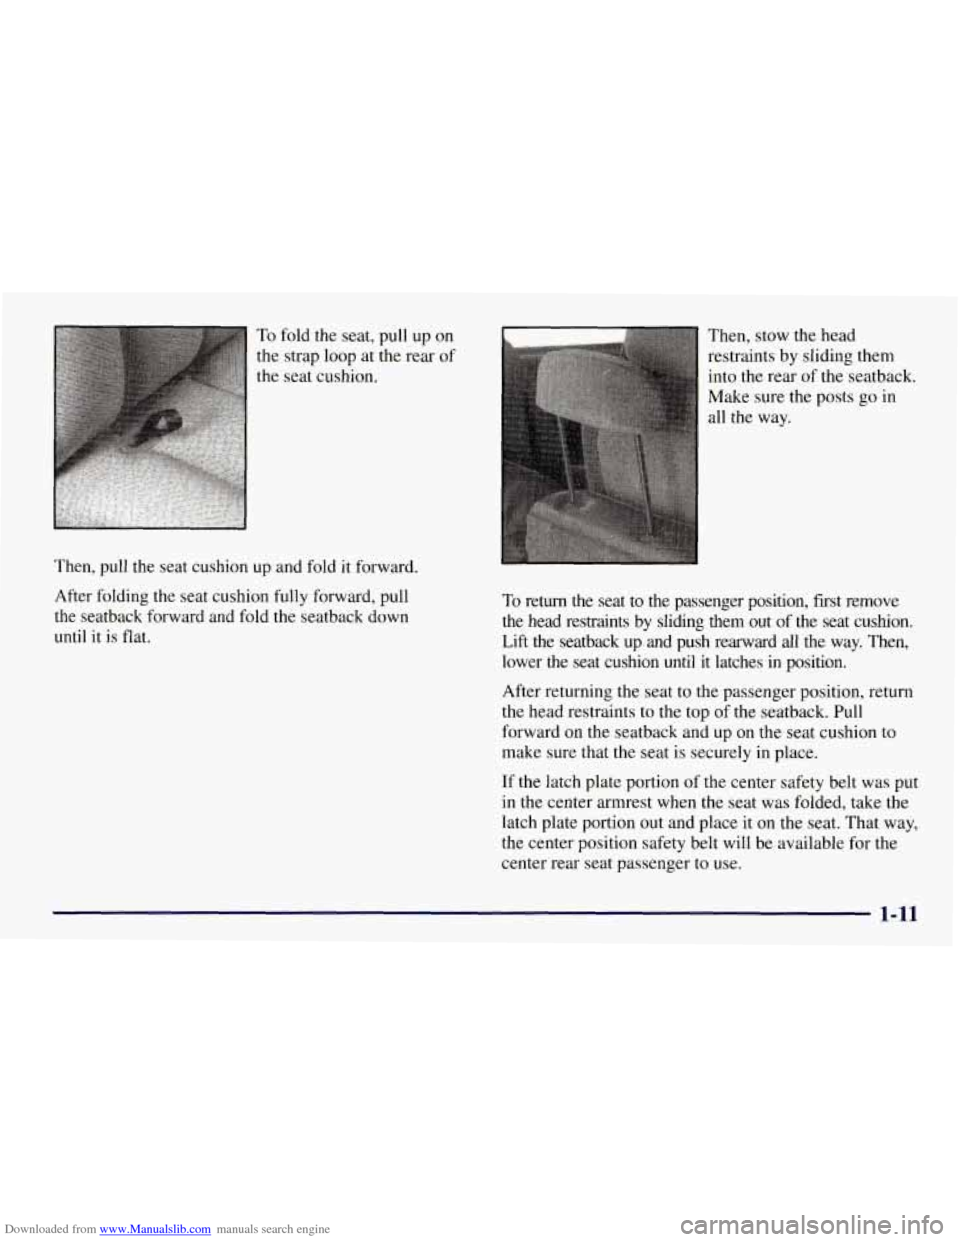
Downloaded from www.Manualslib.com manuals search engine To fold the seat, pull up on
the strap loop at the rear of
the seat cushion.
Then, pull the seat cushion up and fold it forward.
After folding the seat cushion fully forward, pull
the seatback forward and fold the seatback down
until it is flat. Then,
stow the head
restraints by sliding them
into the rear of the seatback.
Make sure the posts go
in
all the way.
To return the seat to the passenger position, first remove
the head restraints by sliding them
out of the seat cushion.
Lift the seatback up and push rearward
all the way. Then,
lower the seat cushion until it latches in position.
After returning the seat to the passenger position, return
the head restraints to the top
of the seatback. Pull
forward on the seatback and up on the seat cushion
to
make sure that the seat is securely in place.
If the latch plate portion
of the center safety belt was put
in the center armrest when the seat was folded, take the
latch plate portion out and place
it on the seat. That way,
the center position safety belt will be available for the
center rear seat passenger to use.
1-11
Page 30 of 433

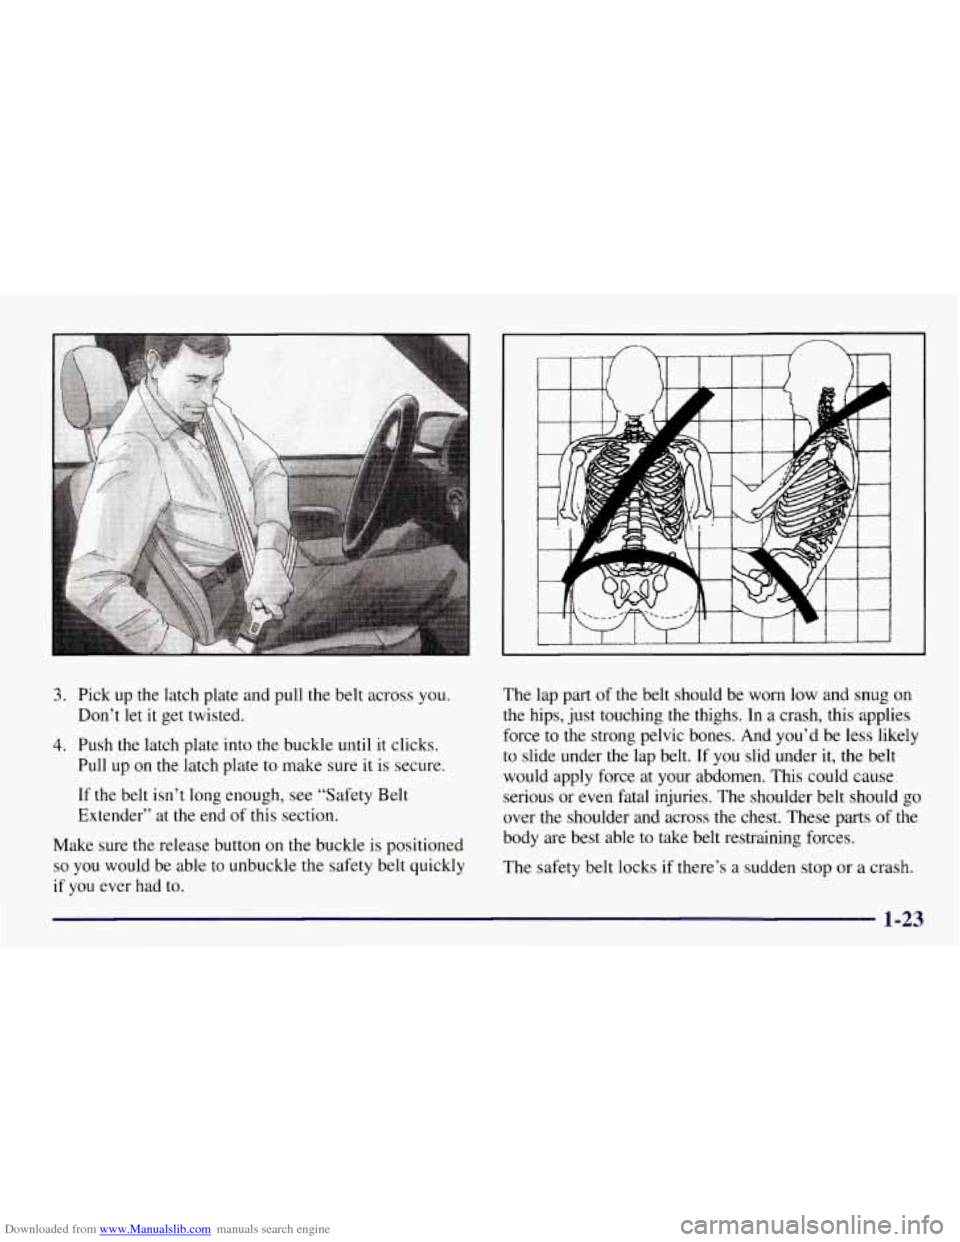
Downloaded from www.Manualslib.com manuals search engine 3. Pick up the latch plate and pull the belt across you.
Don’t let
it get twisted.
4. Push the latch plate into the buckle until it clicks.
Pull up on the latch plate
to make sure it is secure.
If the belt isn’t long enough, see “Safety Belt
Extender” at the end
of this section.
Make sure the release button on the buckle is positioned
so you would be able to unbuckle the safety belt quickly
if
you ever had to.
I-1 I I I I 1
The lap part of the belt should be worn low and snug on
the hips, just touching the thighs. In a crash, this applies
force to the strong pelvic bones. And you’d be less likely
to slide under the lap belt.
If you slid under it, the belt
would apply force at your abdomen. This could cause
serious or even fatal injuries. The shoulder belt should go
over the shoulder and across the chest. These
parts of the
body are best able to take belt restraining forces.
The safety belt locks
if there’s a sudden stop or a crash.
1-23
Page 39 of 433
Downloaded from www.Manualslib.com manuals search engine A CAUTION:
Air bags inflate with great force, faster than the
blink of an eye.
If you’re too close to an inflating
air bag, it could seriously injure you. Safety belts
help keep
you in position before and during a
crash. Always wear your safety belt, even with air
bags. The driver should sit as far back as possible
while still maintaining control of the vehicle.
I A CAUTION:
An inflating air bag can seriously injure small
children. Always secure children properly in your
vehicle.
To read how, see the part of this manual
called “Children” and the caution label on the
right front passenger’s safety belt.
AIR
BAG
There is an air bag
readiness light on the
instrument panel, which
shows
AIR BAG.
The system checks the air bag electrical system for
malfunctions. The light tells you if there is an electrical
problem. See “Air Bag Readiness Light” in the Index
for more information.
1-32
Page 48 of 433
Downloaded from www.Manualslib.com manuals search engine 4-DOOr Utility
1. Pick up the latch plate and pull the belt across you.
Don’t let it get twisted.
2. Push the latch plate into the buckle until it clicks.
Pull up
on the latch plate to make sure it is secure.
When the shoulder belt is pulled out all the way, it
will lock.
If it does, let it go back all the way and
start again.
2-Door Utility and Suburban
1-41
Page 56 of 433
Downloaded from www.Manualslib.com manuals search engine Never hold a baby in your arms while riding in a
vehicle. A baby doesn’t weigh much -- until a
crash. During a crash a baby will become so
heavy you can’t hold it. For example, in a crash
CAUTION: (Continued)
1 CAUTION: (CO-~’----”) I
at only 25 mph (40 km/h), a 12-lb. (5.5 kg) baby
will suddenly become
a 240-lb. (110 kg) force on
your arms. The baby would be almost impossible
to hold.
Secure the baby in an infant restraint.
1-49
Page 57 of 433

Downloaded from www.Manualslib.com manuals search engine Child Restraints
Be sure the child restraint is designed to be used in a
vehicle. If it is, it will have a label saying that
it meets
Federal Motor Vehicle Safety Standards.
Then follow the instructions for the restraint. You may
find these instructions on the restraint itself or in a
booklet, or both. These restraints use the belt system in
your vehicle, but the child also has to be secured within
the restraint to help reduce the chance
of personal injury.
The instructions that come with the infant or child
restraint will show
you how to do that.
Where to Put the Restraint
Accident statistics show that children are safer if they
are restrained in the rear rather than the front seat.
We at General Motors therefore recommend that you
put your child restraint in a rear seat.
Never put a
rear-facing child restraint in the right front passenger
seat. Here’s why:
A child in a rear-facing child restraint can be
seriously injured if the right front passenger’s air
bag inflates. This is because the back of
a
rearfacing child restraint would be very close to
the inflating air bag. Always secure
a rear-facing
child restraint in
a rear seat.
You may, however, secure a forward-facing child
restraint in the right front seat. Before you secure
1 a forward-facing child restraint, always move the
front passenger seat as far back as it will
go. Or,
secure the child restraint in a rear seat.
Wherever you install it, be sure to secure the child
restraint properly.
Keep in mind that an unsecured child restraint can move
around in a collision or sudden stop and injure people in
the vehicle. Be sure to properly secure any child
restraint in your vehicle
-- even when no child is in it.
1-50
Page 58 of 433
Downloaded from www.Manualslib.com manuals search engine Top Strap
If your child restraint has a top strap, it should be
anchored.
If you need to have an anchor installed, you
can ask your
GM dealer to put it in for you. If you want
to install an anchor yourself, your dealer can tell
you
how to do it.
Securing a Child Restraint in a Rear
Outside Seat Position
You’ll be using the lap-shoulder belt. See the earlier part
about the top strap if the child restraint has one.
1. Put the restraint on the seat. Follow the instructions
for the child restraint.
2. Secure the child in the child restraint as the
instructions say.
1-51