Page 92 of 433
Downloaded from www.Manualslib.com manuals search engine Manual Transfer Case
The transfer case shift lever is on the floor to the right of
the driver. Use this lever to shift into and out
of
four-wheel drive.
. . . . . ... .. .. . .. ... ... . ..... .. ... .. . .... . .. ..... .... .. . . . .. .. ... ... . . .
f t I I
The front axle portion of the indicator diagram will light
up when you shift into four-wheel drive and the front
axle engages.
Some delay between shifting into four-wheel drive and
the indicator’s lighting is normal. If the front axle light
does not
go out immediately after you shift out of
four-wheel drive, have your dealer check your system.
2-21
Page 105 of 433

Downloaded from www.Manualslib.com manuals search engine Thrn Signal and Lane Change Indicator
The turn signal has two upward (for right) and two
downward (for left) positions. These positions allow you
to signal a turn or a lane change.
To signal a turn, move the lever all the way up or down.
When the
turn is finished, the lever will return automatically.
Q
An arrow on the instrument
panel will flash in the
direction of the
turn
or lane change.
To signal a lane change, just raise or lower the lever
until the arrow starts to flash. Hold it there until
you
complete your lane change. The lever will return by
itself when you release it. If
you move the lever all the way up or down and the
arrow flashes at twice the normal rate, a signal bulb may
be burned out and other drivers may not see your
turn signal.
If a bulb is burned out, replace it to help avoid an
accident. If the arrows don’t go on at all when you
signal a
turn, check for burned-out bulbs and a blown
fuse (see “Fuses” in the Index).
Headlamp High/Low Beam Changer
To change the headlamps from low beam to high or high
to low, pull the turn signal lever
all the way towards you.
Then release it.
When the high beams are
on, this light on the
instrument panel also will
be on.
2-34
Page 107 of 433

Downloaded from www.Manualslib.com manuals search engine Rear Window Wiper and Washer
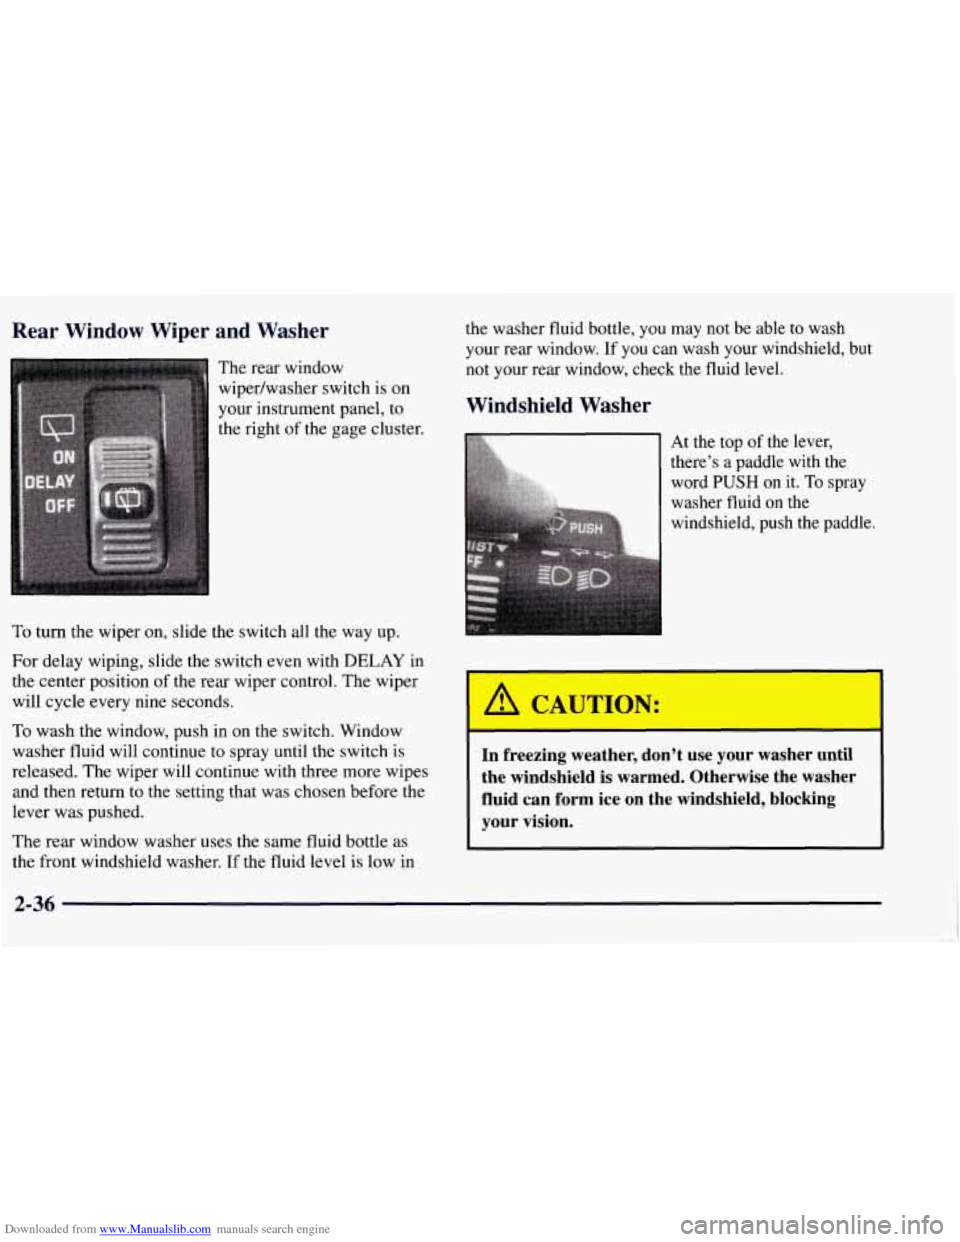
The rear window
wipedwasher switch is on
your instrument panel, to
the right of the gage cluster.
To turn the wiper on, slide the switch all the way up.
For delay wiping, slide the switch even with DELAY in
the center position of the rear wiper control. The wiper
will cycle every nine seconds.
To wash the window, push in on the switch. Window
washer fluid will continue
to spray until the switch is
released. The wiper will continue with three more wipes
and then return to the setting that was chosen before the
lever was pushed.
The rear window washer uses the same fluid bottle as
the front windshield washer. If the fluid level is low
in
the washer fluid bottle, you may not be able to wash
your rear window. If you can wash your windshield, but
not your rear window, check the fluid level.
Windshield Washer
At the top of the lever,
word
PUSH on it. To spray
washer fluid on the
windshield, push the paddle.
i there’s a paddle with the &
A CAUTION:
I
-I
In freezing weather, don’t use your washer until
the windshield is warmed. Otherwise the washer
fluid can form ice on the windshield, blocking
your vision.
Page 111 of 433

Downloaded from www.Manualslib.com manuals search engine Erasing Speed Memory
When you turn off the cruise control or the ignition,
your cruise control set speed memory is erased.
Lamps
Your parkingheadlamp knob is on the driver’s side of
your instrument panel.
Rotate the knob clockwise to the parking lamp symbol
to turn on the following:
0 Parking Lamps,
Sidemarker Lamps,
Clearance Lamps (if you have them),
0 Taillamps,
0 License Plate Lamps and
0 Instrument Panel Lights.
Rotate the knob clockwise again to the master lighting
symbol to turn on all the lamps listed as well as
the headlamps.
Rotate the knob counterclockwise to
OFF to turn off
your lamps.
Rotate the thumb wheel next to the knob up to adjust
instrument panel lights. Rotate the thumb wheel up to
the first notch to return the radio display and gearshift
indicator LED display to full intensity when the
headlamps or parking lamps are on.
To turn on the dome
lamps (with the vehicle doors closed) rotate the thumb
wheel up to the second notch position.
You can switch your headlamps from high to low beam
by pulling on the turn signal/high beam lever.
A circuit breaker protects your headlamps. If you have
an electrical overload, your headlamps will flicker
on
and off. Have your headlamp wiring checked right away
if this happens.
2-40
Page 118 of 433

Downloaded from www.Manualslib.com manuals search engine Outside Mirrors
Adjust your outside mirrors so you can just see the side
of your vehicle and have a clear view of objects behind
you. Some mirrors can be folded in to enter
narrow doorways.
Electric Outside Rearview Mirrors
(If Equipped)
If you have electric mirrors, they can be adjusted to
point where you want from inside the vehicle.
Select the mirror you want
to move by moving the
center
of the switch, located
on the driver’s door armrest,
to
L (left) or R (right).
Then, adjust the mirror angle by pressing the outer
arrows on the switch until the mirror is adjusted where
you want it.
The use of hood mounted air deflectors and convex
add-on mirror attachments may adversely affect
mirror performance.
Convex Outside Mirror
Your passenger’s side mirror may be convex. A convex
mirror’s surface is curved
so you can see more from the
driver’s seat.
1
A convex mirror can make things (like other
vehicles) look farther away than they really are.
If you cut too sharply into the right lane, you could hit a vehicle on your right. Check your
inside mirror or glance over your shoulder before
changing lanes.
2-47
Page 128 of 433

Downloaded from www.Manualslib.com manuals search engine Luggage Carrier (If Equipped)
If you have the optional luggage carrier, you can load
things on top of your vehicle.
The luggage carrier has slats and side rails attached to
the roof, and crossrails which can be moved toward the
front or the rear in the side rails
to help secure cargo. Tie
the load to the side rails or side rail supports.
NOTICE:
Loading cargo that weighs more than 200 lbs.
(90.6 kg) on the luggage carrier may damage
your vehicle. When
you carry large things, never
let them hang over the rear or the sides
of your
vehicle. Load your cargo
so that it rests on the
slats and does not scratch or damage the vehicle.
Put the cargo against the side rails and fasten
it
securely to the luggage carrier.
Don’t exceed the maximum vehicle capacity when
loading your vehicle. For more information on vehicle
capacity and loading, see “Loading Your Vehicle”
in
the Index. To
prevent damage or loss of cargo as you’re driving,
check now and then to make sure the luggage carrier and
cargo are still securely fastened.
Be sure the cargo is properly loaded.
If small heavy objects are placed on the roof, place
the load in the area over the rear wheels (behind
the
rear side door on Suburbans). If you need to, cut a
piece of 3/8 inch plywood to fit inside the crossrails
and side rails to spread the load, If plywood is used,
tie it to the side rail supports.
Tie the load to the crossrails or the side rail supports.
Use the crossrails only to keep the load from sliding.
0 If you need to carry long items, move the crossrails
as far apart as they will go. Tie the load to the
crossrails and the side rails or side rail supports. Also
tie the load to the bumpers. Do not tie the load
so
tightly that the crossrails or side rails are damaged.
0 After moving the crossrails, be sure to tighten all the
slider screws.
For the purpose of wind noise reduction, locate
the front crossrail approximately
18-24 inches
(46 cm to 58 cm) rearward of the front supports.
2-57
Page 133 of 433
Downloaded from www.Manualslib.com manuals search engine Instrument Cluster
CHECK GAGES
c7
lOlblolol TRIP lo 0 0 0 oolol APPLY BRAKE TO SHIFT FROM PARK
United States version shown, Canadian similar.
Your instrument cluster is designed to let you know at a glance how your vehicle is running. You’ll know how fast you’re
going, about
how much fuel you have and many other things you’ll need to know to drive safely and economically.
2-62
Page 134 of 433

Downloaded from www.Manualslib.com manuals search engine Speedometer and Odometer
Your speedometer lets you see your speed in both miles
per hour (mph) and kilometers per hour
(km/h). Your
odometer shows how far your vehicle has been driven,
in either miles (used in the United States) or kilometers
(used in Canada).
Tamper-Resistant Odometer
Your odometer is tamper-resistant. The odometer will
show silver lines between the numbers if someone tries
to turn it back.
You may wonder what happens if your vehicle needs a
new odometer installed. Laws vary as to the procedure
that must be followed,
so check with your state or
provincial vehicle registration office. But generally, if
the new odometer can be set to the mileage total of the
old odometer, then it must be. But if it can’t, then it’s set
at zero, and a label must be put on the driver’s door to
show the old mileage reading when the new odometer
was installed.
Trip Odometer
The trip odometer can tell you how far your vehicle has
been driven since you last set the trip odometer to zero.
To reset the trip odometer, fully press the reset button
located near the trip odometer readout. If the reset
button is not fully pressed, the trip odometer may not go
all the way back to zero. If it doesn’t, you may have to
press the reset button again
to reset the readout to zero.
Tachometer
Your’tachometer displays the engine speed in
revolutions per minute (rpm).
2-63