1997 CHEVROLET SUBURBAN ignition
[x] Cancel search: ignitionPage 171 of 433
Playing a Compact Disc in the Single Remote Disc
Player
(If Equipped)
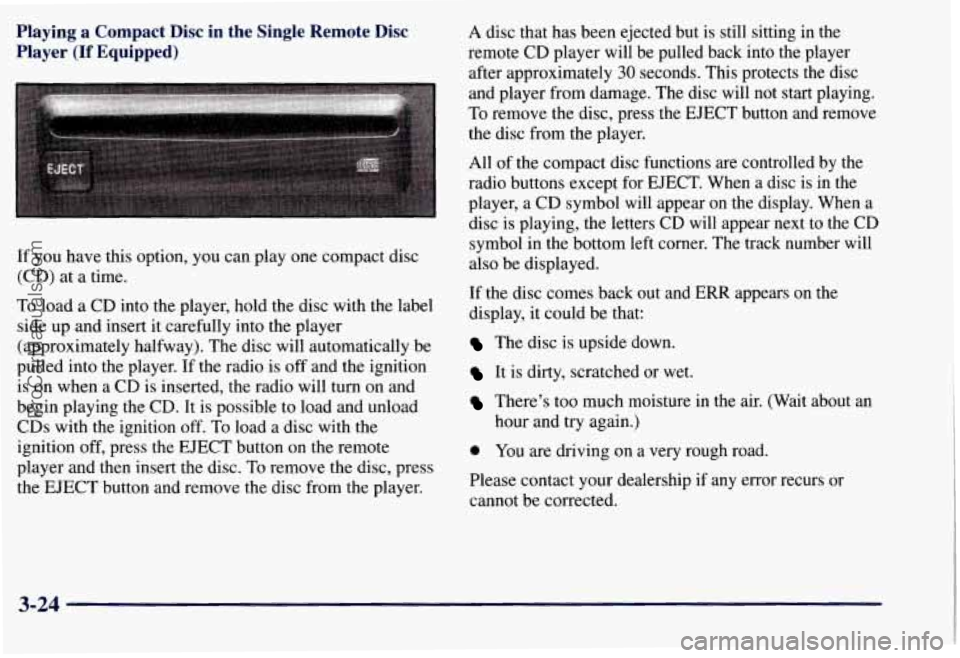
If you have this option, you can play one compact disc
(CD) at a time.
To load
a CD into the player, hold the disc with the label
side up and insert it carefully into the player
(approximately halfway). The disc will automatically be
pulled into the player. If the radio is off and the ignition
is on when a CD is inserted, the radio will turn on and
begin playing the CD. It is possible to load and unload
CDs with the ignition off.
To load a disc with the
ignition off, press the EJECT button on the remote
player and then insert the disc. To remove the disc, press
the EJECT button and remove the disc from the player. A
disc that has been ejected but is still sitting in the
remote CD player will be pulled back into the player
after approximately
30 seconds. This protects the disc
and player from damage. The disc will not start playing.
To remove the disc, press the EJECT button and remove
the disc from the player.
All of the compact disc functions are controlled by the
radio buttons except for EJECT. When a disc is in the
player, a CD symbol will appear on the display. When a
disc is playing, the letters
CD will appear next to the CD
symbol in the bottom left corner. The track number will
also be displayed.
If the disc comes back out and
ERR appears on the
display,
it could be that:
The disc is upside down.
It is dirty, scratched or wet.
There’s too much moisture in the air. (Wait about an
hour and try again.)
0 You are driving on a very rough road.
Please contact your dealership
if any error recurs or
cannot be corrected.
3-24
ProCarManuals.com
Page 173 of 433
Theft-Deterrent Feature
THEFTLOCK" is designed to discourage theft of your
radio. It works by using a secret code to disable all radio
functions whenever battery power is removed.
The THEFTLOCK feature for the radio may be used or
ignored. If ignored, the system plays normally and the
radio is not protected
by the feature. If THEFTLOCK is
activated, your radio will not operate if stolen.
When THEFTLOCK is activated, the radio will display
LOC to indicate a locked condition anytime battery
power is removed. If your battery loses power for any
reason, you must unlock the radio with the secret code
before it will operate.
Activating the Theft-Deterrent Feature
The instructions which follow, explain how to enter your
secret code to activate the THEFTLOCK system. It is
recommended that you read through all nine steps
before starting the procedure.
NOTE: If you allow more than
15 seconds to elapse
between any steps, the radio automatically reverts to
time and you must
start the procedure over at Step 4.
1. Write down any three or four-digit number from
000 to 1999 and keep it in a safe place separate from
the vehicle.
2. Turn the ignition to ACCESSORY or RUN.
3. Turn the radio off.
4. Press the 1 and 4 buttons together. Hold them down
until
--- shows on the display. Next you will use the
secret code number which you have written down.
5. Press MN and 000 will appear on the display.
6. Press MN again to make the last two digits agree
with your code.
7. Press HR to make the first one or two digits agree
8. Press AM-FM after you have confirmed that the
with
your code.
code matches the secret code you have written down.
The display will show REP to let you know that you
need to repeat Steps
5 through 7 to confirm your
secret code.
9. Press AM-FM and this time the display will show
SEC to let you know
that your radio is secure. The
indicator by the volume control will begin flashing
when the ignition is turned off.
ProCarManuals.com
Page 174 of 433
Unlocking the Theft-Deterrent Feature After a
Power
Loss
Enter your secret code as follows; pause no more than
15 seconds between steps:
1.
LOC appears when the ignition is on.
2. Press MN and 000 will appear on the display.
3. Press MN again to make the last two digits agree
with your code.
4. Press HR to make the first one or two digits agree
with your code.
code matches the secret code you have written down.
The display will show SEC, indicating the radio is
now operable and secure.
5. Press AM-FM after you have confirmed that the
If you enter the wrong code eight times, INOP will
appear on the display.
You will have to wait an hour
with the ignition on before you can try again. When you
try again, you will only have three chances to enter the
correct code before
INOP appears.
If you lose or forget your code, contact your dealer.
Disabling the Theft-Deterrent Feature
Enter your secret code as follows; pause no more than
15 seconds between steps:
1. Turn the ignition to ACCESSORY or RUN.
2. Turn the radio off.
3. Press the 1 and 4 buttons together. Hold them down
until SEC shows on the display.
4. Press MN and 000 will appear on the display.
5. Press MN again to make the last two digits agree
with your code.
6. Press HR to make the first one or two digits agree
with your code.
7. Press AM-FM after you have confirmed that the
code matches the secret code you have written down.
The display will show
---, indicating that the radio is
no longer secured.
If the code entered is incorrect, SEC will appear
on the
display. The radio will remain secured until the correct
code is entered.
When battery power is removed and later applied to a
secured radio, the radio won’t turn on and LOC will
appear on the display.
To unlock a secured radio, see “Unlocking the
Theft-Deterrent Feature After a Power
Loss” earlier in
this section.
3-27
ProCarManuals.com
Page 176 of 433
Care of Your Cassette Tape Player
A tape player that is not cleaned regularly can cause
reduced sound quality, ruined cassettes or a damaged
mechanism. Cassette tapes should
be stored in their
cases away from contaminants, direct sunlight and
extreme heat. If they aren’t, they may not operate
properly or may cause failure
of the tape player.
Your tape player should be cleaned regularly after every
50 hours of use. Your radio may display CLN to indicate
that you have used your tape player for
50 hours without
resetting the tape clean timer,
If this message appears
on the display, your cassette tape player needs to be
cleaned. It will still play tapes, but you should clean it as
soon as possible to prevent damage to your tapes and
player. If you notice a reduction in sound quality, try a
known good cassette to see if it is the tape or the tape
player at fault. If this other cassette has no improvement
in sound quality, clean the tape player.
Cleaning may be done with a scrubbing action,
non-abrasive cleaning cassette with pads which scrub
the tape head as the hubs
of the cleaner cassette turn. It
is normal for the cassette to eject while cleaning because
your unit is equipped with a cut tape feature. To
temporarily override this feature for vehicles with
Automatic Tone Control (for one insertion), turn on the
ignition then turn the radio off and press and hold TAPE AUX until the tape symbol
flashes on the display, then
insert the cassette again. For vehicles without Automatic
Tone Control, press both SEEK arrows within five
seconds
of inserting the cassette with the ignition and
radio
off. Insert the cassette at least three times to ensure
thorough cleaning.
A scrubbing action cleaning cassette
is available through your GM dealership.
You may also choose a non-scrubbing action, wet-type
cleaner which uses a cassette with a fabric belt to clean
the tape head. This type of cleaning cassette will not
eject. It may not clean as thoroughly as the scrubbing
type cleaner.
The cassette tape player is able to detect a broken tape.
Some cleaning cassettes may appear as a broken tape.
If
the cleaning cassette is ejected immediately from the
tape player, follow these steps:
1. Turn the radio off.
2. Turn the ignition on.
3. Press and hold the TAPE-AUX button until the tape
symbol flashes.
4. Insert the cleaning cassette and the radio will turn on
in cassette mode.
5. Eject the tape after the tape player has been cleaned.
3-29
ProCarManuals.com
Page 206 of 433
Hard packed snow and ice offer the worst tire traction.
On these surfaces, it’s very easy to lose control. On wet
ice, for example, the traction is
so poor that you will
have difficulty accelerating. And if
you do get moving,
poor steering and difficult braking can cause you to slide
out of control. through.
Also, water that deep can damage your axle
and other vehicle parts.
If the water isn’t too deep, then drive through it slowly. At
fast speeds, water splashes on your ignition system and
your vehicle can stall. Stalling can
also occur if you get
your tailpipe under water. And, as long as your tailpipe
is
under water, you’ll never be able to start your engine.
When you
go through water, remember that when your
brakes get wet, it may take you longer to stop.
I
Driving on frozen lakes, ponds or rivers can be
dangerous. Underwater springs, currents under
the ice, or sudden thaws can weaken the ice. Your
vehicle could fall through the ice and you and
your passengers could drown. Drive your vehicle
on safe surfaces only.
Driving in Water
Light rain causes no special off-road driving problems.
But heavy rain can mean flash flooding, and flood
waters demand extreme caution.
Find out how deep the water is before you drive through
it. If it’s deep enough to cover your wheel hubs, axles or
exhaust pipe, don’t
try it -- you probably won’t get
A CAUTION:
Driving through rushing water can be dangerous.
Deep water can sweep your vehicle downstream
and you and your passengers could drown.
If it’s
only shallow water, it can still wash away the
ground from under your tires, and you could lose
traction and roll the vehicle over. Don’t drive
through rushing water.
See “Driving Through Water” in the Index for more
information on driving through water.
4-27
ProCarManuals.com
Page 216 of 433
A CAUTION:
If you don’t shift down, your brakes could get so
hot that they wouldn’t work well. You would then
have poor braking or even none going down
a hill.
You could crash. Shift down to let your engine
assist your brakes on
a steep downhill slope.
’ A CAUTION:
I
Coasting downhill in NEUTRAL (N) or with the
ignition
off is dangerous. Your brakes will have to
do all the work of slowing down. They could get so
hot that they wouldn’t work well. You would then
have poor braking
or even none going down a hill.
You could crash. Always have your engine running
and your vehicle
in gear when you go downhill.
Know how to go uphill. You may want to shift down
to a lower gear. The lower gears help cool your engine
and transmission, and you can climb the hill better.
Stay in your own lane when driving on two-lane
roads in hills or mountains. Don’t swing wide or cut
across the center of the road. Drive at speeds that let
you stay in your own lane.
As you go over the top of a hill, be alert. There could be
something in your lane, like a stalled car or an accident.
You may see highway signs on mountains that warn
of special problems. Examples
are long grades,
passing or no-passing zones, a falling rocks area
or winding roads. Be alert to these and take
appropriate action.
4-37
ProCarManuals.com
Page 235 of 433
To engage a PTO:
1. Turn the ignition off.
2. Set the parking brake.
3. Shift the transmission into NEUTRAL (N).
4. Engage the PTO.
NOTICE:
Using a PTO for more than four hours without
driving your vehicle
can damage the transfer case
or transmission.
If using a PTO for more than
four hours without driving your vehicle, drive
your vehicle for a while to allow the transfer case
and transmission to cool.
5. Start the vehicle. If you are going to drive the
vehicle, shift the transmission into the gear you
want. Then shift the transfer case into the range you
want (if you have four-wheel drive), apply the
regular brakes and release the parking brake.
Using a Transfer Case Mounted Power
Take-Off
1.
2.
3.
4.
5.
6.
7.
Set the parking brake.
Turn the ignition off.
Shift the transfer case into NEUTRAL
(N).
Shift the transmission into NEUTRAL (N).
Engage the PTO.
If you are going to drive the vehicle, shift the
transfer case into the range you want. Then apply the
regular brakes and release the parking brake.
Shift the transmission to THIRD
(3) to start the
Power Take-Off.
Release the regular brakes to drive the vehicle.
4-56
ProCarManuals.com
Page 241 of 433
3. Turn off the ignition on both vehicles. Unplug
unnecessary accessories plugged into the cigarette
lighter or accessory power outlets. Turn
off all lamps
that aren’t needed, and radios. This will avoid sparks
and help save both batteries. And
it could save
your radio!
NOTICE:
If you leave your radio on, it could be badly
damaged. The repairs wouldn’t be covered by
your warranty.
4. Open the hoods and locate the batteries. Find the
positive
(+> and negative (-) terminals on each battery.
~ If your vehicle has air conditioning, the auxiliary
electric fan under the hood can start up even
when the engine is not running and can injure
you. Keep hands, clothing and tools
away from
any underhood electric fan.
I
Using a match near a battery can cause battery
gas to explode. People have been hurt doing this,
and some have been blinded. Use
a flashlight if
you need more light.
Be sure the batteries have enough water.
You
don’t need to add water to the Delco Freedom@
battery (or batteries) installed in every new
GM
vehicle. But if a battery has filler caps, be sure
the right amount
of fluid is there. If it is low, add
water to take care of that first.
If you don’t,
explosive gas could be present.
Battery fluid contains acid that can burn you.
Don’t get it on you.
If you accidentally get it in
your eyes or on your skin, flush the place with
water and get medical help immediately.
5-4
ProCarManuals.com