1997 CHEVROLET MONTE CARLO ECU
[x] Cancel search: ECUPage 51 of 358

Downloaded from www.Manualslib.com manuals search engine Securing a Child Restraint in the Center
Rear Seat Position See the earlier part about the top strap if the child
restraint has one.
U
You’ll be using the lap belt.
A child in a child restraint in the center front seat
can be badly injured by the right front passenger
air bag if it inflates. Never secure a child restraint
in the center front seat. It’s always better to
secure a child restraint in the rear seat. You may,
however, secure a forward-facing child restraint
in the right front passenger seat, but only with
the seat moved all the way back.
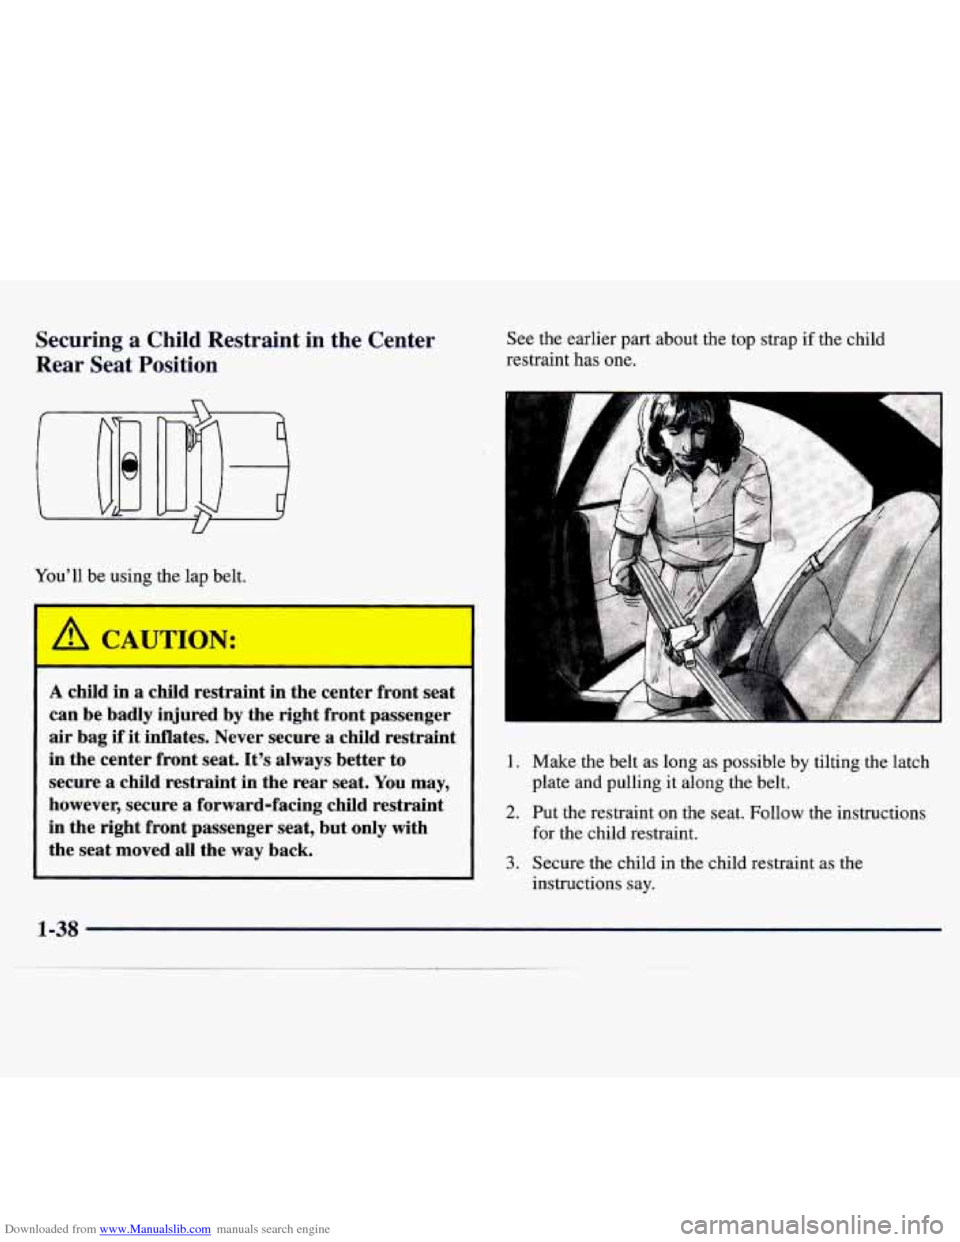
1. Make the belt as long as possible by tilting the latch
2. Put the restraint on the seat. Follow the instructions
plate and pulling
it along the belt.
for the child restraint.
3. Secure the child in the child restraint as the
instructions say.
1-38
Page 52 of 358

Downloaded from www.Manualslib.com manuals search engine 4. Run the vehicle’s safety belt through or around the
restraint. The child restraint instructions will show
you
how.
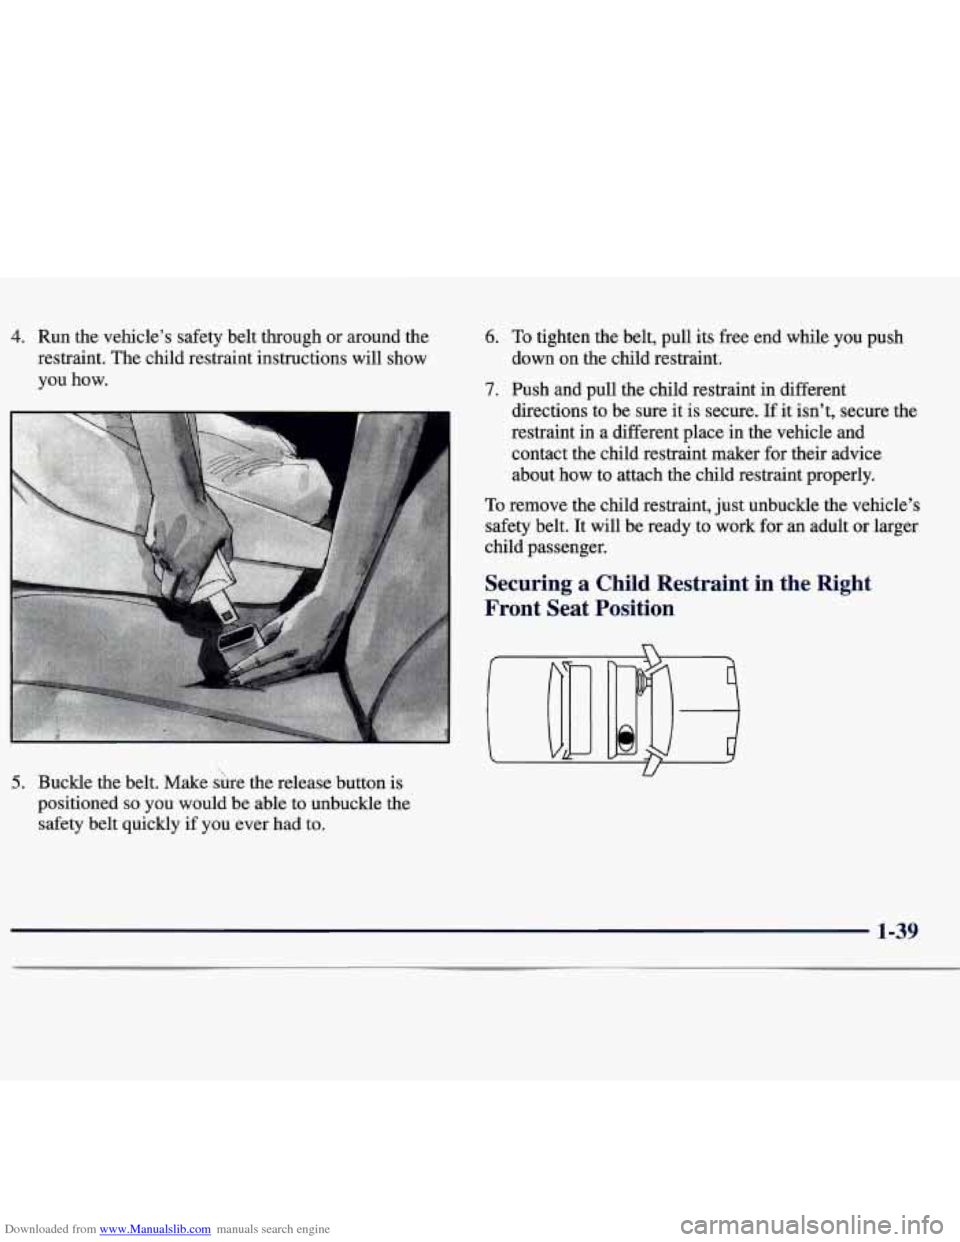
5. Buckle the belt. Make sure the release button is
positioned
so you would be able to unbuckle the
safety belt quickly if you ever had to.
6. To tighten the belt, pull its free end while you push
7. Push and pull the child restraint in different
down
on the child restraint.
directions to be sure it is secure. If it isn’t, secure the
restraint in a different place in the vehicle and
contact the child restraint maker for their advice
about how to attach the child restraint properly.
To remove the child restraint, just unbuckle the vehicle’s
safety belt. It will be ready to work for
an adult or larger
child passenger.
Securing a Child Restraint in the Right
Front Seat Position
U
1-39
Page 53 of 358

Downloaded from www.Manualslib.com manuals search engine Your vehicle has a right front passenger air bag. Never
put a rear-facing child restraint in this seat. Here’s why:
1 A CAUTION: I
I I
A child in a rear-facing child restraint can be
seriously injured if the right front passenger’s air
bag inflates. This
is because the back of a
rear-facing child restraint would be very close to
the inflating air bag. Always secure a rearfacing
child restraint in the rear seat.
You’ll be using the lap-shoulder belt. See the earlier part
about the top strap if the child restraint has
one.
1. Because your vehicle has a right front passenger air
bag, always move the seat as far back as it will go
before securing a forward-facing child restraint. (See
“Seats”
in the Index.)
2. Put the restraint on the seat. Follow the instructions
for the child restraint.
3. Secure the child in the child restraint as the
instructions say.
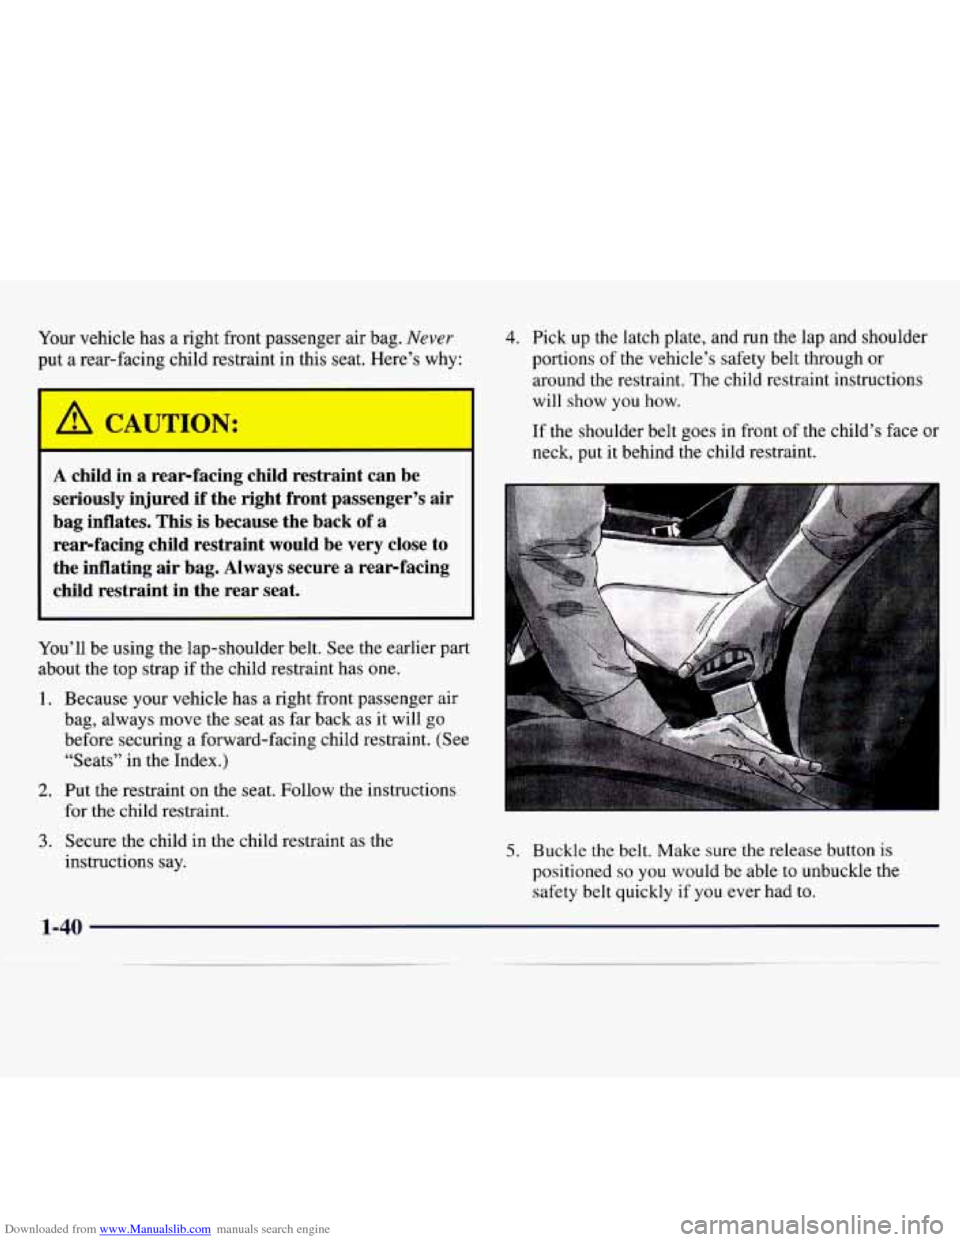
4. Pick up the latch plate, and run the lap and shoulder
portions
of the vehicle’s safety belt through or
around the restraint. The child restraint instructions
will show
you how.
If the shoulder belt goes in front
of the child’s face or
neck, put it behind the child restraint.
5. Buckle the belt. Make sure the release button is
positioned
so you would be able to unbuckle the
safety belt quickly if you ever had
to.
1-40
Page 54 of 358

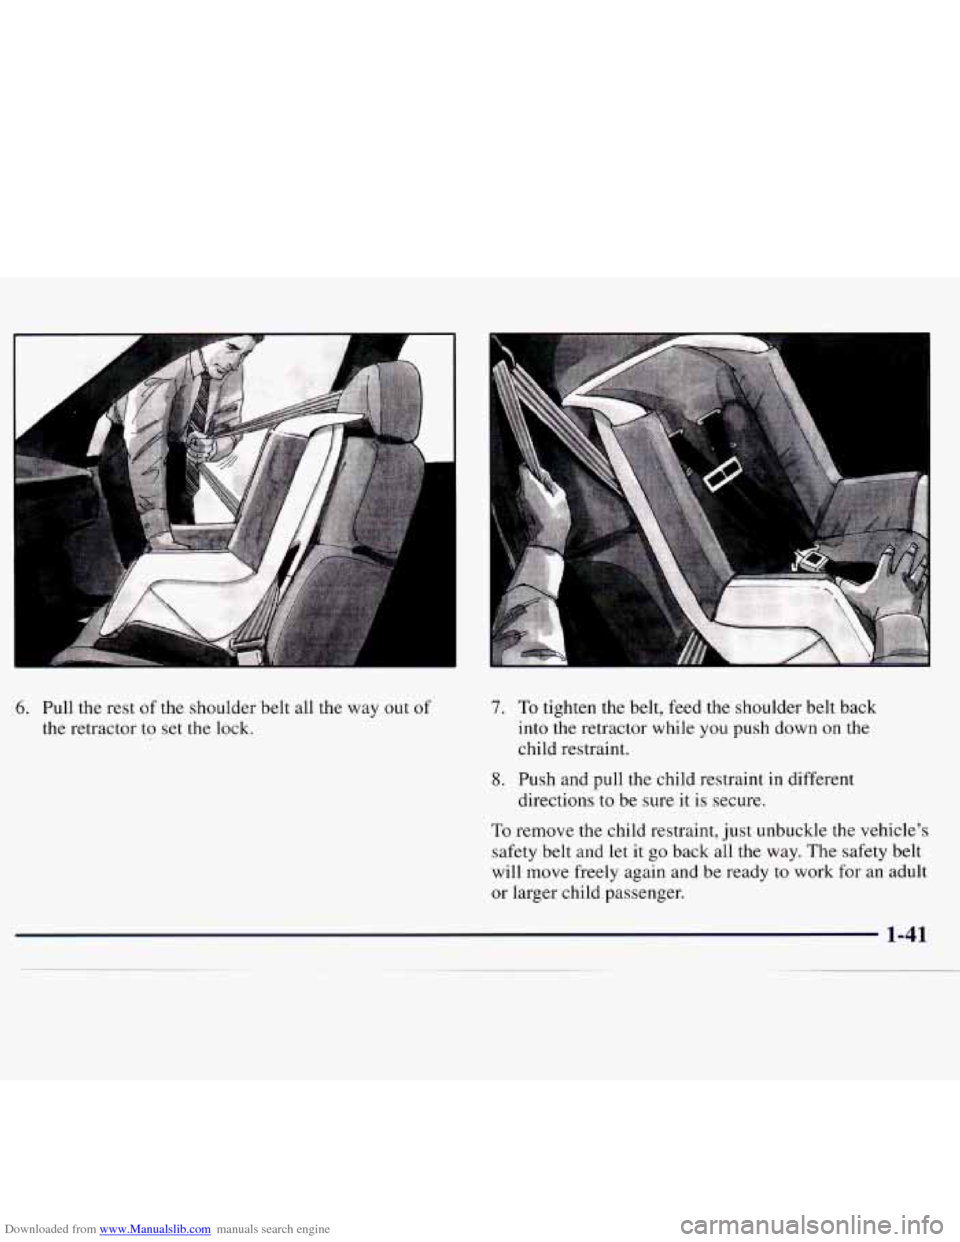
Downloaded from www.Manualslib.com manuals search engine 6. Pull the rest of the shoulder belt all the way out of
the retractor to set the lock.
7. To tighten the belt, feed the shoulder belt back
into the retractor while you push down on the
child restraint.
8. Push and pull the child restraint in different
directions to be sure it is secure.
To remove the child restraint, just unbuckle the vehicle’s
safety belt and let it
go back all the way. The safety belt
will move freely again and be ready to work for an adult
or larger child passenger.
Page 67 of 358

Downloaded from www.Manualslib.com manuals search engine Synchronization
Synchronization may be necessary due to the
security method used by this remote keyless entry
system. The transmitter does not send the same signal
twice to the receiver. The receiver will not respond to
a signal it has previously been sent; this prevents
someone from recording and playing back the signal
from the transmitter.
To resynchronize the transmitter with the receiver, do
the following: While standing close to your vehicle,
simultaneously press and hold the
LOCK and UNLOCK
buttons on the transmitter for about five seconds. The
door locks should cycle (lock and unlock) to confirm
synchronization. If the locks
do not cycle, see your
dealer for service.
Trunk
-
It can be dangerous to drive with the trunk lid
open because carbon monoxide (CO) gas can
come into your vehicle. You can’t see or smell
CO. It can cause unconsciousness and even death.
If you must drive with the trunk lid open or if
electrical wiring or other cable connections must
pass through the seal between the body and the
trunk lid:
Make sure all windows are shut.
nrn the fan on your heating or cooling
system to its highest speed with the setting
on
VENT. That will force outside air into
your vehicle. See “Comfort Controls’’ in
the Index.
instrument panel, open them all the way.
If you have air outlets on or under the
See “Engine Exhaust” in the Index.
Page 69 of 358

Downloaded from www.Manualslib.com manuals search engine Parking at Night
Park in a lighted spot, close all windows and lock your
vehicle. Remember to keep your valuables out
of sight.
Put them
in a storage area, or take them with you.
Parking Lots
If you park in a lot where someone will be watching
your vehicle, it’s best to lock it up and take your keys.
But what if you have to leave your ignition key? What
if
you have to leave something valuable in your vehicle?
0 Put your valuables in a storage area, like your trunk
or glove box.
0 Lock the glove box.
0 Lock all the doors except the driver’s.
Then take the door key and remote kevless entry
transmitter with you.
PASS-K@ 11
Your vehicle is equipped
with the PASS-Key I1
(Personalized Automotive
Security System)
theft-deterrent system.
PASS-Key I1
is a passive
theft-deterrent system. It
works when you insert
or
remove the key from
the ignition.
PASS-Key I1 uses a resistor pellet in the ignition key
that matches
a decoder in your vehicle.
Page 70 of 358

Downloaded from www.Manualslib.com manuals search engine When the PASS-Key 11 system senses that someone is
using the wrong key, it shuts down the vehicle’s starter
and fuel systems. For about three minutes, the starter
won’t work and fuel won’t go to the engine.
If someone
tries to start your vehicle again or uses another key
during this time, the vehicle will not start.
This
discourages someone from randomly trying different
keys with different resistor pellets in
an attempt to make
a match.
The ignition key must be clean and dry before, it’s
inserted in the ignition or the engine may not start. If the
engine does not start and the SECURITY light is on, the
key may be dirty or wet. Turn the ignition off.
Clean and
dry the key. Wait about three minutes and try
again. The SECURITY light may remain on during
this
time. If the starter still won’t work, and the key appears
to be clean and
dry, wait about three minutes and try
another ignition key. At
this time, you may also want to
check
the fuses (see “Fuses and Circuit Breakers” in the
Index). If the starter won’t work with the other key, your
vehicle needs service.
If your vehicle does start, the first
ignition key may be faulty. See your Chevrolet dealer or
a locksmith who can service the PASS-Key 11. If
you accidentally use a key that has a damaged or
missing resistor pellet, the starter won’t work and the
SECURITY light will come on. But you don’t have to
wait three minutes before trying another ignition key.
See your Chevrolet dealer or a locksmith who can
service the PASS-Key
I1 to have a new key made.
If you’re ever driving and the SECURITY light comes
on and stays on, you will be able to restart your engine
if
you turn it off. Your PASS-Key 11 system, however, is
not working properly and must be serviced by your
Chevrolet dealer. Your vehicle is not protected by the
PASS-Key
I1 system.
If you lose or damage a PASS-Key
I1 ignition key, see
your Chevrolet dealer or a locksmith who can service
PASS-Key I1 to have a new key made. In an emergency,
call the Chevrolet Roadside Assistance Center at
1-800-CHEV-USA (1-800-243-8872).
2-11
Page 117 of 358

Downloaded from www.Manualslib.com manuals search engine Change Oil Soon Light
CHG OIL
SOON
The CHANGE OIL
SOON light should come
on as a bulb check when
you start the engine. If this
light stays on for about
20 seconds after you turn
on the ignition, have the
oil changed.
Security Light
SECURITY
This light will come on
when you
turn the key to
START and stay on until the
vehicle starts. It will also
come on and stay on
if your
key is too dirty or wet for
the PASS-Key
I1 system to
read the resistor pellet.
When to change your oil also depends on driving habits
and conditions because they directly affect engine speed,
coolant temperature and vehicle speed. Because of this,
the CHANGE
OIL SOON light may come on as early as
2,000 miles (3,200 km) or less for harsh conditions.
Remember, after changing your engine oil, the system
must be reset; with the ignition key in the RUN position,
but the engine
off, fully push and release the accelerator
pedal three times within five seconds. If the CHANGE
OIL SOON light flashes two times, the system is reset.
However
if the light comes on and stays on for five
seconds, it did not reset. You’ll need
to reset the
system again. If the resistor pellet is
damaged or missing, the light
will flash.
If you’re driving and the light comes on and remains on,
your PASS-Key I1 system is not working properly. Your
vehicle is not protected by PASS-Key
11, and you should
see your dealer.