Page 6 of 386
Downloaded from www.Manualslib.com manuals search engine Vehicle Symbols
These are some of the symbols you may find on your vehicle.
For example, these symbols
are used on an
original battery:
POSSIBLE A
CAUTION
INJURY
PROTECT EYES BY
SHIELDING
CAUSTIC
BURNS
SPARK
OR ,\I/,
COULD FLAME
EXPLODE BATTERY
These symbols are important
for you and
your passengers
whenever your
vehicle is
driven:
UNLOCK Pa
FASTEN
SEAT
BELTS
These symbols
have to do with
your lamps:
SIGNALS e
TURN
RUNNING
* 0
DAYTIME . a
LAMPS .
FOG LAMPS # 0
These symbols
are on some
of
your controls:
WINDSHIELD
WIPER
WINDSHIELD DEFROSTER
VENTILATING FAN
These symbols
are used on
warning and
indicator lights:
COOLANT -
TEMP -
CHARGING BATTERY
SYSTEM
BRAKE
(a)
COOLANT a
ENGINE OIL e,
PRESSURE
ANTI-LOCK
(@)
BRAKES
Here are some
other symbols
you may see:
FUSE
P
LIGHTER -
HORN )tr
SPEAKER
b
FUEL m
Page 9 of 386
Downloaded from www.Manualslib.com manuals search engine Seats and Seat Controls
This part tells you about the seats -- how to adjust them,
take them out and put them back in. It also tells
you
about reclining front seatbacks.
Manual Front Seats
The buckets seats can be adjusted forward or rearward
with the lever at
the front of the seat.
To adjust the seat, pull the lever up to release the seat
bottom
and slide the seat where you want it. Then
release the lever and try to move the seat with your
body, to make sure the seat is locked into place.
You can lose control of the vehicle if you try to
adjust
a manual driver’s seat while the vehicle is
moving. The sudden movement could startle and
confuse you, or make you push
a pedal when you
don’t want to. Adjust the driver’s seat only when
the vehicle
is not moving.
Page 10 of 386

Downloaded from www.Manualslib.com manuals search engine Power Seat (Option)
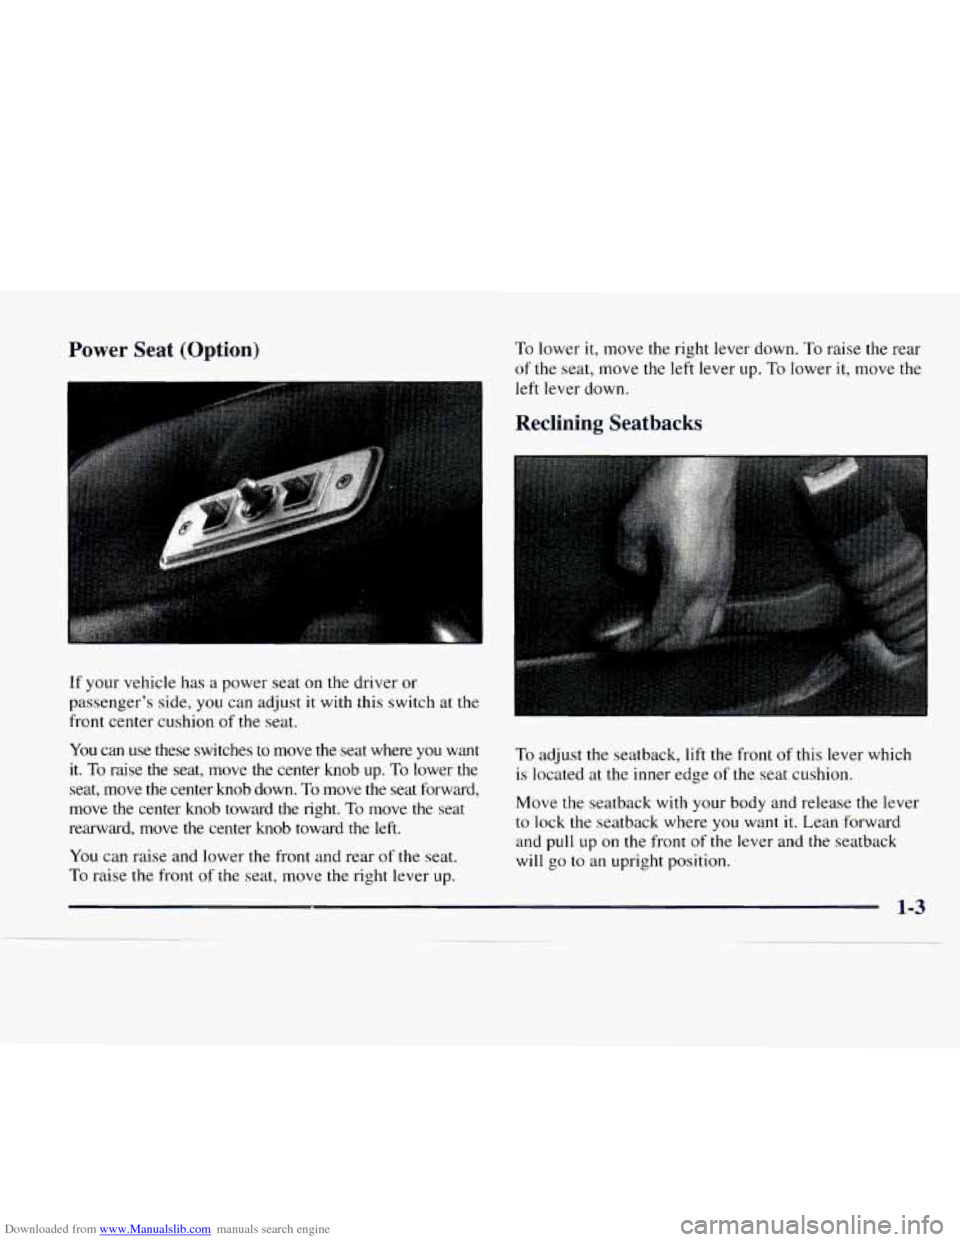
If your vehicle has a power seat on the driver or
passenger’s side, you can adjust it with this switch at the
front center cushion of the seat.
You can use these switches to move the seat where
you want
it.
To raise the seat, move the center knob up. To lower the
seat, move the center knob down.
To move the seat forward,
move the center knob toward
the right. To move the seat
rearward, move
the center knob toward the left.
You can raise and lower the front and rear of the seat.
To raise the front of the seat, move the right lever up.
To lower it, move the right lever down. To raise the rear
of the seat, move the left lever up. To lower it, move the
left lever down.
Reclining Seatbacks
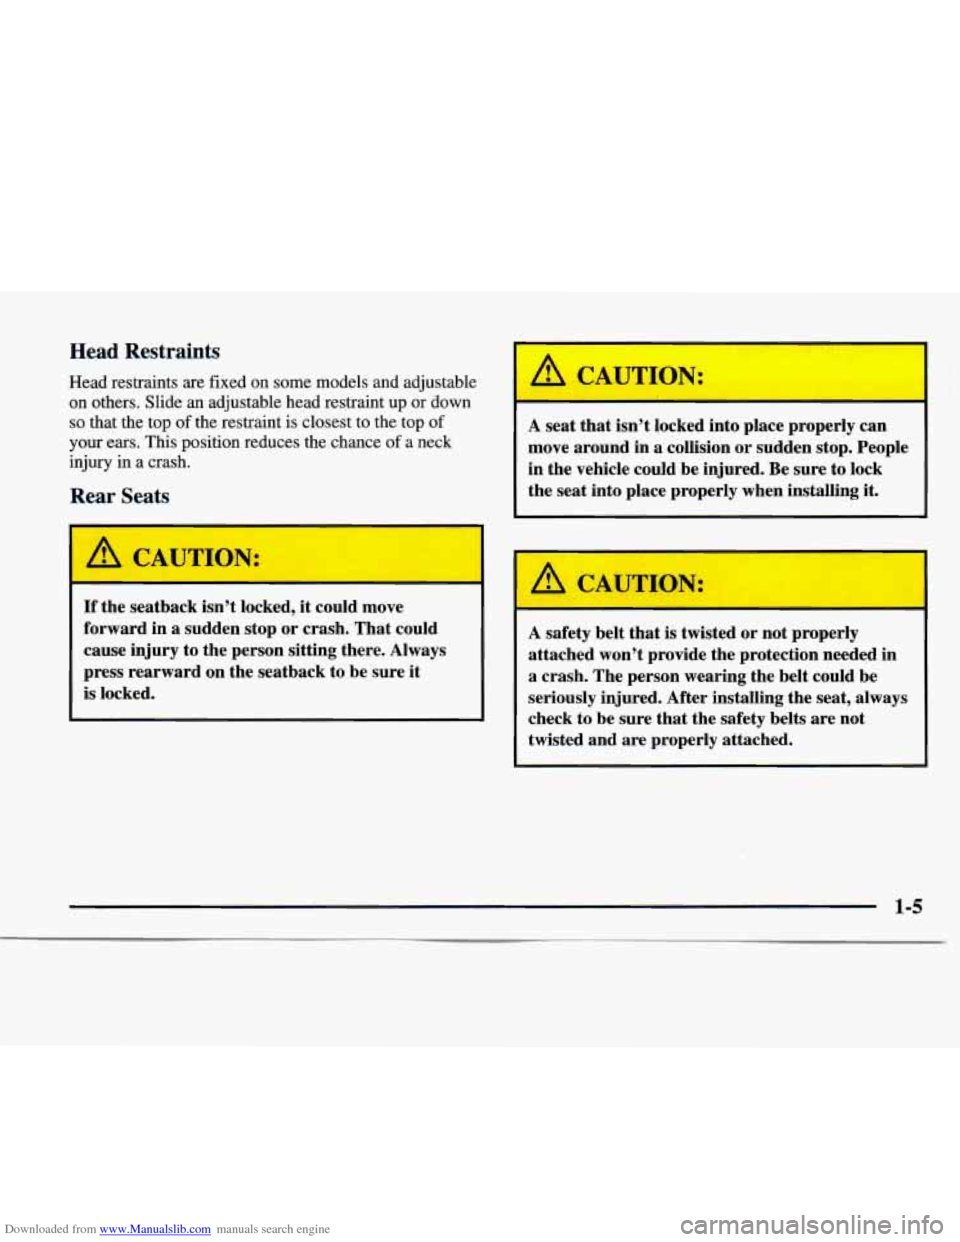
To adjust the seatback, lift the front of this lever which
is located at the inner edge
of the seat cushion.
Move the seatback with your body and release the lever
to lock the seatback where
you want it. Lean forward
and pull
up on the front of the lever and the seatback
will go to an upright position.
Page 12 of 386

Downloaded from www.Manualslib.com manuals search engine Head Restraints
Head restraints are fixed on some models and adjustable on others. Slide
an adjustable head restraint up or down
so that the top of the restraint is closest to the top of
your ears. This position reduces the chance of a neck
injury in a crash.
Rear Seats
I A CAUTION:
If the seatback isn’t locked, it could move
forward
in a sudden stop or crash. That could
cause injury to the person sitting there. Always
press rearward on the seatback to be sure it
is locked.
A CAUTION:
-
A seat that isn’t locked into place properly can
move around in
a collision or sudden stop. People
in the vehicle could be injured. Be sure to lock
the seat into place properly when installing it.
A CAUTION:
A safety belt that is twisted or not properly
attached won’t provide the protection needed in
a crash. The person wearing the belt could be
seriously injured. After installing the seat, always
check to
be sure that the safety belts are not
twisted and are properly attached.
Page 14 of 386
Downloaded from www.Manualslib.com manuals search engine 3. Locate the red handle on the inboard side of the seat
base, rotate the red handle
up.
4. Once the red handle is rotated up, pull the handle
to remove the
locking pin.
5. Stow the locking pin on the rear of the seat base
in the hole that is provided.
6. Repeat this procedure for the pin on the other
seat base.
7. Remove the seat from the vehicle.
8. Install the trim covers to the floor rails.
Page 15 of 386
Downloaded from www.Manualslib.com manuals search engine 9. Stow the seat belt latch plate on the clip at the
window trim.
Replacing the Rear Seat
1. Remove the trim covers from the floor rails.
2. Position the seat into the open slots in both rails.
Push the seat forward in the rail, hooking both seat
bases onto the pins inside
of the rails.
3. Both locking pins that lock the seat into place must
be installed before operating the vehicle.
4. To install the locking pin at the rear of the seat base,
pull the carpetlmat flap back on the inboard side
to
locate the hole in the rail for the pin.
5. Remove the pin from its stowed position on the seat
base while holding the carpevmat flap back.
Page 16 of 386
Downloaded from www.Manualslib.com manuals search engine 6. Insert the red handled locking pin into the seat base. 7. Rotate the red handle down until it is in the
retaining clip.
8. Replace the carpet/mat flap to its original position.
9. Repeat this procedure for the other seat base.
10. Connect the quick release latch plates for the lap
shoulder belts by inserting
the latch plates into the
buckles attached at the outboard positions
of the
bench seat. Do not twist the belt.
Page 22 of 386

Downloaded from www.Manualslib.com manuals search engine @’ If I’m a good driver, and I never drive far from
home,
why should I wear safety belts?
A: You may be an excellent driver, but if you’re in an
accident
-- even one that isn’t your fault -- you and
your passengers can be hurt. Being
a good driver
doesn’t protect you from things beyond your
control, such as bad drivers.
Most accidents occur within
25 miles (40 km) of
home. And the greatest number of serious injuries and deaths occur at speeds
of less than 40 mph
(65 km/h).
Safety belts are for everyone.
How to Wear Safety Belts Properly
Adults
This part is only for people of adult size. Be aware that there are special things to
know about safety
belts and children. And there are different rules for smaller
children and babies. If a child will be riding
in your
vehicle, see the part
of this manual called “Children.”
Follow those rules for everyone’s protection.
First,
you’ll want to know which restraint systems your
vehicle has.
We’ll start with the driver position.
Driver Position
This part describes the driver’s restraint system.
Lap-Shoulder Belt
The driver has a lap-shoulder belt. Here’s how to wear it properly.
1. Close and lock the door.
2. Adjust the seat (to see how, see “Seats” in the Index)
so you can sit up straight.