1997 CHEVROLET CAMARO trunk
[x] Cancel search: trunkPage 58 of 404

Downloaded from www.Manualslib.com manuals search engine Operation Alarmanic Mode
The driver’s door will unlock automatically when
UNLOCK is pressed. If UNLOCK is pressed again
within five seconds, the passenger door will also unlock.
All doors will lock when LOCK is pressed.
The hatch will unlock when the button with the trunk
symbol is pressed twice within five seconds, as long as
the ignition is turned to the
OFF position. If the ignition
is on, the trunk button will only work if the transmission
is in PARK (P) for an automatic transmission, or if the
parking brake
is set on a manual transmission.
The system will turn on the interior lamps for about
40 seconds (or until the ignition switch is turned to the
RUN position), when you unlock
the doors or hatch.
The interior lamps will
go off when you lock the doors.
Operating the Remote Keyless Entry transmitter may
interact with the Vehicle and Content
Theft-DeterrenUAlarm System (if you have this option).
See “Vehicle and Content Theft-DeterrenVAlarm
System” in the Index. If
your vehicle is equipped with the Vehicle and Content
Theft-DeterrenVAlarm System, you will have a fourth
button
on your transmitter. This button is the panic
button. If you are involved in a panic situation, press
this button and your vehicle’s horn will sound and the
headlamps will flash. This will draw needed attention to
you and your vehicle. To turn this feature off, either
push the panic button again or turn the ignition
to the
RUN position. Note:
This feature will not work if your
ignition is on or if the transmitter is
30 feet (9 m) or
more away from your vehicle.
Wansmitter Range
The range of your Remote Keyless Entry system should
be about
3 feet (1 m) up to 30 feet (9 m). At times you
may notice a decrease in the range. This is normal for
the Remote Keyless Entry system. If the transmitter
does not work, or you have
to stand closer to your
vehicle for the transmitter to work:
You may have to replace the battery in your transmitter.
See the instructions for battery replacement.
0 You may be too far from your vehicle. Check your
distance. You may have
to stand closer to your
vehicle in rain or snow.
2-8
Page 63 of 404

Downloaded from www.Manualslib.com manuals search engine When you park your Chevrolet and open the driver’s
key from the ignition and take it with you. Always do
NOTICE: door, you’ll hear a chime reminding you to remove your
If you put things in the hatchback area, be sure
they won’t break the glass when you close it.
Never
slam the hatch down. You could break the
glass or damage the defogger grid (if equipped).
this. Your steering wheel will be locked, and so will
your ignition. If you have an automatic transmission,
taking your
key out also locks your transmission. And
remember
to lock the doors.
I I Parking at Night
On vehicles with the Vehicle and Content
Theft-DeterrenUAlarm System: The hatch switch will
not work while the system
is armed. See “Vehicle and
Content Theft-DeterrendAlarm System” in the Index.
Theft
Vehicle theft is big business, especially in some cities.
Although your Chevrolet
has a number of theft-deterrent
features, we know that nothing we put
on it can make it
impossible
to steal. However, there are ways you can help.
Key in the Ignition
If you leave your vehicle with the keys inside, it’s an
easy target for
joy riders or professional thieves -- so
don’t do it. Park
in a lighted spot, close all windows and lock your
vehicle. Remember to keep your valuables
out of sight.
Put them in a storage area, or take them with
you.
Parking Lots
If you park in a lot where someone will be watching
your vehicle, it’s best to lock
it up and take your keys.
But what if you have to leave your ignition key? What
if
you have to leave something valuable in your vehicle?
0 Put your valuables in a storage area, like your trunk
or glove box.
0 Lock the glove box.
@ Lock all the doors except the driver’s.
Then take the
door key with you.
2-13
Page 66 of 404

Downloaded from www.Manualslib.com manuals search engine Passive Arming
If the ignition was just turned off and a door was
opened, the system will arm
six seconds after all doors
are closed, whether or not you lock them. In all other
cases, the
system will wait 30 seconds after all doors are
closed before arming, allowing you time to get into the
vehicle and put the key in the ignition. The parking
lamps will flash when the system arms. Passive arming
is not enabled from the factory.
Disarming the System
There are two ways to disarm the system:
1. Press the UNLOCK button on the key chain transmitter.
If the horn chirps two or three times when you unlock the
car, the alarm sounded in your absence. Two chirps
means that the shock sensor was set
off and three chirps
means that a door
or the hatch was opened.
2. Turn the ignition to the RUN position with the
proper key.
For more information on customizing the features
mentioned here, see “Feature Customization”
in the Index.
lhrning Off the Alarm
If you started the alarm by pressing the panic button on
the key chain transmitter, you must either push that button again or
turn the ignition switch to the ON
position
to stop the alarm.
If the alarm is sounding due
to the shock sensor or a
door or hatch opening, it can be turned off by either
turning the ignition switch with a proper key inserted or
by pressing any button
on the key chain transmitter. If
you use your key chain transmitter to silence the alarm,
additional things will happen depending upon which
button
you press.
0
0
0
0
Pressing the UNLOCK button will turn the alarm
off, unlock the driver’s door and disarm the system.
Pressing the
LOCK button will turn the alarm off,
keep the doors locked and keep the system armed.
Pressing the trunk symbol button twice within five
seconds will turn the alarm off and will unlock and
disarm the hatch only.
Pressing the panic button will turn the alarm off,
keep the doors locked and keep the system armed.
If the alarm is sounding because an incorrect ignition
key was used, press any button on the key chain
transmitter
to turn the alarm off.
The alarm will stop by itself after two minutes.
2-16
Page 120 of 404

Downloaded from www.Manualslib.com manuals search engine Installing the Boot Cover
After lowering the convertible top, you’ll want to install
the boot cover. The three-piece boot cover is stored in a
bag
in the trunk.
3. Be sure no one or nothing is on or around the top.
Push and hold
DOWN or on the convertible top
switch.
The switch is on the console near the cigarette
lighter. The top will automatically lower into the
storage area.
1. Open the trunk and remove the two side covers from
the storage bag.
2. Install the two side covers by engaging the tab
into the front seatbelt cover. Lower the covers onto
the vehicle.
2-70
Page 121 of 404

Downloaded from www.Manualslib.com manuals search engine Raising Your Convertible Top
1. Park on a level surface. Set the parking brake firmly.
If you have an automatic transmission, shift into
PARK (P).
If you have a manual transmission, shift
into REVERSE
(R). The ignition must be in the
ACC
or RUN position or RAP must be on. Then
lower both sun visors and lower both windows at
least
3 inches (8 cm). If the boot cover is in place, it
must be removed first.
3. Install the middle secuon of the cover by sliding the
tabs into the slots on the right side cover. Lower the
cover and engage the latch.
4. Close the trunk.
2. Open the trunk. Remove the middle piece of the cover
by pushing in on the latch and lifting up on the cover.
2-71
Page 122 of 404

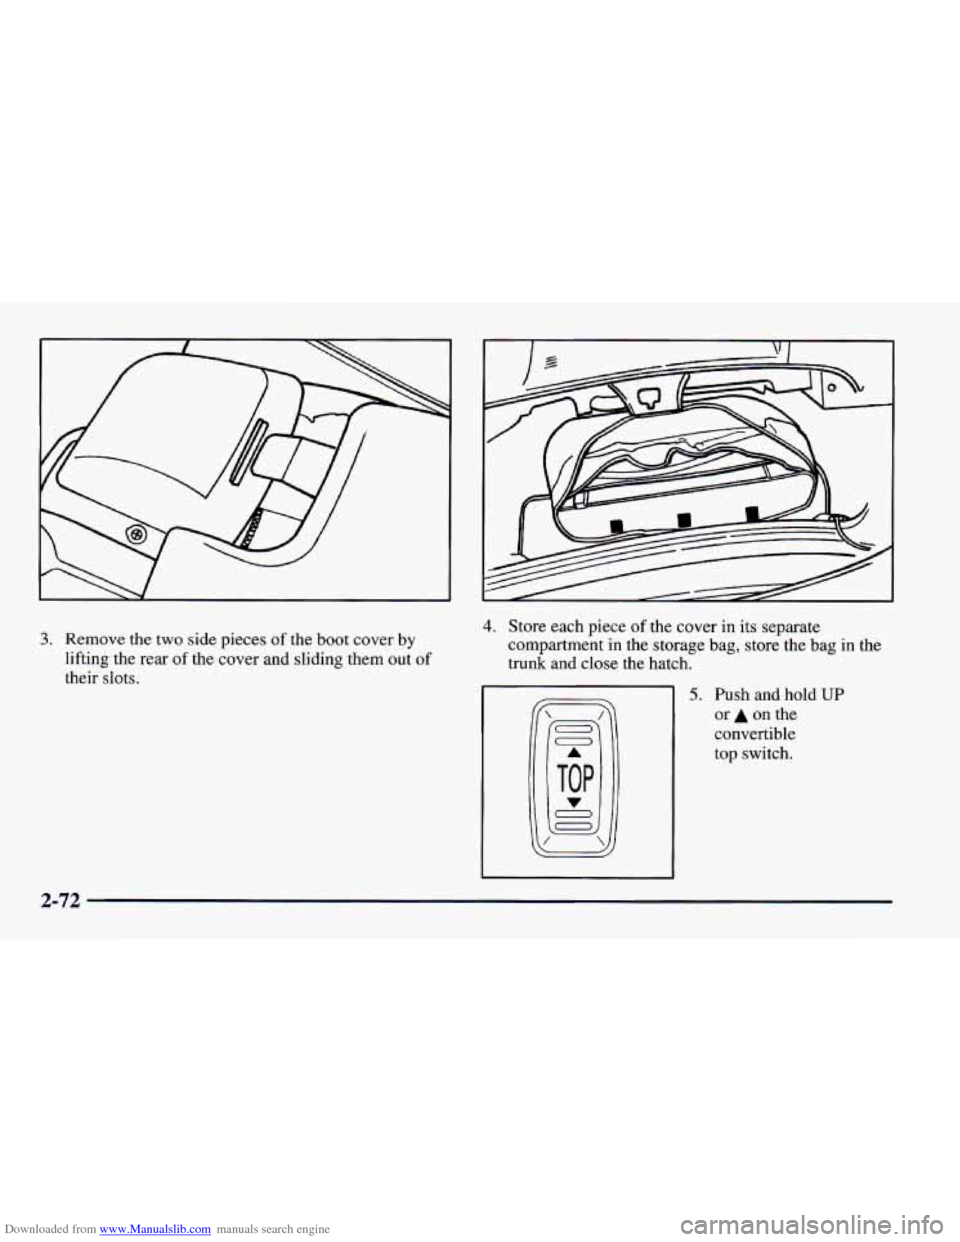
Downloaded from www.Manualslib.com manuals search engine 3. Remove the two side pieces of the boot cover by
lifting the rear
of the cover and sliding them out of
their slots.
r
4. Store each piece of the cover in its separate
compartment in the storage bag, store the bag in the
trunk and close the hatch.
5. Push and hold UP
or A on the
convertible top switch.
2-72
Page 123 of 404

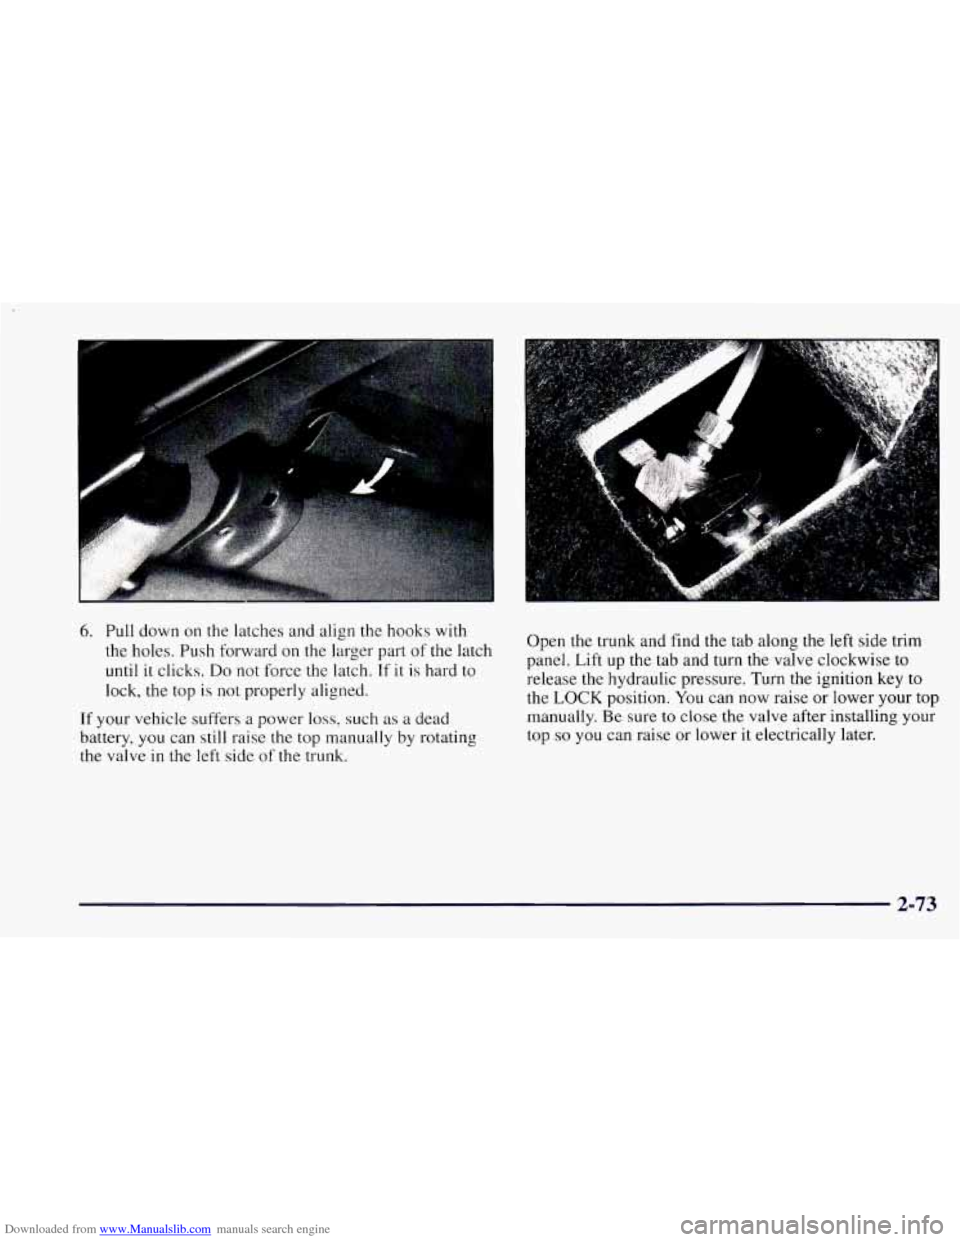
Downloaded from www.Manualslib.com manuals search engine 6. Pull down on the latches and align the hooks with
the holes. Push forward on the larger part of the latch
until it clicks.
Do not force the latch. If it is hard to
lock, the top is not properly aligned.
If your vehicle suffers a power loss, such as a dead
battery, you can still raise
the top manually by rotating
the valve in the left side of the trunk. Open the trunk and
find
the tab along the left side trim
panel. Lift up the tab and turn the valve clockwise to
release the hydraulic pressure. Turn the ignition key to
the LOCK position. You can now raise or lower your
top
manually. Be sure to close the valve after installing your
top
so you can raise or lower it electrically later.
2-73
Page 153 of 404

Downloaded from www.Manualslib.com manuals search engine AM-FM: Press this button to play me radio when a tape
is in the player.
TAPE AUX: Press this button to change to the tape
function when the radio
is on. The tape symbol with an
arrow will appear
on the display when the tape is active.
If your system is equipped with a remote playback
device, pressing this button a second time will allow the
remote device
to play.
EJECT: Press this button to remove the tape. The
radio will play. EJECT may be activated with either the
ignition or radio off. Cassettes may be loaded with the
radio
off if this button is pressed first.
CLN: If this message appears on the display, the
cassette tape player needs to be cleaned. It will still play
tapes, but you should clean it as soon
as possible to
prevent damage to the tapes and player. See “Care of
Your Cassette Tape Player” in the Index. After
you clean
the player, press and hold EJECT for five seconds
to
reset the CLN indicator. The radio will display --- to
show the indicator was reset.
CD Adapter Kits
It is possible to use a CD adapter kit with your cassette
tape player after activating
the bypass feature on your
tape player. To
activate the bypass feature, the ignition must be
on.
Turn your radio off. Press TAPE AUX and hold for three
seconds. After three seconds, the tape symbol on the
display will flash for two seconds indicating the feature is
active.
Turn the radio on and insert the adapter.
This override feature will remain active until EJECT
is pressed.
Trunk Mounted CD Changer
With the optional compact disc changer, you can play up
to 12 discs continuously. Normal size discs may be
played using the trays supplied
in the magazine. The
small discs
(8 cm) can be played only with specially
designed trays.
NOTICE:
Objects in the trunk which may shift or slide
during driving could damage your
CD changer.
Protect your
CD changer by using the
convenience net whenever possible. Place large
objects in the trunk appropriately
so that they
will not come into contact with the
CD changer.
3-13