1997 BUICK REGAL manual radio set
[x] Cancel search: manual radio setPage 85 of 422
Press and hold the power door unlock switch. While
holding the door unlock switch, cycle the transmission
out of and back into
PARK (P). After an initial
transmission cycle, each additional cycle will toggle
the enable/disable state
of the Delayed Locking
function. During this procedure, the chime will sound,
providing you with feedback.
A single chime will be
heard if the Delayed Locking function is disabled and
two chimes will be heard if the function is enabled.
When the door unlock switch is released, the vehicle
will remain in the most recent operating mode.
The Delayed Locking function will be enabled when
your vehicle is shipped from the factory.
Disconnecting the vehicle battery for up
to a year will
not change the programmed mode of the Delayed
Locking function.
Leaving Your Vehicle
If you are leaving the vehicle, take your keys, open your
door and set the locks from inside. Then get out and
close the door. (Also see “Delayed Locking” in this
section for more information.)
Remote Keyless Entry
You can lock and unlock your doors or unlock your
trunk from about
3 feet (1 m) up to 30 feet (9 m) away
using the remote keyless entry transmitter supplied with
your vehicle.
Your remote keyless entry system operates on
a radio
frequency subject to Federal Communications Commission (FCC) Rules and with Industry and
Science Canada.
This device complies with Part 15 of the FCC Rules.
Operation is subject
to the following two conditions:
(1) this device may not cause harmful interference, and
(2) this device must accept any interference received,
including interference that may cause undesired
operation.
This device complies with RSS-210
of Industry and
Science Canada. Operation is subject
to the following
two conditions:
(1) this device may not cause
interference, and
(2) this device must accept any
interference received, including interference that may
cause undesired operation
of the device.
Changes or modifications
to this system by other than an
authorized service facility could void authorization to
use this equipment.
ProCarManuals.com
Page 157 of 422
Section 3 Comfort Controls and Audio Systems
In this section, you’ll find out how to operate the comfort control and audio systems offered with your Buick. Be sure
to read about the particular systems supplied with your vehicle.
3-2
3-2
3 -4
3-7
3-10
3-1
1
3-12
3-12
3-13
3-
15
3-18 Comfort Controls
Manual Single Zone Climate Control
Dual ComforTemp Climate Control
Dual Automatic ComforTemp Climate Control
Ventilation System
Rear Window Defogger
Audio Systems
Setting
the Clock
AM-FM Stereo
AM-FM Stereo with Cassette Tape Player
AM-FM Stereo with Cassette Tape Player and
Automatic Tone Control 3-22
3-26
3-3
1
3-33
3-34
3-34
3-35
3-36
3-36
3-37 AM-FM
Stereo with Compact Disc Player and
Automatic Tone Control AM-FM Stereo with Cassette Tape and
Compact Disc Player with Automatic
Tone Control
Theft-Deterrent Feature
Audio Steering Wheel Controls
Understanding Radio Reception
Tips About Your Audio System
Care of Your Cassette Tape Player
Care of Your Compact Discs
Fixed Mast Antenna
Backglass Antenna
ProCarManuals.com
Page 170 of 422
PUSHBUTTONS: The six numbered pushbuttons let
you return to your favorite stations. You can set up to
18 stations (six AM, six
FM1 and six FM2). Just:
1.
2.
3.
4.
5.
Turn the radio on.
Press the AM-FM button to select the band.
Tune in the desired station. Press and hold one of the six numbered buttons. The
sound will mute. When it returns, release the button.
Whenever you press that numbered button, the
station you set will return.
Repeat the steps for each pushbutton.
P SCAN: Press this button to listen to each of your
preset stations for a few seconds. The radio will
go to
the first preset station, stop for a few seconds, then go
on to the next preset station. Press
P SCAN again to stop
scanning. The radio will not stop at a preset station if the
station is weak.
Setting the Tone
BASS:
Press this knob lightly so it extends. Turn the
knob to increase or decrease bass.
TREB: Press this knob lightly so it extends. Turn the
knob to increase or decrease treble. If a station is weak
or noisy,
you may want to decrease the treble.
Push these knobs back into their stored positions when
you’re not using them.
Adjusting the Speakers
BAL:
Turn the control behind the upper knob to move
the sound to the
left or right speakers. The middle
position balances the sound between the speakers.
FADE: Turn the control behind the lower knob to move
the sound to
the front or rear speakers. The middle
position balances the sound between the speakers.
3-14
ProCarManuals.com
Page 171 of 422
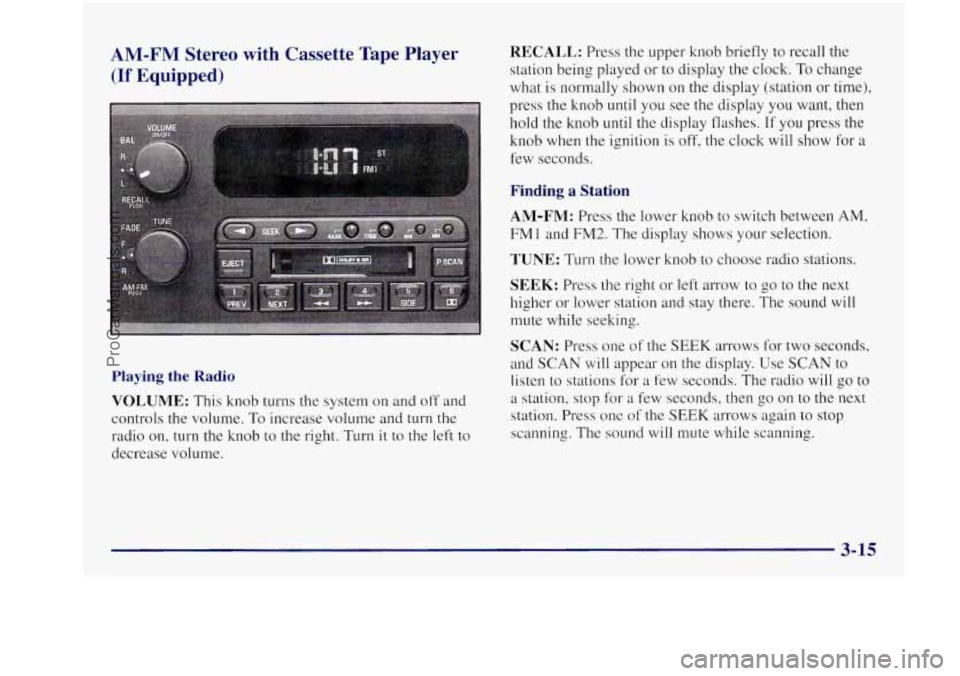
AM-FM Stereo with Cassette Tape Player RECALL: Press the upper knob briefly to recall the
(If Equipped) station being played or to display the clock. To change
what is normally shown on the display (station or time),
press the knob
until you see the display you want, then
hold the knob until the display flashes. If you press the
knob
when the ignition is off, the clock will show for a
few seconds.
Finding a Station
AM-FM: Press the lower knob to switch between AM,
FMl and FM2. The display shows your selection.
TUNE: Turn the lower knob to choose radio stations,
Playing the Radio
VOLUME: This knob turns the system on and off and
controls the volume.
To increase volume and turn the
radio on, turn the knob to the right. Turn
it to the left to
decrease volume.
SEEK: Press the right or left arrow to go to the next
higher
or lower station and stay there. The sound will
mute while seeking.
SCAN: Press one of the SEEK arrows for two seconds,
and
SCAN will appear on the display. Use SCAN to
listen
to stations for a few seconds. The radio will go to
a station, stop for a few seconds, then go on to the next
station. Press one
of the SEEK arrows again to stop
scanning. The sound will mute while scanning.
3-15
__
ProCarManuals.com
Page 172 of 422
PUSHBUTTONS: The six numbered pushbuttons let
you return to your favorite stations. You can set up to
18 stations (six AM, six FMl and six FM2). Just:
1. Turn the radio on.
2. Press AM-FM to select the band.
3. Tune in the desired station.
4. Press and hold one of the six numbered buttons. The
sound will mute. When it returns, release the button.
Whenever you press that numbered button, the
station you set will return.
5. Repeat the steps for each pushbutton.
P SCAN: Press this button to listen to each of your
preset stations for
a few seconds. The radio will go to
the first preset station, stop for
a few seconds, then go
on to the next preset station. Press P SCAN again to stop
scanning.
The radio will not stop at a preset if the station
is weak.
Setting the Tone
BASS: Press this knob lightly so it extends. Turn the
knob to increase or decrease bass.
TREB: Press this knob lightly so it extends. Turn the
knob to increase or decrease treble.
If a station is weak
or noisy, you may want to decrease the treble.
Push these knobs back into their stored positions when
you’re not using them.
Adjusting the Speakers
BAL: Turn the control behind the upper knob to move
the sound to the
left or right speakers. The middle
position balances the sound between the speakers.
FADE: Turn the control behind the lower knob to move
the sound to
the front or rear speakers. The middle
position balances the sound between the speakers.
Playing a Cassette Tape
The longer side with the tape visible should face to the
right.
If the ignition and the radio are on, the tape can be
inserted and will begin playing.
If you hear nothing or
hear a garbled sound, the tape may not be in squarely.
Press
EJECT to remove the tape and start over.
3-16
ProCarManuals.com
Page 173 of 422
While the tape is playing, use the VOLUME, FADE,
BAL, BASS and TREB controls just as you do for the
radio. Other controls may have different functions when
a tape is inserted. The display will show an arrow to
show which side of the tape is playing.
If you want to insert
a tape when the ignition or radio is
off, first press EJECT or RECALL. Note that the
cassette tape adapter kits for portable compact disc
players will work in your cassette tape player.
Your tape bias is set automatically.
If
E and a number appear on the radio display, the tape
won’t play because
of an error.
E10: The tape is tight and the player can’t turn the
tape hubs. Remove the tape. Hold the tape with the
open end down and try to turn the right hub to the
left with a pencil. Turn the tape over and repeat.
If
the hubs do not turn easily, your tape may be
damaged and should not be used in the player.
Try a new tape to make sure your player is
working properly.
Ell: The tape is broken. Try a new tape. If
any error occurs repeatedly or if an error can’t be
corrected, please contact your dealer. If your radio
displays an error number, write it down and provide it to
your dealer when reporting the problem.
PREV (1): Press this button to search for the previous
selection on the tape. Your tape must have at least three
seconds of silence between each selection for PREV to
work. The sound will mute while seeking.
NEXT (2): Press this button to search for the next
selection on the tape. Your tape must have at least three
seconds of silence between each selection for NEXT to
work. The sound will mute while seeking.
The
SEEK left and right arrows will also find the
previous and next selections on the tape.
44 (3): Press this button to reverse the tape rapidly.
Press it again to return to playing speed. The radio will
play while the tape reverses.
bb (4): Press this button to advance quickly to
another part of the tape. Press the button again to
return to playing speed. The radio will play while the
tape advances.
ProCarManuals.com
Page 174 of 422
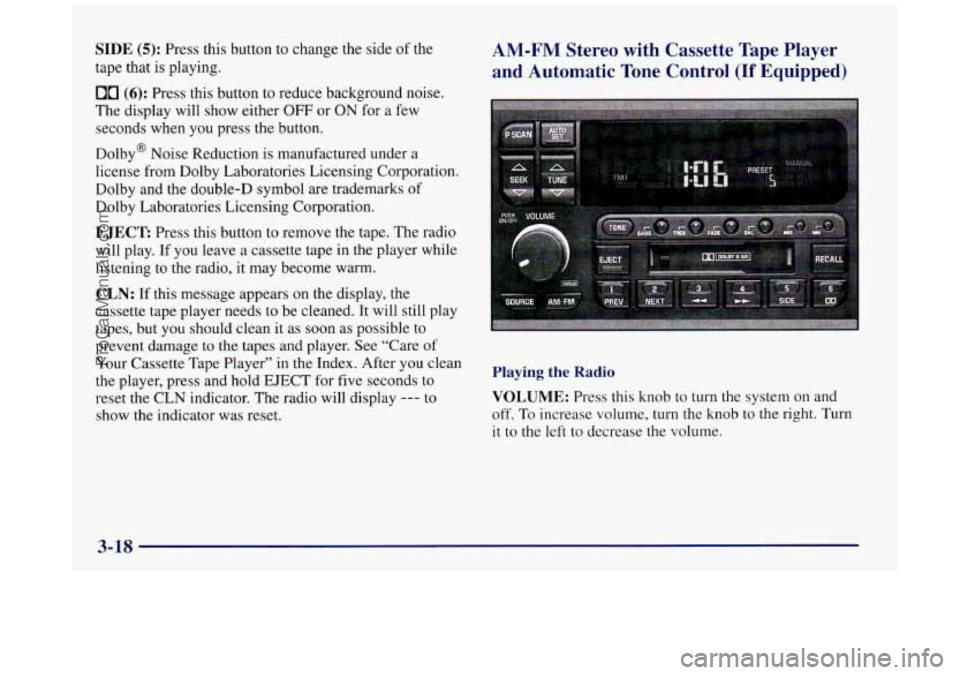
SIDE (5): Press this button to change the side of the
tape that is playing.
00 (6): Press this button to reduce background noise.
The display will show either
OFF or ON for a few
seconds when you press the button.
Dolby@ Noise Reduction is manufactured under a
license from Dolby Laboratories Licensing Corporation.
Dolby and the double-D symbol are trademarks
of
Dolby Laboratories Licensing Corporation.
EJECT Press this button to remove the tape. The radio
will play. If you leave a cassette tape in the player while
listening to the radio, it may become warm.
AM-FM Stereo with Cassette Tape Player
and Automatic Tone Control
(If Equipped)
I
CLN: If this message appears on the display, the
cassette tape player needs to be cleaned. It will still play
tapes, but you should clean it as soon as possible
to
prevent damage to the tapes and player. See “Care of
Your Cassette Tape Player” in the Index. After you clean
the player, press and hold EJECT for five seconds to
reset
the CLN indicator. The radio will display --- to VOLUME: Press this knob to turn the system on and
show the indicator was reset. off.
To increase volume, turn the knob to the right. Turn
Playing the Radio
it to the left to decrease the volume.
I
3-18
ProCarManuals.com
Page 175 of 422
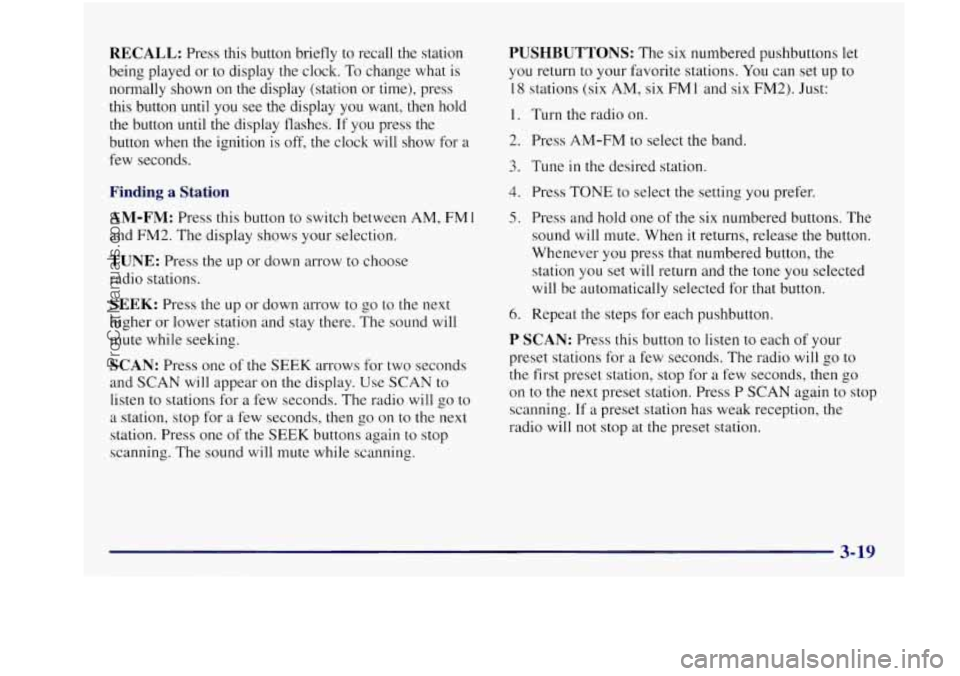
RECALL: Press this button briefly to recall the station
being played or to display the clock.
To change what is
normally shown on the display (station or
time), press
this button until you see the display you want, then hold
the button
until the display flashes. If you press the
button when the ignition is off, the clock will show for
a
few seconds.
Finding a Station
AM-FM: Press this button to switch between AM, FM1
and FM2. The display shows your selection.
TUNE: Press the up or down arrow to choose
radio stations.
SEEK: Press the up or down arrow to go to the next
higher or lower station and stay there. The sound will
mute while seeking.
SCAN: Press one of the SEEK arrows for two seconds
and SCAN will appear on the display. Use SCAN to
listen to stations for
a few seconds. The radio will go to
a station, stop for a few seconds, then go on to the next
station. Press one of the SEEK buttons again to stop
scanning. The sound will mute while scanning.
PUSHBUTTONS: The six numbered pushbuttons let
you return to your favorite stations. You can set up to
18 stations (six AM, six
FM1 and six FM2). Just:
1. Turn the radio on.
2. Press AM-FM to select the band.
3. Tune in the desired station
4. Press TONE to select the setting you prefer.
5. Press and hold one of the six numbered buttons. The
sound will mute. When it returns, release the button.
Whenever you press that numbered button, the
station you set will return and the tone you selected
will be automatically selected for that button.
6. Repeat the steps for each pushbutton.
P SCAN: Press this button to listen to each of your
preset stations for a few seconds. The radio will
go to
the first preset station, stop for a few seconds, then go
on to the next preset station. Press P SCAN again to stop
scanning. If
a preset station has weak reception, the
radio will not stop at the preset station.
ProCarManuals.com