1997 BUICK CENTURY wiper blades
[x] Cancel search: wiper bladesPage 112 of 406
Windshield Wipers
I
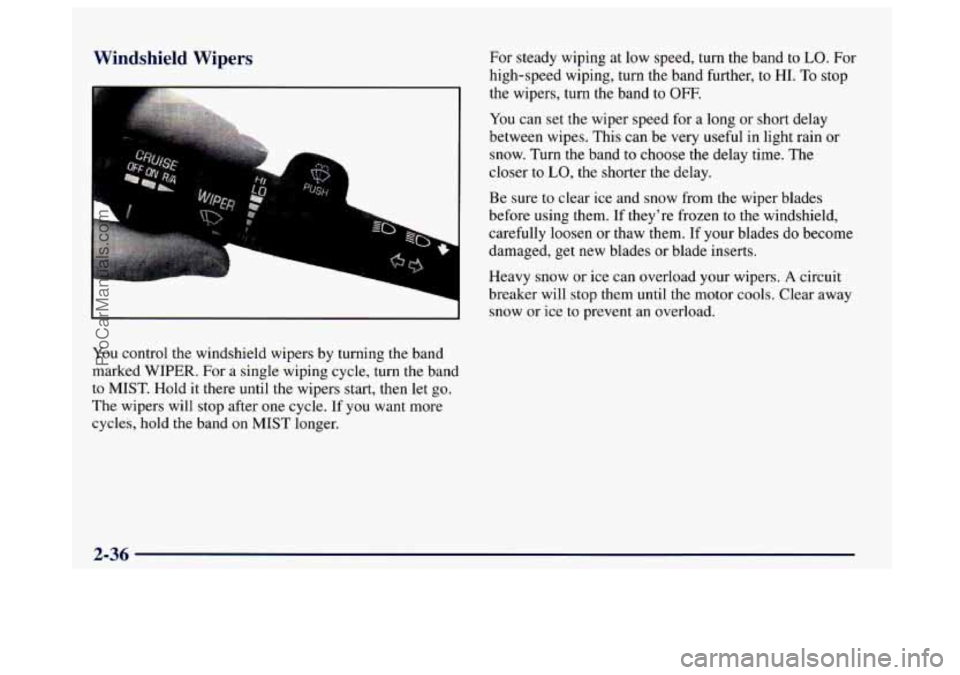
You control the windshield wipers by turning the band
marked WIPER. For a single wiping cycle, turn the band
to MIST. Hold it there until the wipers start, then let go.
The wipers will stop after one cycle. If you want more
cycles,
hold the band on MIST longer.
For steady wiping at low speed, turn the band to LO. For
high-speed wiping, turn the band further,
to HI. To stop
the wipers, turn the band to OFF.
You can set the wiper speed for a long or short delay
between wipes. This
can be very useful in light rain or
snow. Turn the band to choose the delay time. The
closer
to LO, the shorter the delay.
Be sure to clear ice and snow from the wiper blades
before using them. If they're frozen
to the windshield,
carefully loosen or thaw them. If your blades do become
damaged, get new blades or blade inserts.
Heavy snow or ice can overload your wipers.
A circuit
breaker will stop them until the motor cools. Clear away
snow or ice to prevent an overload.
2-36
ProCarManuals.com
Page 202 of 406
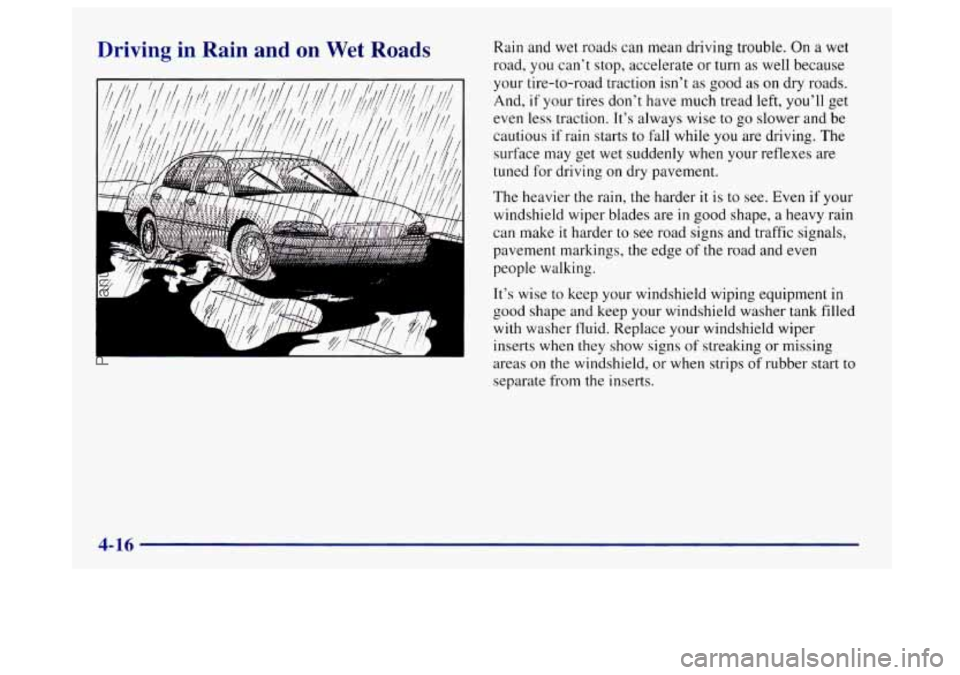
Driving in Rain and on Wet Roads Rain and wet roads can mean driving trouble. On a wet
road, you can’t stop, accelerate or turn as well because
your tire-to-road traction isn’t
as good as on dry roads.
And,
if your tires don’t have much tread left, you’ll get
even less traction. It’s always wise to go slower and be
cautious if rain starts to fall while you are driving. The
surface may get wet suddenly when your reflexes are
tuned for driving on dry pavement.
The heavier
the rain, the harder it is to see. Even if your
windshield wiper blades are
in good shape, a heavy rain
can make
it harder to see road signs and traffic signals,
pavement markings, the edge of the road and even
people walking.
It’s wise to keep your windshield wiping equipment
in
good shape and keep your windshield washer tank filled
with washer fluid. Replace your windshield wiper
inserts
when they show signs of streaking or missing
areas on the Windshield, or when strips
of rubber start to
separate from
the inserts.
4-16
ProCarManuals.com
Page 207 of 406
The exit speed is usually posted.
Reduce your speed according to your speedometer,
not
to your sense of motion. After driving for any distance
at higher speeds,
you may tend to think you are going
slower than you actually are.
Before Leaving on a Long Trip
Make sure you’re ready. Try to be well rested. If you
must start when you’re not fresh
-- such as after a day’s
work
-- don’t plan to make too many miles that first part
of the journey. Wear comfortable clothing and shoes you
can easily drive in.
Is your vehicle ready for a long trip? If you keep it
serviced and maintained, it’s ready to go. If it needs
service, have it done before starting out. Of course,
you’ll find experienced and able service experts in
Buick dealerships all across North America. They’ll be
ready and willing
to help if you need it. Here are some things
you can check before a trip:
0
0
0
0
0
0
0
Windshield Washer Fluid: Is the reservoir full? Are
all windows clean inside and outside?
Wiper Blades: Are they in good shape?
Fuel, Engine Oil, Other Fluids: Have you checked
all levels?
Lamps: Are they all working? Are the lenses clean?
Tires: They are vitally important to a safe,
trouble-free trip.
Is the tread good enough for
long-distance driving? Are the tires all inflated to the
recommended pressure?
Welzther Forecasts: What’s the weather outlook
along your route? Should you delay your trip a short
time
to avoid a major storm system?
Maps: Do you have up-to-date maps?
4-21
ProCarManuals.com
Page 267 of 406

Section 6 Service and Appearance Care
Here you will find information about the care of your Buick. This section begins with service and fuel information,
and then
it shows how to check important fluid and lubricant levels. There is also technical information about your
vehicle, and a part devoted
to its appearance care.
6-2
6-3
6-5
6-
5
6-7
6- 10
6-15
6-17
6-20
6-24
6-25
6-26
6-29
6-30
6-37 6-45
6-45
6-48
6-49 Service
Fuel
Fuels in Foreign Countries
Filling Your Tank
Checking Things Under the Hood
Engine Oil
Air Cleaner
Automatic Transaxle Fluid
Engine Coolant
Power Steering Fluid
Windshield Washer Fluid
Brakes
Battery
Bulb Replacement
Tires
Appearance Care
Cleaning the Inside of Your Buick
Cleaning the Built-in Child Restraint
Care
of Safety Belts and Built-in Child
Restraint Harness 6-49
6-49
6-50
6-50
6-5 1
6-52
6-52 6-52
6-5
3
6-53
6-54
6-55
6-55
6-56 6-62
6-62
6-63
6-63
6-63 Cleaning
Glass Surfaces
Cleaning the Outside
of the Windshield and
Wiper Blades
Weatherstrips
Cleaning the Outside of Your Buick
Cleaning Aluminum Wheels
Cleaning Tires
Sheet Metal Damage
Finish Damage
Underbody Maintenance
Chemical Paint Spotting
Appearance Care Materials Chart
Vehicle Identification Number
(VIN)
Service Parts Identification Label
Electrical System Replacement Bulbs
Capacities and Specifications
Vehicle Dimensions
Normal Maintenance Replacement Parts
Air Conditioning Refrigerants
6-1
ProCarManuals.com
Page 302 of 406
2. Lift the plastic locking tab on the electrical
connector and pull the connector from the dome
lamp assembly.
3. Grasp the bulb housing located in the center of the
assembly and pull straight
up.
4. Pull the bulb out of the socket.
5. Push in a new bulb.
6. Replace the socket into the dome lamp assembly.
7. Reconnect the dome lamp assembly to the wiring
harness, making sure the connector
tab snaps
into place.
Windshield Wiper Blade Replacement
8. Reposition the dome lamp assembly to the roof, and
gently push the assembly into the base plate.
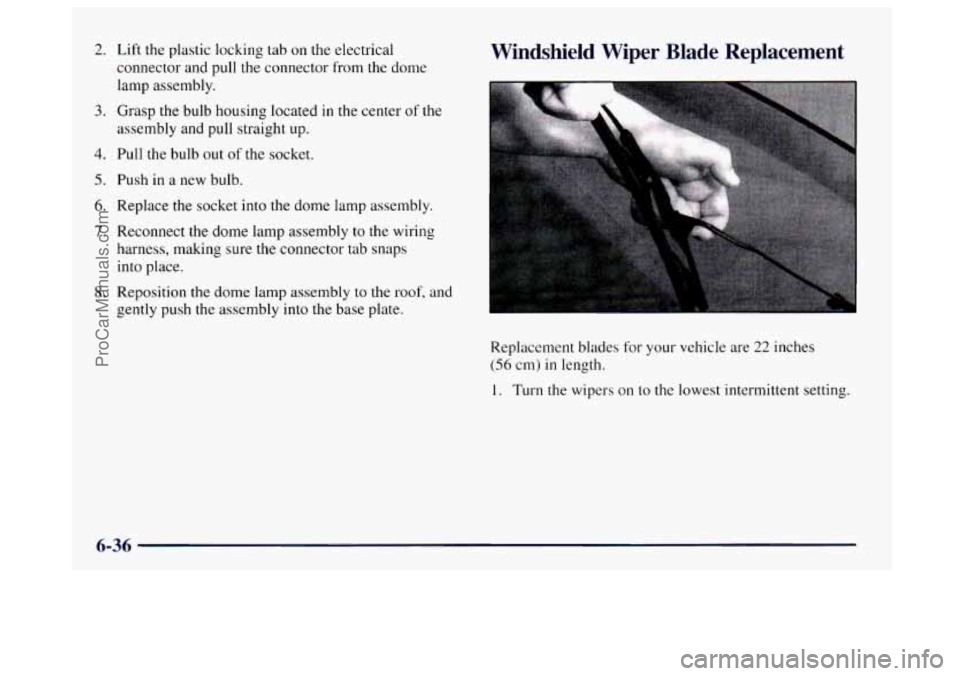
Replacement blades for your vehicle are
22 inches
(56 cm) in length.
1. Turn the wipers on to the lowest intermittent setting.
6-36
ProCarManuals.com
Page 303 of 406
2.
3.
4.
5.
Turn off the ignition while the wipers are at the
outer positions of the wiper pattern. The blades are
more accessible for removal/replacement while
in
this position.
Pull the windshield wiper arm
3 to 4 inches
(7.5 to 10 cm) away from the windshield.
While holding the wiper arm away from
the glass,
push the release clip from under the blade
connecting point and pull
the blade assembly down
toward the glass to remove it from
the wiper arm.
Push the new wiper blade securely
on the wiper arm
until
you hear the release clip “click” into place.
For wiper blade replacement length and type, also see
“Capacities and Specifications”
in the Index.
Tires
Your new Buick comes with high-quality tires made by
a leading tire manufacturer.
If you ever have questions
about your tire warranty and where
to obtain service, see
your Buick Warranty booklet for details.
Pol .y maintained and improperly used tires
are dangerous.
0
0
0
0
Overloading your tires can cause
overheating as
a result of too much friction.
You could have an air-out and a serious
accident. See “Loading Your Vehicle” in
the Index. Underinflated tires pose the same danger as
overloaded tires. The resulting accident could cause serious injury. Check all tires
frequently to maintain the recommended
pressure. Tire pressure should be checked when your tires are cold.
Overinflated tires are more likely to be
cut, punctured
or broken by a sudden
impact
-- such as when you hit a pothole.
Keep tires at the recommended pressure.
Worn, old tires can cause accidents. If your
tread is badly worn, or if your tires have
been damaged, replace them.
6-37
ProCarManuals.com
Page 315 of 406
Care of Safety Belts and Built-in
Child Restraint Harness
Keep the safety belts and the built-in child restraint
harness clean and dry.
Do not bleach or dye safety belts or the built-in
child restraint harness. If you do, they may be
severely weakened. In
a crash, they might not be
able to provide adequate protection. Clean the
safety belts and the child restraint harness only with mild soap and lukewarm water.
Cleaning Glass Surfaces
Glass should be cleaned often. GM Glass Cleaner (GM
Part No. 1050427) or a liquid household glass cleaner
will remove normal tobacco smoke and dust films on
interior glass. Don’t use
abrasive cleaners on glass, because they may
cause scratches. Avoid placing decals on
the inside rear
window, since they
may have to be scraped off later. If
abrasive cleaners are used on the inside of
the rear
window, an electric defogger element
may be damaged.
Any temporary license should not be attached across the
defogger grid.
Cleaning the Outside of the
Windshield and Wiper Blades
If the windshield is not clear after using the windshield
washer, or if the wiper blade chatters when running, wax,
sap or other material may be
on the blade or windshield.
Clean the outside of the windshield with
GM
Windshield Cleaner, Bon Ami@ Powder (non-scratching
glass cleaning powder),
GM Part No. 10500 1 1. The
windshield is clean
if beads do not form when you rinse
it with water.
Grime from the windshield will stick
to the wiper blades
and affect
their performance. Clean the blade by wiping
vigorously with
a cloth soaked in full-strength windshield
washer solvent. Then rinse the blade with water.
Check
the wiper blades and clean them as necessary;
replace blades that look worn.
6-49
ProCarManuals.com
Page 368 of 406
At Least Twice a Year Automatic Transaxle Check
Restraint System Check
Make sure the safety belt reminder light and all your
belts, buckles, latch plates, retractors and anchorages are
working properly. If your vehicle has a built-in child
restraint, also periodically make sure the harness straps,
latch plates, buckle, clip, retractors and anchorages are
working properly. Look for any other loose or damaged
safety belt and built-in child restraint system parts. If
you see anything that might keep a safety belt or built-in
child restraint system from doing its job, have
it
repaired. Have any torn or frayed safety belts or harness
straps replaced.
Also look for any opened or broken air bag coverings,
and have them repaired or replaced. (The air bag system
does
not need regular maintenance.)
Wiper Blade Check
Inspect wiper blades for wear or cracking. Replace blade
inserts that appear worn or damaged or that streak
or
mi.ss areas of the windshield. Also see “Wiper Blades,
Cleaning” in the Index. Check the transaxle
fluid level; add if needed. See
“Automitic Transaxle” in the Index.
A fluid loss
may indicate a problem, Check the system and repair
if needed.
At Least Once a Year
Key Lock Cylinders Service
Lubricate the key lock cylinders with the lubricant
specified in Part
D.
Body Lubrication Service
Lubricate all hinges and latches including those for the
body doors, hood, rear compartment, glove box door,
console door and any folding seat hardware. Part
D tells
you what to use. More frequent lubrication may be
required when exposed
to a corrosive environment.
7-38
ProCarManuals.com