1996 PONTIAC GRAND-AM ignition
[x] Cancel search: ignitionPage 147 of 356
Care of Your Cassette Tape Player
A tape player that is not cleaned regularly can cause
reduced sound quality, ruined cassettes or a damaged
mechanism. Cassette tapes should be stored in their
cases away from contaminants, direct sunlight and
extreme heat.
If they aren’t, they may not operate
properly or may cause failure
of the tape player.
Your tape player should be cleaned regularly after every
50 hours of use. Your radio may display CLN to indicate
that you have used your tape player for
50 hours without
resetting the tape clean timer. If you notice a reduction in sound quality,
try a known good cassette to see if the tape
or the tape player is at fault. If this other cassette has no
improvement
in sound quality, clean the tape player.
Cleaning may
be done with a scrubbing action,
non-abrasive cleaning cassette with pads which scrub
the tape head
as the hubs of the cleaner cassette turn.
Follow these steps to prevent the cassette from being
ejected due to the CUT TAPE DETECTION feature:
1. Turn the radio off and the ignition on.
2. Press and hold the TAPEPLAY button for three
3. Insert the cleaner cassette.
The radio will default back
to CUT TAPE DETECTION
when the cleaner cassette is ejected.
seconds (tape indicator will flash
for two seconds).
You may also choose a non-scrubbing action, wet-type
cleaner which uses a cassette with a fabric belt to clean
the tape head.
It may not clean as thoroughly as the
scrubbing type cleaner.
Cassettes
are subject to wear and the sound quality may
degrade over time. Always make sure that the cassette
tape is
in good condition before you have your tape player serviced.
Care of Your Compact Discs
Handle discs carefully. Store them in their original cases
or other protective cases and away from direct sunlight
and dust.
If the surface of a disc is soiled, dampen a
clean, soft cloth in a mild, neutral detergent solution and
clean it, wiping from the center to the edge.
Be sure never to touch
the signal surface when handling
discs.
Pick up discs by grasping the outer edges or the
edge of the hole and the outer edge.
Fixed Mast Antenna
The fixed mast antenna cb withstand most car washes
without being damaged.
If the mast should ever become
slightly bent, you can straighten it out by hand.
If the mast is
badly bent, as it might be by vandals, you should replace it.
Check every once
in a while to be sure the mast is still
tightened to the fender.
3-25
ProCarManuals.com
Page 172 of 356
If you drive regularly in steep country, or if you’re
planning t’o visit there, here are some tips that can make
your trips safer and more enjoyable.
!Keep your vehicle in good shape. Check dl fluid
levels
and also the brakes, tires, cooling system and
transaxle.
These parts can work hard on mountain
roads.
Know Bow to go down hills. The most important
thing to know is this: let your engine do some of the
slowing down. Shift to a lower gear when you go
down a steep or long hill.
If you don’t shift down, your brakes could get so
hot that they wouldn’t work well. You would then
have poor braking
or even none going ddwn a
hill. You could crash. Shift down to let jour
engine assist
your brakes on a steep. downhill
.. slope.
Coasting downhill in NEUTRAL (N) or dvith the
ignition
off is dangerous. Your brakes will have to
do all the work of slowing down. They could get so
hot that they wouldn’t work well. You would then
haxe
poor braking or even none going down a hill.
You could crash. Always have your engine running
and your vehicle
in gear when you go downhill.
Know how to go uphill. Drive in the highest gear
possible.
Stay in your own lane when driving on two-lane
roads
in hills or mountains. Don’t swing wide or cut
across the center
of the road. Drive at speeds that let
you stay in your own lane.
As you go over the top of a hill, be alert. There could be
something in your lane, like a stalled car or an accident.
0 You may see highway signs on mountains that warn of
special problems. Examples are long grades, passing or
no-passing
zones, a falling rocks Area or winding
roads. Be alert to these and take appropriate action.
ProCarManuals.com
Page 178 of 356
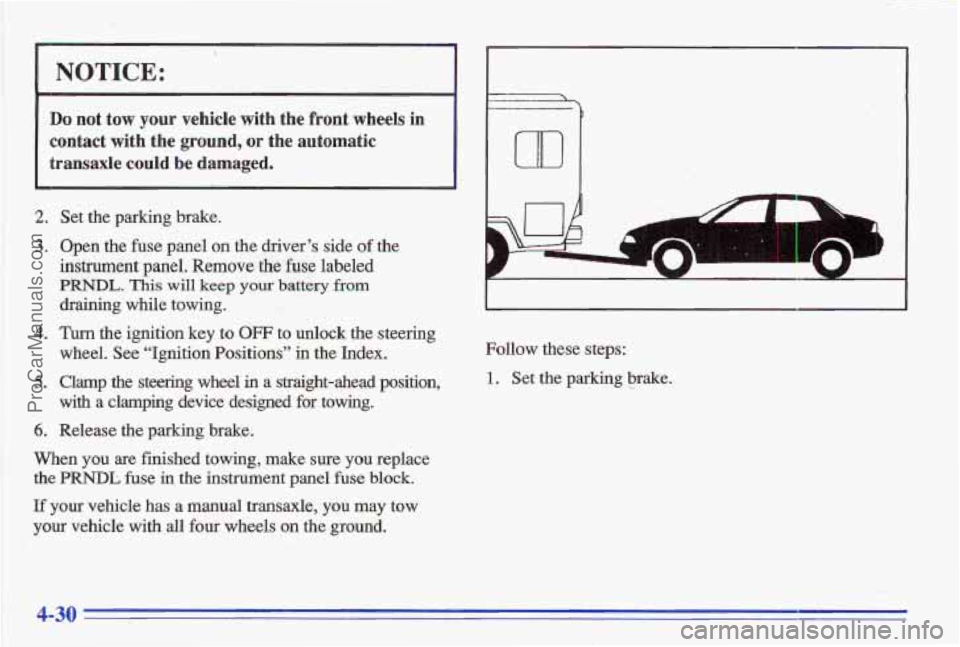
NOTICE:
Do not tow your vehicle with the front wheels in
contact with the
ground, or the automatic
transaxle
could be damaged.
2. Set the parking brake.
3. Open the fuse panel on the driver’s side of the
instrument
panel. Remove the fuse labeled
PRNDL. This will keep your battery from
draining while towing.
wheel. See “Ignition Positions”
in the Index.
with
a clamping device designed for towing.
4. Turn the ignition key to OFF to unlock the steering
5. Clamp the steering wheel in a straight-ahead position,
6. Release the parking brake.
When you are finished towing, make sure you replace
the PRNDL fuse in the instrument panel fuse block.
If your vehicle has a manual transaxle, you may tow
your vehicle with all four wheels on the ground.
m
Follow these steps:
1. Set the parking brake. .
4-30
ProCarManuals.com
Page 179 of 356
2.
3.
4.
5.
Open the fuse panel on the driver's side of the
instrument panel. Remove the fuse labeled
PRNDL. This will keep your battery from
draining while towing.
Tum the ignition key to OFF to unlock the
steering wheel.
Shift your manual transaxle to
NEUTRAL (N).
Release the parking brake.
When you
are finished towing, make sure you replace
the
PRNDL fuse in the instrument panel fuse block.
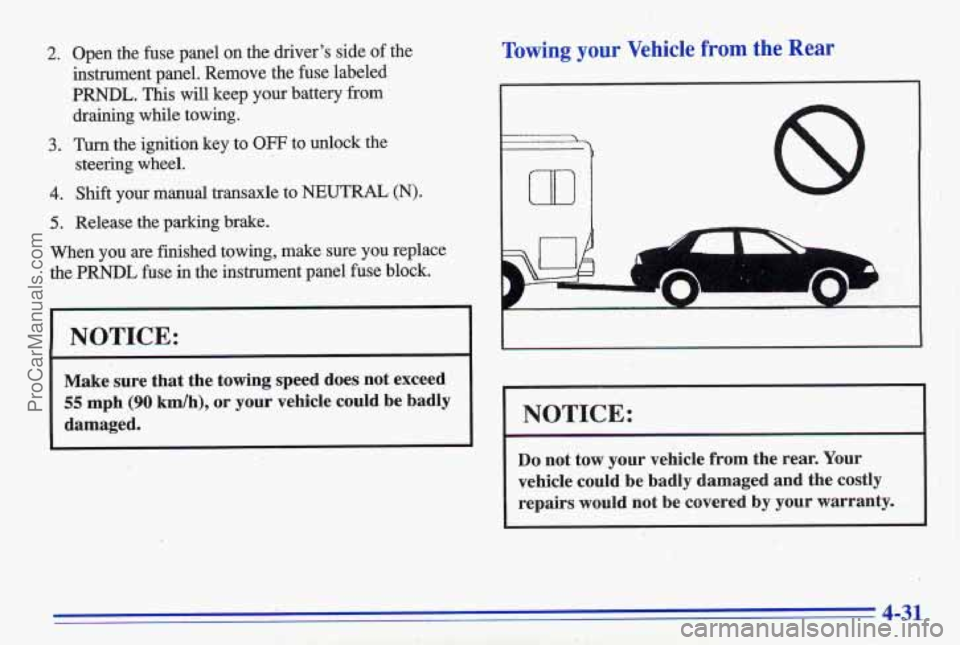
NOTICE:
Make sure that the towing speed does not exceed
55 mph (90 kdh), or your vehicle could be badly
damaged.
Towing your Vehicle from the'Rear
'b
8
,NOTICE:
~~ ~
Do not tow your vehicle from the rear. Your
vehicle could be badly damaged and the costly
repairs would not be covered by your warranty.
, .. P 'I
4-31
ProCarManuals.com
Page 193 of 356
2. Get the vehicles close enough so the jumper cables
can reach, but be sure the vehicles aren’t touching
each other.
If they are, it could cause a ground
connection
you don’t want. You woulddt be able to
start your Pontiac, and the bad grounding could
You could be injured if the vehicles roll. Set the
parking brake firrnly on each vehicle. Put on automatic transaxle in
PARK (P) or a manual
transaxle
in NEUTRAL (N).
1 damage the electrical systems.
3. Turn off the ignition on both vehicles. Unplug
unnecessary accessories plugged into the cigarette lighter.
Turn off all lamps that aren’t needed as well
as radios. This will avoid sparks and help save both
batteries. In addition,
it could save your radio!
I NOTICE:
.If you leave your radio on, it could be badly
damaged. The repairs wouldn’t be covered
by
your warranty.
An electric fan can start up even when the engine
is not running and can injure
you. Keep hands,
clothing and tools.away from any underhood electric fan.
4. Open the hoods and locate the batteries.
5. Find the positive (+) and negative (-) terminals on
each battery.
5-3
ProCarManuals.com
Page 198 of 356
When your vehicle is being towed, have the ignition key
OFF. The steering wheel should be clamped in a
straight-ahead position, with
a clamping device
designed for towing service. Do not use the vehicle's
steering column lock
for this. The transaxle should be in
NEUTRAL (N) and the parking brake released.
The ignition key must be in the
OFF position to keep the
automatic
door locks from locking during towing.
Don't have your vehicle towed on the front wheels,
unless
you 'must. If the vehicle must be towed on the
front wheels,' (see speed and distance restrictions
later in
this section) farther than 50 miles (80 km) your
transaxle will be damaged. If these limits must be
exceeded, then
the front wheels have to be supported on
a
dolly.
r
A vehicle can fall from a car carr if it isn't
adequately secured.
This can cause a collision,
1 serious personal injury and vehicle damage. The
' vehicle should be tightly secured with chains or
steel cables before it is transported.
Don't use substitutes (ropes, leather straps,
canvas webbing, etc.) that can
be cut by sharp
edges underneath the towed vehicle. Always use
T-hooks inserted in the T-hook slots. Never use
J-hooks. They will damage drivetrain and
suspension components.
ProCarManuals.com
Page 280 of 356
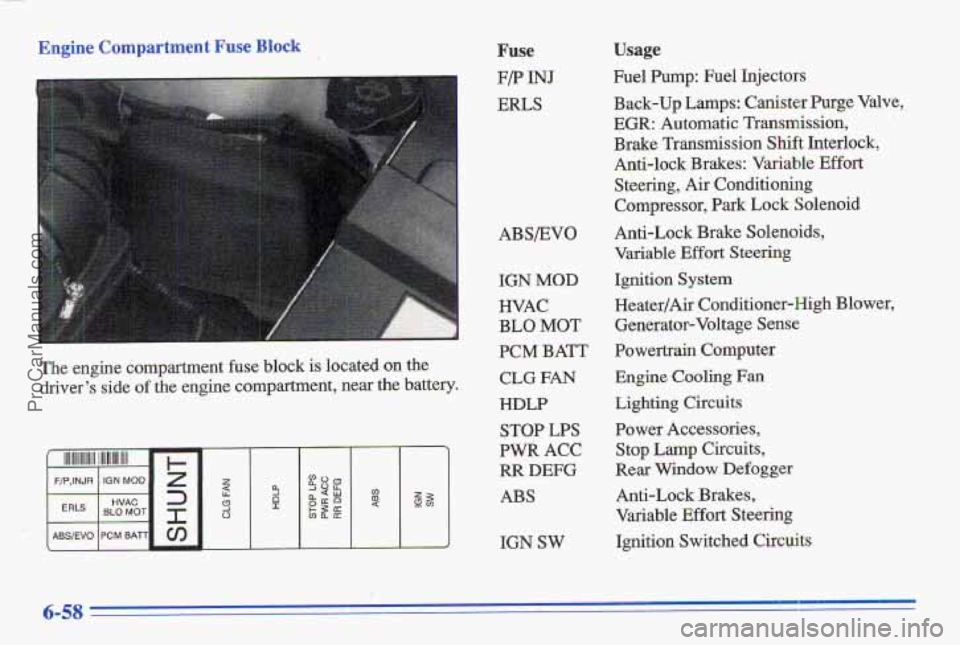
Engine Compartment Fuse Block Fuse
F/P INJ
ERLS
ABs/Evo
IGN MOD
HVAC
BLO MOT
PCM BATT
CLG FAN
HDLP
STOP LPS
PWR ACC
RR DEFG
ABS
Usage
Fuel Pump: Fuel Injectors
Back-up
Lamps: Canister Purge Valve,
EGR: Automatic Transmission,
Brake Transmission Shift Interlock,
Anti-lock Brakes: Variable
Effort
Steering, Air Conditioning
Compressor,
Park Lock Solenoid
Anti-Lock Brake Solenoids,
Variable Effort Steering
Ignition System
Heater/Ais Conditioner-High Blower, Generator-Voltage Sense
Powertrain Computer
Engine Cooling Fan
Lighting Circuits
Power Accessories,
Stop Lamp Circuits,
Rear Window Defogger
Anti-Lock Brakes,
Variable
Effort Steering
Ignition Switched Circuits
I , ^*^ >, .. ,.",
The engine compartment fuse block is located on the
driver's side
of the engine compartment, near the battery,
€GN sw
ProCarManuals.com
Page 347 of 356
Halogen Bulbs ................... .... 6-33
Hazard Warning Flashers
................... ... 5-1
Head Restraints ................................. 1-5
Headlamps ..................................... 2-39
Bulb Replacement
............................ 6-33
HighLow Beam Changer
...................... 2-32
Hearing Impaired, Customer Assistance .............. 8-4
High-Beam Headlamps
.......................... 2-32
Highway Hypnosis
.............................. 4-23
Hill
and Mountain Roads ......................... 4-23
Hitches, Trailer
................................. 4-37
Checking Things Under
......................... 6-6
Hydraulic Clutch
............................... 6-21
Hydraulic Clutch Fluid
........................... 6-22
Hydraulic Clutch System Check
................... 7-38
OnReminder
................................ 2-40
Wiring
...................................... 6-54
.Heating
.................. ; ..................... 3-5
Hood Prop
........................................ 6-7
Release
........................................ 6-6
Horn ......................................... 2-30
Hydroplaning .............................. : .... 4-19
Ignition Switch
................................ 2- 11
Illuminated Entry
............................... 2-42
Inside Daymight Rearview Mirror
................. 2-44
Exhaust Systems
............................. 7-41
Front-Wheel-Drive Axle Boot
.................. 7-41,
Inflation. Tire
.................................. 6-38
Inspections
BmkeSystem ................................ 7-41
Front-Wheel-Drive Axle
Seal .................... 7-41 Radiator and Heater Hose
...................... 7-41
Suspension
................................... 7-41
Steering .................................... 7-41
Throttle Linkage
............................... 7-41
Instrument Panel
............................... 2-50
Brightness Control ............................ 2-41
Fuse Block
.................................. 6-55
Interior Lamps ................................. 2-41
Cleaning
.................................... 6-48
Cluster
2-52 .....................................
Jack. Tire .................................... 5-23
Jump Starting
................................... 5-2
Key Lock Cylinders Service ..................... 7-38
Key Release Button
............................. 2-13
Keyless Entry System
............................ 2-6
Keys .......................................... 2-1
Labels Certification/”ire ............................. 4-32
Service
Parts Identification ..................... 6-53
Tire-Loading Information
...................... 4-32
Vehicle Identification Number
: .................. 6-53
Lamps ........................................ 2-39
Fog
........................................ 2-41
Interior
..................................... 2-41
On Reminder ................................ 2-40
Latches, Seatback
................................ 1-5
Leaving Your Vehicle ............................. 2-5
Leaving Your Vehicle with the Engine Running ....... 2-26
Lighter
....................................... 2-47
9-5
ProCarManuals.com